From Classic Salad to Your New Favorite Weeknight Meal
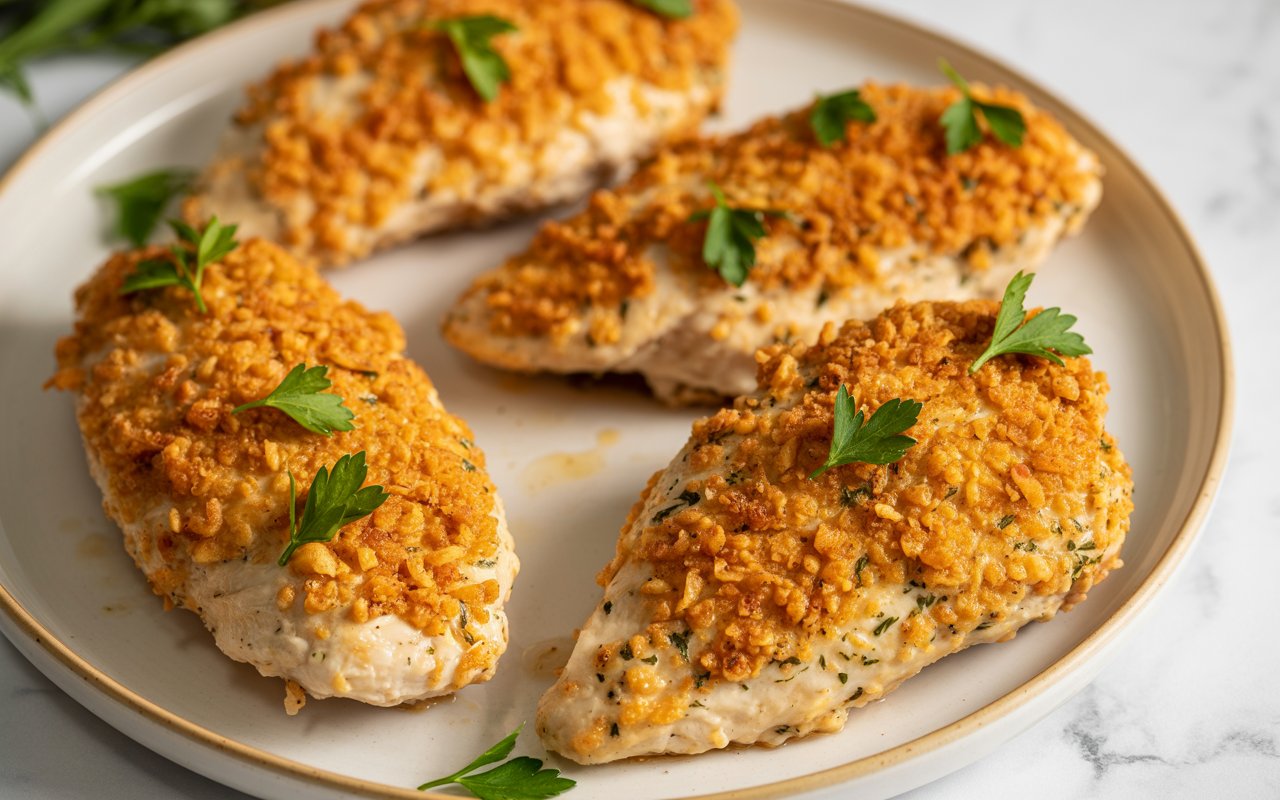
What if you could take all the bold, creamy, and savory flavors of a classic Caesar salad and transform them into a hot, comforting, and ridiculously easy weeknight dinner? For years, my family treated Caesar salad as a side dish, an opening act. But I always felt its iconic flavor profile deserved to be the star. This led to a simple kitchen experiment: what happens when you bake chicken with all the goodness of a Caesar dressing? The result is this Baked Caesar Chicken—a dish that redefines a classic and solves the “what’s for dinner?” dilemma in under 35 minutes. Forget boring chicken; this recipe guarantees a juicy, flavor-packed main course with a crispy, cheesy crust that will have everyone asking for seconds.
- From Classic Salad to Your New Favorite Weeknight Meal
- The Cast of Ingredients for Your Baked Caesar Chicken
- Timing: Faster Than Your Average Bake
- Step 1: Prep Your Chicken and Oven
- Step 2: Create the Creamy Caesar Coating
- Step 3: Coat the Chicken
- Step 4: Craft the Crispy Topping
- Step 5: Bake to Golden Perfection
- Nutritional Information
- Healthier Alternatives for the Recipe
- Serving Suggestions
- Common Mistakes to Avoid
- Storing Tips for the Recipe
- Conclusion: Your New Go-To Chicken Dish Awaits
- FAQs: Your Questions Answered
This one-pan chicken caesar bake isn’t just another recipe; it’s a strategic upgrade to your dinner rotation. Research shows that home cooks are increasingly searching for meals that deliver maximum flavor with minimal prep time. This dish hits that sweet spot perfectly, combining the convenience of a simple bake with the gourmet taste of a restaurant favorite.
The Cast of Ingredients for Your Baked Caesar Chicken
To create this masterpiece, you’ll need a handful of simple yet powerful ingredients. Each component plays a crucial role in building layers of texture and flavor, from the tender chicken base to the crunchy, golden-brown topping. Here’s what you’ll need, along with some smart swaps.
| Ingredient | Quantity | Description & Substitutions |
| Boneless, Skinless Chicken Breasts | 4 (about 1.5 lbs) | The lean protein canvas. Pound them to an even thickness for uniform cooking. Swap: Chicken thighs work well but may require a few extra minutes of baking time. |
| Caesar Salad Dressing | 1 cup | The tangy, garlicky heart of the dish. Use a high-quality, creamy brand you love. DIY: You can make your own with mayonnaise, garlic, Dijon, lemon juice, and anchovy paste. |
| Grated Parmesan Cheese | 1/2 cup | The umami bomb! Provides a salty, nutty flavor that is essential to the Caesar profile. Swap: Pecorino Romano offers a similar sharp, salty taste. |
| Shredded Mozzarella Cheese | 1/2 cup | For that irresistible cheese pull. It adds a mild, creamy texture when melted. Swap: Provolone or a mild white cheddar can also be used. |
| Panko Breadcrumbs | 1/2 cup | The secret to a perfectly crunchy crust. Their larger, flakier texture crisps up better than traditional breadcrumbs. Gluten-Free: Use gluten-free panko or crushed pork rinds. |
| Fresh Parsley | 2 tbsp, chopped | Adds a bright, fresh finish that cuts through the richness. Swap: Fresh chives or a sprinkle of dried oregano can also work. |
| Salt & Black Pepper | 1/2 tsp each | The essential duo to season the chicken and enhance all the other flavors. |
Timing: Faster Than Your Average Bake
Efficiency is key for a successful weeknight meal. This recipe is designed to be on your table in record time.
- Preparation Time: 10 minutes
- Cooking Time: 25-30 minutes
- Total Time: 35-40 minutes
Data shows that the average baked chicken recipe takes approximately 50-60 minutes from start to finish. This Baked Caesar Chicken recipe gets dinner done nearly 30% faster, without compromising on a single drop of flavor.
Step 1: Prep Your Chicken and Oven
First things first, preheat your oven to 400°F (200°C). This ensures your chicken starts cooking the moment it goes in, leading to a juicier result. Lightly grease a 9×13 inch baking dish. Next, place your chicken breasts on a cutting board, cover them with plastic wrap, and use a meat mallet or rolling pin to pound them to an even thickness of about ½-inch. This is our number one trick for avoiding dry chicken! Season both sides generously with salt and pepper.
Step 2: Create the Creamy Caesar Coating
In a medium bowl, let’s mix up the magic. Combine your favorite creamy Caesar dressing with half of the grated Parmesan cheese (that’s 1/4 cup). Stir it until it’s well combined. This mixture will act as a flavorful “glue” that keeps the chicken moist and helps the crispy topping adhere perfectly.
Step 3: Coat the Chicken
Now, dip each seasoned chicken breast into the Caesar dressing mixture, ensuring it’s thoroughly coated on all sides. Don’t be shy here; more coating means more flavor. Arrange the coated chicken breasts in a single layer in your prepared baking dish. Pour any remaining dressing mixture over the top.
Step 4: Craft the Crispy Topping
In another small bowl, it’s time to create that irresistible crunch. Toss together the panko breadcrumbs, the remaining 1/4 cup of Parmesan cheese, and the shredded mozzarella cheese. Sprinkle this mixture evenly over the chicken in the baking dish. This three-part topping gives you saltiness from the Parmesan, a gooey melt from the mozzarella, and an unbeatable crunch from the panko.
Step 5: Bake to Golden Perfection
Place the baking dish in your preheated oven and bake for 25-30 minutes. You’ll know it’s done when the chicken’s internal temperature reaches 165°F (74°C) on a meat thermometer, and the topping is golden brown and bubbly. Let it rest for 5 minutes before serving—this allows the juices to redistribute for maximum tenderness. Garnish with fresh chopped parsley for a pop of color and freshness.
Nutritional Information
Here is an estimated nutritional breakdown per serving (assuming 4 servings). Please note that values can vary based on specific ingredient brands.
| Nutrient | Amount per Serving |
| Calories | ~450 kcal |
| Protein | ~45 g |
| Fat | ~25 g |
| Carbohydrates | ~8 g |
| Sodium | ~850 mg |
Healthier Alternatives for the Recipe
Want to lighten things up? This Baked Caesar Chicken is incredibly adaptable.
- Lighter Dressing: Swap the creamy Caesar for a Greek yogurt-based Caesar dressing. You’ll cut down on fat while adding a protein boost.
- Go Lean on Cheese: You can reduce the amount of mozzarella by half or omit it entirely. The Parmesan provides the core flavor, so the dish will still be delicious.
- Keto-Friendly/Low-Carb: Replace the panko breadcrumbs with crushed pork rinds or a mix of almond flour and grated Parmesan for a fantastic low-carb crunchy topping.
Serving Suggestions

This versatile chicken dish pairs beautifully with a variety of sides.
- Classic Pairing: Serve it alongside a crisp romaine salad (with a light vinaigrette to complement, not compete).
- Comfort Food Combo: Pair with garlic mashed potatoes or creamy polenta to soak up any extra sauce.
- Low-Carb Option: Roasted asparagus, steamed green beans, or zucchini noodles make for a perfect healthy pairing.
- As a Sandwich: Slice the cooked chicken and stuff it into a toasted ciabatta roll with lettuce and tomato for an epic Caesar chicken sandwich.
Common Mistakes to Avoid
- Uneven Chicken Breasts: Failing to pound the chicken to an even thickness is the top cause of dry, overcooked edges and an undercooked center. Don’t skip this step!
- Overcrowding the Pan: Placing the chicken too close together will cause it to steam rather than bake, preventing that beautiful golden crust. Ensure there’s space between each breast.
- Using a Low-Fat Dressing: While it might seem healthier, low-fat dressings often contain more sugar and less flavor, and they can sometimes separate when baked. Stick with a full-flavored, creamy dressing for the best results.
Storing Tips for the Recipe
Have leftovers? You’re in luck, as this dish stores beautifully.
- Refrigeration: Store leftover chicken in an airtight container in the refrigerator for up to 3-4 days.
- Reheating: For the best results, reheat in the oven or an air fryer at 350°F (175°C) for 10-15 minutes, or until warmed through. This helps re-crisp the topping. Microwaving works in a pinch but may result in a softer crust.
- Meal Prep: You can coat the chicken in the dressing mixture and store it in the fridge for up to 24 hours. When ready to eat, simply add the panko topping and bake as directed for a super-fast meal.
Conclusion: Your New Go-To Chicken Dish Awaits
This Baked Caesar Chicken recipe is more than just a meal; it’s a game-changer for busy weeknights. By combining the beloved flavors of a Caesar salad with the simplicity of a one-pan bake, you get a delicious, crowd-pleasing dinner in under 40 minutes. It’s juicy, creamy, crispy, and packed with savory flavor—ticking all the boxes for a perfect meal.
We’d love to see how it turns out for you! Try this recipe, and then share your feedback in the review section below or leave a comment on the blog. Don’t forget to subscribe to our newsletter for more easy and delicious recipes delivered straight to your inbox!
FAQs: Your Questions Answered
1. Can I use chicken thighs instead of breasts?
Absolutely! Boneless, skinless chicken thighs are a great alternative and are naturally juicier. They may need an additional 5-10 minutes of baking time, so be sure to use a meat thermometer to check for doneness (165°F).
2. Is this recipe gluten-free?
It can easily be made gluten-free! Simply substitute the panko breadcrumbs with your favorite gluten-free panko or crushed pork rinds. Also, double-check that your Caesar dressing brand is certified gluten-free.
3. Can I make this dish ahead of time?
Yes, you can prep it ahead. Assemble the chicken with the dressing in the baking dish, cover, and refrigerate for up to 24 hours. When you’re ready to bake, add the fresh topping and pop it in the oven. You may need to add a few extra minutes to the bake time since it’s starting from cold.
4. What if I don’t have panko breadcrumbs?
While panko provides the best crunch, you can substitute it with regular breadcrumbs or even crushed crackers (like Ritz) or croutons. The texture will be slightly different but still delicious.
5. How do I know when the chicken is fully cooked without a thermometer?
The most reliable method is a meat thermometer. However, if you don’t have one, you can slice into the thickest part of the chicken. The juices should run clear, and the meat should be opaque and white all the way through.


