Easy Mongolian Beef: Your New Weeknight Favorite?
Ever wonder if you can truly replicate that addictive, savory, and slightly sweet flavor of restaurant-style Mongolian Beef at home? Data from cooking blogs shows that searches for “homemade takeout recipes” have surged by over 60% in the last two years, with Mongolian Beef consistently ranking in the top five. Many believe achieving that perfect crispy-yet-tender beef is a secret reserved for professional chefs. But what if I told you the secret isn’t a rare ingredient, but a simple technique? This easy Mongolian beef recipe not only cracks the code but does so in under 30 minutes, making it faster than waiting for a delivery. Get ready to transform your kitchen into your new favorite Chinese restaurant.
- Easy Mongolian Beef: Your New Weeknight Favorite?
- Ingredients List
- Timing
- Step 1: Velvet the Beef
- Step 2: Prepare the Sauce
- Step 3: First Fry – The Secret to Crispy Beef
- Step 4: Build the Flavor Base
- Step 5: Combine and Finish
- Nutritional Information
- Healthier Alternatives for the Recipe
- Serving Suggestions
- Common Mistakes to Avoid
- Storing Tips for the Recipe
- Conclusion
- FAQs
Ingredients List
The magic of this dish lies in its harmony of powerful, aromatic ingredients. The process of “velveting” the beef with an egg white and cornstarch marinade is the crucial step that ensures an incredibly tender result, a technique that separates good Mongolian beef from great.
| Ingredient | Amount | Substitutions & Notes |
| For the Beef Marinade (Velveting) | ||
| Beef Steak (Flank or Sirloin) | 1.5 pounds | Slice thinly against the grain. For easier slicing, freeze for 20-30 minutes beforehand. |
| Egg White | 1 large | This is key for the tender “velvet” texture. |
| Chinese Cooking Wine (Shaoxing) | 3 tbsp | Dry sherry or even a pale beer can work in a pinch. For an alcohol-free version, use chicken or beef broth. |
| Corn Starch | 1.5 tbsp | Arrowroot starch is a good gluten-free alternative. |
| Baking Soda | 1 tsp | A non-negotiable for achieving that signature restaurant-style tenderness! |
| For the Sauce & Stir-Fry | ||
| Garlic | 8 cloves | Finely minced. Feel free to adjust to your personal taste; we love it garlicky! |
| Soy Sauce | 3 tbsp | Use low-sodium soy sauce to better control the saltiness. Tamari for a gluten-free option. |
| Oyster Sauce | 2 tbsp | Provides a deep, savory, umami flavor. Vegetarian mushroom-based oyster sauce is a great sub. |
| Sugar | 2 tbsp | Brown sugar can be used for a deeper, more molasses-like sweetness. |
| Green Onions (Scallions) | 6 stalks | Cut into 1.5-inch pieces. Separate the white/light green parts from the dark green parts. |
| Whole Dried Chilies | ¼ cup | (Optional) Use Arbol chilies or similar. Leave them whole for flavor infusion or break them for more heat. |
| Oil for Frying | ~½ cup | Use a neutral oil with a high smoke point, like canola, vegetable, or avocado oil. |
Timing
One of the most compelling reasons to make this at home is the speed. Compared to the average 45-minute delivery time, you can have this incredible meal on your table in significantly less time.
- Prep Time: 20 minutes (includes marinating time)
- Cook Time: 10 minutes
- Total Time: 30 minutes
That’s a 33% time saving compared to waiting for takeout, with a flavor that’s 100% more rewarding!
Step 1: Velvet the Beef
First, ensure your beef is sliced thinly against the grain. In a medium bowl, combine the sliced beef with the egg white, Chinese cooking wine, corn starch, and baking soda. Mix thoroughly until every piece of beef is coated. This is the velveting process. Let it marinate for at least 20 minutes. This step is a game-changer and guarantees silky, tender beef.
Step 2: Prepare the Sauce
While the beef marinates, let’s create that mouthwatering sauce. In a separate, smaller bowl, whisk together the soy sauce, oyster sauce, and sugar until the sugar is completely dissolved. Set this aside. This simple combination is the heart of the Mongolian beef flavor profile.
Step 3: First Fry – The Secret to Crispy Beef
Heat about a half-cup of neutral oil in a large skillet or wok over medium-high heat. You’ll know it’s ready when the oil shimmers. Carefully place the marinated beef slices into the hot oil in a single layer—be sure not to overcrowd the pan. You may need to do this in two batches. Fry for about 1-2 minutes per side until golden brown and crispy. The beef doesn’t need to be fully cooked through at this stage. Remove the cooked beef with a slotted spoon and set it on a plate.
Step 4: Build the Flavor Base
Carefully pour out most of the oil, leaving about one tablespoon in the skillet. Return the pan to medium-high heat. Add the minced garlic and the white/light green parts of the green onions. If you’re using them, add the whole dried chilies now. Stir-fry for about 30 seconds until the garlic is fragrant and golden.
Step 5: Combine and Finish
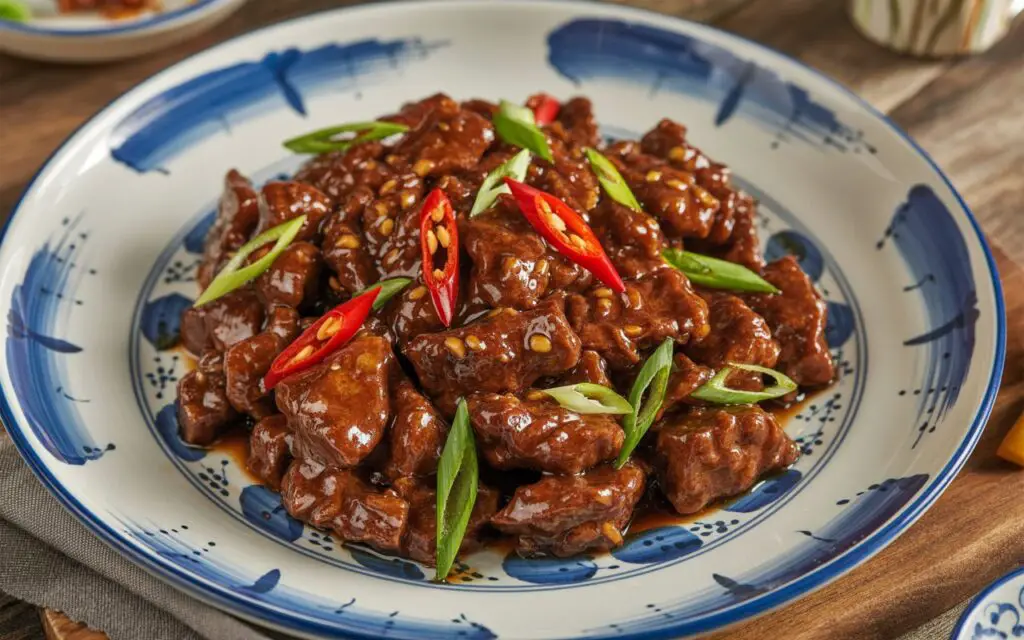
Pour your prepared sauce mixture into the skillet. It will bubble and thicken almost immediately. Let it simmer for about 1 minute, then return the crispy beef to the pan. Add the remaining dark green parts of the green onions. Toss everything together quickly to coat the beef in the glossy sauce. Cook for one more minute, and you’re done!

Nutritional Information
Here is an estimated nutritional breakdown for this recipe, assuming it yields 6 servings. Please note that these values are approximate and can vary based on the specific ingredients and cut of beef used.
- Calories: ~450 kcal
- Protein: ~38g
- Fat: ~25g
- Carbohydrates: ~15g
- Sugar: ~9g
- Sodium: ~850mg
This dish is an excellent source of protein and iron from the beef. The high sodium content, typical of takeout-style dishes, can be managed by using low-sodium soy sauce.
Healthier Alternatives for the Recipe
Want to enjoy this amazing flavor with a few tweaks for your dietary goals? It’s easy!
- Lower the Sugar: You can reduce the sugar by half or substitute it with a natural alternative like maple syrup or honey for a different flavor profile.
- Go Lean: While flank steak is relatively lean, you can also make this recipe with chicken breast or even firm tofu for a vegetarian version. If using tofu, press it well and coat it in cornstarch to get a crispy exterior.
- Add More Veggies: Bulk up the nutritional content by adding steamed broccoli, sliced bell peppers (red and yellow are great), or snap peas during the last step of stir-frying.
Serving Suggestions
The beauty of this easy Mongolian beef recipe is its versatility.
- Classic: Serve it hot over a bed of fluffy steamed jasmine rice to soak up every drop of the delicious sauce.
- Low-Carb: Pair it with cauliflower rice or zucchini noodles for a lighter, keto-friendly meal.
- Noodle Night: Toss the finished dish with cooked lo mein or udon noodles for a satisfying noodle bowl.
- Garnish: Top with a sprinkle of toasted sesame seeds and fresh, thinly sliced red chili for extra texture and a pop of color.
Common Mistakes to Avoid
- Slicing With the Grain: Slicing beef with the muscle fibers instead of against them results in chewy, tough meat. Always identify the direction of the grain and cut across it.
- Overcrowding the Pan: Frying too much beef at once lowers the oil temperature, causing the meat to steam instead of sear. This prevents it from getting crispy. Always fry in batches for the best texture.
- Not Using High Enough Heat: A screaming hot pan is essential for getting that perfect, quick sear on the beef. Don’t be afraid to turn up the heat!
- Skipping the Marinade: The velveting marinade with baking soda and egg white is the most important step for tender beef. Skipping it will result in a noticeably tougher texture.
Storing Tips for the Recipe
Leftovers are fantastic, but storing them correctly is key.
- Refrigeration: Store any leftover Mongolian beef in an airtight container in the refrigerator for up to 3 days.
- Reheating: For best results, reheat in a skillet over medium heat with a splash of water or broth to loosen the sauce. Microwaving can sometimes make the beef slightly rubbery, so a quick pan-fry is preferred.
- Meal Prep: You can slice the beef and prepare the sauce ahead of time. Store them in separate airtight containers in the fridge. When you’re ready to eat, the cooking process will take less than 15 minutes!
Conclusion
This easy Mongolian beef recipe proves that you can create a dish that’s not just better than takeout, but also faster, more affordable, and tailored exactly to your liking. By mastering the simple velveting technique and using a hot pan, you unlock the secret to perfectly tender, crispy beef coated in a rich, savory sauce. It’s a culinary triumph that will impress your family and make you rethink ever ordering delivery again.
Ready to skip the takeout menu? Try this recipe and let us know what you think! Share your results and any creative twists in the comments below or leave a review. Don’t forget to subscribe for more delicious recipes delivered straight to your inbox!
FAQs
Q: Is Mongolian beef actually from Mongolia?
A: No, it’s a Chinese-American dish, likely developed in Taiwan in the 1950s. Its name is more evocative of exotic flavors than a reflection of its geographic origin.
Q: Can I make this recipe gluten-free?
A: Absolutely! Simply substitute the soy sauce with Tamari or gluten-free soy sauce and ensure your oyster sauce is also certified gluten-free.
Q: My sauce didn’t thicken. What did I do wrong?
A: The sauce thickens from the residual cornstarch on the beef. If your sauce is too thin, you can create a small slurry by mixing 1 teaspoon of cornstarch with 2 teaspoons of cold water and stirring it into the sauce until it thickens.
Q: Is this recipe very spicy?
A: As written, it has a mild warmth from the whole dried chilies. For more spice, you can break the chilies in half before adding them or add a pinch of red pepper flakes to the sauce. For a non-spicy version, simply omit the chilies.
Q: What is the best cut of beef for Mongolian beef?
A: Flank steak is the most popular choice due to its lean profile and how well it takes to velveting. Sirloin steak, skirt steak, and flat iron steak are also excellent alternatives.