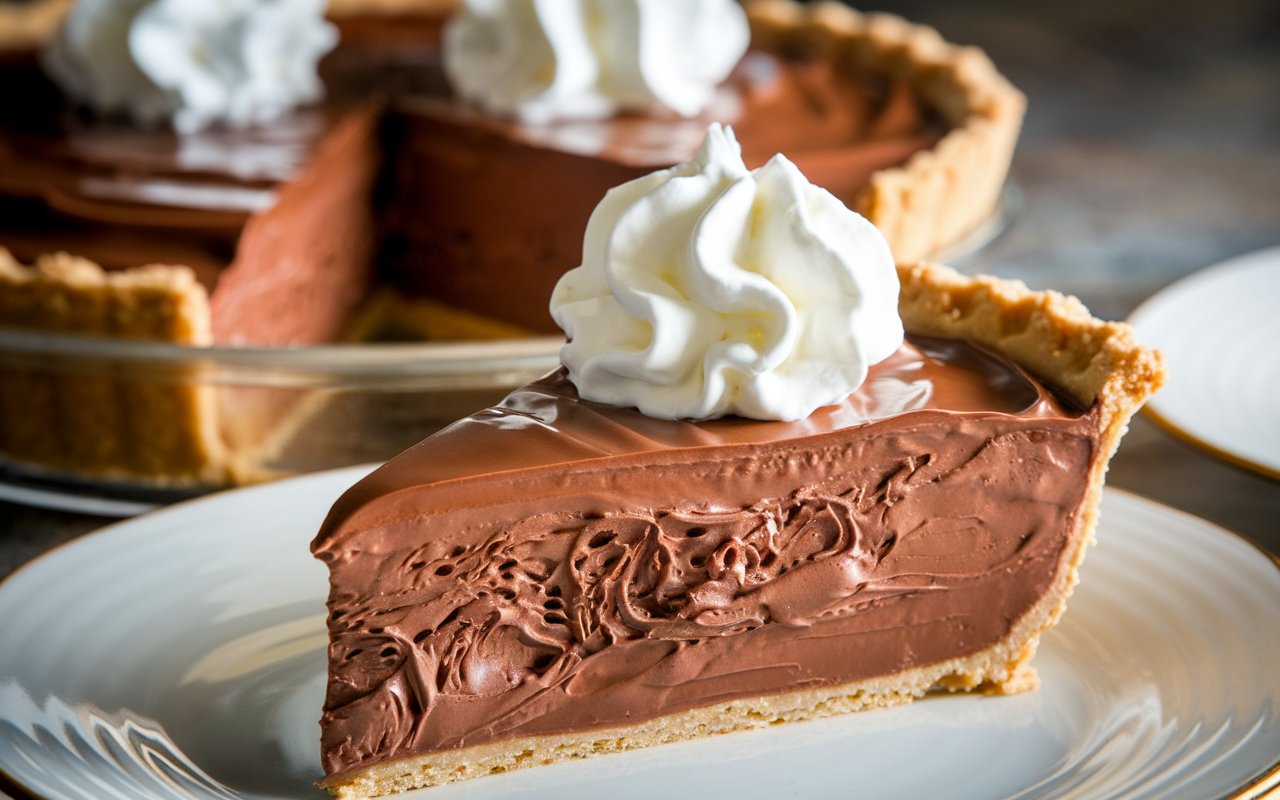
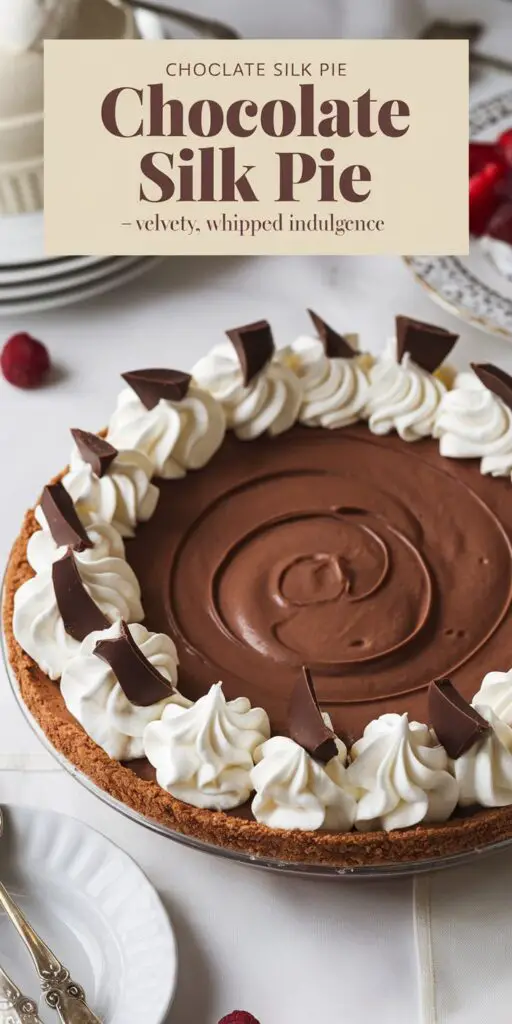
The mere phrase Chocolate Silk Pie conjures an image of a luxurious dessert: a cloud-like chocolate filling layered inside a crisp pastry shell, each forkful practically dissolving on your tongue. Picture the silky texture of mousse, but firmer, more decadent—whipped to airy perfection and stabilized with just enough butter or cream to maintain shape. Topped with a billow of whipped cream or chocolate shavings, this pie stands as a testament to the indulgent side of chocolate desserts, perfect for special occasions or whenever you need a sweet, comforting treat.
- Section 1: Why Chocolate Silk Pie Enchants
- Section 2: Ingredient Overview
- Section 3: Step-by-Step Recipe (Approx. 2+ Hours, including chilling time)
- Section 4: Topping & Finishing
- Section 5: Tips for Achieving a True “Silk” Texture
- Section 6: Flavor Variations
- Section 7: Serving Suggestions
- Section 8: FAQ – Chocolate Silk Pie
- Conclusion
My first encounter with chocolate silk pie occurred at a local café known for homemade pies. One taste of the slice left me awe-struck: the chocolate flavor was intense yet refined, the texture unbelievably smooth, as though it had been folded with a million tiny air pockets. Determined to replicate this at home, I learned the technique: vigorously beating eggs, sugar, butter, and melted chocolate to incorporate enough air while carefully managing the temperature to keep the mixture stable. Over time, I found that a pinch of salt enhances the cocoa notes, and that thoroughly whipping the filling yields that luscious, airy result. Now, chocolate silk pie is my go-to whenever I want a dessert that stuns with both taste and texture, bridging the world between mousse and a traditional pie, all in a single bite.
In this article, we’ll guide you through crafting a Chocolate Silk Pie—from making or selecting a pie crust, to whipping a stable chocolate filling, to finishing with optional toppings. Whether you’re a chocolate connoisseur seeking a new recipe or simply desire a dessert that wows guests with its velvety indulgence, prepare for a slice of pure chocolate bliss that justifies every minute of effort.

Section 1: Why Chocolate Silk Pie Enchants
- Melt-in-Your-Mouth Texture
The hallmark of a silk pie is its airy, mousse-like filling, achieved through thorough beating. It’s soft yet holds shape once chilled. - Rich Chocolate Flavor
Using quality chocolate or cocoa ensures a luxurious taste that pairs well with the pastry crust, adding a crisp contrast. - Visually Striking
Topped with whipped cream, chocolate curls, or grated chocolate, the pie beckons like a patisserie showpiece, though it’s not overly complex to make. - Sliceable Mousse
While standard chocolate mousse is served in cups, chocolate silk pie gives you a neat wedge, bridging the convenience of a slice with the decadence of whipped filling.
Section 2: Ingredient Overview
Use this table for a 9-inch pie, about 8 slices:
| Ingredient | Quantity | Notes |
|---|---|---|
| Pie Crust (homemade or store-bought) | 1 (9-inch) | Blind-baked for best results |
| Unsalted Butter | ~1 cup (2 sticks, ~226 g) | Divided if using some for melted chocolate, also in the filling |
| Sugar | ~1 cup | Granulated sugar for the sweetener |
| Eggs | 4 large | Often raw or partially cooked in some methods—ensure freshness |
| Bittersweet or Semi-Sweet Chocolate | ~8 oz (226 g), chopped | Choose quality chocolate (60–70% cocoa) for intense flavor |
| Cocoa Powder (optional) | 1–2 tbsp | Boost chocolate intensity, optional if you want deeper color/flavor |
| Heavy Cream (cold) (optional for topping) | ~1 cup | For whipped cream garnish |
| Vanilla Extract | 1–2 tsp | Elevates the overall flavor |
| Salt | ¼–½ tsp | Balances sweetness & chocolate bitterness |
| Chocolate Shavings or Curls (garnish) | As desired | For final presentation, optional |

Important Note on Raw Eggs: Traditional chocolate silk pie often uses raw or partially cooked eggs, thoroughly beaten. For safety, you can use pasteurized eggs or adopt a method of gently cooking the eggs in a double boiler to reduce risk, while still achieving the airy texture.
Section 3: Step-by-Step Recipe (Approx. 2+ Hours, including chilling time)
Crust Preparation
- Pre-Bake Pie Crust
- If using a homemade pastry crust, roll out and fit it into a 9-inch pie dish. Crimp edges as desired. Chill for 30 minutes to reduce shrinkage.
- Blind-bake at 375°F (190°C): line with parchment, fill with pie weights or dried beans. Bake ~15 minutes, remove weights, and bake another 5–7 minutes until lightly golden. Let cool completely.
- Alternative Chocolate Crumb Crust
- You could sub a chocolate cookie crust if you want double chocolate. Mix 1½ cups chocolate cookie crumbs with ¼ cup melted butter, press into the pie dish, and bake ~8 minutes at 350°F (175°C). Cool before filling.
Chocolate Filling
- Melt Chocolate
- In a microwave-safe bowl or double boiler, melt ~8 oz chopped chocolate with 2 tablespoons butter, stirring until smooth. Set aside to cool slightly but remain pourable.
- Cream Butter & Sugar
- In a stand mixer (paddle attachment) or with a hand mixer, beat the remaining butter (~14 tablespoons) with 1 cup sugar and pinch of salt. Cream on medium-high ~2–3 minutes until fluffy.
- If you prefer less sweetness, reduce sugar to ¾ cup. The next steps will incorporate eggs, so ensuring the butter-sugar mixture is well creamed sets the foundation for a silky texture.
- Incorporate Eggs (Pasteurization Option)
- Traditional method: Add 1 egg at a time to the butter-sugar mixture, beating on medium-high ~2 minutes per egg. The extended beating helps dissolve sugar and incorporate air. Continue until all 4 eggs are added, producing a light, voluminous mixture.
- If you want to reduce raw egg risk, consider a double-boiler approach: whisk eggs + sugar over simmering water until ~160°F (71°C), then transfer to a mixing bowl to whip with butter. This ensures safer consumption while retaining some fluff.
- Blend in Melted Chocolate
- Gradually pour in cooled melted chocolate while beating on low, then increase to medium-high for ~1 minute, ensuring even distribution. Scrape bowl sides as needed. If using cocoa powder for extra depth, sift it in now, mixing thoroughly.
- Add Vanilla
- Drizzle in 1–2 teaspoons vanilla extract, beating briefly to combine. Taste test the filling—adjust sugar or salt if needed.
- Fill & Chill
- Spoon or pour the airy chocolate mixture into the cooled crust, smoothing the top with a spatula. Chill at least 2 hours (longer is better for firm slices, ideally 4 hours or overnight).
Section 4: Topping & Finishing
- Whipped Cream (Optional)
- If desired, whip ~1 cup cold heavy cream with 2 tablespoons sugar and 1 teaspoon vanilla until soft peaks form. Spread or pipe onto chilled pie, or serve dollops alongside.
- Chocolate Shavings
- Garnish with curls or grated chocolate to accent the luscious interior. Alternatively, dust cocoa powder lightly.
- Final Presentation
- Slice with a clean, warm knife for neat slices. Wipe the blade between cuts. The filling is delicate, so handle gently. The cross-section should reveal a smooth, mousse-like interior inside the crisp crust.
Section 5: Tips for Achieving a True “Silk” Texture
- Extended Whipping
- Thoroughly beating each egg for 1–2 minutes is key to dissolving sugar granules and incorporating air. Shortcuts lead to grainy or less airy filling.
- Properly Melted Chocolate
- Overheated chocolate can seize or turn grainy. Gently melt to avoid scorching. If it’s too hot when mixing, it might melt the butter excessively or scramble eggs in some methods.
- Chill Time
- At least 2 hours in the fridge is needed. The mixture sets and slices cleanly. For an ultra-silky texture, overnight chilling is best.
- Watch for Graininess
- If sugar remains undissolved, the filling may taste gritty. Room-temp butter and ample beating time usually prevent this. If you sense grains, beat more or use superfine sugar.
Section 6: Flavor Variations
- Spiked Chocolate Silk
- Fold in 1 tablespoon coffee liqueur or orange liqueur for an adult twist. The alcohol can intensify chocolate notes.
- Peppermint Silk
- Add ½ teaspoon peppermint extract to the filling. Top with crushed candy canes or mint chocolate shavings for a holiday vibe.
- Salted Caramel Drizzle
- For an extra layer, swirl or drizzle homemade salted caramel over the chilled filling. The sweet-salty accent pairs beautifully.
- Nutty Crust
- Replace standard pie crust with a pecan or almond crumb crust. The subtle nuttiness can complement the chocolate’s richness.
Section 7: Serving Suggestions
- Fresh Berries: Contrasts the sweetness with a tangy, juicy note—raspberries or strawberries in particular highlight chocolate’s depth.
- Coffee or Espresso: A robust cup can cut through the pie’s richness, providing a balanced finishing note for the palate.
- Scoop of Vanilla Gelato: If you’re doubling down on indulgence, a small gelato or ice cream portion accentuates the pie’s luxurious mouthfeel.
- Leftovers: Store in the fridge up to 3–4 days. If you used raw eggs, aim to consume within 2–3 days. The filling may soften at room temp; keep chilled for best slices.
Section 8: FAQ – Chocolate Silk Pie
Q1: Are raw eggs safe in this pie?
A1: Traditional recipes do use raw (or partially cooked) eggs. For safety, use pasteurized eggs or adopt a double-boiler approach to bring eggs up to 160°F (71°C) if you’re concerned. This approach reduces salmonella risk while retaining airy texture.
Q2: Do I need a pre-baked crust?
A2: Yes. The chocolate silk filling isn’t baked, so the crust must be fully cooked and cooled. Whether it’s a standard pastry crust or crumb crust, ensure it’s blind-baked or set beforehand.
Q3: Could I lighten it with less butter?
A3: Reducing butter changes the silkiness. Some recipes find success with whipped cream folded in, but that’s heading into mousse territory. For a classic texture, keep near the standard ratio of butter to chocolate and sugar.
Q4: My filling turned grainy. Any fix?
A4: Usually, sugar not fully dissolved or insufficient beating time is to blame. If it’s still in the mixing bowl, continue beating. If it’s already poured into the crust, you can’t fix it, but you can top with whipped cream to mask slight graininess.
Q5: Why is my pie not slicing cleanly?
A5: Possibly insufficient chilling time. Another factor might be warm kitchen conditions or not enough beating to set the structure. Chill longer or keep slices smaller for neat plating.
Conclusion
Blending the lusciousness of whipped chocolate with the convenience and presentation of a pie, Chocolate Silk Pie offers a uniquely velvety dessert that satisfies intense chocolate cravings in a refined form. From the crisp, baked crust to the airy swirl of chocolate filling, each forkful dissolves gently on the tongue, bringing the phrase “melt-in-your-mouth” to life. Whether for a holiday spread or a special treat for your chocolate-loving circle, this pie stands as a testament to how a few quality ingredients can produce a showstopping sweet finale.
Now that you know how to harness the synergy of butter, sugar, eggs, and good chocolate—plus the crucial step of thorough whipping—why not plan a batch soon? Gather your pastry crust, pick a favorite brand of dark chocolate, and let the swirl of sweet creaminess fill your kitchen with that seductive cocoa aroma. After you savor that last divine bite—maybe garnish with extra whipped cream or fresh berries—circle back here to share your personal flourishes. Did you spice it up with a dash of cinnamon, slip in a hint of coffee liqueur, or finalize it with chocolate curls? Your creativity might motivate others to journey into the realm of chocolate silk perfection.