The Retro Salad That Always Steals the Show
Growing up, summers in Charleston, South Carolina, were filled with church picnics and family cookouts on sweltering afternoons. The potluck table was always a sight to behold, laden with deviled eggs, potato salad, and pitchers of sweet tea. But the one dish I remember vanishing faster than any other was my aunt’s Green Pea Salad. It seemed so simple, almost humble. How could a salad made from frozen peas be the undisputed star of the show?
- The Retro Salad That Always Steals the Show
- Your Simple List of Ingredients
- Your Quick & Easy Timeline
- Step 1: Thaw the Peas
- Step 2: Prepare Your Mix-ins
- Step 3: Mix the Creamy Dressing
- Step 4: Combine, Chill, and Serve
- Estimated Nutritional Information
- Healthier Swaps & Delicious Variations
- Perfect Serving Suggestions
- Common Mistakes to Avoid
- Storing Your Creamy Salad
- The Simple, Beloved Classic Your Table Needs
- Frequently Asked Questions
- Q1: Do I have to cook the frozen peas first?
- Q2: Can I make this salad a day ahead of my party?
- Q3: My salad seems watery. What can I do?
- Q4: What other mix-ins work well in this salad?
- Classic Green Pea Salad (A Potluck Favorite!)
It’s because some recipes don’t need to be complicated to be perfect. This classic Green Pea Salad recipe is a testament to that. It’s a creamy, crunchy, sweet, and savory side dish that hits all the right notes. It’s the incredibly easy, refreshingly cool, and wonderfully nostalgic dish that has earned its place as a potluck legend for a reason.
Your Simple List of Ingredients
The magic of this salad is its simplicity. You only need a few key ingredients to create this creamy, crowd-pleasing side dish.
| Ingredient | Amount | Notes |
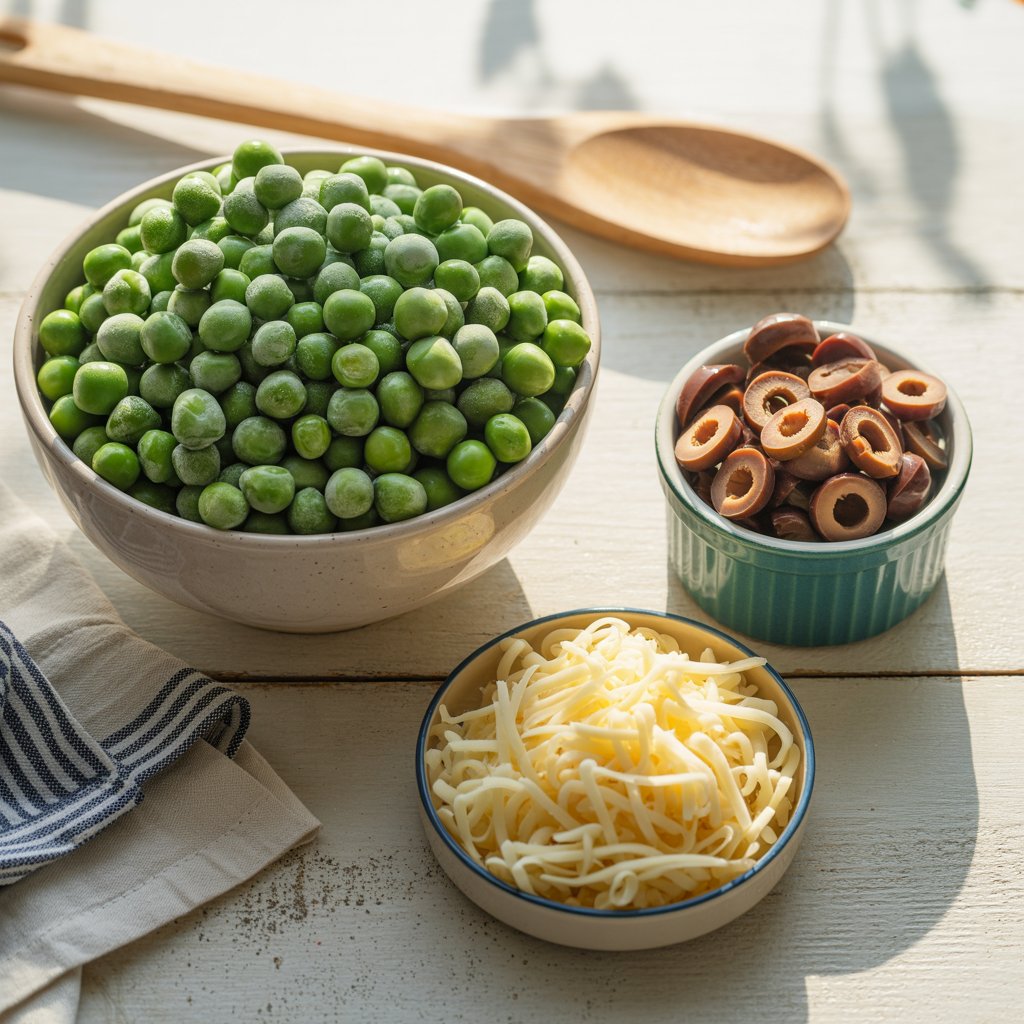
| Frozen Green Peas | 3 cups | The star of the show! Use sweet petite peas for the best flavor and texture. |
| Red Onion | ¼ cup | Finely diced for a sharp, savory bite that cuts through the creaminess. |
| Plain Greek Yogurt | ½ cup | Lends a healthy tang and creaminess to the dressing. |
| Mayonnaise | ¼ cup | For that classic, rich dressing flavor. Use a good quality brand. |
| Fresh Basil Leaves | 4 leaves | Finely chopped, for a surprising hint of fresh, aromatic flavor. |
| Canned Sliced Black Olives | 2.25 ounces | Optional, but they add a wonderful briny, salty bite. Drained well. |
| Shredded Mozzarella Cheese | ½ cup | Optional, but the cheese adds a lovely savory, chewy element. |

Your Quick & Easy Timeline
This is one of the fastest side dishes you can whip up, with almost no cooking required.
- Prep Time: 10 minutes
- Chill Time (Recommended): 30-60 minutes
- Total Time: Approximately 40-70 minutes (mostly hands-off)
Kitchen Insight: Don’t shy away from frozen vegetables! According to food science research, vegetables are typically flash-frozen at their peak ripeness, a process that locks in their vitamins and minerals. This means frozen peas are often just as nutritious, if not more so, than fresh peas that have traveled long distances to your grocery store.
Step 1: Thaw the Peas
The first and most important step is to properly thaw your frozen peas. You have two easy options. You can either place the frozen peas in a colander and run cool water over them for a couple of minutes until thawed, or you can simply let them sit out on the counter for about an hour. Once thawed, drain them very well and pat them dry with a paper towel to remove any excess moisture.
Step 2: Prepare Your Mix-ins
While the peas are thawing, finely dice your red onion. There’s no need to cook it; its sharp, raw crunch is a key part of the salad’s texture. Finely chop your fresh basil leaves. If you’re using the optional black olives and mozzarella, have them ready to go.
Step 3: Mix the Creamy Dressing
In a large bowl, whisk together the plain Greek yogurt and the mayonnaise until you have a smooth, creamy base. This simple two-ingredient dressing is the perfect tangy and rich vehicle for all the other flavors.
Step 4: Combine, Chill, and Serve
To the bowl with the dressing, add the thawed and dried peas, the diced red onion, and the chopped basil. If you’re using them, add the black olives and shredded mozzarella cheese now. Gently stir everything together until all the peas are evenly coated in the creamy dressing. For the best flavor, cover the salad and chill it in the refrigerator for at least 30 minutes to an hour. This allows the flavors to meld together beautifully. Serve cold.

Estimated Nutritional Information
Here is an approximate nutritional breakdown per serving (assuming 6 side-dish servings), including optional cheese and olives.
- Calories: 180 kcal
- Carbohydrates: 15g
- Protein: 9g
- Fat: 10g
- Fiber: 5g
Disclaimer: This is an estimate and will vary based on your specific ingredients.
Healthier Swaps & Delicious Variations
This simple salad is a wonderful canvas for creativity.
- All-Yogurt Dressing: For a lighter version, omit the mayonnaise entirely and use ¾ cup of plain Greek yogurt for the dressing. You may want to add a pinch of sugar or a tiny drizzle of honey to balance the extra tang.
- Add More Crunch: For extra texture and flavor, consider adding some crispy, crumbled bacon or diced celery.
- Change the Cheese: Swap the mozzarella for a sharp, shredded cheddar cheese for a bolder flavor.
- Vegan-Friendly: To make this salad vegan, use a plant-based yogurt and vegan mayonnaise, and omit the cheese.
Perfect Serving Suggestions
This Green Pea Salad is the ultimate team player at any meal.
- BBQ and Cookout Staple: It’s the perfect cool and creamy counterpoint to smoky grilled foods like burgers, hot dogs, ribs, and chicken.
- Potluck Hero: Bring a big bowl of this to your next potluck or picnic. It travels well and is always one of the first dishes to disappear.
- Holiday Side: Its fresh, simple flavor makes it a wonderful addition to a holiday spread, especially for Easter, Mother’s Day, or the Fourth of July.

Common Mistakes to Avoid
- Using Canned Peas: Please don’t! Canned peas are very soft and mushy and will not work in this salad. Frozen peas have a much better texture—firm, with a slight pop.
- Not Draining the Peas Properly: Any excess water on your thawed peas will make your dressing runny and the salad watery. Pat them dry with a paper towel after thawing and draining.
- Making It Too Far in Advance: While a short chill time is great for melding flavors, this salad is best enjoyed the day it’s made. If it sits for more than a day, the peas can release more water and make the salad less creamy.
Storing Your Creamy Salad
Proper storage will keep your salad tasting fresh.
- Storing: Store any leftovers in an airtight container in the refrigerator. It is best enjoyed within 2 days.
- Can I Freeze It?: Unfortunately, this salad does not freeze well. The dressing will separate, and the texture of the peas will change upon thawing. It’s best made fresh.
The Simple, Beloved Classic Your Table Needs
This Green Pea Salad recipe is a delightful reminder that the most beloved dishes are often the simplest. With just a handful of ingredients and a few minutes of your time, you can create a creamy, refreshing, and utterly delicious side dish that evokes memories of happy gatherings. It’s a timeless classic that proves you don’t need to be fancy to be a star.
We hope you bring this nostalgic favorite to your next gathering! Let us know how it turned out in the comments below. For more easy and delicious potluck-perfect recipes, be sure to subscribe.
Frequently Asked Questions
Q1: Do I have to cook the frozen peas first?
No, you do not need to cook them. Simply thawing them is all that’s required. Frozen peas are blanched before they are frozen, so they are tender and perfectly safe to eat once thawed. This is what gives the salad its signature fresh, slightly crisp texture.
Q2: Can I make this salad a day ahead of my party?
You can, but for the best texture and creaminess, I recommend making it just a few hours before you plan to serve it. If you need to make it the day before, you might find it has become a little watery overnight. You can try to revive it by giving it a good stir and, if needed, stirring in an extra tablespoon of Greek yogurt to thicken it back up.
Q3: My salad seems watery. What can I do?
This is usually because the peas weren’t dried well enough after thawing. To fix a salad that’s already made, you can try stirring in a little extra Greek yogurt or a tablespoon of finely grated Parmesan cheese, which can help absorb some of the excess moisture and thicken the dressing.
Q4: What other mix-ins work well in this salad?
This is a great base recipe to build on! Many people love to add crispy crumbled bacon, finely diced cheddar cheese instead of mozzarella, chopped hard-boiled eggs, or diced celery for extra crunch. Feel free to experiment!
Print
Classic Green Pea Salad (A Potluck Favorite!)
- Total Time: 40 minutes
- Yield: 6 side-dish servings 1x
Description
A bright, creamy side that comes together in minutes—tender peas tossed in a tangy Greek-yogurt–mayo dressing with red onion, fresh basil, and optional olives and mozzarella for extra zing. Chill to let the flavors meld, then watch it disappear at your next gathering!
Ingredients
- 3 cups Frozen green peas (Thawed & very well drained)
- 1/4 cup Red onion finely diced
- 1/2 cup Plain Greek yogurt
- 1/4 cup Mayonnaise (Good-quality brand)
- 4 leaves Fresh basil finely chopped
- 2.25 oz Canned sliced black olives optional (Well drained)
- 1/2 cup Shredded mozzarella cheese optional
Dressing:
- To taste Salt & fresh cracked pepper
Instructions
Thaw & Dry the Peas:
- Place frozen peas in a colander and run under cool water, or let sit at room temperature about 1 hour.
- Drain thoroughly, then pat with paper towels to remove all excess moisture.
Prep Mix-Ins:
- While peas thaw, finely dice red onion and basil. If using, drain olives and shred mozzarella.
Whisk the Dressing:
- In a large bowl, whisk together Greek yogurt and mayonnaise until smooth. Season lightly with salt and pepper.
Combine & Chill:
- Add dried peas, diced onion, chopped basil, olives, and mozzarella to the dressing.
- Gently fold until everything is evenly coated.
- Cover and refrigerate at least 30 minutes to let flavors meld.
Serve Cold:
- Stir briefly, taste, and adjust seasoning if needed.
- Transfer to a serving bowl and garnish with a few extra basil leaves or cracked pepper.
Notes
-
Frozen Veggie Tip: Flash-frozen at peak ripeness, frozen peas often lock in more nutrients than off-season fresh peas.
-
Make-Ahead: Salad can be assembled and chilled up to 8 hours ahead—reserve any garnish until just before serving.
-
Variations: Swap basil for fresh mint or parsley; stir in crumbled bacon for extra flavor.
- Prep Time: 10 minutes
- Category: Salad, Side Dish
- Cuisine: American, Potluck Classics
Nutrition
- Calories: 180