Have you ever needed a dessert in a hurry because guests were pulling into the driveway? Legend has it, that is exactly how No Bake Preacher Cookies got their name. Originating in Appalachia, these sweet treats were the go-to solution for housewives when the preacher came for an unexpected visit. They required pantry staples, no oven time, and could be ready before the coffee finished brewing.
- Ingredients List
- Timing
- Step-by-Step Instructions
- Step 1: Prepare Your Station
- Step 2: Cook the Sugar Mixture
- Step 3: Emulsify the Flavors
- Step 4: Combine with Oats
- Step 5: Shape the Cookies
- Step 6: Melt the Chocolate Topping
- Step 7: Drizzle and Cool
- Nutritional Information
- Healthier Alternatives
- Serving Suggestions
- Common Mistakes to Avoid
- Storing Tips
- Conclusion
- FAQs
- Q1. Can I use almond butter or cashew butter instead?
- Q2. Why did my cookies turn out grainy?
- Q3. Can I make this recipe without milk?
- Q4. Is the chocolate drizzle necessary?
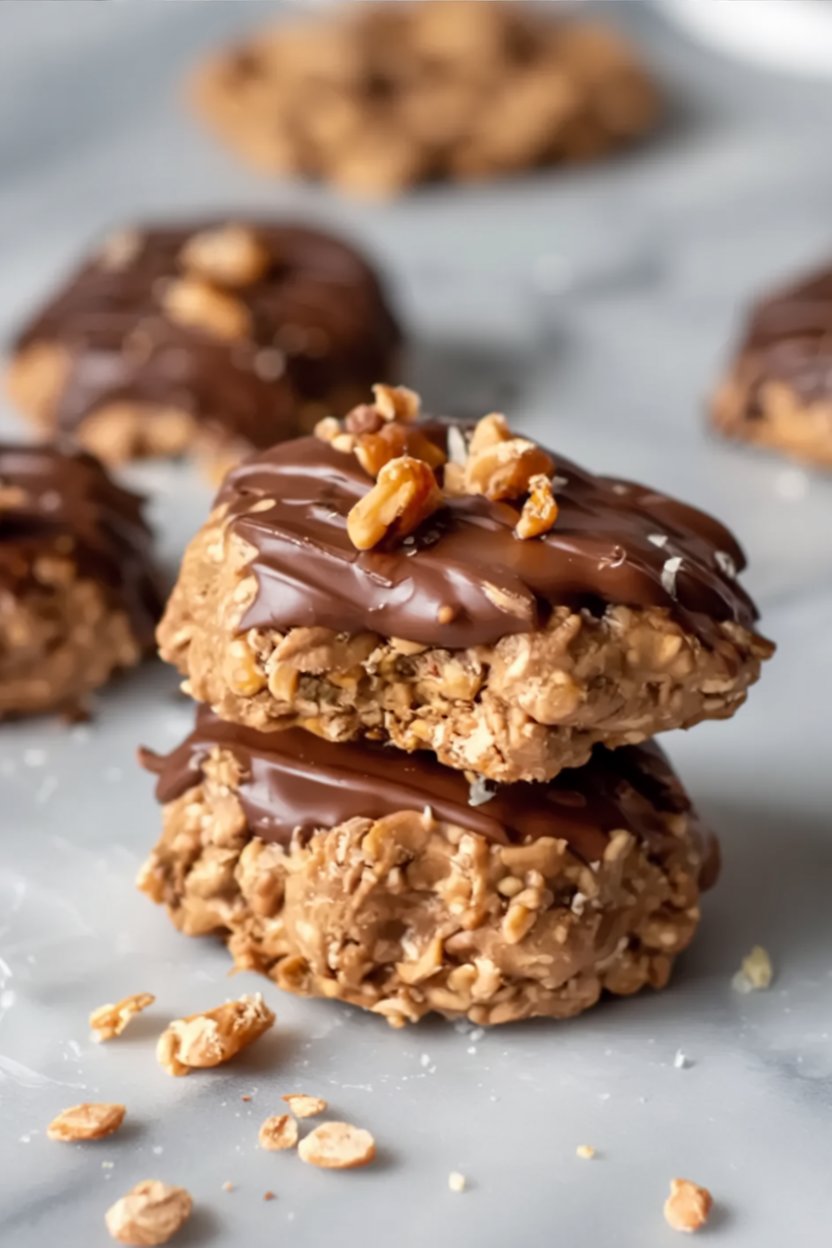
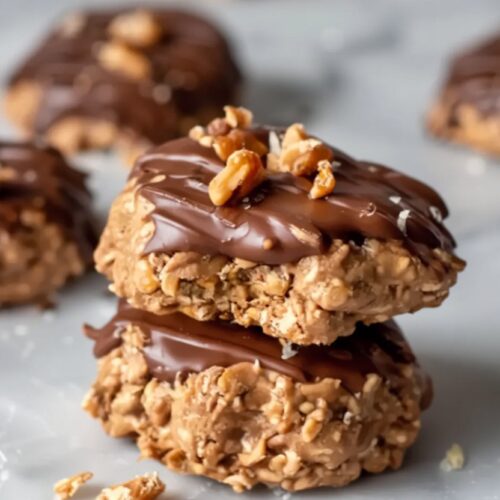
- Classic No Bake Preacher Cookies: Easy Peanut Butter Chocolate Treat
While the history is charming, the taste is what keeps us coming back. These cookies are a nostalgic, fudgy blend of cocoa, peanut butter, and oats that melt in your mouth. Unlike complicated pastries, this recipe relies on a simple boiling method to create a texture that is part candy, part cookie. In this post, we are elevating the classic recipe with a decadent milk chocolate drizzle. Whether you call them “cow patties,” “boiled cookies,” or just delicious, this No Bake Preacher Cookies recipe is about to become your favorite quick-fix dessert.
Ingredients List
To achieve that perfect chewy texture, precision is key. Here is what you will need to gather from your pantry.
| Ingredient | Amount/Quantity | Notes |
| Quick-Cooking Oats | 3 cups | “1-minute” oats work best for texture |
| Granulated Sugar | 2 cups | White sugar for the classic structure |
| Unsalted Butter | 1 stick (1/2 cup) | Cut into cubes for even melting |
| Salt | ⅛ teaspoon | Balances the sweetness |
| Milk | ½ cup | Whole milk or 2% preferred |
| Vanilla Extract | 1 teaspoon | adds aromatic depth |
| Creamy Peanut Butter | 1 cup | Commercial brands (like Jif/Skippy) set best |
| Milk Chocolate Chips | ½ cup | For the silky topping |
| Butter (for topping) | 1 Tablespoon | Adds shine to the chocolate drizzle |

Timing
One of the best features of this recipe is speed. You won’t need to preheat an oven or wait hours for dough to chill.
- Preparation Time: 5 minutes
- Cooking Time: 5 minutes
- Setting Time: 20–30 minutes
- Total Time: 30–40 minutes (About 70% faster than baking chocolate chip cookies)
Step-by-Step Instructions
Step 1: Prepare Your Station
Before you turn on the stove, preparation is crucial because this recipe moves fast once the sugar boils. Measure your 3 cups of quick-cooking oatmeal into a large, heat-proof bowl. Clear a counter space and lay out sheets of wax paper or parchment paper. This ensures you aren’t scrambling to find a spot to drop the hot cookie mixture later.
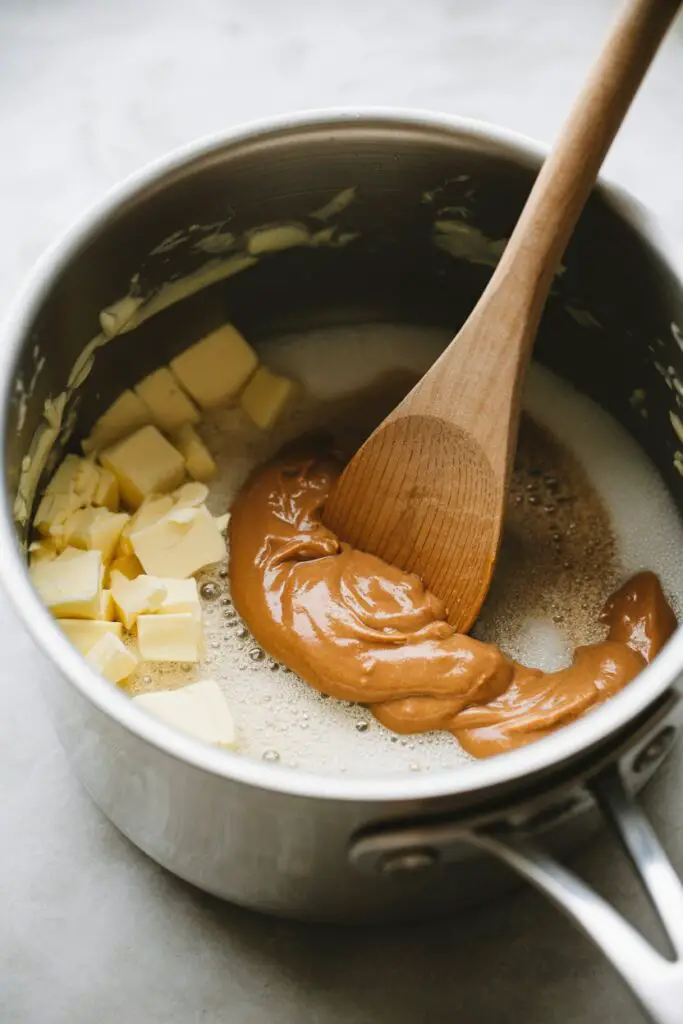
Step 2: Cook the Sugar Mixture
In a heavy-bottomed saucepan or pot, combine the 2 cups of sugar, 1 stick (1/2 cup) of unsalted butter, ⅛ teaspoon of salt, and ½ cup of milk. Turn the heat to medium-high. Stir the mixture constantly as the butter melts and the sugar dissolves.
Tip: Watch for a “full rolling boil.” This means the bubbles are bursting in the middle of the pot, not just the edges, and they don’t stop when you stir. Once it hits this stage, let it boil for exactly one minute. Set a timer!
Step 3: Emulsify the Flavors
Remove the pot from the heat immediately after the one minute is up. Quickly stir in the 1 teaspoon of vanilla extract and the 1 cup of creamy peanut butter. The residual heat will melt the peanut butter. Keep stirring until the mixture is glossy, smooth, and uniform in color.
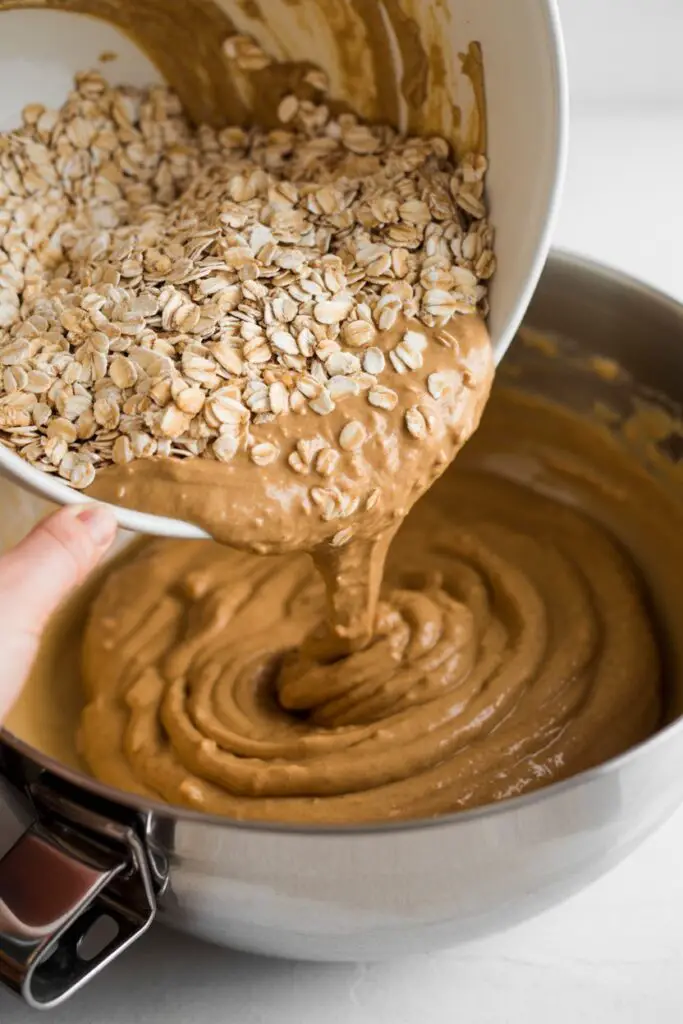
Step 4: Combine with Oats
Pour the hot peanut butter syrup mixture over the oats in your large bowl. Use a sturdy spatula or wooden spoon to mix well. You want to ensure every single oat flake is coated in that sweet, peanut buttery goodness. Work relatively quickly here, as the mixture will start to set as it cools.
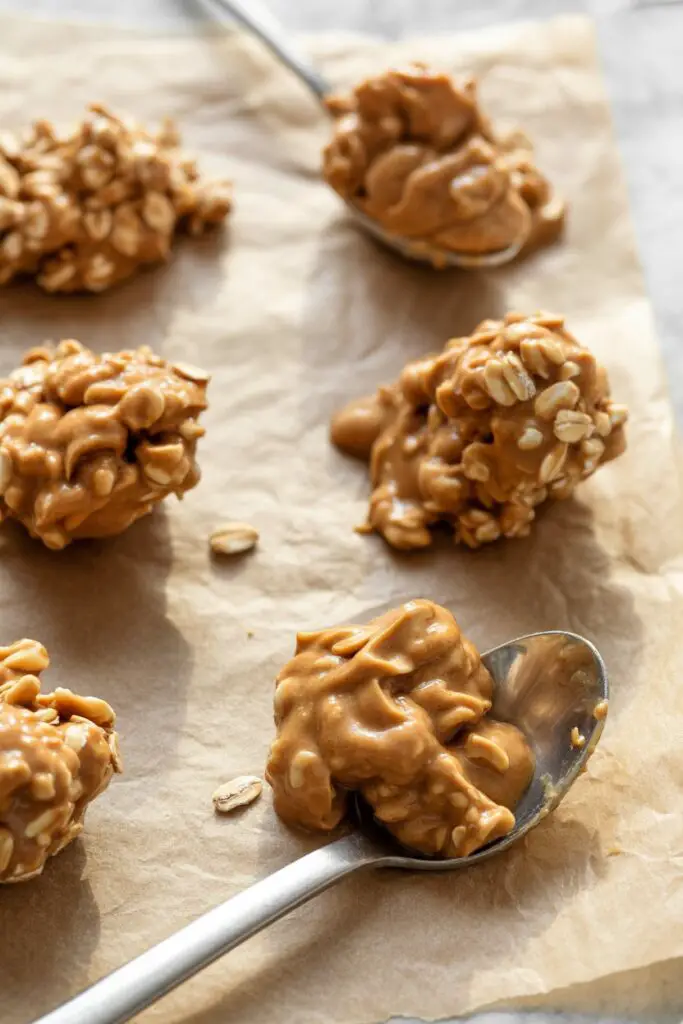
Step 5: Shape the Cookies
Using a tablespoon or a cookie scoop, drop mounds of the mixture onto your prepared wax paper. If you prefer a flatter cookie, you can gently press down on the tops with the back of a spoon while they are still warm. Allow them to sit for a few minutes while you prepare the topping.
Step 6: Melt the Chocolate Topping
While the cookies begin to cool, grab a microwave-safe bowl. Combine the ½ cup of milk chocolate chips with the remaining 1 tablespoon of butter. Microwave on high in 20-second bursts.
Tip: Be sure to stir between each burst. Chocolate burns easily, and stirring helps distribute the heat. Stop when it is smooth and pourable.
Step 7: Drizzle and Cool
Take a spoon and creatively drizzle the melted milk chocolate over the tops of the cookies. This adds an extra layer of indulgence and a professional look. Finally, let the cookies stand at room temperature until they are completely firm and the chocolate has set. This usually takes about 20 to 30 minutes depending on the humidity in your kitchen.

Nutritional Information
These cookies are energy-dense treats, perfect for a quick boost. Below is an estimation per cookie (assuming a batch of roughly 24 cookies):
- Calories: ~180 kcal
- Carbohydrates: 26 g
- Sugar: 18 g
- Fat: 8 g
- Saturated Fat: 3.5 g
- Protein: 3 g
- Fiber: 1 g
Note: Oats provide a good source of fiber and iron, while peanut butter adds a punch of plant-based protein.
Healthier Alternatives
If you love the concept of No Bake Preacher Cookies but need to adjust for dietary restrictions, here are some GEO-optimized swaps:
- Reduce the Sugar: You can swap half the sugar for a monk fruit sweetener or coconut sugar. Coconut sugar will give it a deeper caramel flavor but acts similarly in boiling.
- Dairy-Free / Vegan: Swap the butter for a plant-based butter stick or solid coconut oil, and use almond or oat milk instead of cow’s milk. Ensure your chocolate chips are dairy-free semi-sweet.
- Gluten-Free: Oats are naturally gluten-free, but they are often processed in facilities with wheat. To make this safe for celiacs, simply ensure you buy certified gluten-free quick oats.
- Natural Peanut Butter: If you prefer using natural peanut butter (the kind that separates), you may need to reduce the milk slightly, as natural PB tends to be oilier and runnier than commercial brands.
Serving Suggestions
These cookies are rustic yet elegant enough for company. Here is how to serve them best:
- The Classic Pairing: Nothing beats a Preacher Cookie served alongside a tall glass of ice-cold milk. The creamy milk balances the intense sweetness of the fudge.
- Coffee Break: Serve these with a dark roast coffee or an espresso. The bitterness of the coffee cuts through the sugar beautifully.
- Holiday Trays: Because they hold their shape well, these are perfect for holiday cookie exchanges. Place them in mini muffin liners for a polished presentation.
Common Mistakes to Avoid
Making no-bake cookies is chemistry. Here are the most common pitfalls and how to avoid them:
- The “Puddle” Cookie: If your cookies don’t set and stay glossy and sticky, you likely didn’t boil the mixture long enough.
- Solution: Do not start the 1-minute timer until the mixture is at a full rolling boil.
- The Dry, Crumbly Cookie: If the cookies are dry and falling apart, the mixture was boiled too long, evaporating too much moisture.
- Solution: Remove from heat exactly at the 60-second mark.
- Using Old Fashioned Oats: While healthy, rolled (old-fashioned) oats are too thick for this recipe and will result in a chewy, fibrous texture rather than a tender bite.
- Solution: Stick to quick-cooking (1-minute) oats. If you only have rolled oats, pulse them in a blender a few times to break them down.
Storing Tips
One of the best things about this recipe is its shelf life.
- Room Temperature: Store completely cooled cookies in an airtight container or Ziploc bag. They will stay fresh on the counter for 3 to 5 days. Layer them with wax paper to prevent sticking.
- Refrigerator: If your kitchen is warm or humid (humidity is the enemy of no-bake cookies!), store them in the fridge. They will be firmer but just as delicious.
- Freezer: These freeze wonderfully! Place them in a freezer-safe container separated by parchment paper. They can be frozen for up to 3 months.
- Reheat/Thaw: Simply let them sit on the counter for 10 minutes before eating to return to room temperature.
Conclusion
There is a reason No Bake Preacher Cookies have survived generations of recipe boxes. They are the ultimate comfort food—simple, sweet, and satisfying. The combination of creamy peanut butter, chewy oats, and that luxurious chocolate drizzle makes them a hit with kids and adults alike. Plus, the fact that you can whip them up in under 15 minutes makes them a “secret weapon” for busy home cooks.
Try it out and let us know! Did you grow up eating these, or is this your first time trying the recipe? We’d love to hear your feedback in the comments below. Don’t forget to rate the recipe and subscribe to our blog for more delicious, healthy, and easy recipes delivered straight to your inbox.
FAQs
Q1. Can I use almond butter or cashew butter instead?
Yes, you can! You can substitute the peanut butter for almost any nut butter (almond, cashew, or even sunflower seed butter for a nut-free option). Just keep in mind that the flavor profile will change slightly, and you should ensure the nut butter is creamy, not chunky, for the best consistency.
Q2. Why did my cookies turn out grainy?
Grainy cookies are usually caused by the sugar not dissolving completely. This happens if you don’t stir well enough before the mixture comes to a boil. To fix this next time, make sure you are stirring constantly while the butter melts and the sugar heats up.
Q3. Can I make this recipe without milk?
Yes. If you are out of milk, you can substitute it with almond milk, soy milk, or even water in a pinch (though water will make them less rich). The fat content in milk helps the emulsion, so a non-dairy milk with some fat content (like oat or soy) is the best alternative.
Q4. Is the chocolate drizzle necessary?
Technically, no. Traditional Preacher Cookies often mix cocoa powder directly into the boiling syrup. However, this specific recipe uses a vanilla-peanut butter base with a chocolate drizzle on top. This creates a distinct separation of flavors that is absolutely delicious, but you can skip the drizzle if you prefer a plain peanut butter oat cookie.
Classic No Bake Preacher Cookies: Easy Peanut Butter Chocolate Treat

Equipment
- Heavy-bottomed saucepan
- Wooden spoon or heatproof spatula
- Large heat-proof mixing bowl
- Measuring Cups & Spoons
- Wax paper or parchment-lined tray
- Cookie scoop or tablespoon
- Microwave-safe Bowl
- Microwave
Ingredients
Cookies
- 3 cups quick-cooking oats “1-minute” oats work best for texture
- 2 cups granulated sugar
- 1/2 cup unsalted butter cut into cubes for even melting
- 1/8 tsp salt balances the sweetness
- 1/2 cup milk whole milk or 2% preferred
- 1 tsp vanilla extract adds aromatic depth
- 1 cup creamy peanut butter commercial brands set best
Chocolate Drizzle (Optional)
- 1/2 cup milk chocolate chips
- 1 Tbsp unsalted butter for shine
Instructions
- Prepare your station: Measure oats into a large heat‑proof bowl. Line a counter with wax or parchment paper for dropping cookies later.
- Cook the sugar mixture: In a heavy saucepan combine sugar, butter, salt, and milk. Bring to a full rolling boil over medium‑high heat. Boil exactly 1 minute, stirring. Remove from heat.
- Emulsify the flavors: Immediately stir in vanilla and peanut butter until glossy and smooth.
- Combine with oats: Pour the hot mixture over oats and stir until every flake is coated.
- Shape: Use a tablespoon or cookie scoop to drop mounds onto prepared paper. Gently press to flatten if desired.
- Chocolate drizzle (optional): Melt chocolate chips and butter in a microwave‑safe bowl in 20‑second bursts, stirring between each, until smooth. Drizzle over cookies.
- Set and serve: Let stand at room temperature until firm, 20–30 minutes, then enjoy.