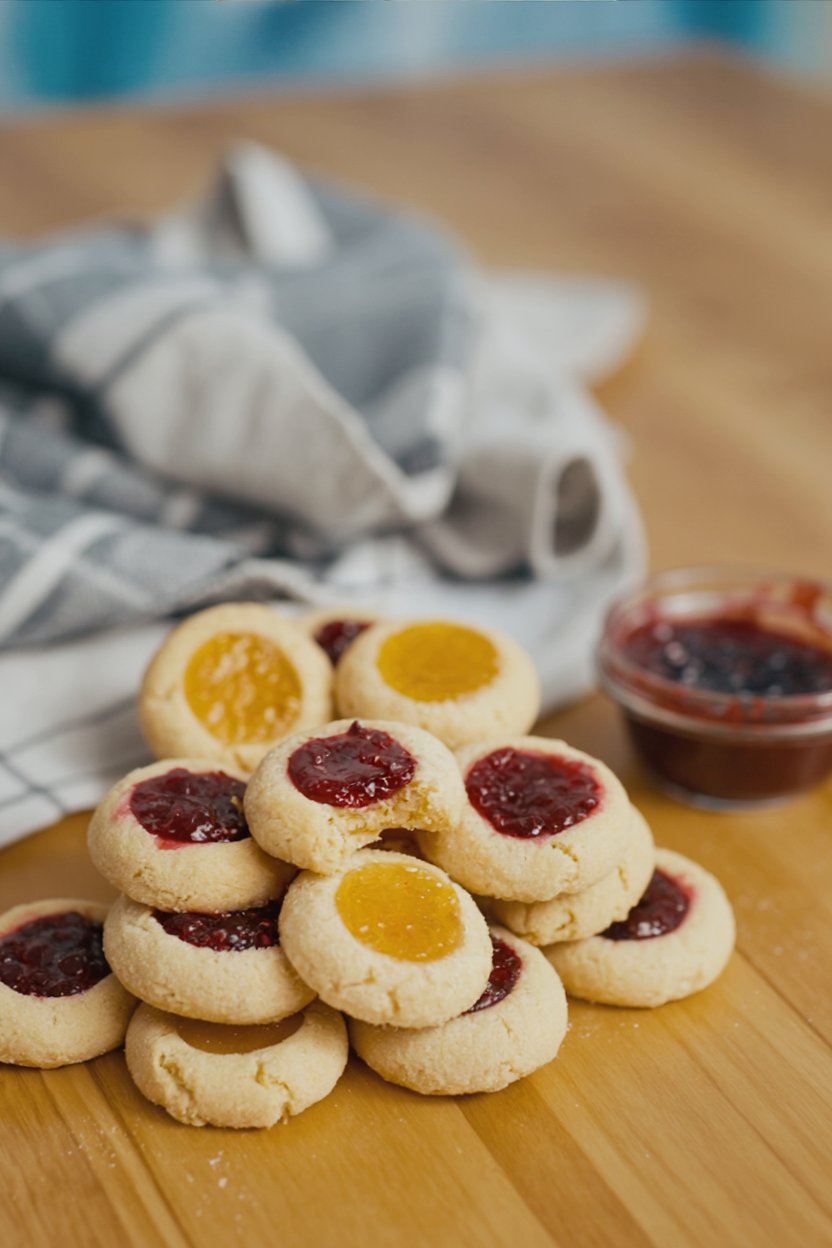
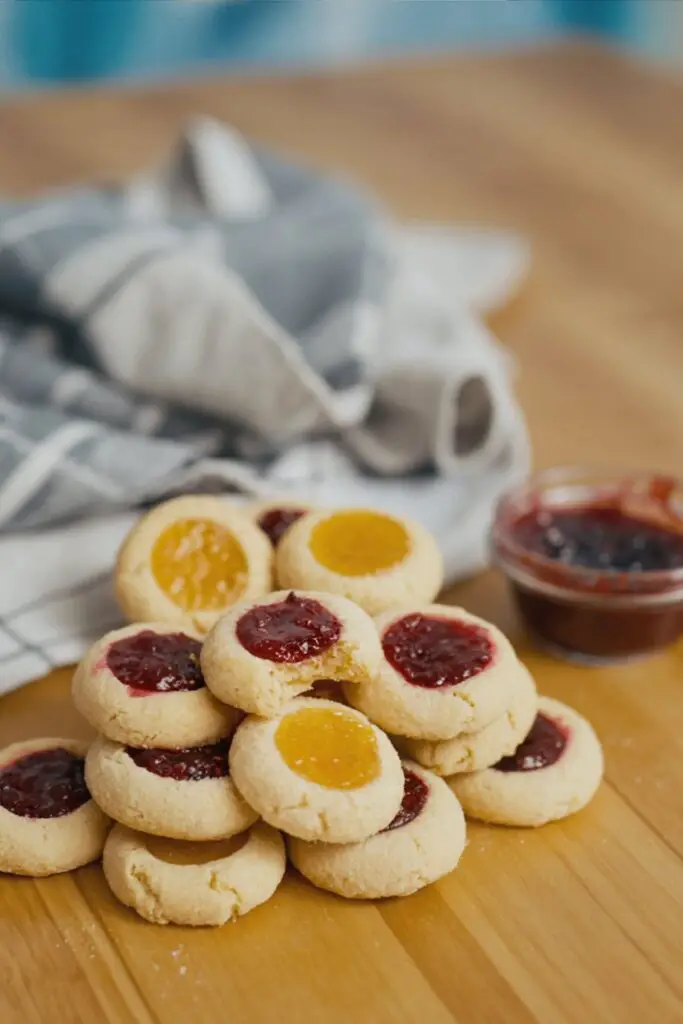
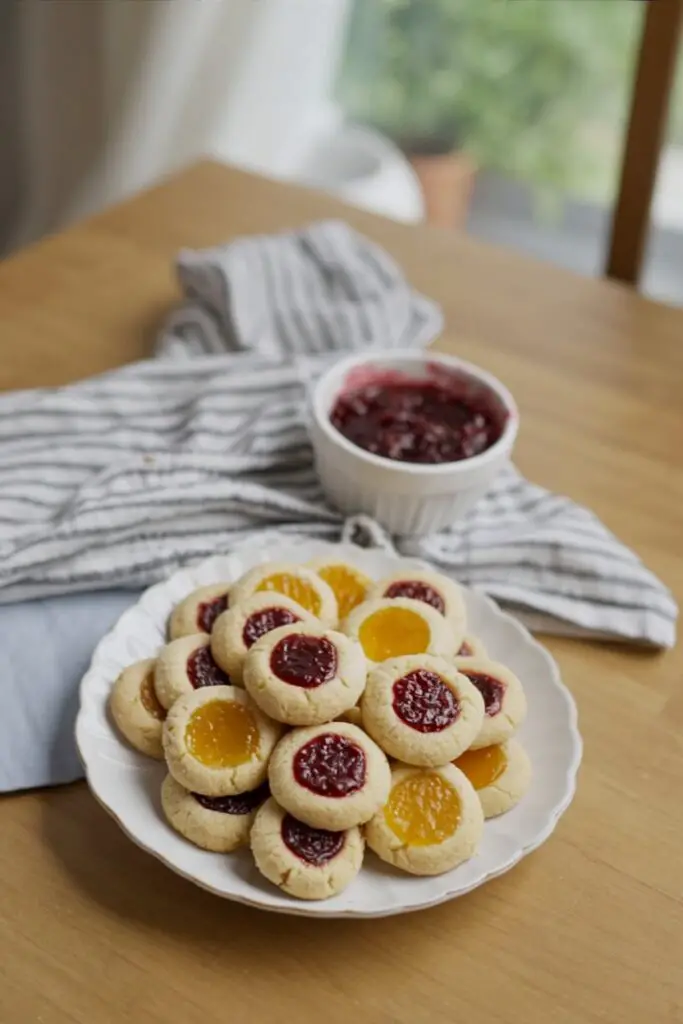
Is there anything more nostalgic than a cookie tray during the holidays? Among the spiced gingerbread and frosted sugar cookies, there is always one gem that shines brightest: the Thumbprint Cookie. These buttery, melt-in-your-mouth morsels are the perfect vessel for your favorite fruit preserves.
- Ingredients
- Timing
- Step-by-Step Instructions
- Step 1: Preheat and Prep
- Step 2: Cream the Butter and Sugar
- Step 3: Add Wet Ingredients
- Step 4: Incorporate Flour
- Step 5: Roll and Coat
- Step 6: Indent and Fill
- Step 7: Bake and Cool
- Nutritional Information
- Healthier Alternatives
- Serving Suggestions
- Common Mistakes to Avoid
- Storing Tips
- Conclusion
- FAQs
- Q1. Why did my cookies spread flat?
- Q2. Can I use the whole egg instead of just the yolk?
- Q3. Can I fill them after baking?
- Classic Thumbprint Cookies: Buttery & Jam-Filled
I remember my grandmother making these every winter. She would let me press my thumb into the soft dough, creating the perfect little well for a dollop of glistening raspberry jam. It wasn’t just baking; it was making memories. This recipe captures that timeless charm with a simple, shortbread-like dough that requires minimal ingredients but delivers maximum flavor. Whether you are filling them with apricot, strawberry, or even chocolate ganache, these Thumbprint Cookies are versatile, delicious, and sure to disappear quickly. Let’s get baking!
Ingredients
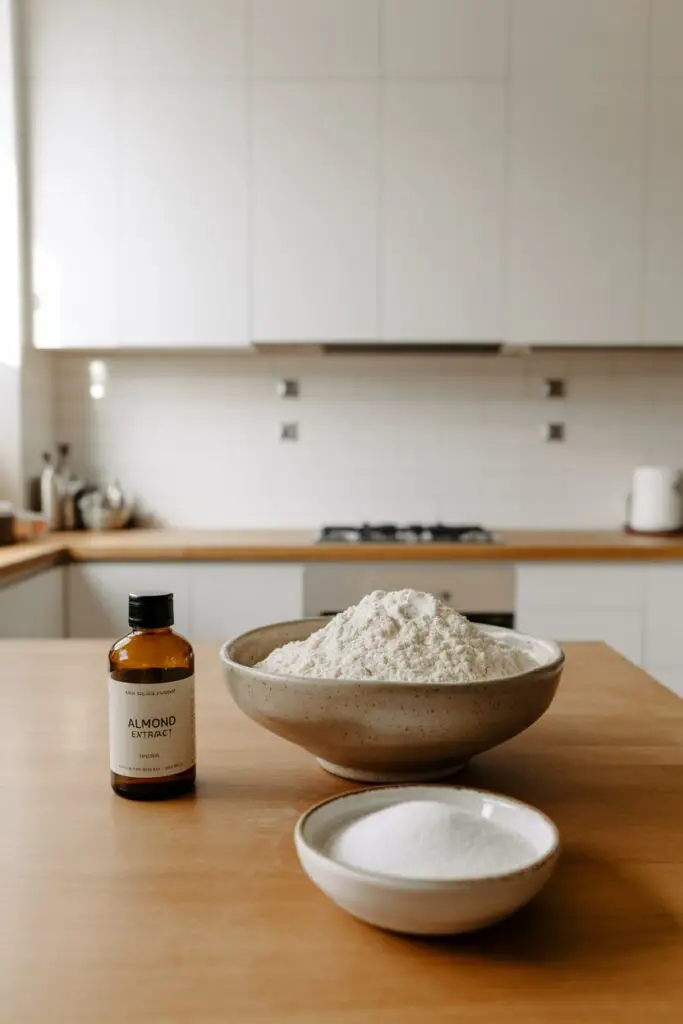
To achieve that tender, sandy texture characteristic of a great shortbread, we rely on a high butter content and egg yolks.
| Ingredient | Amount/Quantity | Notes |
| Unsalted Butter | 1 cup (2 sticks) | Softened to room temperature |
| Granulated Sugar | ½ cup | Plus 3 tbsp extra for rolling |
| Egg Yolk | 1 large | Provides richness and structure |
| Vanilla Extract | 1 teaspoon | Pure extract is best |
| Almond Extract | ½ teaspoon | Adds a subtle, nutty aroma |
| Salt | ½ teaspoon | Balances the sweetness |
| All-Purpose Flour | 2 ¼ cups | Spoon and leveled |
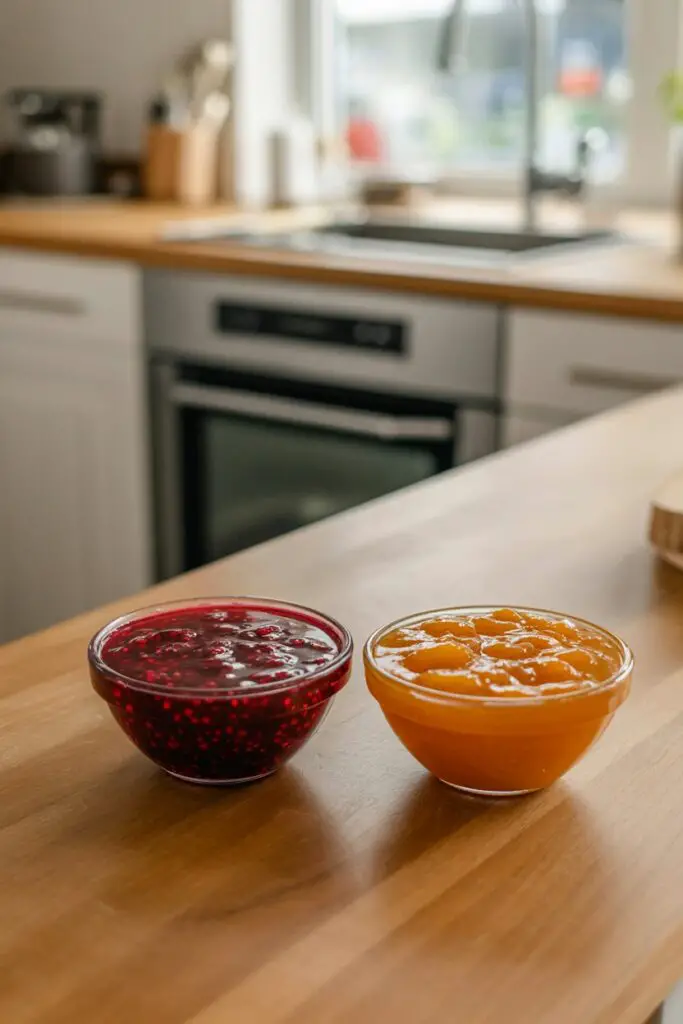
| Jam/Preserves | ½ cup | Raspberry, apricot, or your favorite flavor |

Timing
This recipe is straightforward, but allowing the cookies to cool properly is key to keeping the jam set.
- Prep Time: 20 minutes
- Cook Time: 10-11 minutes per batch
- Total Time: ~35 minutes (Faster than chilling dough for cut-out cookies!)
Step-by-Step Instructions
Follow these steps to ensure your cookies don’t spread too much and hold their beautiful shape.
Step 1: Preheat and Prep
Preheat your oven to 350°F (175°C). Line two large baking sheets with parchment paper or silicone baking mats. Set these aside.
Step 2: Cream the Butter and Sugar
In the bowl of an electric mixer (or a large bowl with a hand mixer), beat the softened butter and ½ cup of granulated sugar together until light and creamy. This usually takes about 2-3 minutes. Scrape down the sides of the bowl to ensure everything is incorporated.
Step 3: Add Wet Ingredients
Add the egg yolk, vanilla extract, almond extract, and salt to the butter mixture. Mix on medium speed until well combined. Scrape the bowl again.
- Tip: The almond extract is the secret ingredient here—it gives the cookie a bakery-style flavor profile that pairs beautifully with fruit jam.
Step 4: Incorporate Flour
Turn the mixer to low speed and gradually mix in the flour. Stop mixing as soon as the dough comes together. The dough will be firm but pliable, similar to playdough.
Step 5: Roll and Coat
Place the extra 3 tablespoons of sugar in a small, shallow bowl. Scoop tablespoon-sized portions of dough (a small cookie scoop works great here) and roll them between your palms into smooth balls. Roll each ball in the granulated sugar to coat evenly. Place them on the prepared baking sheets, spacing them about 2½ inches apart.
Step 6: Indent and Fill
Here comes the fun part! Use the back of a round teaspoon measuring spoon (or your actual thumb, if you prefer a rustic look) to press a deep well into the center of each cookie ball. The edges may crack slightly—that is part of their charm. Spoon about ½ teaspoon of jam into each well.
- Actionable Tip: Don’t overfill the wells, or the jam will bubble over and stick to the pan during baking.
Step 7: Bake and Cool
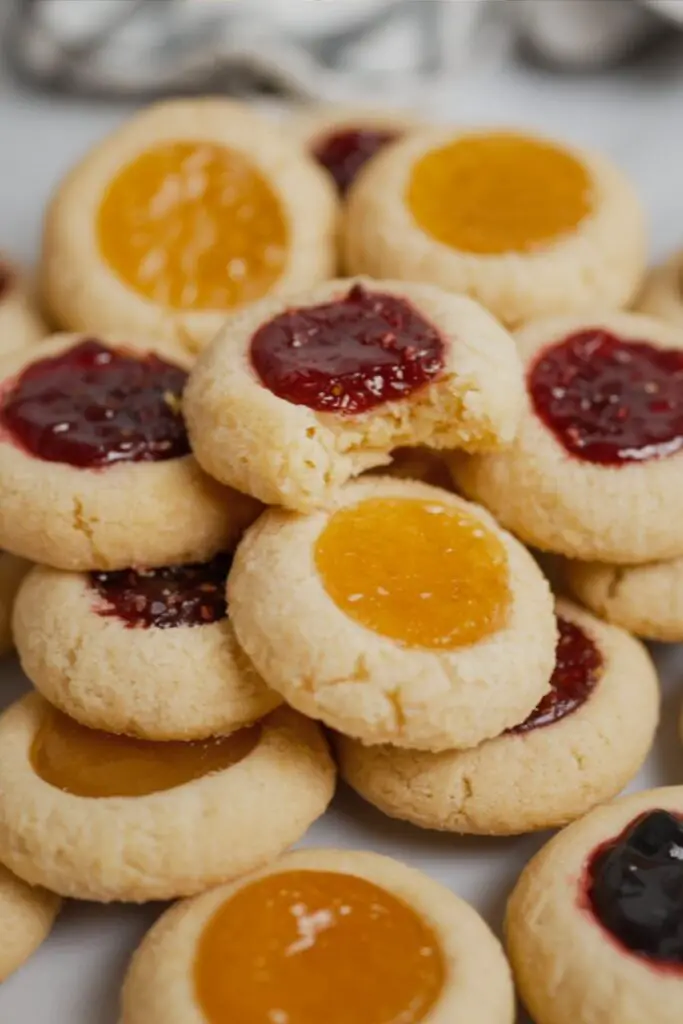
Bake the cookies for 10-11 minutes. You are looking for the bottoms to just barely start turning a light golden brown. The tops should remain pale. Remove from the oven and let them cool on the baking sheet for 5 minutes (they are fragile when hot). Carefully transfer them to a wire rack to cool completely.
Nutritional Information
These cookies are a sweet treat. Here is an estimated breakdown per cookie (based on a batch of 24):
- Calories: ~120 kcal
- Fat: 6 g (Saturated: 3.5 g)
- Carbohydrates: 15 g
- Sugar: 8 g
- Protein: 1 g
- Sodium: 50 mg
Healthier Alternatives
While these are meant to be indulgent, here are a few swaps to fit different dietary needs:
- Reduce Sugar: You can skip rolling the dough balls in the extra sugar to cut down on sweetness. Use a low-sugar or “all-fruit” jam spread.
- Gluten-Free: Swap the all-purpose flour for a high-quality 1:1 Gluten-Free Baking Flour blend. The texture will be slightly more crumbly but still delicious.
- Vegan Option: Use a vegan butter stick alternative (not tub margarine) and replace the egg yolk with 1 tablespoon of cornstarch mixed into the flour to help bind the dough.
- Whole Grain: Substitute half of the all-purpose flour with white whole wheat flour for a nuttier taste and a fiber boost.
Serving Suggestions
These cookies are versatile and look stunning on a dessert table.
- The Holiday Platter: Arrange them alongside chocolate crinkles and snickerdoodles. The red raspberry jam creates a festive pop of color.
- Tea Time: Serve these with a hot cup of Earl Grey tea or coffee. The buttery, not-too-sweet dough is perfect for dipping.
- Flavor varitions:
- Chocolate Lover: Fill the centers with chocolate ganache or Nutella instead of jam after baking.
- Lemon Zest: Add 1 teaspoon of lemon zest to the dough and fill with lemon curd.
- Turtle Style: Roll the dough in chopped pecans and fill the center with caramel sauce.
Common Mistakes to Avoid
Cookie baking is a science. Watch out for these common pitfalls:
- Butter too warm: If your butter is melted or oily, the cookies will spread into flat puddles. Solution: The butter should be cool to the touch but indent slightly when pressed. If the dough feels warm, chill the balls for 10 minutes before baking.
- Cracking too much: If the dough cracks severely when you press the thumbprint, it might be too dry. Solution: Roll the ball in your warm hands for a few extra seconds to make it pliable before pressing.
- Overbaking: Shortbread should be pale. Solution: Pull them out when the edges are set but not browned. They will continue to firm up as they cool on the pan.
Storing Tips
These cookies store beautifully, making them great for gifting.
- Room Temperature: Store in an airtight container for up to 1 week. If stacking them, place a sheet of wax paper between layers to prevent the jam from sticking.
- Freezing: You can freeze the baked cookies for up to 3 months. Thaw at room temperature.
- Dough Prep: You can make the dough balls, press the indentations, and freeze them unfilled on a baking sheet. Once frozen, transfer to a bag. When ready to bake, place frozen cookies on a sheet, fill with jam, and add 1-2 minutes to the baking time.
Conclusion
Thumbprint Cookies are the little black dress of the baking world: simple, elegant, and always appropriate. With their tender, buttery crumb and bright jewel-toned centers, they offer a delightful contrast of textures and flavors in every bite. They are easy enough for a weekday baking session but special enough for your holiday gift boxes.
We hope you enjoy baking these classic treats! Try it out and let us know in the comments which jam flavor you chose—classic raspberry or something adventurous like fig? We’d love to hear your feedback. Don’t forget to rate the recipe and subscribe to our blog for more timeless baking recipes delivered straight to your inbox.
FAQs
Q1. Why did my cookies spread flat?
This usually happens if the butter was too warm or you didn’t measure the flour correctly. Make sure to spoon and level your flour rather than scooping directly from the bag, which packs it down. Also, consider chilling the dough balls for 20 minutes before baking.
Q2. Can I use the whole egg instead of just the yolk?
Using the whole egg will make the cookie more cake-like and less tender/sandy. The yolk provides richness and helps achieve that melt-in-your-mouth shortbread texture. Save the white for an omelet or meringue!
Q3. Can I fill them after baking?
Yes! If you want to fill them with chocolate ganache, lemon curd, or caramel, it is best to bake the indentations empty (you may need to re-press them gently halfway through baking) and fill them after the cookies have cooled. Jam, however, is best baked with the cookie to set properly.
Print
Classic Thumbprint Cookies: Buttery & Jam-Filled
- Total Time: 35 minutes
- Yield: 24 cookies 1x
Description
Buttery shortbread-style cookies with a tender crumb and jammy centers. Fill with raspberry, apricot, strawberry, or your favorite preserves for a nostalgic holiday treat that’s simple and irresistible.
Ingredients
Cookie Dough
- 1 cup unsalted butter (softened to room temperature)
- 1/2 cup granulated sugar
- 1 large egg yolk
- 1 tsp vanilla extract (pure)
- 1/2 tsp almond extract
- 1/2 tsp fine salt
- 2 1/4 cups all-purpose flour (spooned & leveled)
For Rolling & Filling
- 3 tbsp granulated sugar (for rolling)
- 1/2 cup jam or fruit preserves (raspberry, apricot, or favorite flavor)
Instructions
- Preheat oven to 350°F (175°C). Line two large baking sheets with parchment paper or silicone mats.
- Cream butter and 1/2 cup sugar with an electric mixer until light and creamy, 2–3 minutes. Scrape bowl.
- Beat in egg yolk, vanilla, almond extract, and salt until combined.
- On low speed, mix in flour just until a soft, pliable dough forms; do not overmix.
- Roll tablespoon portions of dough into balls. Roll each ball in the remaining 3 tbsp sugar and place 2 1/2 inches apart on sheets.
- Use a round 1 tsp measure (or your thumb) to press a deep well in each ball. Spoon about 1/2 tsp jam into each indentation; do not overfill.
- Bake 10–11 minutes, until bottoms are just turning light golden and tops remain pale. Cool 5 minutes on sheet, then transfer to a rack to cool completely.
Notes
For extra neat wells, re-press the centers right after baking. If dough cracks when indenting, smooth with slightly damp fingers. Swap jam for lemon curd or chocolate ganache for variation.
- Prep Time: 20 minutes
- Cook Time: 11 minutes
- Category: Cookies, Dessert
- Cuisine: American
Nutrition
- Calories: 120
- Sugar: 8
- Sodium: 50
- Fat: 6
- Saturated Fat: 3.5
- Carbohydrates: 15
- Protein: 1
- Cholesterol: 15