The Ultimate Healthy Snack That Tastes Like Dessert?
Did you know that the average store-bought granola bar contains over 12 grams of sugar and often includes highly processed ingredients and artificial flavors? What if you could have a snack that’s not only bursting with the vibrant, tropical flavors of a beach vacation but is also packed with nutrients to fuel your day? That’s precisely what you get with these incredible Coconut Lime Chia Pudding Bars. This recipe is a game-changer for anyone seeking a delicious, healthy, and easy-to-make snack. These no-bake bars are the perfect solution for busy mornings, afternoon slumps, or even a light, refreshing dessert. Forget sugary, processed snacks; these bars are loaded with fiber, healthy fats, and the zesty goodness of lime and coconut, all while being incredibly simple to whip up.
- The Ultimate Healthy Snack That Tastes Like Dessert?
- Your Shopping List for a Taste of the Tropics
- Ready in a Flash: Your No-Bake Timeline
- Step 1: Building Your No-Bake Base
- Step 2: Whipping Up the Creamy Chia Pudding
- Step 3: Assembling Your Tropical Delight
- Step 4: The Essential Chill
- A Nutrient-Packed Treat: The Nutritional Lowdown
- Make Them Your Own: Healthy Swaps and Variations
- Serving Suggestions for a Taste of Paradise
- Common Mistakes to Sidestep for Perfect Bars
- Storing Your Tropical Treats
- Your New Favorite No-Bake Snack
- Your Questions, Answered: Chia Pudding Bar FAQs
Your Shopping List for a Taste of the Tropics
Creating these delectable bars is all about combining fresh, wholesome ingredients. Below is everything you’ll need, along with some handy substitutions to fit your pantry and dietary needs.
| Ingredient Category | Ingredient | Quantity | Sensory Description & Smart Swaps |
| For the Base | Rolled Oats (Old-Fashioned) | 1.5 cups | The hearty, chewy foundation. Use certified gluten-free if needed. Swap: Quinoa flakes for a protein-rich alternative. |
| Unsweetened Shredded Coconut | 1 cup | For that authentic, tropical flavor and delightful texture. | |
| Almond Flour | 1/2 cup | Creates a tender, cake-like texture. Swap: Oat flour for a nut-free option. | |
| A Pinch of Sea Salt | 1/4 tsp | Essential for balancing the sweetness and enhancing the flavors. | |
| For the Chia Pudding Layer | Full-Fat Coconut Milk (canned) | 1 can (13.5 oz) | The key to a rich, creamy pudding. Swap: Light coconut milk for a lower-fat version, though it will be less creamy. |
| Chia Seeds | 1/2 cup | The superfood that works magic to create the pudding texture. | |
| Pure Maple Syrup | 1/4 cup | For a touch of natural, unrefined sweetness. Swap: Agave nectar or date syrup. Adjust to your taste. | |
| Fresh Lime Zest | 2 tbsp | The zesty, aromatic star of the show. | |
| Fresh Lime Juice | 1/4 cup | Adds that signature tangy kick. | |
| Vanilla Extract | 1 tsp | Complements the coconut and lime beautifully. | |
| Optional Toppings | Toasted Coconut Flakes, Lime Zest | For Garnish | Adds a final flourish of flavor and visual appeal. |
Ready in a Flash: Your No-Bake Timeline
One of the best things about these Coconut Lime Chia Pudding Bars is how quickly they come together, with no oven required!
- Preparation Time: 15 minutes
- Chilling Time: At least 2 hours
- Total Time: Approximately 2 hours and 15 minutes
Compared to the average baked bar recipe, which can take up to 45 minutes of active prep and baking time, this no-bake recipe saves you time and keeps your kitchen cool, making it a perfect year-round treat.
Step 1: Building Your No-Bake Base
First things first, let’s create the sturdy and delicious foundation for our bars. In a medium bowl, combine the rolled oats, shredded coconut, almond flour, and sea salt. Mix these dry ingredients until they are well combined. Next, add in half a cup of the full-fat coconut milk and the maple syrup. Stir everything together until a sticky, crumbly dough forms. A helpful tip is to use your hands to really work the mixture together to ensure everything is evenly moistened. Line an 8×8 inch baking dish with parchment paper, leaving some overhang on the sides to act as handles for easy removal later. Press the base mixture firmly and evenly into the bottom of the prepared dish. Use the bottom of a glass or a measuring cup to pack it down tightly.
Step 2: Whipping Up the Creamy Chia Pudding
Now for the star of the show – the luscious coconut lime chia pudding. In a separate bowl, whisk together the remaining coconut milk, chia seeds, lime zest, lime juice, and vanilla extract. Continue to whisk for about a minute to prevent any clumps from forming. Let the mixture sit for 10 minutes, then give it another good whisk. You’ll notice it has already started to thicken. This two-step whisking process is key to a perfectly smooth chia pudding.
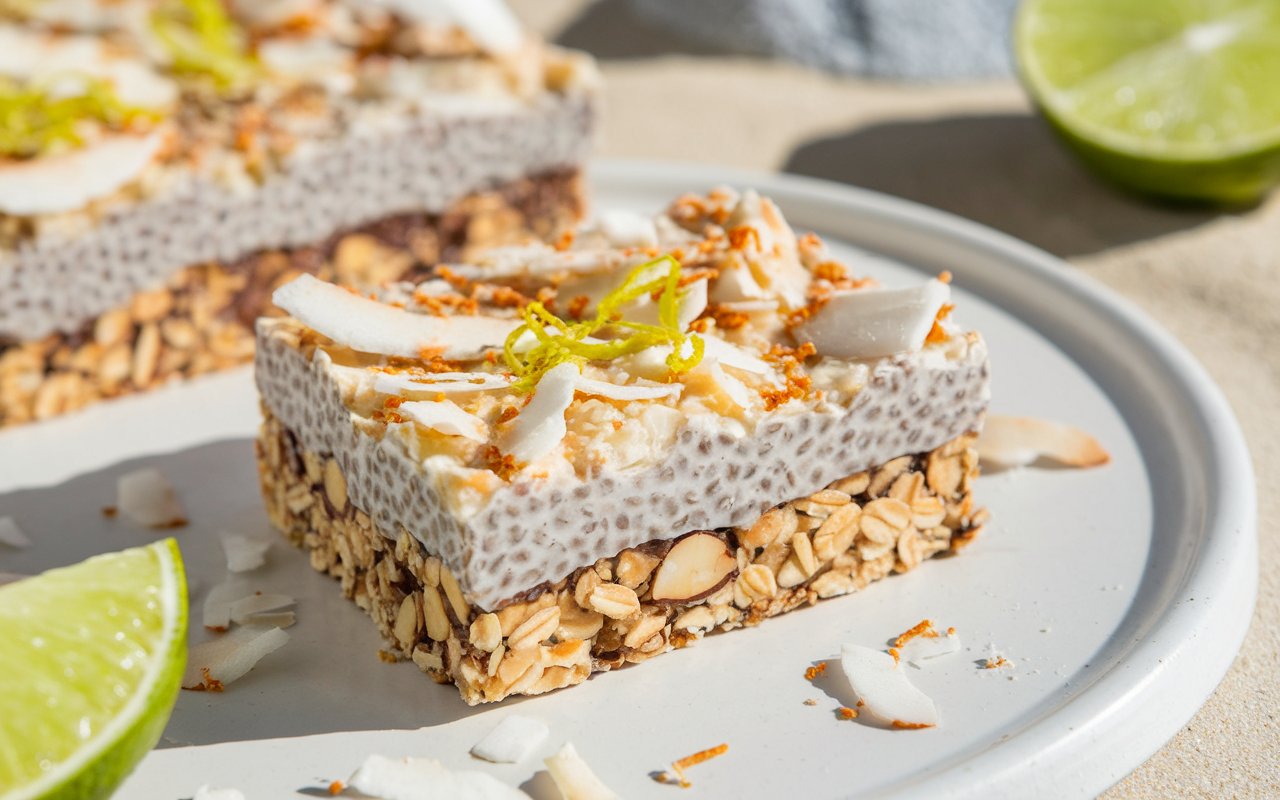
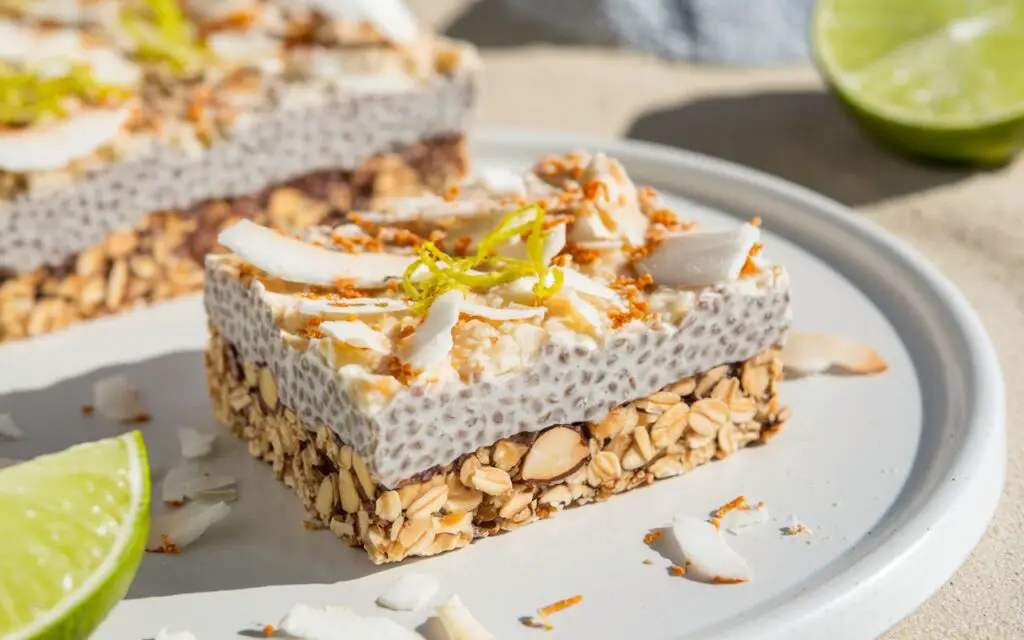
Step 3: Assembling Your Tropical Delight
Pour the coconut lime chia pudding mixture over the prepared base in the baking dish. Use a spatula to spread it out evenly, making sure it reaches all the corners. The vibrant, creamy pudding on top of the wholesome base already looks incredibly appetizing.
Step 4: The Essential Chill

Now for the easiest, yet most crucial, step. Cover the baking dish with plastic wrap or a reusable lid and place it in the refrigerator to set for at least 2 hours. For the firmest bars that are easiest to slice, you can let them chill for up to 4 hours or even overnight. This allows the chia seeds to fully hydrate and the flavors to meld together into a truly harmonious treat. Once chilled and firm, use the parchment paper handles to lift the bars out of the dish and onto a cutting board. Slice into your desired size – squares or bars both work great!
A Nutrient-Packed Treat: The Nutritional Lowdown
Indulging in these bars means you’re also nourishing your body. Here’s an approximate nutritional profile per bar (assuming 12 bars per batch):
- Calories: 210 kcal
- Carbohydrates: 18g
- Protein: 4g
- Fat: 14g (primarily from coconut and almonds)
- Fiber: 6g
- Sugar: 7g (all from natural sources)
These Coconut Lime Chia Pudding Bars are a fantastic source of fiber, which aids in digestion, and healthy fats that provide sustained energy. The chia seeds also contribute a healthy dose of omega-3 fatty acids.
Make Them Your Own: Healthy Swaps and Variations
While this recipe is fantastic as is, here are some ways to customize it to your liking and dietary needs:
- For a Protein Punch: Add a scoop of vanilla or collagen protein powder to the base mixture for an extra boost of protein, making these bars an excellent post-workout snack.
- Go Nut-Free: If you have a nut allergy, simply swap the almond flour for oat flour. You can make your own by blending rolled oats until they reach a fine, flour-like consistency.
- Add Some Crunch: For extra texture, consider adding a quarter cup of chopped macadamia nuts or almonds to the base mixture.
- Berry Delicious: Fold in half a cup of finely chopped mango or pineapple into the chia pudding for an extra burst of tropical flavor.
Serving Suggestions for a Taste of Paradise
These bars are delightful on their own, but here are a few ways to elevate your snacking experience:
- A Touch of Toasted Goodness: Before serving, sprinkle the bars with toasted coconut flakes for an extra layer of coconut flavor and a delightful crunch.
- Zesty Finish: A final grating of fresh lime zest over the top of the bars just before serving will enhance their fresh, vibrant aroma.
- Yogurt Parfait Style: Crumble a bar over a bowl of Greek yogurt or coconut yogurt and top with fresh berries for a delicious and filling breakfast or snack.
- Dessert Transformation: Serve a bar with a dollop of whipped coconut cream and a drizzle of honey or maple syrup for a healthy yet decadent dessert.
Common Mistakes to Sidestep for Perfect Bars
To ensure your Coconut Lime Chia Pudding Bars turn out perfectly every time, here are a few common pitfalls to avoid:
- Not Using Full-Fat Coconut Milk: While you can use light coconut milk, full-fat is essential for achieving that ultra-creamy, rich pudding texture.
- Skipping the Double Whisk: If you don’t whisk the chia pudding mixture a second time after it has rested for a few minutes, you may end up with clumps of chia seeds.
- Being Impatient with the Chill Time: The chilling process is non-negotiable. Cutting into the bars too early will result in a soft, pudding-like consistency rather than a firm, sliceable bar.
- Forgetting the Parchment Paper Handles: This small step makes a huge difference when it’s time to remove the bars from the dish. It ensures you can lift them out cleanly without them breaking apart.
Storing Your Tropical Treats
These bars are perfect for meal prepping. Here’s how to keep them fresh and delicious:
- In the Refrigerator: Store the bars in an airtight container in the refrigerator for up to a week. They are a fantastic grab-and-go snack.
- In the Freezer: These bars also freeze exceptionally well. Slice them into individual portions, wrap them in plastic wrap, and then place them in a freezer-safe bag or container. They will last for up to 3 months. To enjoy, simply thaw them in the refrigerator for an hour or on the counter for about 20 minutes.
Your New Favorite No-Bake Snack
In summary, these Coconut Lime Chia Pudding Bars are the perfect marriage of incredible flavor and wholesome nutrition. They are easy to make, require no baking, and are endlessly customizable. This recipe provides a fantastic alternative to sugary, processed snacks, offering sustained energy and a taste of the tropics in every bite. We’ve given you all the tips and tricks to make these bars a staple in your healthy snacking repertoire.
We would love to see your creations! Give this recipe a try and share your feedback in the comments below. Did you try any fun variations? Don’t forget to subscribe to our blog for more delicious, healthy, and easy-to-follow recipes!
Your Questions, Answered: Chia Pudding Bar FAQs
- Can I use black chia seeds instead of white?Yes, black and white chia seeds are nutritionally almost identical and can be used interchangeably in this recipe.
- Are these bars suitable for a vegan diet?Absolutely! This recipe is 100% vegan as it uses plant-based ingredients like coconut milk and maple syrup.
- My base is too crumbly. What should I do?If your base mixture seems too dry, add a tablespoon more of coconut milk or maple syrup until it holds together when pressed.
- Can I make this recipe in a different-sized dish?Yes, you can use a loaf pan for thicker bars or a larger dish for thinner bars. You will just need to adjust the chilling time accordingly.
- How do I get clean, sharp slices?For the cleanest cuts, use a large, sharp knife. It also helps to wipe the knife clean between each slice. Chilling the bars thoroughly is the most important factor for clean slices.