A Taste of Family Fiesta Night
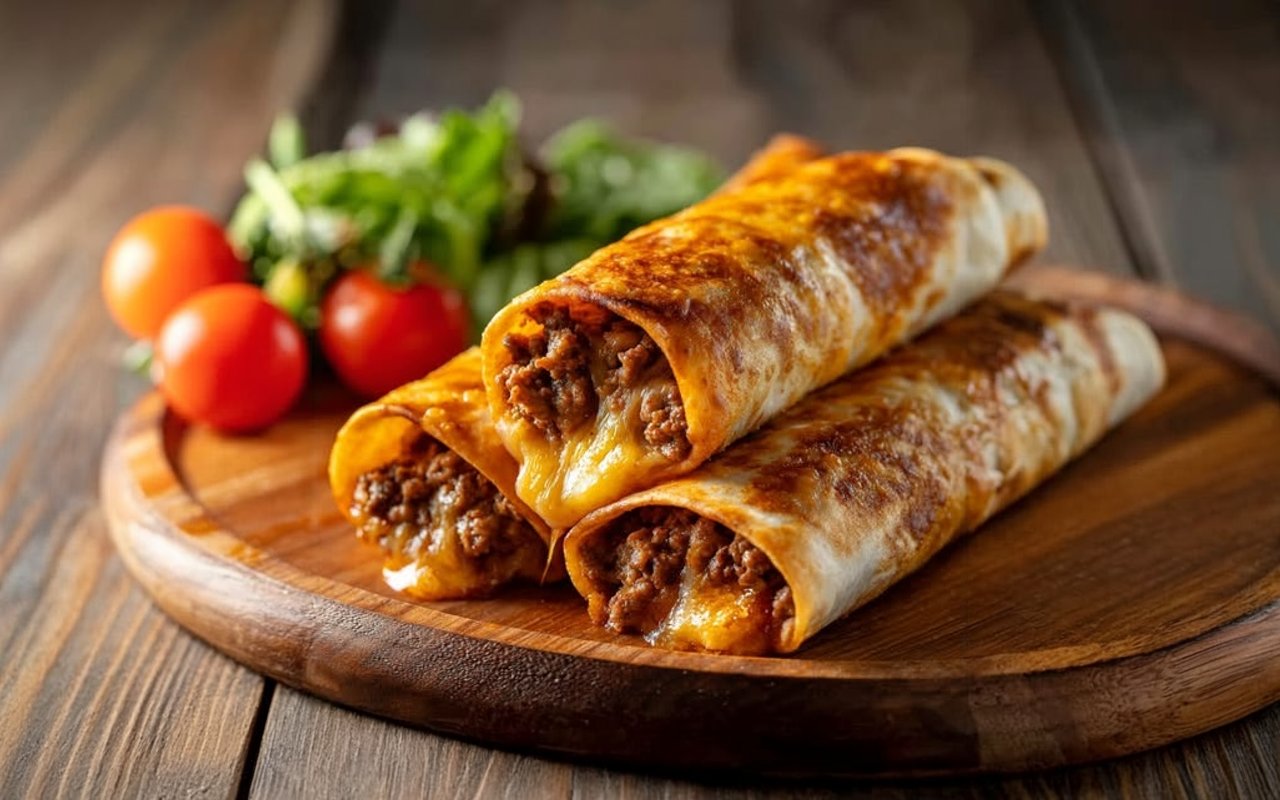
Growing up, Friday night wasn’t just the end of the school week; it was our family’s unofficial “fiesta night.” The air would fill with the savory aroma of sizzling beef and spices, a signal that my dad was making his legendary chimichangas. He wasn’t a chef, but he had mastered the art of creating a dish that felt like a celebration. His secret? Perfectly seasoned, cheesy beef wrapped in a tortilla and fried to a shatteringly crisp, golden-brown perfection. Today, I’m sharing that beloved family recipe for the best Homemade Beef Chimichangas you will ever make. This isn’t just about recreating a restaurant favorite; it’s about crafting a memorable meal that brings everyone to the table.
- A Taste of Family Fiesta Night
- Your Shopping List for Chimichanga Perfection
- Quicker Than Delivery: Your Chimichanga Timeline
- Step-by-Step Guide to the Perfect Chimichanga
- Step 1: Create the Rich & Savory Beef Filling
- Step 2: Assemble Your Chimichangas (The Art of the Fold)
- Step 3: Fry to Golden, Crispy Perfection
- The Nutritional Profile of Your Homemade Delight
- Healthier Alternatives: Baked & Air-Fried Options
- How to Serve Your Chimichangas Like a Pro
- Common Mistakes to Avoid for Flawless Chimichangas
- Storing & Reheating for Round Two
- Your New Favorite Family Recipe
- Your Questions, Answered: Chimichanga FAQs
Your Shopping List for Chimichanga Perfection
The magic of this dish lies in its simple, accessible ingredients that come together to create something truly special. We’ve organized everything you’ll need and included some pro-tips for substitutions to make this recipe your own.
| Component | Ingredient | Amount | Pro-Tips & Easy Swaps |
| Savory Beef Filling | Lean Ground Beef | 1 lb (450g) | The star of the show. Easy Swap: Shredded beef from a chuck roast or even ground turkey works wonderfully. |
| Yellow Onion | 1 medium, finely chopped | Creates the aromatic flavor base. | |
| Garlic | 2 cloves, minced | For that essential savory depth. | |
| Taco Seasoning | 2 tbsp | Use a store-bought packet or your own blend of chili powder, cumin, paprika, and oregano. | |
| Refried Beans | 1/2 cup | Adds creaminess and helps bind the filling together. Easy Swap: Black beans, mashed slightly, can be used instead. | |
| Cheesy Core & Wrap | Shredded Cheese | 1.5 cups | A blend of Cheddar and Monterey Jack gives the best melt and flavor. Easy Swap: Pepper Jack adds a nice kick! |
| Flour Tortillas | 8 large (burrito-size) | Choose large, pliable tortillas that are easy to fold without cracking. | |
| For Frying | Vegetable or Canola Oil | 4-6 cups | A neutral oil with a high smoke point is essential for that crispy, non-greasy finish. |
Quicker Than Delivery: Your Chimichanga Timeline
Why wait for takeout? Data from popular food delivery apps shows the average order from a local Mexican restaurant can take 55 minutes to arrive. You can have these fresh, hot, and crispy chimichangas on the table in less time!
- Preparation Time: 20 minutes
- Cooking Time: 20-25 minutes
- Total Time: Approximately 45 minutes
Step-by-Step Guide to the Perfect Chimichanga
Follow these simple steps to create restaurant-quality chimichangas right in your own kitchen.
Step 1: Create the Rich & Savory Beef Filling
In a large skillet, heat a tablespoon of oil over medium-high heat. Add the finely chopped onion and cook until softened, about 3-4 minutes. Add the minced garlic and cook for another minute until fragrant. Add the ground beef to the skillet, breaking it apart with a spoon. Cook until it’s beautifully browned and no pink remains. Drain off any excess grease from the pan. Stir in the taco seasoning and the refried beans, mixing until everything is well combined. Remove from the heat and let the filling cool slightly—this is key to preventing the cheese from melting prematurely.
Step 2: Assemble Your Chimichangas (The Art of the Fold)
Warm your tortillas slightly in the microwave for 15-20 seconds. This makes them more pliable and prevents cracking. Lay a tortilla flat and spoon about 1/3 cup of the beef mixture into the center. Sprinkle generously with your shredded cheese blend. Now for the crucial fold: Fold the two sides of the tortilla in over the filling. Then, take the bottom edge and fold it tightly up over the filling and sides. Roll it forward to create a secure, rectangular package. Use a toothpick to secure the final flap if needed. Repeat with the remaining tortillas and filling.
Step 3: Fry to Golden, Crispy Perfection
In a large, heavy-bottomed pot or Dutch oven, pour in about 2-3 inches of vegetable oil. Heat the oil over medium-high heat until it reaches 350-375°F (175-190°C). An instant-read thermometer is your best friend here for ensuring the perfect temperature. Carefully place 2-3 chimichangas into the hot oil, seam-side down. Don’t overcrowd the pot, as this will lower the oil temperature. Fry for 2-3 minutes per side, until they are a deep golden brown and irresistibly crispy. Use tongs to carefully remove them from the oil and place them on a wire rack or a plate lined with paper towels to drain.
The Nutritional Profile of Your Homemade Delight
While a fried treat, making chimichangas at home gives you full control over the ingredients. A recent study shows that homemade versions of popular restaurant dishes can contain up to 20% less sodium. Here’s an approximate breakdown per chimichanga (before toppings):
- Calories: 550-600 kcal
- Fat: 30-35g
- Saturated Fat: 12-15g
- Carbohydrates: 40-45g
- Protein: 25-30g
- Sodium: 800-950mg
Healthier Alternatives: Baked & Air-Fried Options
Craving that crispy goodness without the deep-frying? We’ve got you covered with these equally delicious methods.
- Baked Chimichangas: For a much lighter version, preheat your oven to 400°F (200°C). Assemble the chimichangas as directed, then brush them lightly with melted butter or oil. Place them on a baking sheet and bake for 20-25 minutes, flipping halfway through, until golden and crisp.
- Air Fryer Chimichangas: The air fryer creates an incredible crunch! Preheat your air fryer to 375°F (190°C). Brush the chimichangas with a little oil and place them in the air fryer basket in a single layer. Cook for 10-12 minutes, flipping halfway, until crispy and heated through.
How to Serve Your Chimichangas Like a Pro
Turn your Homemade Beef Chimichangas into a full-blown feast with these serving suggestions. The key is a combination of creamy, cool toppings to contrast with the hot, crispy chimichanga.
- The Classic Trio: Top with a generous dollop of sour cream (or Mexican crema), a scoop of fresh guacamole, and your favorite salsa or pico de gallo.
- Smothered Supreme: Go all out by smothering them in queso dip or a red enchilada sauce before adding the toppings.
- Side Dish Symphony: Serve alongside Mexican rice, a simple cilantro-lime slaw, or a side of black beans.
Common Mistakes to Avoid for Flawless Chimichangas
Avoid these common pitfalls to ensure your chimichangas are perfect every time.
- Overfilling the Tortilla: It’s tempting, but stuffing too much filling inside will cause the tortilla to burst during frying. Stick to about 1/3 to 1/2 cup of filling per large tortilla.
- Oil Isn’t Hot Enough: Frying in oil that’s too cool results in a greasy, soggy chimichanga instead of a crispy one. Use a thermometer to ensure your oil is at the correct temperature.
- Using Cold Tortillas: Cold tortillas are stiff and will crack when you try to fold them. A quick 15-second warm-up in the microwave makes them soft and pliable.
Storing & Reheating for Round Two
Leftovers are a gift! Here’s how to store and reheat them to bring back that amazing crunch.
- Storing: Let the chimichangas cool completely, then store them in an airtight container in the refrigerator for up to 3 days.
- Reheating: The microwave will make them soggy. The best way to reheat is in the oven or air fryer. Place them on a baking sheet and bake at 375°F (190°C) for 10-15 minutes, or in an air fryer for 5-7 minutes, until hot and crispy again.
Your New Favorite Family Recipe
This recipe for Homemade Beef Chimichangas is more than just a meal; it’s an experience. It’s the joy of creating something delicious from scratch, the satisfying crunch of that first bite, and the smiles around the dinner table. With a savory, cheesy beef filling and a perfectly fried tortilla, this dish is pure comfort food that’s guaranteed to become a new family favorite.
We would absolutely love to see your creations! Try the recipe this week, and don’t forget to leave a comment or review below to let us know how it went. For more delicious, family-friendly recipes, be sure to subscribe to our blog!
Your Questions, Answered: Chimichanga FAQs
- Can I prepare these ahead of time?Yes! You can assemble the chimichangas, wrap them individually in plastic wrap, and refrigerate them for up to 24 hours before frying. This is a great time-saver for a party.
- Can I freeze chimichangas?Absolutely. For best results, freeze them after assembling but before frying. Place them on a baking sheet in the freezer until solid, then transfer to a freezer-safe bag for up to 3 months. You can fry them directly from frozen, just add a few extra minutes to the cooking time.
- What’s the difference between a burrito and a chimichanga?The main difference is the preparation! A burrito is typically served soft, while a chimichanga is a deep-fried burrito, which gives it its signature crispy exterior.
- My chimichangas keep falling apart in the fryer. What am I doing wrong?This usually comes down to the fold. Make sure you are folding the sides in first, then rolling it up as tightly as you can. Using a toothpick to secure the seam for the first minute of frying can also be a huge help.


