What happens when you take a rich, fudgy, intensely chocolatey brownie and top it with a layer of light, airy, silky-smooth chocolate mousse? You get a dessert that is so decadent, so luxurious, and so mind-blowingly delicious that it might just ruin all other brownies for you. This isn’t just a brownie; it’s an experience.
- Ingredients
- Timing
- Step-by-Step Instructions
- Part 1: Bake the Fudgy Brownie Layer
- Step 1: Preheat Oven and Prepare Pan
- Step 2: Mix the Brownie Batter
- Step 3: Bake and Cool the Brownies
- Part 2: Make the Silky Chocolate Mousse
- Step 4: Melt the Chocolate
- Step 5: Bloom and Dissolve the Gelatin
- Step 6: Combine Chocolate and Gelatin Mixture
- Step 7: Whip the Cream and Fold the Mousse
- Part 3: Assemble and Chill
- Step 8: Top the Brownies and Chill
- Step 9: Slice and Serve Your Best Brownies Ever
- Nutritional Information
- Healthier Alternatives
- Serving Suggestions
- Common Mistakes to Avoid
- Storing Tips
- Conclusion
- FAQs
- Q1: Can I use dark chocolate for the mousse instead of milk chocolate?
- Q2: Why do I need to sift the cocoa powder and flour for the brownies?
- Q3: I’ve never used gelatin before. Is it difficult?
- Q4: Can I make these in a different size pan, like an 8×8 or 9×9?
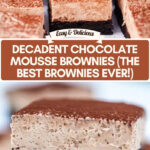
- Decadent Chocolate Mousse Brownies (The Best Brownies Ever!)
We’re not kidding when we call these the Best Brownies Ever! This recipe for Chocolate Mousse Brownies features a dense, chewy brownie base that bakes up to perfection, all topped with a stabilized milk chocolate mousse that sets up beautifully. It’s the ultimate show-stopping dessert for chocolate lovers, perfect for special occasions or any time you need a truly indulgent treat.
Ingredients
This two-layer dessert has a simple, rich brownie base and a stabilized mousse topping. Using good quality chocolate is key!
For the Fudgy Brownie Layer:
| Ingredient | Amount/Quantity | Notes |
| Softened Unsalted Butter | 2 tablespoons | For greasing the pan |
| Large Eggs | 4 | Room temperature is best |
| Granulated Sugar | 2 cups | |
| Unsalted Butter, melted | 8 ounces (2 sticks) | |
| Unsweetened Cocoa Powder | 1 ¼ cups | Sifted, for a smooth batter |
| Pure Vanilla Extract | 1 teaspoon | |
| All-Purpose Flour | ⅓ cup | Sifted; yes, only 1/3 cup! |
| Kosher Salt | ½ teaspoon | Balances the sweetness |
For the Chocolate Mousse Layer:
| Ingredient | Amount/Quantity | Notes |
| Good Quality Milk Chocolate | 10 ounces | Finely chopped |
| Chilled Heavy Whipping Cream | 2 ½ cups, divided | |
| Unflavored Gelatin | 7 grams (1 packet) | Stabilizes the mousse |
| Cold Water | 2 tablespoons | For blooming the gelatin |
Timing
This is a two-part dessert that requires significant chilling time for the mousse to set. It’s the perfect make-ahead recipe!
- Preparation Time: 25 minutes
- Baking Time: 30-35 minutes
- Mousse Prep & Cooling: 30 minutes
- Chilling Time: 6 hours (or overnight)
- Total Time: Approximately 7 hours 30 minutes (mostly hands-off)
Step-by-Step Instructions
We’ll make this decadent dessert in two main phases: first, baking and cooling the brownie base, then making and setting the mousse topping.
Part 1: Bake the Fudgy Brownie Layer
Step 1: Preheat Oven and Prepare Pan
First, preheat your oven to 325°F (160°C). Take a 13×9-inch baking pan and line it with parchment paper, allowing the paper to overhang on the two long sides. This “sling” will be crucial for lifting the brownies out later. Use the 2 tablespoons of softened butter to grease the parchment paper and any exposed parts of the pan.
Step 2: Mix the Brownie Batter

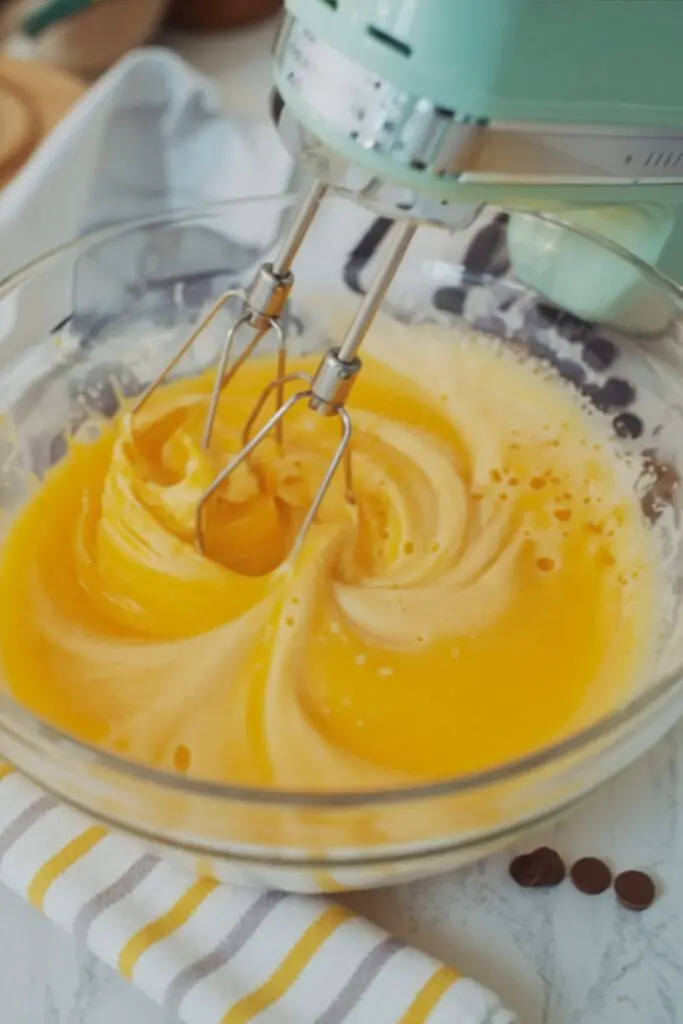
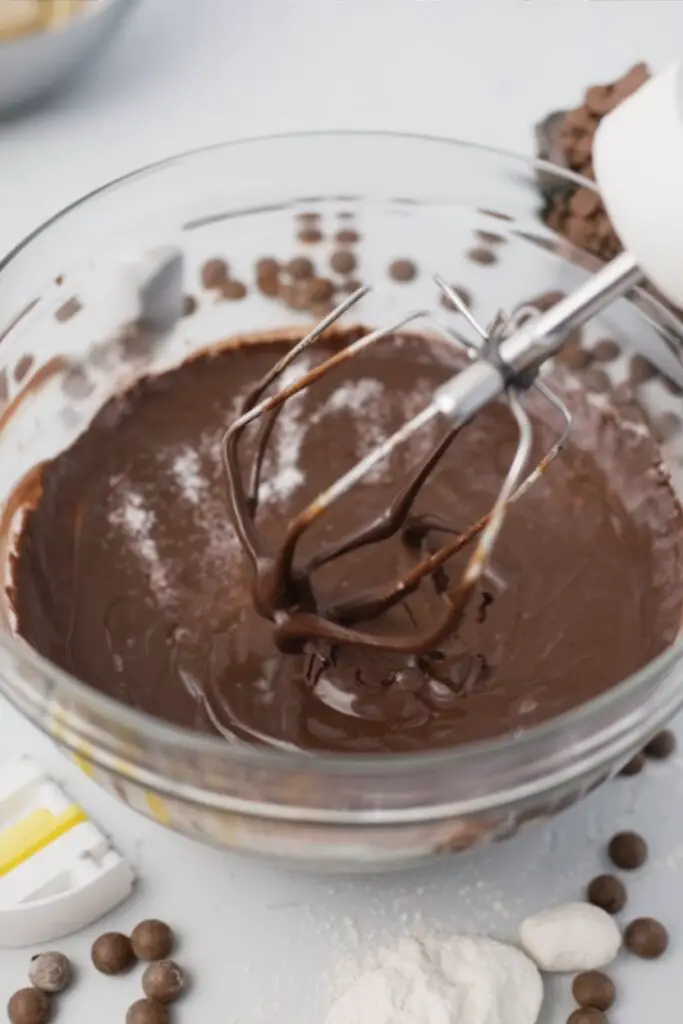
In the large bowl of a stand mixer fitted with the wire whisk attachment (or using a hand mixer), beat the eggs on medium speed until they are fluffy and light yellow. Add the sugar and beat again until just combined. Add the melted butter, sifted cocoa powder, vanilla, sifted flour, and salt. Mix on low speed until all the ingredients are just combined and no dry streaks remain.
- Actionable Tip: Do not overmix! Overmixing will develop the gluten in the small amount of flour, leading to a tough brownie. Mix only until the batter comes together.
Step 3: Bake and Cool the Brownies
Pour the thick batter into your prepared pan and use a spatula to spread it into an even layer. Bake for 30-35 minutes. The brownies are done when a toothpick inserted into the center comes out with just a few moist crumbs attached, not wet batter. (In some ovens, 25-30 minutes may be perfect).
- Actionable Tip: Be careful not to overbake! You want a fudgy, dense base. When done, remove the brownie from the oven and place the entire pan on a wire rack to cool completely. The brownies must be at room temperature before you add the mousse.
Part 2: Make the Silky Chocolate Mousse
Step 4: Melt the Chocolate
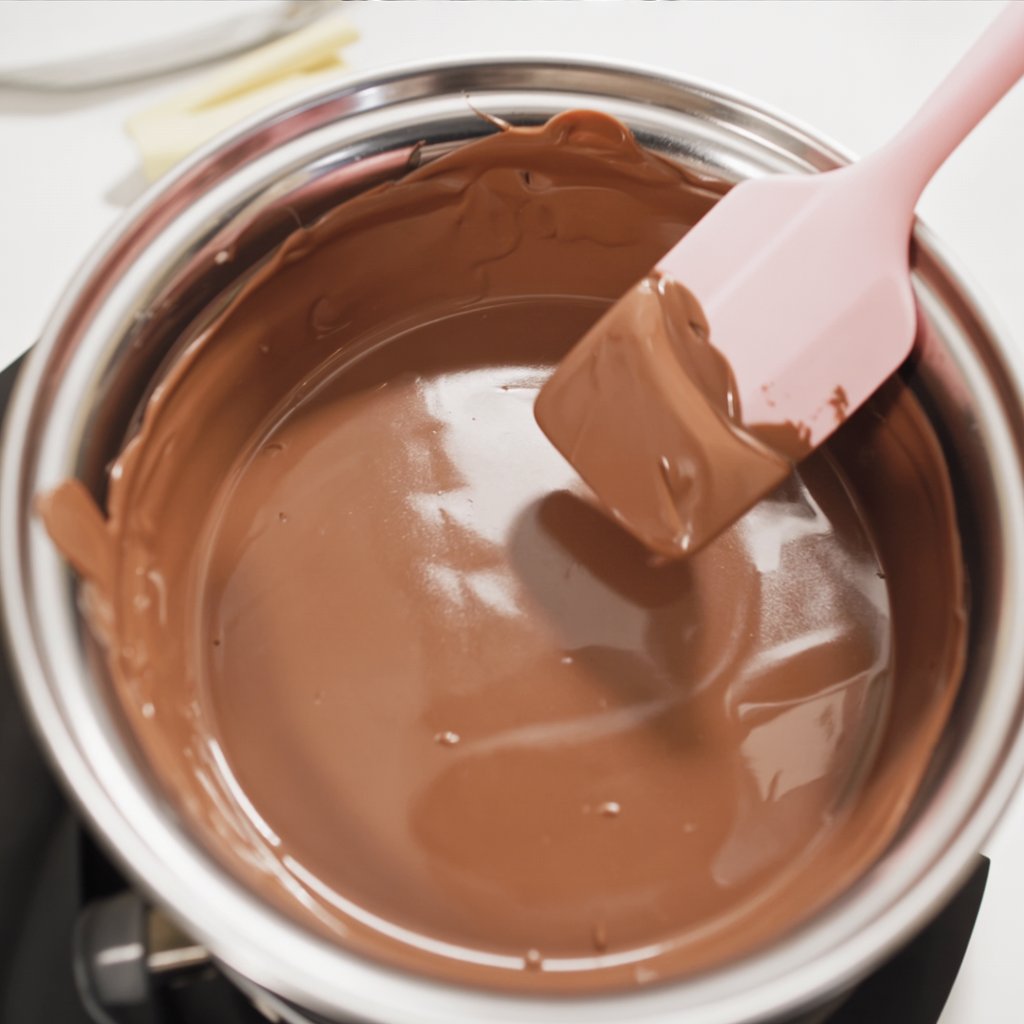
Bring a small pot of water to a simmer. Place the 10 ounces of finely chopped milk chocolate into a large, heatproof bowl. Set the bowl over the simmering water (a double boiler), ensuring the bottom of the bowl does not touch the water. Stir occasionally until the chocolate is completely melted and smooth. Remove the bowl from the heat and set it aside.
Step 5: Bloom and Dissolve the Gelatin
While the chocolate melts, place the 2 tablespoons of cold water in a small, microwave-safe bowl. Sprinkle the gelatin packet evenly over the water. Let it sit for 10 minutes to “bloom” – it will become thick and gel-like. In a separate small saucepan, bring ½ cup of the heavy cream to a gentle boil. Remove it from the heat. Add the bloomed gelatin mixture to the hot cream and stir until the gelatin is fully dissolved and incorporated.
Step 6: Combine Chocolate and Gelatin Mixture
Pour about half of the hot cream/gelatin mixture into the bowl of melted chocolate. Whisk quickly and vigorously. The mixture may look like it’s separating, but keep whisking! Add the rest of the hot cream mixture and continue to whisk until the chocolate mixture is perfectly smooth, glossy, and well combined. Set this chocolate “ganache” aside to cool completely to room temperature.
- Actionable Tip: The chocolate mixture must be at room temperature before folding in the whipped cream. If it’s too warm, it will melt the whipped cream and ruin the mousse.
Step 7: Whip the Cream and Fold the Mousse
Place the remaining 2 cups of cold heavy cream in the bowl of your stand mixer fitted with the wire whisk. Whisk on medium-high speed until the cream forms soft peaks (when you lift the whisk, the peak just gently flops over).
Once the chocolate mixture is at room temperature, add about one-third of the whipped cream to it. Using a large spatula, gently fold it in to lighten the chocolate. Add the remaining whipped cream and continue to gently fold, scraping the bottom of the bowl, until no white streaks remain and the mousse is one uniform color.
- Actionable Tip: Be gentle! Folding, not stirring, is essential to keep the air you whipped into the cream, which is what makes the mousse light and airy.
Part 3: Assemble and Chill
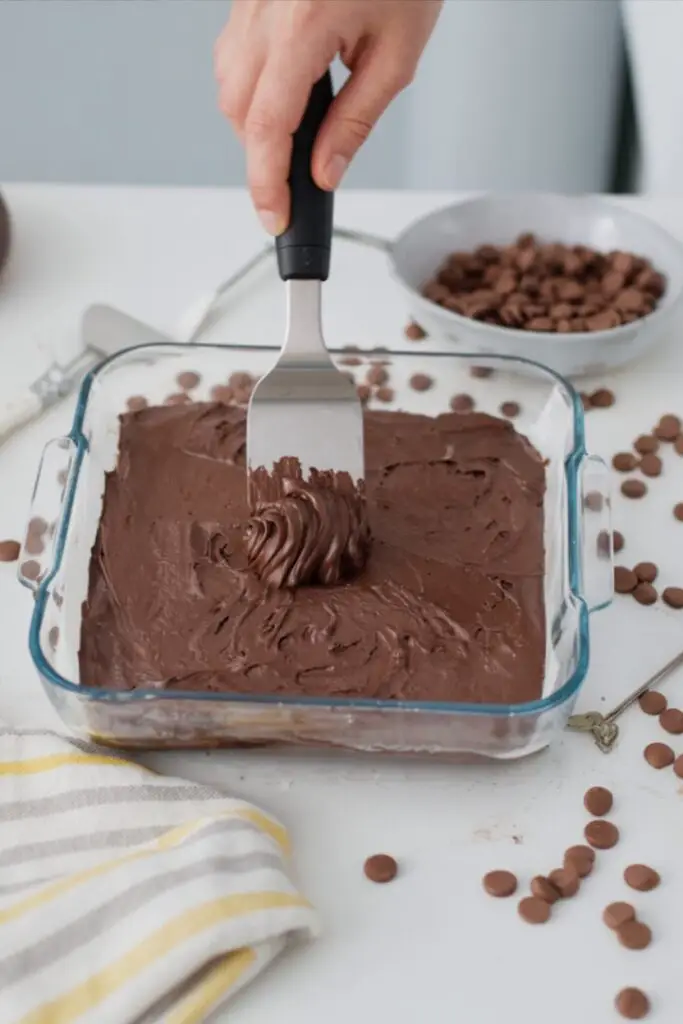
Step 8: Top the Brownies and Chill

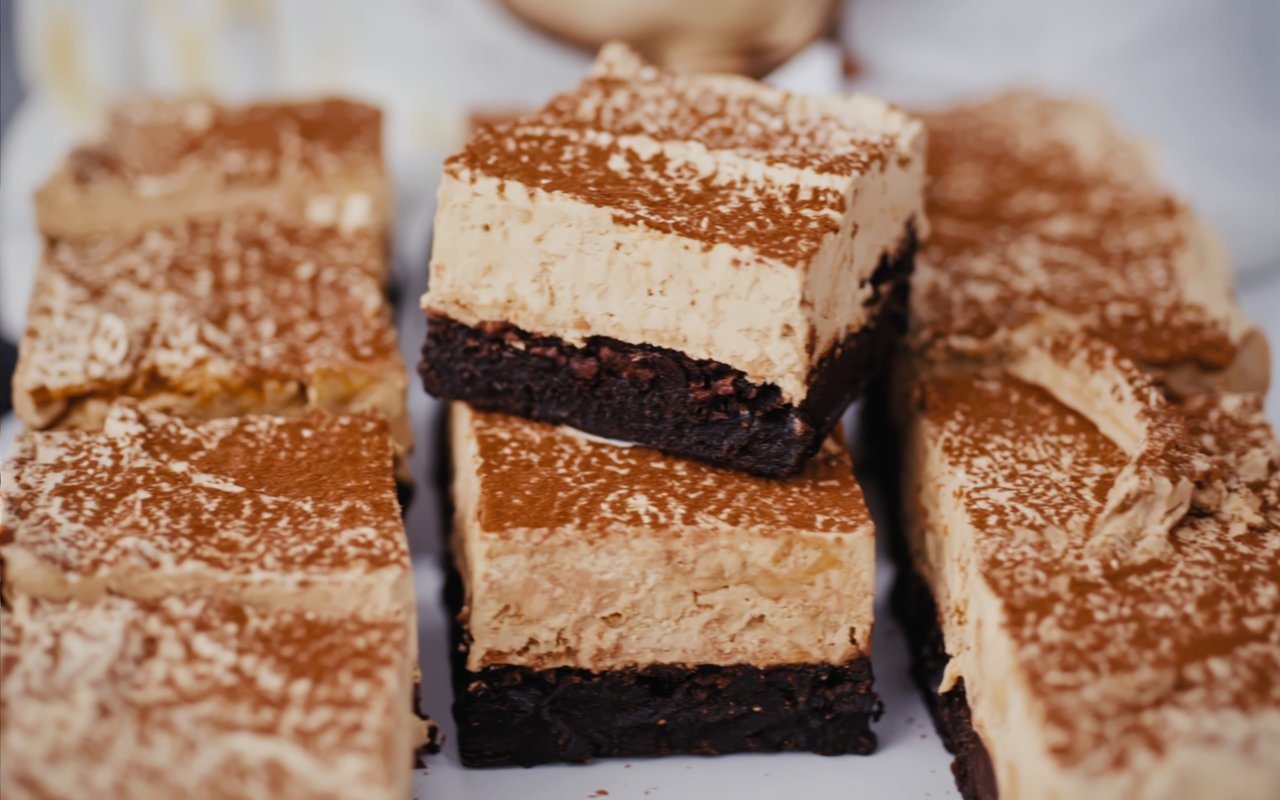
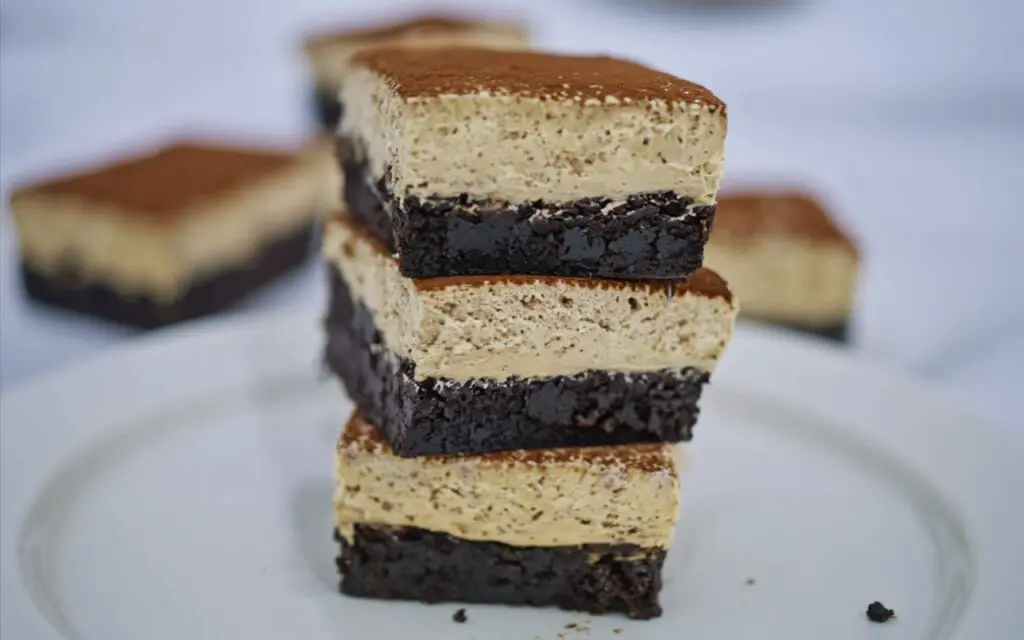
Pour the finished chocolate mousse evenly over the completely cooled brownie base in the pan. Use an offset spatula or the back of a spoon to spread the mousse into a smooth, level top layer.
Cover the pan with plastic wrap (try not to let it touch the mousse) and place it in the refrigerator to chill for at least 6 hours, or preferably overnight. This long chill time is essential for the mousse to set fully.
Step 9: Slice and Serve Your Best Brownies Ever
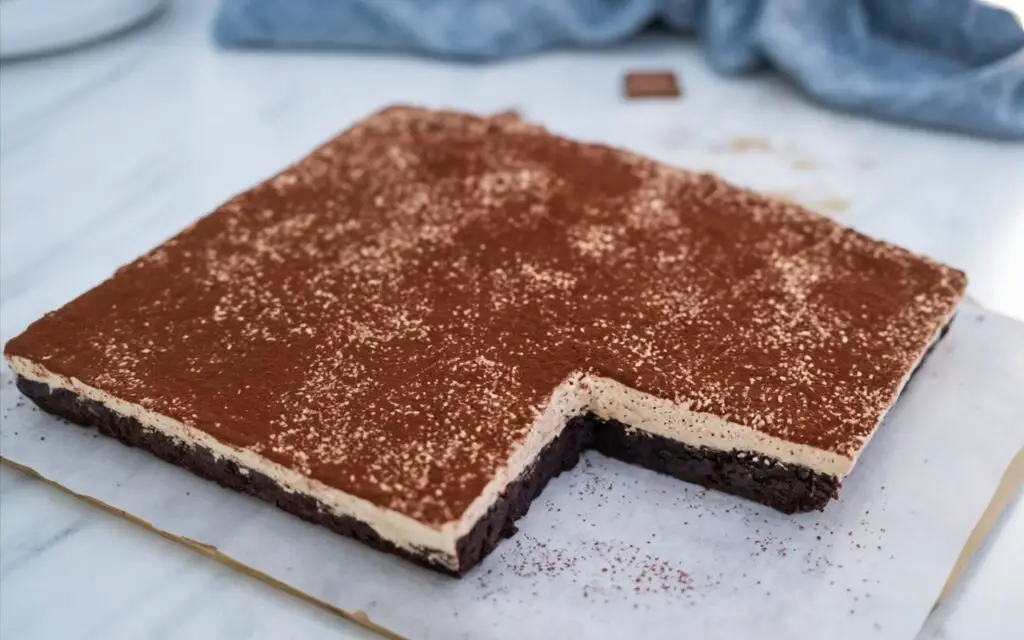

Before serving, remove the pan from the fridge. Use the parchment paper “slings” to carefully lift the entire brownie slab out of the pan and onto a cutting board. Dust the top with a little extra cocoa powder, if desired.
- Actionable Tip: For perfectly clean, sharp cuts, fill a tall glass with hot water. Dip a large, sharp knife into the hot water, wipe it dry with a towel, and make one slice. Repeat dipping and wiping the knife before every single cut.Cut into square bars and serve chilled.
Nutritional Information
This is a highly indulgent dessert! Nutritional information is an estimate per bar (assuming 15-18 bars) and will vary based on brands used.
- Calories: (Estimate needed, likely high)
- Protein: (Estimate needed)
- Carbohydrates: (Estimate needed)
- Fat: (Estimate needed)
- (Consider adding sugar content)
Healthier Alternatives
This recipe is designed for maximum indulgence, so “healthy” is relative. For dietary needs:
- Gluten-Free: This recipe is a fantastic candidate for a gluten-free conversion due to the very low amount of flour in the base. Substitute the ⅓ cup of all-purpose flour with a high-quality measure-for-measure gluten-free baking blend.
- Lower Sugar: You could use dark chocolate (70% or higher) in the mousse instead of milk chocolate for a less sweet, more intense flavor.
- Dairy-Free/Vegan: A vegan version would require significant substitutions: vegan butter, egg replacers (like flax eggs), vegan milk chocolate, and a high-fat whipped coconut cream (plus agar-agar instead of gelatin). This would fundamentally change the recipe and texture.
Serving Suggestions
These Chocolate Mousse Brownies are a show-stopping dessert all on their own.
- Simple Elegance: Serve a chilled square on a dessert plate, dusted with a bit of cocoa powder or powdered sugar.
- With Berries: The rich chocolate pairs beautifully with the tartness of fresh raspberries or sliced strawberries.
- A La Mode: While already rich, a very small scoop of vanilla bean or raspberry sorbet on the side would be a stunning contrast.
- For a Crowd: These are perfect for parties because they must be made ahead and are easily cut into portions to feed a crowd.
Common Mistakes to Avoid
For perfect mousse brownies, watch out for these key steps:
- Overbaking the Brownies: A dry brownie base will ruin the decadent, fudgy experience. Solution: Pull the brownies from the oven when the toothpick just has moist crumbs, not when it’s perfectly clean.
- Rushing the Cooling: Adding warm mousse to a warm brownie, or folding hot chocolate into whipped cream, will result in a melted, soupy mess. Solution: Be patient! The brownie base and the chocolate ganache mixture must both be completely at room temperature before proceeding.
- Overwhipping the Cream: Whipping the cream to stiff peaks will make the final mousse heavy and grainy instead of light and silky. Solution: Stop whipping as soon as you reach soft peaks (the peak gently flops over).
- Not Chilling Long Enough: The mousse needs time to set fully, thanks to the gelatin. Solution: Do not try to rush the chilling. 6 hours is the minimum, but overnight is truly best for firm, clean slices.
Storing Tips
These brownies must be stored in the refrigerator due to the dairy-based mousse.
- Refrigerate: Store the cut brownie bars in a single layer in an airtight container (or cover the pan tightly with plastic wrap) in the refrigerator for up to 4 days.
- Freezing: Yes, these freeze beautifully! Place the cut bars on a baking sheet to freeze solid, then transfer them to a freezer-safe, airtight container, separating layers with parchment paper. Freeze for up to 3 months.
- Serving from Frozen: Let the brownies thaw in the refrigerator for a few hours or on the counter for about 30-60 minutes before serving. They are also delicious partially frozen!
Conclusion
This recipe for Chocolate Mousse Brownies is truly the definition of a show-stopping dessert. The combination of the dense, fudgy brownie layer and the light-as-air, silky chocolate mousse is pure bliss. While it requires some patience with cooling and chilling, the steps are simple and the end result is absolutely worth the wait. These are, quite possibly, the Best Brownies Ever!
Ready to create the ultimate chocolate dessert? Give this recipe a try and let us know what you think in the comments below! Don’t forget to rate the recipe and subscribe for more decadent dessert inspiration!
FAQs
Q1: Can I use dark chocolate for the mousse instead of milk chocolate?
Yes, absolutely! If you prefer a more intense, less sweet dessert, substitute the 10 ounces of milk chocolate with an equal amount of good quality semi-sweet or dark chocolate (60-70% cacao). The process remains exactly the same.
Q2: Why do I need to sift the cocoa powder and flour for the brownies?
Cocoa powder, in particular, is very prone to clumping. Sifting it (along with the small amount of flour) ensures your brownie batter is perfectly smooth and free of any bitter, dry pockets of cocoa.
Q3: I’ve never used gelatin before. Is it difficult?
Not at all! “Blooming” the gelatin simply means letting it soak in a small amount of cold water first. This hydrates it and ensures it will dissolve smoothly in the hot cream without clumping. It’s a very simple but crucial step for a stable mousse.
Q4: Can I make these in a different size pan, like an 8×8 or 9×9?
You can, but the layers will be extremely thick, and the baking time for the brownie base will increase significantly. The 13×9 pan is highly recommended for the best ratio of brownie to mousse and for proper cooking.
Print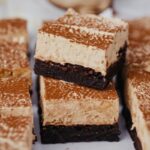
Decadent Chocolate Mousse Brownies (The Best Brownies Ever!)
- Total Time: 7 hours 30 minutes
- Yield: 16 Bars 1x
Description
What happens when you take a rich, fudgy, intensely chocolatey brownie and top it with a layer of light, airy, silky-smooth chocolate mousse? You get a dessert that is so decadent, so luxurious, and so mind-blowingly delicious that it might just ruin all other brownies for you. This recipe features a dense, chewy brownie base that bakes up to perfection, all topped with a stabilized milk chocolate mousse that sets up beautifully. It’s the ultimate show-stopping dessert for chocolate lovers.
Ingredients
For the Fudgy Brownie Layer:
- 2 tablespoons Softened Unsalted Butter, for greasing
- 4 Large Eggs, room temperature
- 2 cups Granulated Sugar
- 8 ounces (2 sticks) Unsalted Butter, melted
- 1 1/4 cups Unsweetened Cocoa Powder, sifted
- 1 teaspoon Pure Vanilla Extract
- 1/3 cup All-Purpose Flour, sifted
- 1/2 teaspoon Kosher Salt
For the Chocolate Mousse Layer:
- 10 ounces Good Quality Milk Chocolate, finely chopped
- 2 1/2 cups Chilled Heavy Whipping Cream, divided
- 7 grams (1 packet) Unflavored Gelatin
- 2 tablespoons Cold Water
Instructions
Part 1: Bake the Fudgy Brownie Layer
-
- Preheat and Prep Pan: Preheat oven to 325°F (160°C). Line a 13×9-inch pan with parchment paper, leaving an overhang on the long sides. Grease the parchment and pan with the 2 tablespoons of softened butter.
- Mix Batter: In a large bowl, beat the eggs on medium speed until fluffy. Add the sugar and beat until just combined. Add the melted butter, sifted cocoa powder, vanilla, sifted flour, and salt. Mix on low speed only until the batter is just combined.
- Bake and Cool: Pour the batter into the prepared pan and spread evenly. Bake for 30-35 minutes, until a toothpick inserted in the center comes out with just a few moist crumbs. Do not overbake. Let the brownie cool completely in the pan on a wire rack.
Part 2: Make the Silky Chocolate Mousse
- Melt Chocolate: Place the chopped milk chocolate in a large, heatproof bowl over a pot of simmering water (double boiler), ensuring the bowl doesn’t touch the water. Stir until melted and smooth. Remove from heat.
- Bloom & Dissolve Gelatin: Sprinkle the gelatin packet over the 2 tablespoons of cold water in a small, microwave-safe bowl. Let it “bloom” for 10 minutes. In a small saucepan, bring ½ cup of the heavy cream to a gentle boil. Remove from heat. Add the bloomed gelatin and stir until fully dissolved.
- Combine Chocolate & Cream: Pour half of the hot cream/gelatin mixture into the melted chocolate and whisk vigorously. Add the rest of the hot cream and whisk until the mixture is perfectly smooth and glossy. Set this “ganache” aside to cool completely to room temperature.
- Whip Cream & Fold Mousse: In a large, chilled bowl, whip the remaining 2 cups of cold heavy cream on medium-high speed until it forms soft peaks. Add about one-third of the whipped cream to the cooled chocolate ganache and fold it in gently to lighten it. Add the remaining whipped cream and gently fold until no white streaks remain.
Part 3: Assemble and Chill
- Top the Brownies: Pour the finished chocolate mousse evenly over the completely cooled brownie base in the pan. Spread it into a smooth, level top layer.
- Chill to Set: Cover the pan with plastic wrap (try not to let it touch the mousse) and refrigerate for at least 6 hours, or preferably overnight, until the mousse is fully set.
- Slice and Serve: Use the parchment paper overhangs to lift the entire brownie slab out of the pan. For clean cuts, dip a large, sharp knife in hot water, wipe it dry, and make one slice. Repeat dipping and wiping before every single cut. Serve chilled.
Notes
- Do Not Overmix: When making the brownie batter, mix only until the ingredients just come together. Overmixing will develop the gluten (even in the small amount of flour) and lead to a tough, cakey brownie instead of a fudgy one.
- Don’t Overbake: The secret to a fudgy brownie base is to pull it from the oven when it’s just done (a few moist crumbs on a toothpick, not wet batter).
- Room Temp Ganache is Key: The chocolate/gelatin/cream mixture must be at room temperature before you fold in the whipped cream. If it’s too warm, it will melt the whipped cream and ruin the light, airy texture of the mousse.
- Fold, Don’t Stir: Folding is essential to keep the air you whipped into the cream. Use a large spatula and a “scrape-from-the-bottom-and-fold-over-the-top” motion to combine the mousse.
- The Hot Knife Trick: For perfectly clean, bakery-style slices, you must use a hot, clean knife. Dip the knife in hot water and wipe it dry before every single cut.
- Prep Time: 25 minutes
- Cook Time: 35 minutes
- Category: Dessert, Brownies
- Method: Baking, Chilling
- Cuisine: American
Nutrition
- Serving Size: 1 bar
- Calories: 460 kcal
- Sugar: 32 g
- Sodium: 105 mg
- Fat: 30.5 g
- Saturated Fat: 18 g
- Unsaturated Fat: 12.5 g
- Trans Fat: 1 g
- Carbohydrates: 40.4 g
- Fiber: 3.5 g
- Protein: 5.6 g
- Cholesterol: 135 mg