There is a distinct magic that happens when the aroma of toasted cocoa and warm butter fills the kitchen. It transports you straight to a cozy nonna’s kitchen, regardless of your heritage. If you have been searching for the perfect holiday cookie or simply want to elevate your afternoon coffee, this Chocolate Pizzelle recipe is the answer.
- Ingredients
- Timing
- Step-by-Step Instructions
- Step 1: Prep the Butter and Iron
- Step 2: Whisk the Dry Ingredients
- Step 3: Aerate the Eggs
- Step 4: Create the Batter
- Step 5: Bake the Pizzelles
- Step 6: Cool and Serve
- Nutritional Information
- Healthier Alternatives
- Serving Suggestions
- Common Mistakes to Avoid
- Storing Tips
- Conclusion
- FAQs
- Q1. Do I need a specific pizzelle iron?
- Q2. Can I make the batter ahead of time?
- Q3. Why are my pizzelles sticking to the iron?
- Q4. Can I omit the cinnamon?
- Decadent Chocolate Pizzelle Recipe: An Easy Italian Treat
Known as the oldest cookie in the world, the pizzelle is an easy Italian treat that looks incredibly intricate but is surprisingly simple to master. While the traditional anise or vanilla versions are classics, this chocolate variation adds a rich, deep flavor profile that is irresistible. By incorporating unsweetened cocoa powder and a hint of cinnamon, we transform the standard waffle cookie into a sophisticated dessert. Whether you are prepping for a festive cookie swap or treating yourself, this Chocolate Pizzelle recipe delivers a crisp, delicate texture that melts in your mouth.
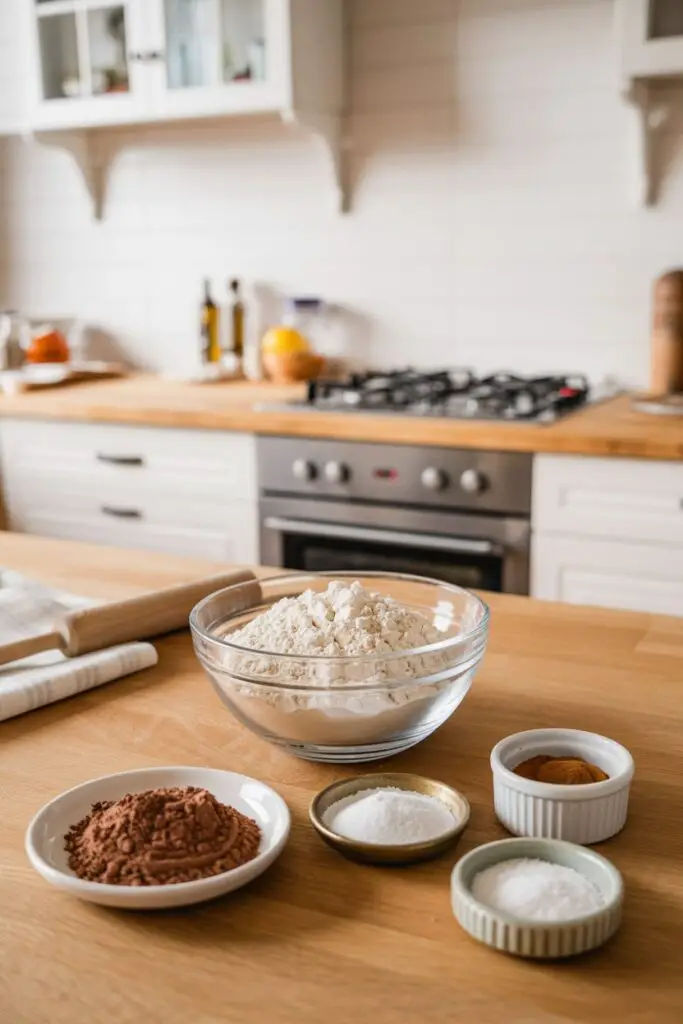
Ingredients
To achieve that signature snap and rich flavor, precision is key. Here is everything you need to get started.
| Ingredient | Amount/Quantity | Notes |
| Large Eggs | 4 | Room temperature (crucial for volume). |
| Granulated Sugar | ¾ cup + 3 tbsp | Divided use; provides structure and crispness. |
| Unsalted Butter | ¾ cup | Melted and completely cooled. |
| Pure Vanilla Extract | ¼ teaspoon | Enhances the chocolate flavor. |
| All-Purpose Flour | 2 cups | The base of your batter. |
| Unsweetened Cocoa Powder | 3 tablespoons | Use Dutch-process for a darker cookie. |
| Baking Powder | 2 teaspoons | Provides a slight lift. |
| Cinnamon | ¼ teaspoon | Adds warmth and depth. |
| Kosher Salt | Pinch | Balances the sweetness. |
| Powdered Sugar | As needed | Optional, for dusting. |

Timing
Pizzelles are fantastic because they cook individually on the stovetop or counter, meaning you don’t have to wait for an oven to preheat or bake trays for 15 minutes at a time.
- Prep Time: 15 minutes
- Cook Time: 20–30 minutes (depending on batch size and iron speed)
- Total Time: ~45 minutes (faster than a batch of chocolate chip cookies!)
Step-by-Step Instructions
Step 1: Prep the Butter and Iron
Start by melting the ¾ cup of unsalted butter. Set it aside to cool completely. This is critical—if the butter is hot, it will scramble your eggs! Meanwhile, preheat your pizzelle iron. Once hot, lightly spray the plates with non-stick cooking spray (unless you have a well-seasoned non-stick iron).
- Note: See the manufacturer’s instructions for your specific iron regarding oiling.
Step 2: Whisk the Dry Ingredients
In a medium bowl, whisk together the 2 cups of flour, 3 tablespoons of unsweetened cocoa powder, 2 teaspoons of baking powder, ¼ teaspoon of cinnamon, and a pinch of kosher salt.
- Tip: Sifting the cocoa powder is a good idea if it looks lumpy, ensuring a smooth batter without bitter pockets of dry cocoa.
Step 3: Aerate the Eggs
In a large mixing bowl, beat the 4 room-temperature eggs with the sugar (¾ cup plus the extra 3 tablespoons). Use a hand mixer or stand mixer and beat for about 3 minutes. You are looking for the mixture to become pale yellow and light in texture.
- Why this matters: This step incorporates air, which gives the pizzelle its delicate, crisp structure rather than being dense and tough.
Step 4: Create the Batter
Add the cooled melted butter and ¼ teaspoon of vanilla extract to the egg mixture. Mix well. Next, add half of the dry ingredients to the wet mixture and mix until just blended. Fold in the remaining flour mixture and combine until just mixed.
- Texture Check: The dough should be sticky and thick, somewhere between a cake batter and a cookie dough.
Step 5: Bake the Pizzelles
Drop the batter by heaping tablespoonfuls into the center of the pizzelle pattern on your hot iron. Close the lid and lock it (if your iron has a clip). Bake for about 1 to 1 ½ minutes.
- Visual Cue: The cookies are done when they are set and the steam stops pouring out of the sides of the iron. Since these are chocolate, you can’t rely on “golden brown” as a visual cue, so timing is important!
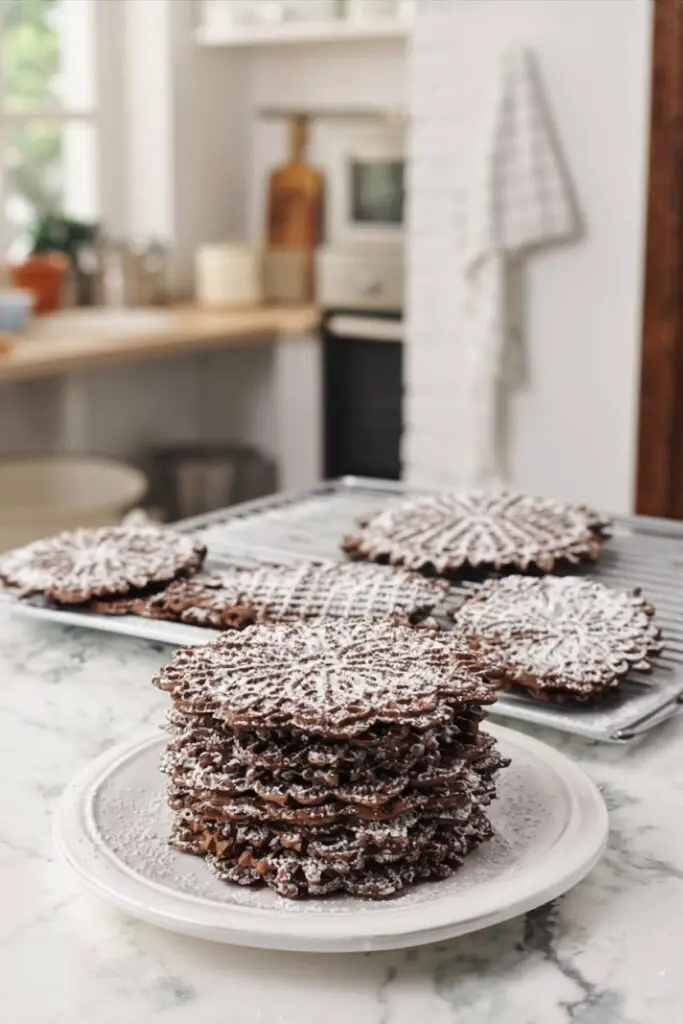
Step 6: Cool and Serve
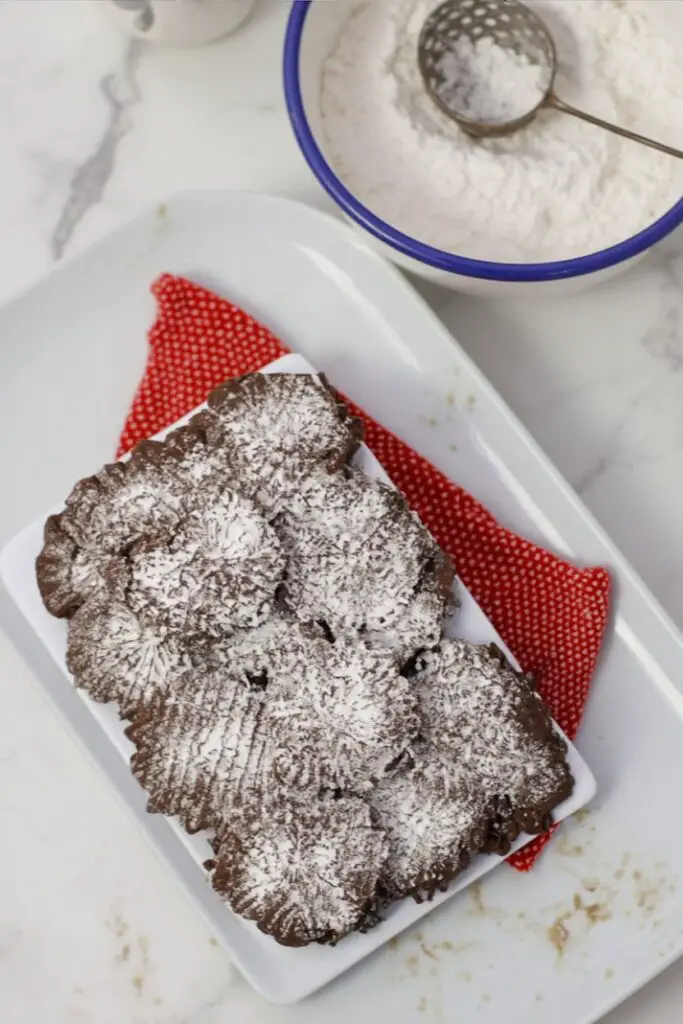
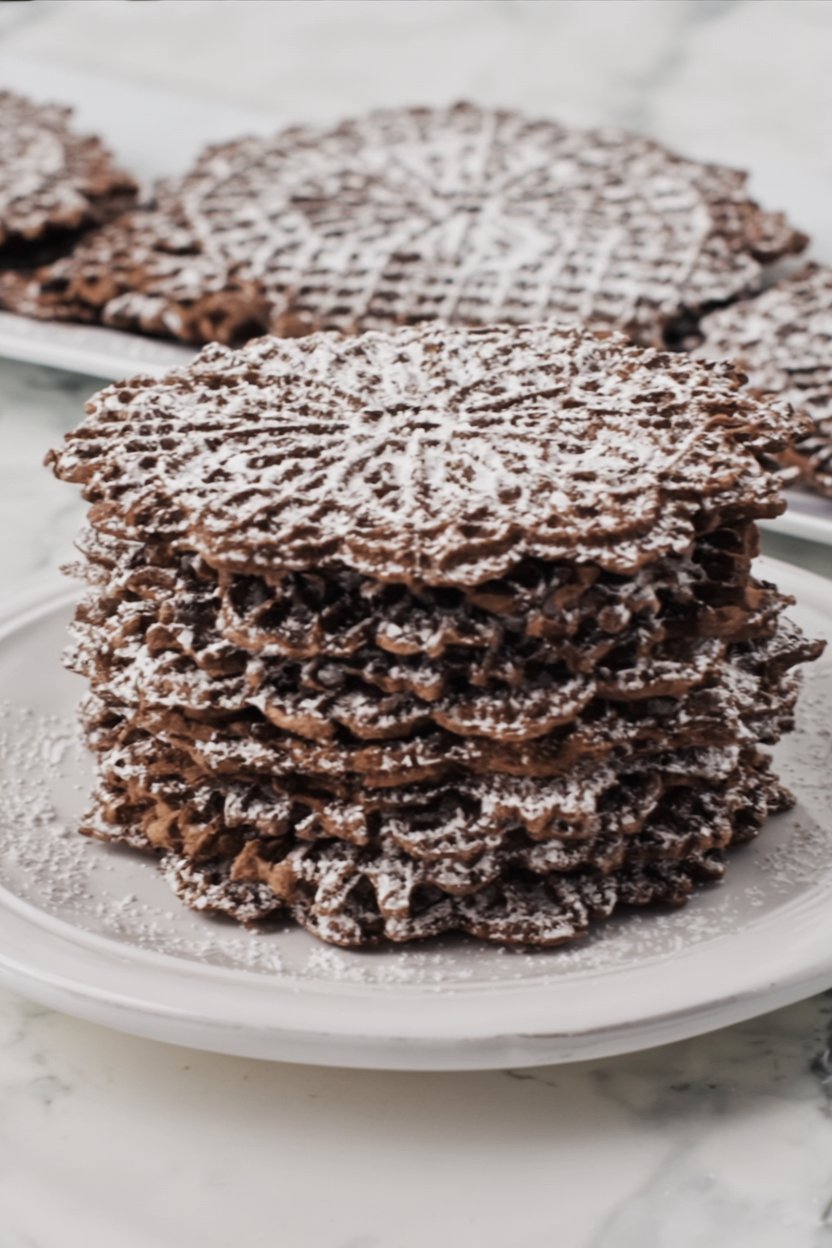
Carefully remove the hot cookies with a spatula or a fork. Place them immediately on a wire rack to cool completely. They will be soft when they first come out but will crisp up as they cool. Once cool, dust with powdered sugar for a snowy finish.
Nutritional Information
Here is an estimated breakdown per cookie (assuming a yield of approximately 30 cookies):
- Calories: ~85 kcal
- Carbohydrates: 11g
- Sugars: 6g
- Fat: 4g (Saturated: 2.5g)
- Protein: 1.5g
- Sodium: 30mg
Note: These are a lighter option compared to dense, frosting-covered holiday cookies, making them a delightful guilt-free accompaniment to coffee.
Healthier Alternatives
If you are looking to tweak this Chocolate Pizzelle recipe to fit specific dietary needs, here are some expert swaps:
- Whole Grain: Swap half of the all-purpose flour for whole wheat pastry flour. It adds fiber without making the cookie too heavy.
- Sugar Alternative: Use a 1:1 granular monk fruit sweetener or erythritol instead of cane sugar for a lower-glycemic treat.
- Dairy-Free: Substitute the butter for melted coconut oil or a high-quality plant-based butter stick. The coconut oil adds a lovely subtle flavor that pairs well with the cocoa.
- Gluten-Free: Use a reputable 1:1 gluten-free flour blend (one that contains xanthan gum). Pizzelles are very forgiving with gluten-free flour because they are cooked in a mold.
Serving Suggestions
While these cookies are delicious on their own, there are many ways to elevate this easy Italian treat:
- The Cannoli Twist: While the cookies are still hot and pliable (seconds after removing from the iron), roll them around a dowel or cannoli form. Once cooled and hard, fill them with sweetened ricotta or whipped cream.
- Ice Cream Sandwiches: Take two cooled pizzelles and sandwich a scoop of gelato (hazelnut or pistachio works best) in the middle.
- Edible Bowls: Drape a hot pizzelle over the bottom of an inverted muffin tin or small bowl. It will harden into a cup shape—perfect for holding fresh berries or mousse.
- Coffee Companion: Serve alongside a shot of espresso or a cappuccino. The slight bitterness of the cocoa complements the coffee perfectly.
Common Mistakes to Avoid
Pizzelles can be finicky. Avoid these pitfalls to ensure perfection:
- Using Hot Butter: As mentioned, adding hot butter to eggs will cook them, resulting in scrambled egg bits in your batter. Solution: Melt the butter first and let it sit while you prep everything else.
- Overmixing: Once the flour is added, mix gently. Overmixing develops gluten, which makes the pizzelle tough and rubbery instead of light and crisp. Solution: Stop mixing as soon as the flour streaks disappear.
- Overfilling the Iron: Putting too much batter in the center will cause it to ooze out the sides, creating a mess and burning on the iron. Solution: Start with a smaller amount (a level tablespoon) and adjust upward if needed.
- Stacking Warm Cookies: If you stack them while warm, the steam will make them soggy. Solution: Always use a wire rack and keep them in a single layer until completely cool.
Storing Tips
Moisture is the enemy of the pizzelle!
- Room Temperature: Store cooled cookies in an airtight metal tin or glass container. Plastic containers or bags often trap moisture and can soften the cookies over time. They will stay fresh for up to 2 weeks.
- Recrisping: If they do become soft, you can place them in a 300°F oven for 2–3 minutes to crisp them back up.
- Freezing: You can freeze these cookies! Stack them gently in a firm container (to prevent breakage) and freeze for up to 3 months. Thaw at room temperature.
Conclusion
This Chocolate Pizzelle recipe is more than just a cookie; it’s a bridge to old-world Italian baking traditions with a modern chocolatey twist. It is an easy Italian treat that looks impressive, tastes divine, and fills your home with the most welcoming scent imaginable.
Whether you roll them, stack them, or eat them warm right off the iron (we won’t tell!), they are sure to become a staple in your recipe box. Try it out and let us know! Did you keep them flat or roll them into cannolis? We’d love to hear your feedback in the comments below. Don’t forget to rate the recipe and subscribe to our blog for more delicious, authentic recipes delivered straight to your inbox.
FAQs
Q1. Do I need a specific pizzelle iron?
Yes, you need a pizzelle iron to create the signature waffle pattern and thinness. However, you can use a waffle cone maker in a pinch, though the pattern will be different and the cookie slightly thicker.
Q2. Can I make the batter ahead of time?
Absolutely. You can prepare the batter, cover it tightly, and refrigerate it for up to 2 days. The batter will stiffen in the fridge (due to the butter), so let it sit on the counter for 15-20 minutes to soften before pressing.
Q3. Why are my pizzelles sticking to the iron?
This usually happens if the iron isn’t hot enough or hasn’t been greased properly. Make sure the indicator light says “ready” before dropping the batter, and use a light coating of cooking spray for the first few batches.
Q4. Can I omit the cinnamon?
You can, but I highly recommend keeping it! In this Chocolate Pizzelle recipe, the cinnamon acts as a background note that amplifies the chocolate flavor—similar to Mexican chocolate—rather than making it taste spicy.
Print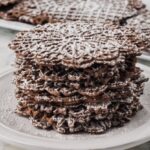
Decadent Chocolate Pizzelle Recipe: An Easy Italian Treat
- Total Time: 45 minutes
- Yield: 30 Cookies 1x
- Diet: Vegetarian
Description
Known as the oldest cookie in the world, the pizzelle is an easy Italian treat that looks incredibly intricate but is surprisingly simple to master. While traditional versions use anise or vanilla, this chocolate variation adds a rich, deep flavor profile by incorporating unsweetened cocoa powder and a hint of cinnamon. Whether you are prepping for a festive cookie swap or treating yourself, this recipe delivers a crisp, delicate texture that melts in your mouth.
Ingredients
- 4 Large Eggs, room temperature
- 3/4 cup + 3 tbsp Granulated Sugar
- 3/4 cup Unsalted Butter, melted and completely cooled
- 1/4 teaspoon Pure Vanilla Extract
- 2 cups All-Purpose Flour
- 3 tablespoons Unsweetened Cocoa Powder (Dutch-process recommended)
- 2 teaspoons Baking Powder
- 1/4 teaspoon Cinnamon
- 1 Pinch Kosher Salt
- As needed Powdered Sugar (for dusting)
Instructions
- Prep Butter and Iron: Melt the butter and set it aside to cool completely. Preheat your pizzelle iron and lightly grease the plates if needed.
- Whisk Dry Ingredients: In a medium bowl, whisk together flour, cocoa powder, baking powder, cinnamon, and salt. (Tip: Sift the cocoa powder if it looks lumpy).
- Aerate the Eggs: In a large bowl, beat the eggs and sugar on high speed for about 3 minutes. The mixture should become pale yellow and light. This step creates the delicate structure.
- Create the Batter: Add the cooled melted butter and vanilla to the egg mixture; mix well. Add half the dry ingredients, mix until blended, then fold in the remaining dry ingredients. The batter should be sticky and thick.
- Bake: Drop heaping tablespoonfuls of batter into the center of the pizzelle pattern on the hot iron. Close and lock the lid. Bake for 1 to 1 ½ minutes.
- Cool and Serve: Remove the cookies when the steam stops pouring out of the iron. Place immediately on a wire rack to cool and crisp up. Dust with powdered sugar once cool.
Notes
- Butter Temperature: It is critical that the melted butter is cool before adding it to the eggs, otherwise, the heat will scramble them.
- The Steam Cue: Because the batter is dark chocolate, you cannot rely on “golden brown” as a visual cue for doneness. Instead, watch the steam; when it stops pouring out of the sides of the iron, the cookie is usually done.
- Aeration: Don’t rush step 3! Beating the eggs and sugar for the full 3 minutes incorporates the air needed for a crisp, light texture.
- Prep Time: 15 minutes
- Cook Time: 30 minutes
- Category: Dessert, Cookie
- Method: Pizzelle Iron
- Cuisine: Italian
Nutrition
- Serving Size: 1 cookie
- Calories: 85 kcal
- Sugar: 6 g
- Sodium: 30 mg
- Fat: 4 g
- Saturated Fat: 2.5 g
- Unsaturated Fat: 1.5 g
- Trans Fat: 0 g
- Carbohydrates: 11 g
- Fiber: 0.5 g
- Protein: 1.5 g
- Cholesterol: 35 mg