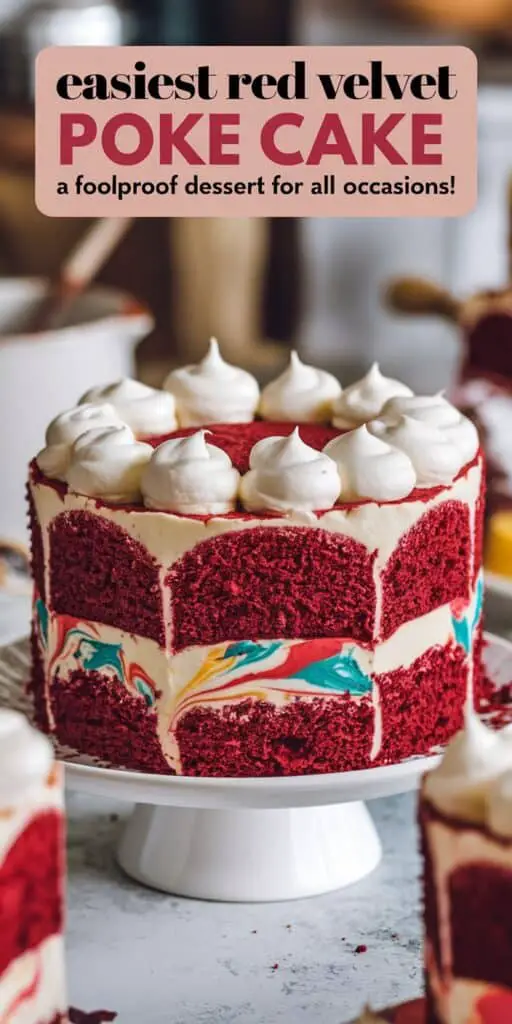
Few desserts merge convenience, dazzling color, and indulgent taste quite like a poke cake. In particular, a red velvet poke cake is the stuff of sweet daydreams—impossibly soft, vibrantly crimson, and drizzled with a luscious filling. Despite its elaborate appearance, this dessert demands minimal baking prowess, making it a top contender for potlucks and holiday gatherings. You simply bake a red velvet sheet cake, “poke” it full of holes, pour in some creamy filling, and top it all off. When you slice into it, the stunning swirl of red cake and white filling practically calls for oohs and ahhs.
In this guide, we’ll break down everything you need to craft an “Easiest Red Velvet Poke Cake” that impresses both visually and flavor-wise. From cake mix shortcuts to homemade toppings, you’ll learn to create a dessert that’s moist, eye-catching, and dangerously easy to devour. Whether you’re a novice baker or a seasoned pro looking for a reliable crowd-pleaser, you’ll walk away equipped with step-by-step instructions, tips, and variations.
Why a Poke Cake?

The “poke cake” approach guarantees extra moisture and flavor. Once the cake is baked, you literally poke holes into it—using a fork, skewer, or even the handle of a wooden spoon—and pour in a sweet, liquid or semi-liquid filling. Think sweetened condensed milk, cream cheese pudding, or even fruit puree. The result is a dessert that’s saturated in flavor from top to bottom, banishing any risk of dryness.
For a red velvet poke cake, the contrast of bright red crumb with a white or cream-colored filling is downright striking. That color interplay is half the fun. It also sets the stage for creative toppings, from whipped cream and sprinkles to a swirl of cream cheese frosting. In short, poke cakes are a quick path to a show-stopping dessert that takes minimal time to assemble.
Ingredients and Equipment

- Red Velvet Cake Mix: A standard 15.25-oz box is typical. Alternatively, use your own red velvet recipe, but a mix speeds things up.
- Eggs, Oil, Water: According to the cake mix box instructions (if making from scratch, you’ll need flour, sugar, cocoa, baking powder, vinegar, red food coloring, etc.).
- Filling of Choice:
- Sweetened Condensed Milk: For a super-moist, milky infusion.
- White Chocolate Pudding: Prepared with milk, it sets into a thick, creamy layer.
- Cream Cheese Mixture: Softened cream cheese beaten with sweetened condensed milk or whipped topping can add tang and richness.
- Topping:
- Whipped Topping: Thawed from frozen, or homemade whipped cream.
- Cream Cheese Frosting: Perfect if you love the classic red velvet-cream cheese combo.
- Mixing Bowls: One for the cake, another for the filling.
- 9×13-inch Pan: Ideal for sheet cakes.
- Utensils for Poking: A fork or the handle of a wooden spoon.
Step-by-Step Instructions
- Prepare and Bake the Cake
- Preheat your oven to the temperature specified on the cake mix box (usually around 350°F / 175°C).
- In a large mixing bowl, combine the cake mix with the required eggs, oil, and water. Mix until just combined—overmixing can lead to a denser cake.
- Grease your 9×13-inch pan lightly and pour in the batter, smoothing the top with a spatula.
- Bake for the time indicated on the box (often 25–30 minutes) or until a toothpick inserted in the center comes out clean.
- Cool Slightly and Poke
- Once the cake is out of the oven, let it rest for about 10 minutes. It should still be warm but not scorching hot.
- Using a fork or a wooden spoon handle, poke holes across the entire surface of the cake. Aim for holes every inch or so. Don’t worry if it looks messy—these holes are crucial for capturing the filling.
- Prepare the Filling
- Sweetened Condensed Milk: No extra prep needed aside from opening the can.
- White Chocolate Pudding: Whisk pudding mix with cold milk as per the package directions until slightly thickened.
- Cream Cheese Mixture: Beat softened cream cheese with 1/2 cup of sweetened condensed milk or a portion of whipped topping until smooth.
- Carefully pour or spoon the filling over the cake, letting it seep into the holes. If using pudding or cream cheese mix, spread it gently with a spatula so it seeps down.
- Chill and Set
- Place the cake in the refrigerator for at least 2 hours. This step is essential because it allows the filling to firm up and fully penetrate the cake’s crumb.
- Top It Off
- Right before serving, spread a layer of whipped topping or cream cheese frosting over the entire surface. If you use homemade whipped cream, sweeten it lightly to complement the cake.
- For decoration, consider sprinkling cake crumbs (reserved from leveling the cake, if you did so) or red-colored sprinkles.
Variations and Tips
- Homemade Red Velvet: If you prefer everything from scratch, blend cocoa, red food coloring, and the typical wet and dry ingredients. The poke method remains the same, but baking times may differ slightly.
- Flavor Twists:
- Chocolate Ganache Poke: Drizzle a thin, warm ganache into the holes. This intensifies the cocoa flavor for a more chocolate-forward dessert.
- Boozy Infusion: For an adult version, combine sweetened condensed milk with a splash of liqueur (like Irish cream). Not too much, or it might alter the cake’s consistency.
- No Food Coloring: Traditional red velvet calls for red coloring, but you can omit it for a more natural hue. It won’t have that iconic red color, though.
- Multiple Layers: If you want a layered poke cake, bake two round red velvet cakes, stack them with filling in between. You’ll need extra filling since you’re poking holes in two layers.
Serving Suggestions
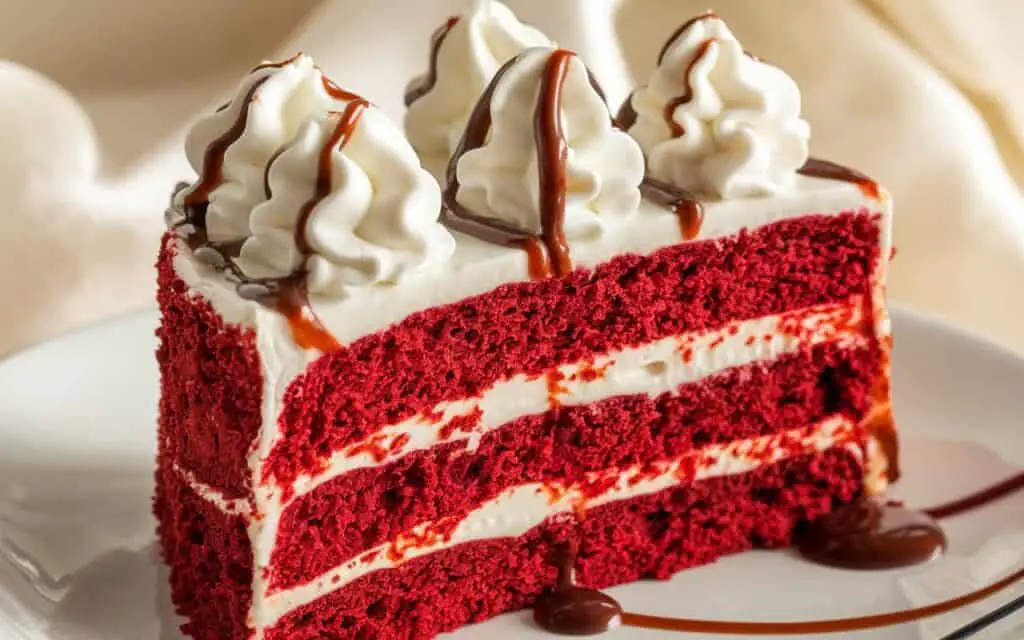
- Slice and Reveal: The real show happens when you slice into the cake. The red crumb contrasted by the white filling swirling through each bite is mesmerizing.
- Individual Portions: If you want to get fancy, cut the cake into squares and top each piece with a swirl of whipped cream from a piping bag.
- Pairing: A scoop of vanilla or cream cheese ice cream, or a drizzle of chocolate sauce can amplify the indulgence. For something lighter, a glass of cold milk or a mug of tea balances the cake’s sweetness.
Frequently Asked Questions
- Why is my red velvet cake not a bright red color?
- This can happen if the cocoa ratio is high or if you used less food coloring. Some brands of food coloring also produce a duller hue.
- How do I store the cake?
- Because of the filling and topping (which may contain dairy), cover and store it in the refrigerator. It should keep for 3–4 days, though the texture might grow moister as time passes.
- Is poke cake too soggy?
- When done right, poke cake is moist but not mushy. If it’s soggy, you may have added too much filling or not allowed enough time for the liquid to soak in and set.
- Can I freeze it?
- You can freeze it before adding the topping. Wrap the cooled, filled cake tightly and freeze for up to a month. Thaw, then add whipped topping or frosting fresh before serving.
- Can I use a different cake flavor?
- Absolutely. The poke method works for almost any cake—lemon, chocolate, vanilla. Red velvet is special because of the color contrast, but feel free to explore.
Conclusion
Poke cakes are a testament to how a few simple steps can yield a dessert that looks like you spent hours perfecting it. The “Easiest Red Velvet Poke Cake” drives this point home: a standard box mix (or homemade base) meets a dreamy filling that seeps into every crumb, finished with a fluffy or creamy topping. It’s a treat designed to stand out at gatherings, from Valentine’s Day potlucks to family reunions.
What truly sets this dessert apart is how effortless it is—no intricate layering or piping required. You poke, pour, and chill. Yet the final result speaks volumes: luscious, vibrant, and loaded with classic red velvet tang. If you’re hunting for a crowd-pleaser that harmonizes taste, appearance, and simplicity, look no further. This poke cake deserves a spot in your dessert rotation, ready to delight sweet-tooths and novices alike.
Print
Easiest Red Velvet Poke Cake: A Foolproof Dessert for All Occasions!
- Total Time: 1 hour 50 minutes
- Yield: 12 1x
Description
Indulge in this ultra-simple red velvet poke cake that combines the moist, rich flavor of red velvet cake with a luscious cream cheese drizzle. Perfect for birthdays, celebrations, or any day you need a little extra sweetness, this cake is as foolproof as it is irresistible. With minimal ingredients and a straightforward assembly, it’s the ultimate crowd-pleasing dessert for any occasion.
Ingredients
For the Cake:
- 1 box box Red velvet cake mix (Use your favorite brand; follow package directions)
- Ingredients as required by mix usually eggs, oil, and water (Prepare according to box instructions)
- 1/2 cup Buttermilk (Substitute water for a lighter flavor if desired)
For the Poke Filling:
- 1/2 cup Hot water (Adjust if needed to create a moist cake texture)
- 1 package Cream cheese frosting (8 oz Use store-bought or homemade, softened)
- For Garnish (Optional)
- To taste: Fresh berries or red sprinkles For an extra festive touch
Instructions
Bake the Cake:
- Preheat your oven according to the cake mix package directions (typically 350°F/175°C).
- Prepare a 9×13-inch baking pan by greasing it lightly.
- Mix the red velvet cake batter as directed on the box, substituting buttermilk for water if desired.
- Pour the batter into the prepared pan and bake for the time specified (usually 25–30 minutes) until a toothpick inserted in the center comes out clean. Allow the cake to cool slightly in the pan.
Poke the Cake:
- Once the cake has cooled for 10 minutes, use a fork or skewer to poke holes evenly across the entire surface of the cake.
Add the Poke Filling:
- Pour the 1/2 cup of hot water slowly over the cake, allowing it to seep into the holes and moisten the cake.
- Gently warm the cream cheese frosting (if needed) so it’s pourable, then drizzle it evenly over the top of the cake. Use a spatula or the back of a spoon to spread it slightly into the holes for extra creaminess.
Chill and Garnish:
- Let the cake sit at room temperature for about 10 minutes, then refrigerate for at least 1 hour to allow the frosting to set.
- Just before serving, garnish with fresh berries or a sprinkle of festive red decorations if desired.
- Cut into squares and serve chilled or at room temperature.
Notes
For a homemade twist, try making your own cream cheese frosting by beating 8 oz cream cheese with 1/4 cup butter, 2 cups powdered sugar, and 1 tsp vanilla extract.
Adjust the hot water amount if your cake mix directions suggest a different liquid ratio to achieve optimal moistness.
This poke cake is versatile—serve it as a dessert, snack, or even a celebratory treat at parties.
Enjoy your Ultimate Red Velvet Poke Cake—a foolproof, dazzling dessert that’s sure to be a hit at any occasion!
- Prep Time: 20 minutes
- Cook Time: 30 minutes
- Category: Desserts
- Cuisine: American, Quick & Easy Desserts
Nutrition
- Calories: 300