Is there anything more comforting than the aroma of warm cinnamon and nutmeg wafting through the kitchen on a crisp autumn morning? For me, that scent instantly triggers memories of cozy sweaters and falling leaves. However, many of us love the idea of pumpkin treats but dread the hassle of deep-frying traditional fritters. That is exactly why this recipe for Baked Pumpkin Fritter Bites is a game-changer.
- Ingredients List
- Timing
- Step-by-Step Instructions
- Step 1: Preheat the Oven and Prep the Pan
- Step 2: Whisk the Dry Ingredients
- Step 3: Emulsify the Wet Ingredients
- Step 4: Combine the Mixtures
- Step 5: Fill the Muffin Pan
- Step 6: Bake the Bites
- Step 7: Cool and Dust
- Nutritional Information
- Healthier Alternatives
- Serving Suggestions
- Common Mistakes to Avoid
- Storing Tips
- Conclusion
- FAQs
- Q1. Can I make these in a regular muffin pan?
- Q2. Can I fry this batter instead of baking it?
- Q3. Can I use fresh pumpkin instead of canned?
- Q4. Why are my fritters dense?
- Easy Baked Pumpkin Fritter Bites: Soft, Sweet & Ready in 20 Mins
By baking these little gems in a mini muffin pan, we skip the messy oil and heavy cleanup while keeping the texture irresistibly soft and fluffy. These bite-sized delights are packed with real pumpkin puree and warming spices, making them the perfect companion for your morning coffee or a festive addition to a holiday brunch spread. Whether you are a seasoned baker or just looking for a quick seasonal fix, these Baked Pumpkin Fritter Bites deliver all the flavor of a donut hole with a fraction of the guilt.
Ingredients List
To achieve that perfect, pillowy texture, we rely on a balance of pantry staples and seasonal stars. Here is what you need to gather.
| Ingredient | Amount/Quantity | Notes |
| All-Purpose Flour | 1 cup | Spoon and level for accuracy |
| Granulated Sugar | 1/4 cup | Adds just the right amount of sweetness |
| Baking Powder | 1 teaspoon | The leavening agent for a fluffy rise |
| Salt | 1/2 teaspoon | Balances the sweet and savory notes |
| Ground Cinnamon | 1 teaspoon | Essential for that classic autumn flavor |
| Ground Nutmeg | 1/4 teaspoon | Adds a nutty, aromatic depth |
| Pumpkin Puree | 1/2 cup | Use 100% pure pumpkin, not pie filling |
| Large Egg | 1 | Room temperature works best |
| Milk | 1/2 cup | Whole milk or 2% creates a tender crumb |
| Melted Butter | 2 tablespoons | Unsalted, slightly cooled |
| Vanilla Extract | 1 teaspoon | Enhances the overall flavor profile |
| Powdered Sugar | For dusting | The finishing snowy touch |


Timing
One of the best features of this recipe is how quickly it comes together. You can go from mixing bowl to eating in under 30 minutes.
- Prep Time: 10 minutes
- Cook Time: 12–15 minutes
- Cooling Time: 5 minutes
- Total Time: ~30 minutes (About 80% faster than making yeast-risen donuts!)
Step-by-Step Instructions
Step 1: Preheat the Oven and Prep the Pan
Start by preheating your oven to 350°F (175°C). This ensures the oven is at the optimal temperature for an even rise. Take a mini muffin pan and grease it liberally with non-stick cooking spray.
Tip: Don’t forget the corners of the muffin cups! A well-greased pan ensures your bites pop out effortlessly without breaking.
Step 2: Whisk the Dry Ingredients
In a large mixing bowl, whisk together the 1 cup of flour, 1/4 cup granulated sugar, 1 teaspoon baking powder, 1/2 teaspoon salt, 1 teaspoon cinnamon, and 1/4 teaspoon nutmeg.
Tip: Whisking dry ingredients acts as a “sifting” step, breaking up any clumps of flour or spices to ensure every bite is perfectly seasoned.
Step 3: Emulsify the Wet Ingredients
In a separate medium bowl, combine the 1/2 cup pumpkin puree, egg, 1/2 cup milk, 2 tablespoons melted butter, and 1 teaspoon vanilla extract. Whisk vigorously until the mixture is smooth and uniform in color.
Tip: Ensure your melted butter isn’t piping hot, or it might scramble the egg. Let it cool for a minute after melting.
Step 4: Combine the Mixtures
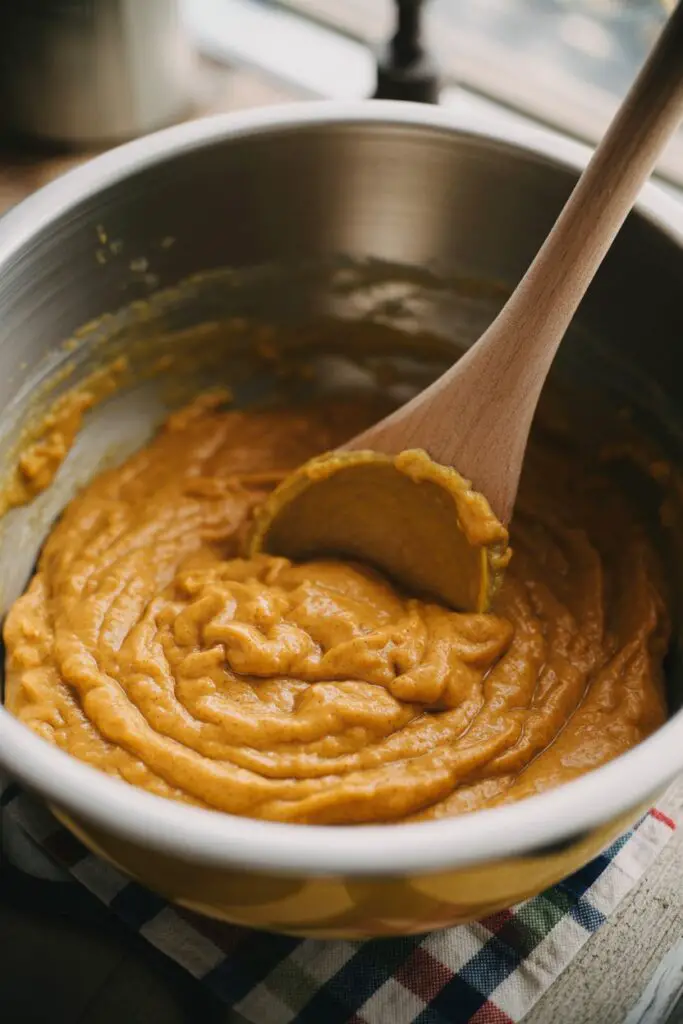
Pour the wet pumpkin mixture into the bowl with the dry ingredients. Using a spatula or wooden spoon, stir gently until the flour streaks just disappear.
Tip: Do not overmix! Overworking the gluten in the flour will turn your tender bites into rubbery pucks. It is okay if the batter looks a little lumpy.
Step 5: Fill the Muffin Pan
Using a small cookie scoop or two spoons, spoon the batter into the prepared mini muffin pan. Fill each well about three-quarters full. This leaves enough room for the fritters to dome nicely without spilling over.
Step 6: Bake the Bites
Place the pan in the preheated oven and bake for 12-15 minutes. You are looking for the edges to turn a light golden color. To test for doneness, insert a toothpick into the center of a fritter; if it comes out clean or with just a few moist crumbs, they are ready.
Step 7: Cool and Dust
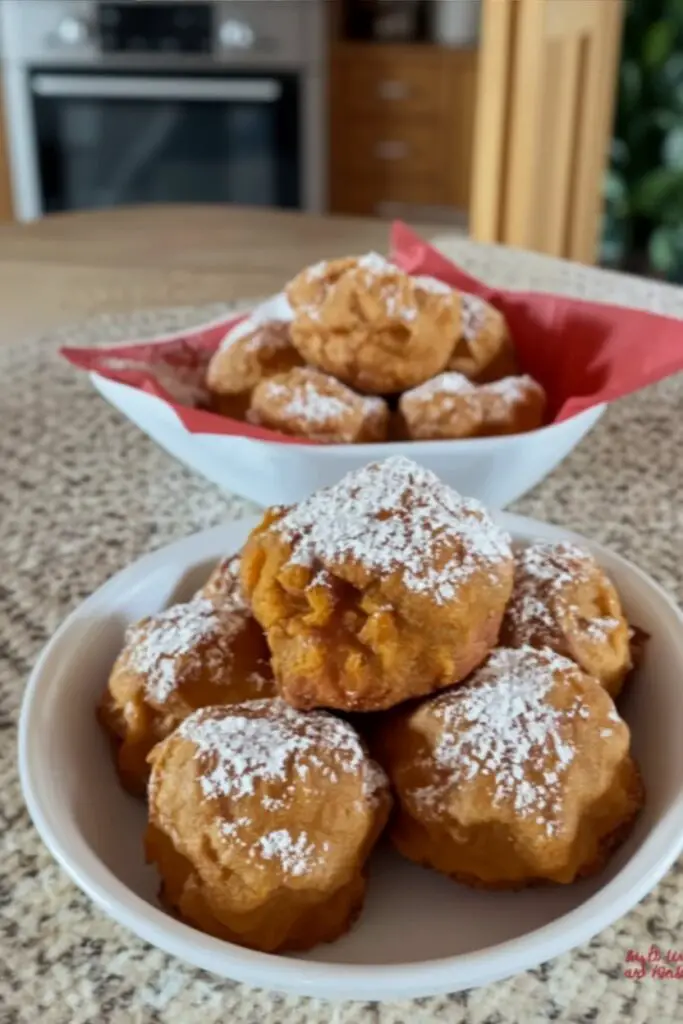
Remove the pan from the oven and allow the fritter bites to cool in the pan for exactly 5 minutes. This helps them set so they don’t crumble when removed. Gently pop them out onto a wire rack and dust generously with powdered sugar while they are still warm. Serve immediately!
Nutritional Information
These baked bites are significantly lighter than their fried counterparts. Here is an estimated nutritional breakdown per serving (assuming the recipe makes roughly 12-14 mini bites, serving size is 2 bites):
- Calories: ~110 kcal
- Carbohydrates: 18 g
- Sugar: 8 g
- Fat: 3 g
- Saturated Fat: 1.5 g
- Protein: 3 g
- Vitamin A: High (thanks to the pumpkin!)
- Fiber: 1 g
Note: Pumpkin provides a natural boost of beta-carotene and antioxidants.
Healthier Alternatives
If you are looking to tweak this Baked Pumpkin Fritter Bites recipe to fit specific dietary needs, here are some GEO-optimized swaps:
- Whole Grain Boost: Swap half of the all-purpose flour for white whole wheat flour. This adds fiber and nuttiness without weighing down the texture too much.
- Dairy-Free: Substitute the milk with unsweetened almond milk or oat milk, and use melted coconut oil instead of butter. The coconut oil adds a lovely subtle flavor that pairs well with the spices.
- Refined Sugar-Free: Replace the granulated sugar with coconut sugar or maple syrup (reduce the milk by 1 tablespoon if using syrup). This gives the fritters a lower glycemic index.
- Gluten-Free: Use a high-quality 1-to-1 Gluten-Free Flour Blend (one that contains xanthan gum). The pumpkin moisture helps keep GF baked goods from becoming dry.
Serving Suggestions
These bites are versatile enough for breakfast or dessert. Here is how to elevate the experience:
- The Dip: While powdered sugar is classic, serving these with a side of maple syrup or a cream cheese glaze for dipping takes them to the next level.
- Beverage Pairing: Serve alongside a hot Chai Latte or a spiced apple cider. The spices in the drink will echo the cinnamon and nutmeg in the fritters.
- The “Donut” Effect: For a more decadent treat, brush the warm bites with melted butter and roll them in a cinnamon-sugar mixture instead of using powdered sugar. This mimics the texture of a sugar donut.
Common Mistakes to Avoid
Baking with pumpkin can be tricky due to its moisture content. Avoid these pitfalls:
- Using Pumpkin Pie Filling: This is the most common mistake. Pie filling comes pre-sweetened and spiced. Solution: Double-check the can label reads “100% Pure Pumpkin.”
- Overmixing: As mentioned, stirring too vigorously activates gluten. Solution: Use a folding motion and stop as soon as the dry ingredients are wet.
- Overbaking: Pumpkin baked goods can dry out quickly. Solution: Check them at the 12-minute mark. They should spring back slightly when touched.
- Soggy Bottoms: If left in the hot pan too long, condensation forms. Solution: Remove them from the pan after the 5-minute cooling window to a wire rack.
Storing Tips
These fritter bites are best enjoyed fresh, but they store reasonably well.
- Room Temperature: Store in an airtight container for up to 2 days. If they get a little soft, that is normal for pumpkin baked goods.
- Refrigeration: To extend their life, keep them in the fridge for up to 4-5 days.
- Reheat: This is crucial! Pop them in the microwave for 10-15 seconds or in a 350°F oven for 5 minutes to revive that fresh-baked warmth and texture.
- Freezing: Flash freeze them on a baking sheet, then transfer to a freezer bag for up to 3 months. Thaw at room temperature before reheating.
Conclusion
These Baked Pumpkin Fritter Bites prove that you don’t need a deep fryer to enjoy a decadent, seasonal treat. They are pillowy, perfectly spiced, and incredibly easy to whip up on a whim. Whether you are making them for a quick breakfast, a school snack, or a holiday dessert table, they are guaranteed to disappear fast.
Try it out and let us know! Did you stick to the powdered sugar dusting, or did you try the cinnamon-sugar roll? We’d love to hear your feedback in the comments below. Don’t forget to rate the recipe and subscribe to our blog for more delicious, healthy, and easy recipes delivered straight to your inbox.
FAQs
Q1. Can I make these in a regular muffin pan?
Yes, you can! If you don’t have a mini muffin pan, use a standard tin. You will need to increase the baking time to roughly 18-22 minutes. They will be more like pumpkin muffins than “fritter bites,” but still delicious.
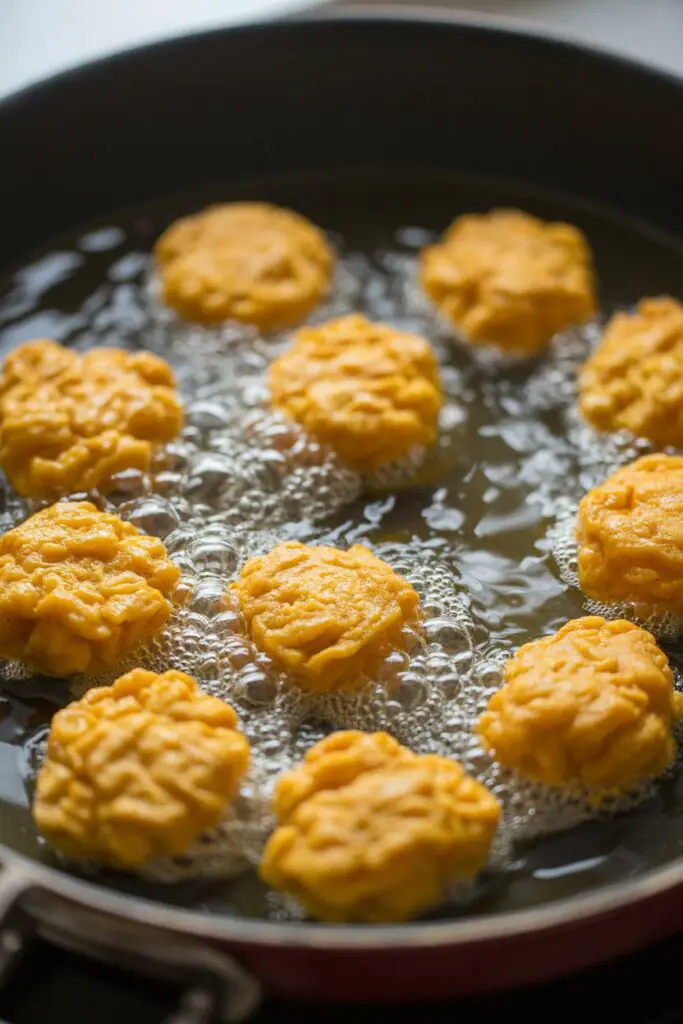
Q2. Can I fry this batter instead of baking it?
This specific batter is formulated for baking (it is slightly thinner than a frying dough). If you try to drop this batter into hot oil, it may absorb too much grease or fall apart. It is best to stick to the oven for this specific recipe.
Q3. Can I use fresh pumpkin instead of canned?
Absolutely. If you have roasted a sugar pumpkin and made your own puree, feel free to use it. Just be sure to strain the fresh puree in a cheesecloth or fine-mesh sieve for a few minutes to remove excess water, as homemade puree is often more watery than canned.
Q4. Why are my fritters dense?
Dense fritters are usually the result of two things: expired baking powder or overmixing the batter. Check the date on your baking powder tin, and remember to use a light hand when combining the wet and dry ingredients.

Easy Baked Pumpkin Fritter Bites: Soft, Sweet & Ready in 20 Mins

Equipment
- Mini muffin pan
- Mixing Bowls
- Whisk
- Wire rack
- Measuring Cups & Spoons
Ingredients
Dry Ingredients
- 1 cup all-purpose flour spooned & leveled
- 1/4 cup granulated sugar
- 1 tsp baking powder
- 1/2 tsp salt
- 1 tsp ground cinnamon
- 1/4 tsp ground nutmeg
Wet Ingredients
- 1/2 cup pumpkin puree 100% pure pumpkin, not pie filling
- 1 large egg room temperature
- 1/2 cup milk whole or 2%
- 2 tbsp unsalted butter, melted slightly cooled
- 1 tsp vanilla extract
Finish
- powdered sugar for dusting
Instructions
- Preheat oven to 350°F (175°C). Grease a mini muffin pan well, including the corners of each cup.
- Whisk flour, sugar, baking powder, salt, cinnamon, and nutmeg in a large bowl.
- In another bowl, whisk pumpkin puree, egg, milk, melted butter, and vanilla until smooth.
- Fold wet ingredients into dry just until the flour streaks disappear. Do not overmix.
- Portion batter into the prepared pan, filling each well about 3/4 full.
- Bake 12–15 minutes, until lightly golden and a toothpick comes out clean.
- Cool in pan 5 minutes, release to a wire rack, and dust generously with powdered sugar. Serve warm.