Do you ever crave the comforting, nostalgic taste of a classic cherry pie but don’t have the time (or patience) for rolling out a finicky crust? What if you could capture that perfect balance of sweet-tart fruit filling and buttery, tender crust, all in an incredibly easy-to-make bar?
- Ingredients
- Timing
- Step-by-Step Instructions
- Step 1: Preheat Oven and Prepare Pan
- Step 2: Make the Crust and Crumb Mixture
- Step 3: Finish the Crumbly Dough
- Step 4: Par-Bake the Crust
- Step 5: Add Filling and Topping
- Step 6: Bake Until Golden and Bubbly
- Step 7: Cool Completely
- Step 8: Prepare and Drizzle the Glaze
- Step 9: Lift, Slice, and Serve
- Nutritional Information
- Healthier Alternatives
- Serving Suggestions
- Common Mistakes to Avoid
- Storing Tips
- Conclusion
- FAQs
- Q1: Can I use a different pie filling?
- Q2: Can I make my own cherry pie filling?
- Q3: Why is almond extract used?
- Q4: My crust seems too crumbly to press. What did I do wrong?
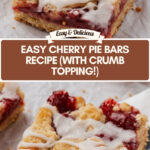
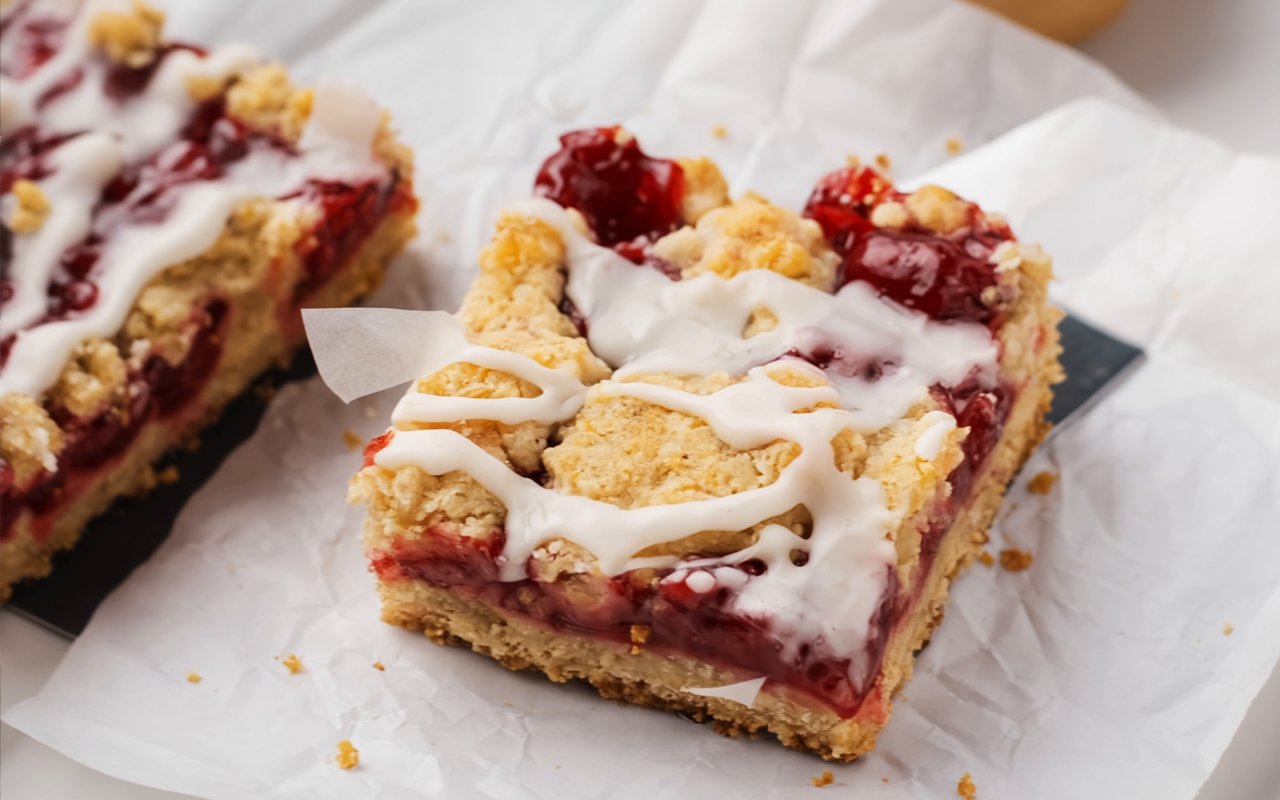
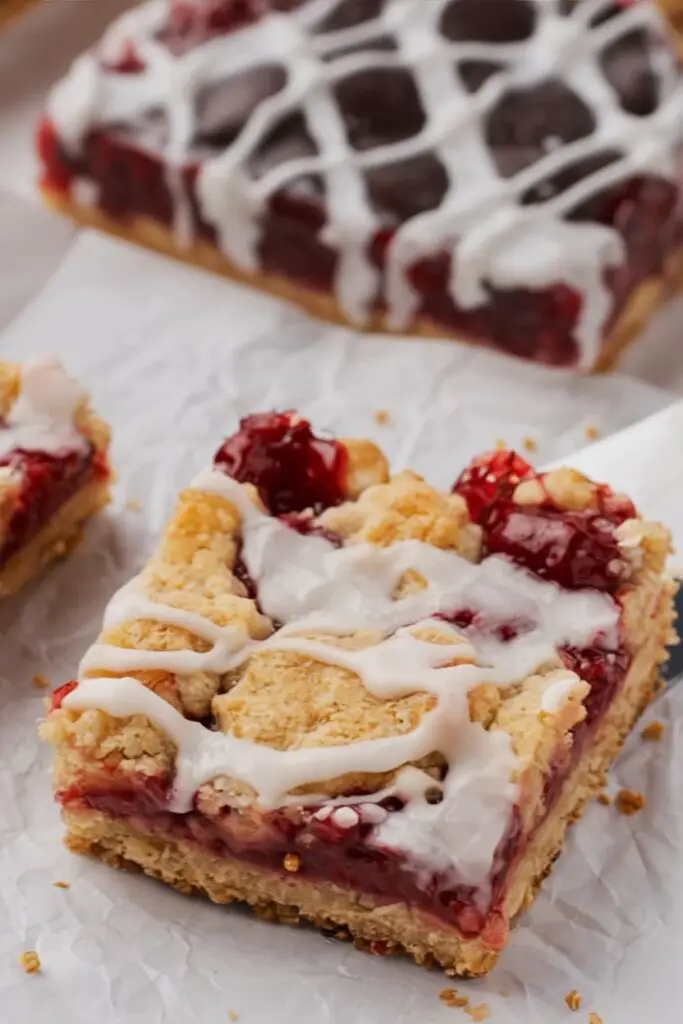
- Easy Cherry Pie Bars Recipe (with Crumb Topping!)
These Cherry Pie Bars are the answer! This simple recipe features a delicious, buttery shortbread crust that magically doubles as its own crumb topping. It’s all layered with a vibrant cherry pie filling and finished with a sweet almond glaze. These cherry crumb bars are perfect for potlucks, parties, or any time you need a simple and delicious dessert that’s guaranteed to disappear fast. Get ready to fall in love with this easy twist on a timeless favorite!
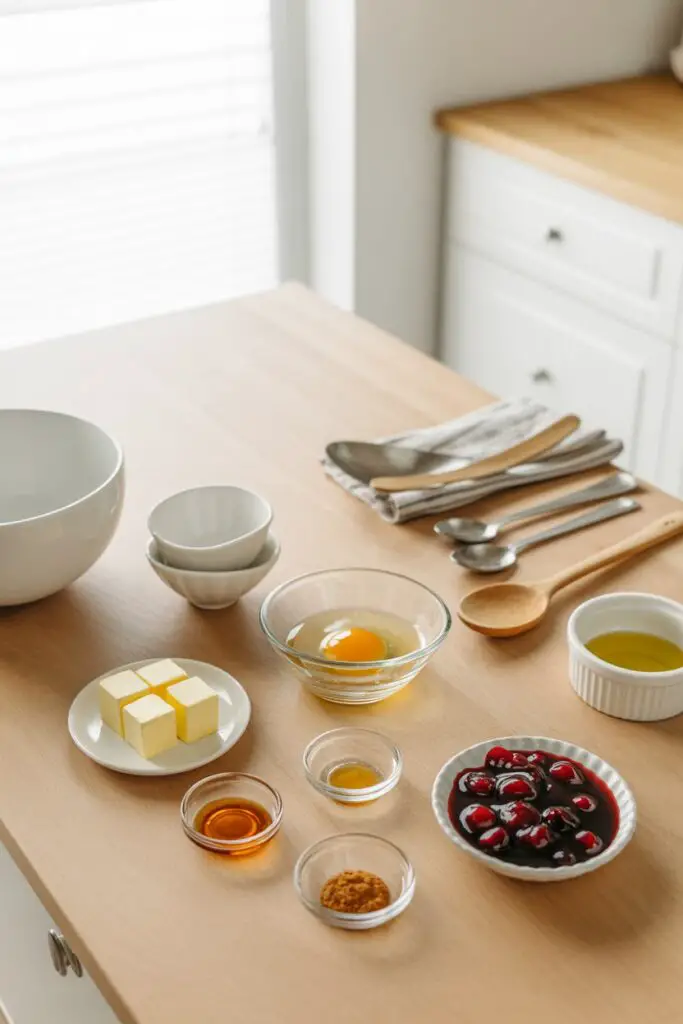
Ingredients
This recipe uses one simple dough for both the crust and the crumb topping, making it incredibly easy.
| Ingredient | Amount/Quantity | Notes |
| For the Crust & Crumb Topping: | ||
| All-Purpose Flour, spooned & leveled | 3 cups (390g) | |
| Granulated Sugar | 1 cup (200g) | |
| Baking Powder | 1 teaspoon | |
| Salt | ½ teaspoon | Balances the sweetness |
| Ground Cinnamon | ¼ teaspoon | Adds a hint of warmth |
| Unsalted Butter, cold & cubed | 1 cup (2 sticks) | Keeps the crust tender and crumbly |
| Large Egg, beaten | 1 | |
| Pure Vanilla Extract | 1 teaspoon | |
| Almond Extract | ¼ teaspoon | Enhances the cherry flavor |
| For the Filling: | ||
| Cherry Pie Filling (canned) | 1 (21-ounce) can | Or your favorite homemade filling |
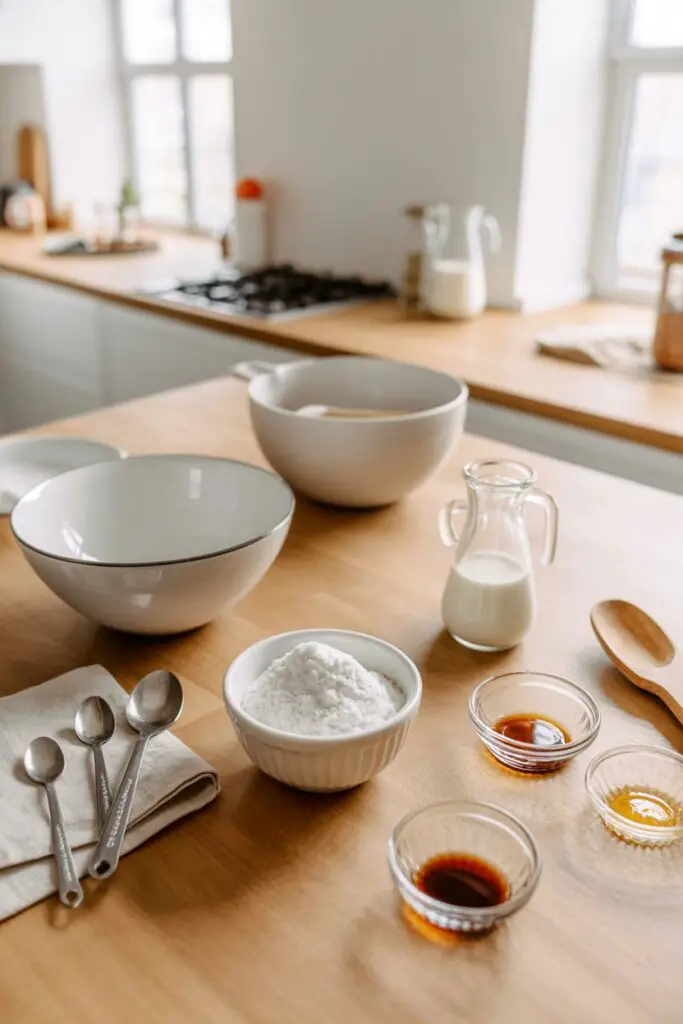
| For the Almond Glaze: | ||
| Powdered Sugar | 1 cup | Sifted, if lumpy |
| Milk | 2 tablespoons | Or more, as needed for consistency |
| Pure Vanilla Extract | ½ teaspoon | |
| Almond Extract | ¼ teaspoon |

Timing
This easy recipe comes together quickly, with the most time-consuming part being the (mostly hands-off) baking and cooling.
- Preparation Time: 20 minutes
- Cooking Time: 35-42 minutes
- Cooling Time: 1 hour 30 minutes (minimum)
- Total Time: Approximately 2 hours 30 minutes
Step-by-Step Instructions
Follow these simple steps to create delicious, buttery cherry bars that are perfect every time.
Step 1: Preheat Oven and Prepare Pan
First, preheat your oven to 375°F (190°C). Line a 9×13 inch baking dish with parchment paper, leaving a slight overhang on the two longer sides. This parchment “sling” will make it incredibly easy to lift the bars out later for cutting.
Step 2: Make the Crust and Crumb Mixture
In a large mixing bowl, whisk together the all-purpose flour, granulated sugar, baking powder, salt, and cinnamon. Add the cold, cubed butter to the flour mixture. Using a pastry blender, two forks, or your fingertips, work the butter into the flour until the mixture resembles coarse, pea-sized crumbs.
- Actionable Tip: Using cold butter is essential for a tender, shortbread-like crust. Work quickly so the butter doesn’t melt!
Step 3: Finish the Crumbly Dough
In a small separate bowl, whisk together the beaten egg, 1 teaspoon of vanilla extract, and ¼ teaspoon of almond extract. Pour this egg mixture over the flour-butter crumbs. Use a fork to gently toss and stir everything together. The dough should remain very crumbly – do not overmix!
Step 4: Par-Bake the Crust
Take a little more than half (about ⅔) of the crumbly dough mixture and press it firmly and evenly into the bottom of your prepared 9×13 baking dish.
- Actionable Tip: Use the flat bottom of a measuring cup to press the crust down firmly. This creates a sturdy base that won’t crumble when you add the filling.Bake the bottom crust for 10-12 minutes, or until it’s just starting to turn lightly golden and no longer looks wet or shiny.
Step 5: Add Filling and Topping
Remove the pan from the oven. Spoon the cherry pie filling over the partially baked crust. Use an offset spatula to gently spread the filling into an even layer, all the way to the edges. Sprinkle the remaining crumb mixture evenly over the top of the cherry filling.
- Actionable Tip: For a more rustic, streusel-like topping, gently press some of the remaining crumb mixture together in your hands to form slightly bigger pieces as you sprinkle it on top.
Step 6: Bake Until Golden and Bubbly
Return the baking dish to the oven. Bake for an additional 25-30 minutes. The bars are done when the crumb topping is lightly golden brown and the cherry filling is hot and bubbling around the edges.
Step 7: Cool Completely
Transfer the pan to a wire rack and let the Cherry Pie Bars cool completely in the pan. This is the most important step for clean slices! Cooling can take 1-2 hours.
- Actionable Tip: Do not rush the cooling process! Slicing into warm bars will result in a gooey mess as the filling and crust haven’t had time to set. Patience is key.
Step 8: Prepare and Drizzle the Glaze
Once the bars are completely cool, make the glaze. In a small bowl, whisk together the powdered sugar, 2 tablespoons of milk, ½ teaspoon of vanilla extract, and ¼ teaspoon of almond extract until smooth. If the glaze seems too thick, add a bit more milk (½ teaspoon at a time) until it reaches a perfect, drizzling consistency. Drizzle the glaze all over the top of the cooled bars.
Step 9: Lift, Slice, and Serve
Let the glaze set for about 15-20 minutes. Once set, use the parchment paper overhangs to carefully lift the entire slab of bars out of the baking dish and onto a cutting board. Slice into bars or squares and enjoy!
Nutritional Information
Nutritional information is an estimate per bar and can vary based on the size you cut them and the brands of ingredients used. (Assuming 18 bars per pan).
- Calories: Approx. 280-320 kcal
- Protein: 3 g
- Carbohydrates: 45-50 g
- Fat: 10-12 g
- Saturated Fat: 6 g
- Sugar: 28-32 g
Healthier Alternatives
While these bars are a decadent treat, here are a few potential adjustments:
- Whole Wheat: Substitute 1 cup of the all-purpose flour with white whole wheat flour for added fiber. The crust may be slightly denser.
- Sugar Reduction: You can slightly reduce the granulated sugar in the crust (by ¼ cup) or use a “less sugar” or homemade cherry pie filling. You can also skip the glaze or use it very sparingly.
- Gluten-Free: Use a high-quality measure-for-measure gluten-free all-purpose flour blend in the crust mixture. Ensure your baking powder is also gluten-free.
- Add Oats: Replace ½ cup of the flour in the topping portion of the crumb mixture with old-fashioned rolled oats for a chewier, streusel-like texture.
Serving Suggestions

These Cherry Pie Bars are fantastic on their own, but they’re also fun to dress up!
- A La Mode: Serve a slightly warm (reheated) bar with a scoop of vanilla bean ice cream. The contrast of warm fruit and cold cream is divine!
- Potluck Perfect: These are the ultimate easy-to-transport dessert. Cut them in the pan or lift the whole slab onto a platter and cut at the event. They’re always a crowd-pleaser!
- Holiday Baking: With their beautiful red color, these are perfect for Christmas, Valentine’s Day, or 4th of July dessert spreads.
- Simple Treat: Enjoy with a cup of coffee or tea for a perfect afternoon pick-me-up.
Common Mistakes to Avoid
For perfect bars, be sure to avoid these common mistakes:
- Using Melted or Softened Butter: This will result in a greasy, dense crust instead of a light, crumbly one. Solution: Use cold butter, cut into cubes, and work it in quickly so it stays in small pieces.
- Overmixing the Crumb Mixture: Overmixing after adding the egg will create a tough, bready crust. Solution: Stir just until the dough comes together in crumbs. It should look and feel crumbly, not like a smooth cookie dough.
- Cutting While Warm: The #1 mistake! This leads to messy, gooey bars. Solution: Be patient and let the bars cool completely (at least 1.5-2 hours) at room temperature before glazing and slicing.
- Runny Glaze: Adding too much milk at once. Solution: Start with 2 tablespoons of milk and add more, just ½ teaspoon at a time, until you reach the desired drizzling consistency.
Storing Tips
These bars store beautifully, making them great for making ahead.
- Room Temperature: Store the cooled and cut bars in an airtight container at room temperature. Layer them between sheets of parchment or wax paper to prevent the glaze from sticking. They will stay fresh for 3-4 days.
- Refrigerate: You can refrigerate the bars in an airtight container for up to a week.
- Freezing: These bars freeze wonderfully! Cut them into squares and place them in a freezer-safe container, separated by layers of parchment paper. Freeze for up to 3 months. Thaw at room temperature before serving.
Conclusion
These Easy Cherry Pie Bars deliver all the nostalgic flavor of a classic cherry pie with half the effort. The simple, buttery crust and crumb topping, paired with a sweet-tart cherry filling and a lovely almond glaze, create an irresistible treat for any occasion. This recipe is a keeper for its simplicity, crowd-pleasing flavor, and beautiful presentation!
Ready to bake a batch of these delicious bars? Let us know how they turned out in the comments below! We love hearing your feedback. Don’t forget to rate the recipe and subscribe for more easy and delicious dessert ideas!
FAQs
Q1: Can I use a different pie filling?
Absolutely! This crumb bar recipe is a fantastic base for all kinds of fruit fillings. Try apple, blueberry, peach, or even strawberry-rhubarb pie filling (canned or homemade) for a different twist.
Q2: Can I make my own cherry pie filling?
Yes, homemade cherry pie filling would be delicious! You’ll need about 2.5 to 3 cups of your favorite homemade filling. Ensure it’s not too thin; it should be a similar consistency to canned pie filling.
Q3: Why is almond extract used?
Almond extract has a natural affinity for stone fruits like cherries and peaches. It adds a subtle, fragrant, almost marzipan-like note that beautifully enhances and deepens the cherry flavor. If you’re not a fan, you can omit it and use all vanilla extract instead.
Q4: My crust seems too crumbly to press. What did I do wrong?
The dough is supposed to be very crumbly! It’s not a traditional roll-out dough. When you press about 2/3 of it into the pan, the crumbs will compact together to form the crust. If it seems exceptionally dry (like sand), double-check your flour measurement (scooping vs. spooning & leveling can add extra flour).
Print
Easy Cherry Pie Bars Recipe (with Crumb Topping!)
- Total Time: 2 hours 30 minutes
- Yield: 18 Bars 1x
Description
Do you ever crave the comforting, nostalgic taste of a classic cherry pie but don’t have the time (or patience) for rolling out a finicky crust? These Cherry Pie Bars are the answer! This simple recipe features a delicious, buttery shortbread crust that magically doubles as its own crumb topping. It’s all layered with a vibrant cherry pie filling and finished with a sweet almond glaze. These cherry crumb bars are perfect for potlucks, parties, or any time you need a simple and delicious dessert that’s guaranteed to disappear fast.
Ingredients
For the Crust & Crumb Topping
- 3 cups (390g) All-Purpose Flour, spooned & leveled
- 1 cup (200g) Granulated Sugar
- 1 teaspoon Baking Powder
- 1/2 teaspoon Salt
- 1/4 teaspoon Ground Cinnamon
- 1 cup (2 sticks) Unsalted Butter, cold & cubed
- 1 Large Egg, beaten
- 1 teaspoon Pure Vanilla Extract
- 1/4 teaspoon Almond Extract
For the Filling
- 1 (21-ounce) can Cherry Pie Filling
For the Almond Glaze
- 1 cup Powdered Sugar, sifted
- 2 tablespoons Milk (or more, as needed)
- 1/2 teaspoon Pure Vanilla Extract
- 1/4 teaspoon Almond Extract
Instructions
- Preheat Oven and Prepare Pan: Preheat your oven to 375°F (190°C). Line a 9×13 inch baking dish with parchment paper, leaving an overhang on the two longer sides to create a “sling.”
- Make the Crumb Mixture: In a large bowl, whisk together the flour, granulated sugar, baking powder, salt, and cinnamon. Add the cold, cubed butter. Using a pastry blender or your fingertips, work the butter into the flour until the mixture resembles coarse, pea-sized crumbs.
- Finish the Dough: In a small bowl, whisk together the beaten egg, 1 teaspoon vanilla extract, and ¼ teaspoon almond extract. Pour this over the flour-butter crumbs and use a fork to toss everything together until the dough is uniformly crumbly.
- Par-Bake the Crust: Press a little more than half (about ⅔) of the crumbly dough firmly and evenly into the bottom of the prepared 9×13 dish. Bake for 10-12 minutes, until just starting to turn lightly golden.
- Add Filling and Topping: Remove the pan from the oven. Spoon the cherry pie filling over the partially baked crust and spread it into an even layer. Sprinkle the remaining ⅓ of the crumb mixture evenly over the cherry filling.
- Bake Until Golden: Return the dish to the oven. Bake for an additional 25-30 minutes, until the crumb topping is lightly golden brown and the cherry filling is hot and bubbling around the edges.
- Cool Completely: Transfer the pan to a wire rack and let the bars cool completely in the pan (this can take 1-2 hours).
- Prepare and Drizzle Glaze: Once the bars are completely cool, make the glaze. In a small bowl, whisk together the powdered sugar, 2 tablespoons of milk, ½ teaspoon vanilla, and ¼ teaspoon almond extract until smooth. Drizzle the glaze over the top of the cooled bars.
- Lift and Slice: Let the glaze set for 15-20 minutes. Use the parchment paper overhangs to lift the entire slab of bars out of the dish. Slice into squares and serve.
Notes
- Parchment Sling: Using a parchment “sling” with an overhang is highly recommended. It makes it incredibly easy to lift the cooled bars out of the pan for clean, easy cutting.
- Cold Butter is Key: Using cold butter and working quickly is essential for a tender, shortbread-like crust and a crumbly topping.
- Sturdy Crust: Use the flat bottom of a measuring cup to press the bottom crust down firmly. This creates a sturdy base that holds up to the filling.
- Bigger Crumbles: For a more rustic, streusel-like topping, gently press some of the remaining crumb mixture together in your hands to form slightly bigger pieces as you sprinkle it on top.
- Cool Completely! Do not rush the cooling process. Slicing into warm bars will result in a gooey mess, as the filling and crust haven’t had time to set. Patience is key for clean slices.
- Prep Time: 20 minutes
- Cook Time: 42 minutes
- Category: Dessert, Bars
- Method: Baking
- Cuisine: American
Nutrition
- Serving Size: 1 bar
- Calories: 300 kcal
- Sugar: 30 g
- Sodium: 95 mg
- Fat: 11 g
- Saturated Fat: 6 g
- Unsaturated Fat: 5 g
- Trans Fat: 0.3 g
- Carbohydrates: 48 g
- Fiber: 1 g
- Protein: 3 g
- Cholesterol: 25 mg