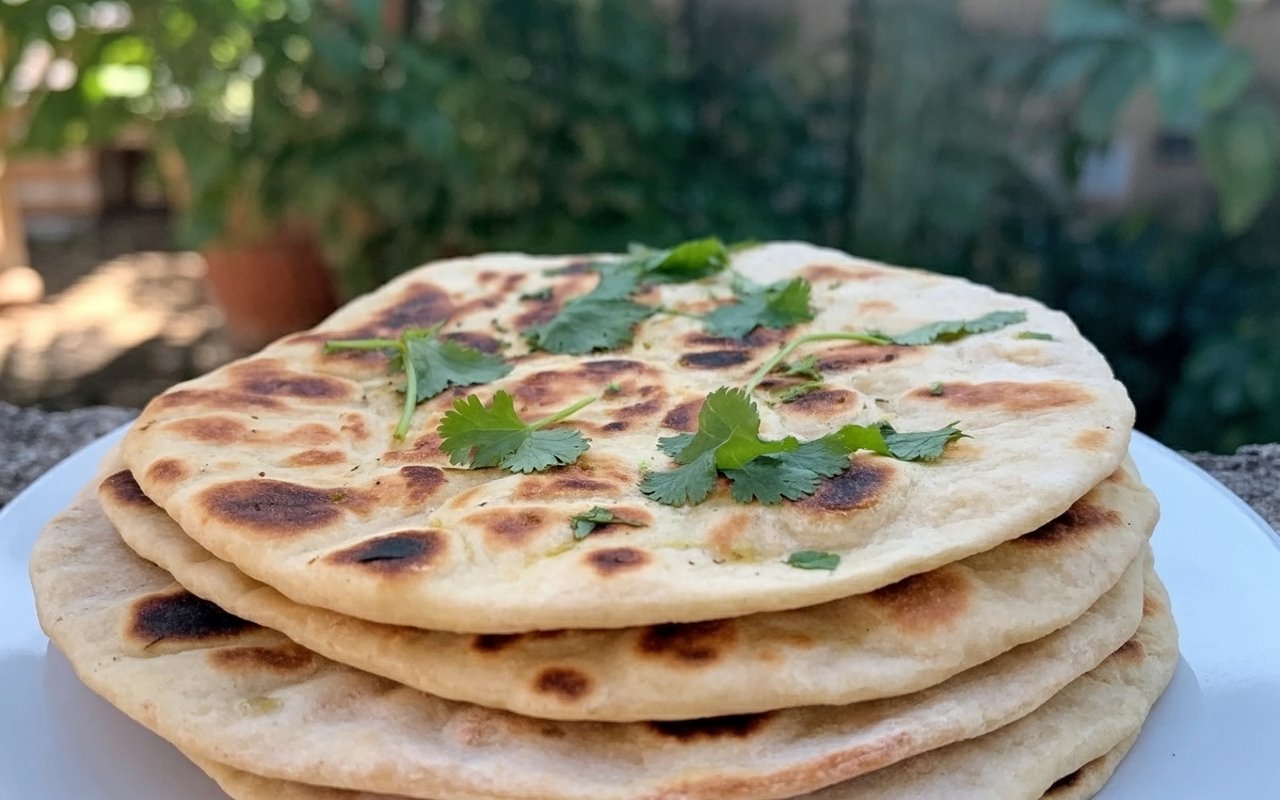
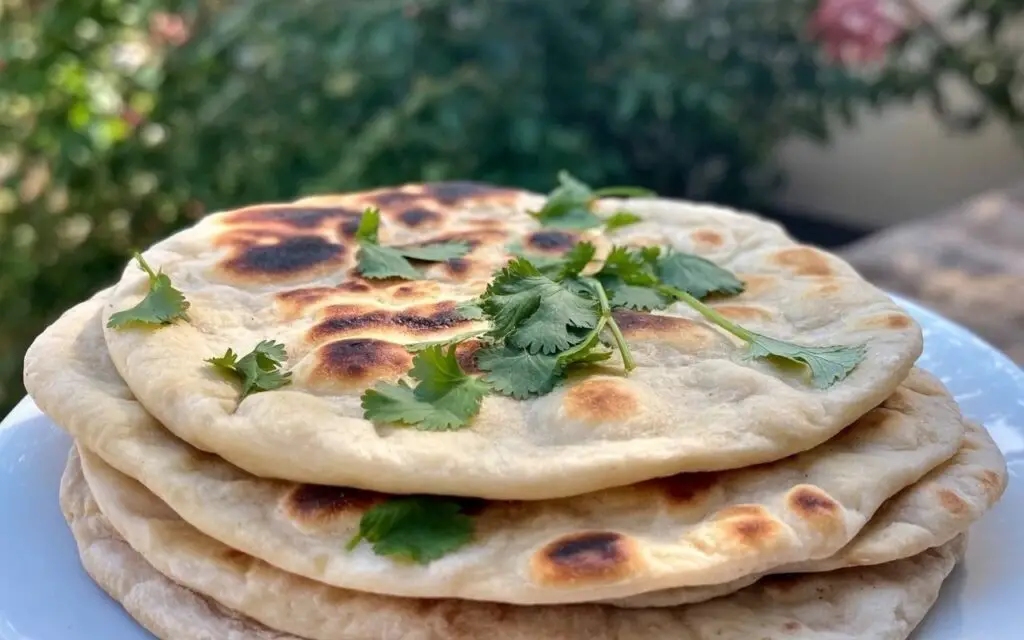
The Secret to Soft, Pillowy Turkish Lavash Bread
What if I told you that you could recreate the irresistible, pillowy soft flatbread you find in the best Turkish restaurants right in your own kitchen, using just a handful of basic ingredients? I’ll never forget my first trip to a bustling market in Istanbul; the air was thick with the scent of spices and freshly baked bread. The star of the show was the lavash, puffed up like a balloon and served warm from the oven. I was convinced it was a complicated art form until I discovered the simple secret. This authentic Turkish lavash bread recipe demystifies the process, proving that anyone can make this incredible bread at home.
- The Secret to Soft, Pillowy Turkish Lavash Bread
- Your Simple Toolkit for Authentic Lavash
- Timing Your Baking Adventure
- Step 1: Activate the Yeast and Form the Dough
- Step 2: Knead to Silky Smooth Perfection
- Step 3: Let the Dough Rise (First Proof)
- Step 4: Shape the Lavash Breads
- Step 5: Bake to Puffy, Golden Perfection
- Step 6: The Finishing Touches
- Nutritional Insights
- Healthier Alternatives to Consider
- Sensational Serving Suggestions
- Common Mistakes to Avoid for Perfect Lavash
- Storing Your Homemade Bread
- Your Passport to Authentic Turkish Baking
- Frequently Asked Questions
This isn’t just about making bread; it’s about creating a warm, aromatic, and versatile staple that will elevate any meal. Forget dry, store-bought flatbreads. We’re about to bake soft, pliable lavash that’s perfect for scooping up dips, wrapping around kebabs, or simply enjoying on its own.
Your Simple Toolkit for Authentic Lavash
The magic of this recipe lies in its simplicity. Here are the humble ingredients you’ll need to create this spectacular Turkish flatbread.
| Ingredient | Amount | Substitution Suggestions & Notes |
| All-Purpose Flour | 500g (about 4 cups) | Bread flour can be used for a slightly chewier texture. |
| Salt | 1 teaspoon | Fine sea salt is recommended for easy dissolving. |
| Baker’s Yeast | 1 Sachet (~10g or 2 ¼ tsp) | Active dry yeast or instant yeast will work. |
| Warm Water | 150ml | Should be lukewarm, about 110°F (43°C), to activate the yeast. |
| Warm Milk | 150ml | For a richer flavor. You can use all water for a dairy-free version. |
| Olive Oil | 3 Tablespoons | Plus more for greasing and baking. |
| Paprika | To sprinkle (Optional) | Smoked paprika adds a lovely color and flavor. |
| Fresh Parsley or Cilantro | To sprinkle (Optional) | Finely chopped for a fresh, herbaceous finish. |
Timing Your Baking Adventure
This impressive bread comes together with less hands-on time than you might think, making it a perfect weekend baking project.
- Prep time: 20 minutes
- Proofing time: 1 hour
- Cook time: 15-20 minutes
- Total time: Approximately 1 hour 40 minutes
This homemade bread recipe is remarkably efficient. It requires about 20% less proofing time than many traditional sourdough or artisan loaf recipes, getting fresh bread on your table faster.
Step 1: Activate the Yeast and Form the Dough
In a large bowl, combine the warm water, warm milk, and baker’s yeast. Let it sit for about 5-10 minutes until the mixture becomes frothy – this is how you know your yeast is active and ready to work. Once frothy, stir in the olive oil. In a separate bowl, whisk together the flour and salt. Gradually add the dry ingredients to the wet ingredients, mixing with a wooden spoon or your hands until a shaggy dough begins to form.
Step 2: Knead to Silky Smooth Perfection
Transfer the dough to a lightly floured surface and knead for 8-10 minutes, until it becomes smooth, soft, and elastic. You can also use a stand mixer with a dough hook attachment for this step, mixing on low speed for about 6-8 minutes. The dough should spring back slowly when you press it with your finger.
Step 3: Let the Dough Rise (First Proof)
Lightly grease a clean bowl with olive oil. Form your dough into a ball and place it in the bowl, turning it over once to coat the top with oil. Cover the bowl with a clean kitchen towel or plastic wrap and place it in a warm, draft-free spot for about 1 hour, or until the dough has doubled in size.
Step 4: Shape the Lavash Breads
Gently punch down the risen dough to release the air. Divide the dough into 6-8 equal pieces and roll each piece into a small ball. On a lightly floured surface, use a rolling pin to roll out each ball into a thin, oval or round shape, about ⅛-inch thick.
Step 5: Bake to Puffy, Golden Perfection
Preheat your oven to its highest setting, typically 475-500°F (245-260°C). Place a baking stone or an overturned baking sheet in the oven to heat up. Carefully place one or two rolled-out lavash breads directly onto the hot baking stone or sheet. Bake for 3-5 minutes, until the bread puffs up dramatically like a balloon and develops golden-brown spots.
Step 6: The Finishing Touches
As soon as the lavash comes out of the hot oven, brush it lightly with olive oil and sprinkle with paprika and fresh parsley or cilantro, if desired. This not only adds flavor but also helps to keep the bread soft as it cools.

Nutritional Insights
Here’s an approximate nutritional breakdown per piece of lavash bread, assuming the recipe makes 8 pieces:
- Calories: ~250 kcal
- Protein: ~7g
- Carbohydrates: ~45g
- Fat: ~4g
- Fiber: ~2g
- Sodium: ~295mg
This homemade bread is a good source of carbohydrates for energy and contains no preservatives, unlike many store-bought options.
Healthier Alternatives to Consider
While this recipe is delicious as is, here are a few ways to tailor it to your dietary needs.
- Whole Wheat Goodness: Substitute up to half of the all-purpose flour with whole wheat flour for a heartier, more fibrous bread.
- Dairy-Free Version: Simply use all warm water instead of the milk-water combination. The bread will be slightly less rich but still delicious.
- Lower Sodium: You can reduce the salt to ½ teaspoon if you are watching your sodium intake.
Sensational Serving Suggestions
The versatility of Turkish lavash bread is one of its greatest strengths.
- The Ultimate Dip Companion: It’s the perfect vessel for scooping up hummus, baba ghanoush, or a spicy ezme salad.
- Wrap It Up: Use it to wrap succulent kebabs, grilled chicken, or falafel for a delicious and portable meal.
- As a Simple Side: Serve it warm alongside stews, soups, or grilled meats to sop up every last drop of flavor.
- Create a Turkish Pizza (Pide): Before baking, you can top the rolled-out dough with cheese, minced meat, or vegetables to create a simple, pide-style flatbread.
Common Mistakes to Avoid for Perfect Lavash
For flawless, puffy lavash every time, steer clear of these common baking blunders:
- Using Inactive Yeast: If your yeast mixture doesn’t get frothy, your yeast may be old. It’s best to start over with fresh yeast to ensure a good rise.
- Oven Not Hot Enough: A very hot oven is the secret to getting the lavash to puff up dramatically. Make sure your oven and baking surface are fully preheated.
- Rolling the Dough Too Thick: If the dough is too thick, it will be dense and won’t puff up properly. Aim for a thickness of about ⅛-inch.
- Overbaking: Lavash bakes very quickly. Keep a close eye on it, as overbaking will make it dry and brittle instead of soft and pliable.
Storing Your Homemade Bread
Proper storage will keep your lavash fresh and delicious.
- At Room Temperature: Store the lavash in a plastic bag or bread box at room temperature for up to 3 days. The plastic bag is key to trapping moisture and keeping it soft.
- Freezing: This bread freezes beautifully. Stack the cooled lavash breads with a piece of parchment paper between each one, place them in a freezer-safe bag, and freeze for up to 3 months.
- Reheating: To reheat, you can warm the lavash in a dry skillet over medium heat for about 30 seconds per side, or spritz it with a little water and warm it in the oven for a few minutes.
Your Passport to Authentic Turkish Baking
This authentic Turkish lavash bread recipe is your gateway to the wonderful world of homemade bread. The process is simple, the ingredients are basic, and the result is a soft, puffy, and incredibly versatile flatbread that will transport your taste buds straight to the heart of Turkey. It’s a rewarding baking project that fills your home with an irresistible aroma and your table with delicious possibilities.
I wholeheartedly invite you to try this recipe and discover the simple joy of baking fresh lavash. Share your results and how you enjoyed your bread in the comments section below. For more recipes that bring global flavors to your kitchen, be sure to subscribe to our blog!
Frequently Asked Questions
Can I make this lavash on the stovetop?
Yes! You can cook the lavash in a hot, dry cast-iron skillet over medium-high heat. Cook for 1-2 minutes per side, until it puffs up and develops charred spots.
Why didn’t my lavash puff up?
The most common reasons are that your oven wasn’t hot enough, the dough was rolled too thick, or your yeast was not active. A very hot surface is essential for the rapid steam creation that causes the puff.
Can I make the dough in advance?
Yes, you can prepare the dough and let it do its first rise in the refrigerator for up to 24 hours. This slow fermentation can even enhance the flavor. Just be sure to let it sit at room temperature for about 30-60 minutes before shaping.
What is the difference between lavash and pita bread?
While both are leavened flatbreads, Turkish lavash is typically rolled much thinner than pita and often bakes up larger and more irregularly shaped. Lavash is often softer and more pliable than the pocketed pita bread.