What if you didn’t have to choose between two of the world’s greatest comfort foods? We’ve all faced that delicious dilemma: do you go for the crispy, saucy, sweet-and-spicy chicken, or a bowl of rich, gooey, creamy mac and cheese?
- Ingredients You’ll Need
- How Long Will This Take?
- Step-by-Step Instructions
- Step 1: Cook the Pasta
- Step 2: Prepare and Fry the Crispy Chicken
- Step 3: Create the Honey Pepper Glaze
- Step 4: Make the Creamy Cheese Sauce (Roux)
- Step 5: Assemble and Serve Your Delight
- Estimated Nutritional Information
- Healthier Alternatives & Variations
- Serving Suggestions
- Common Mistakes to Avoid
- Storing and Reheating
- The Ultimate Comfort Food Mashup
- Frequently Asked Questions (FAQs)
- Q1. Can I make this less spicy?
- Q2. Can I use chicken breasts instead of thighs?
- Q3. Do I really have to shred my own cheese?
- Q4. What’s the best way to make this ahead of time?
- Easy Honey Pepper Chicken Mac and Cheese (Ultimate Recipe)
This is where the ultimate comfort food mashup comes in: the Creamy Honey Pepper Chicken Mac and Cheese Delight. This recipe is the one you didn’t know you were missing, and it’s about to become a new favorite.
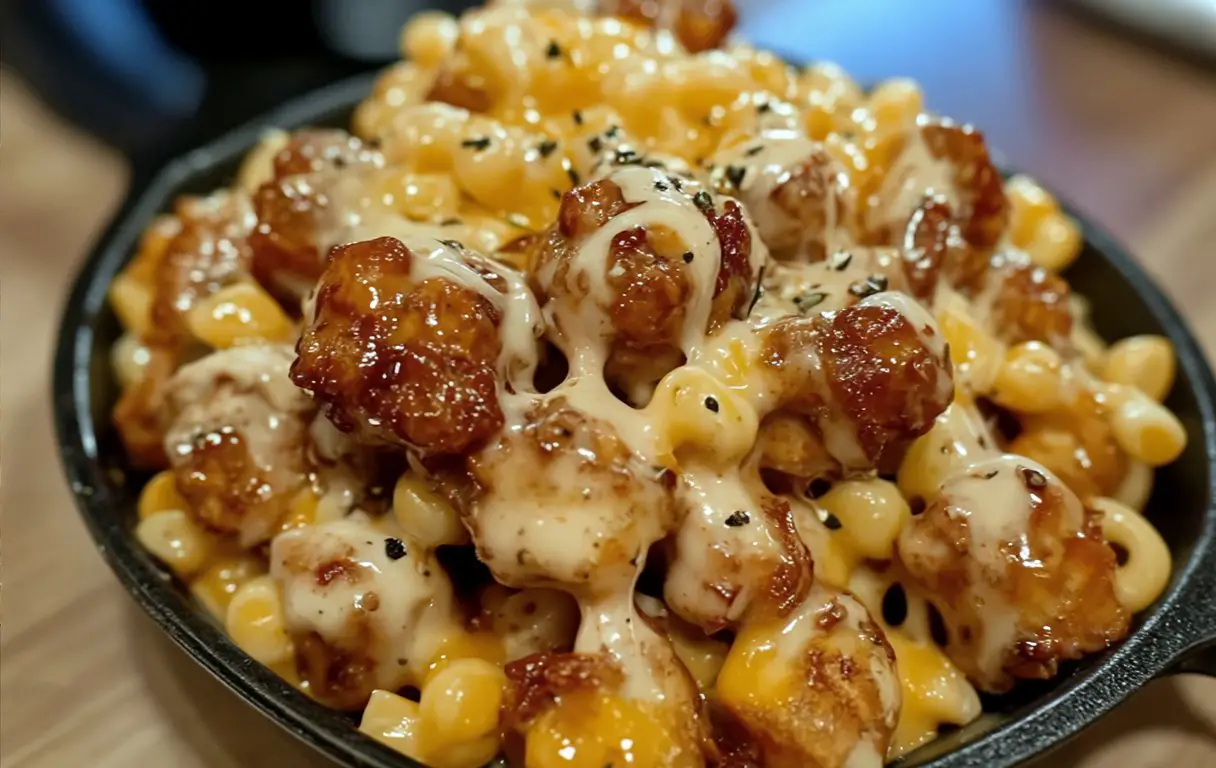
We’re talking about golden, audibly crispy chicken bites tossed in a vibrant, sticky honey pepper glaze. That chicken is then piled high on a bed of the creamiest, dreamiest homemade mac and cheese you’ve ever had. It’s savory, sweet, spicy, and outrageously cheesy all in one bite. This is the perfect show-stopping dinner for a cozy night in, a potluck, or any time you need a serious flavor upgrade.
Ingredients You’ll Need
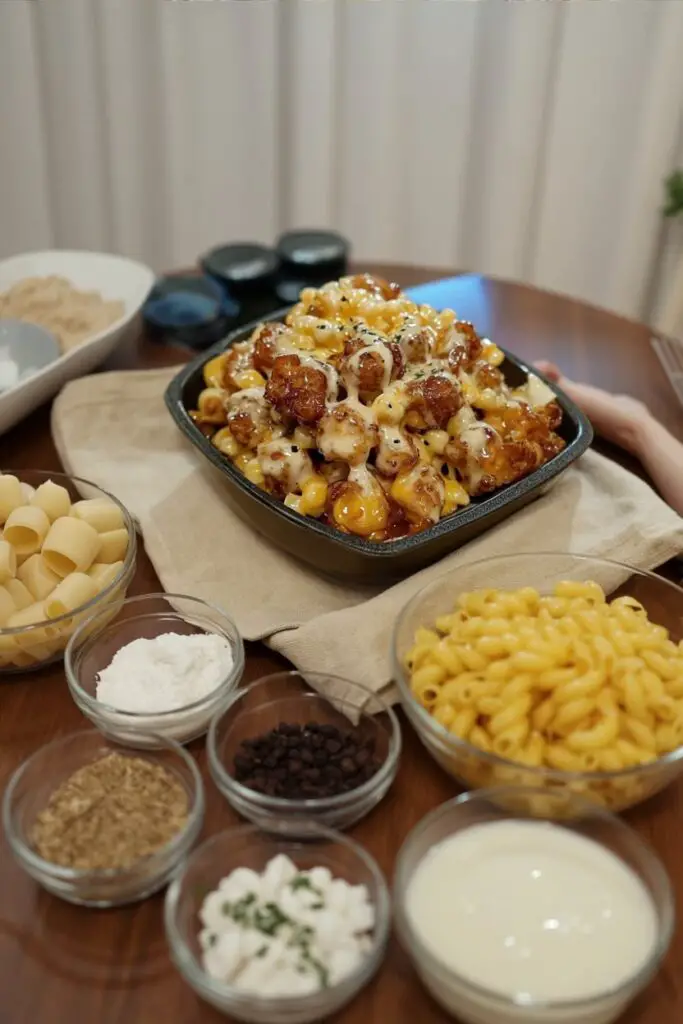
This recipe has three main components: the chicken, the glaze, and the mac. The key to success is prepping your ingredients (mise en place) before you start cooking!
| Ingredient | Amount/Quantity | Notes |
| For the Crispy Chicken | ||
| Boneless, Skinless Chicken | 1.5 lbs (about 680g) | Thighs or breasts, cut into 1-inch pieces |
| All-Purpose Flour | 1/2 cup | |
| Cornstarch | 1/4 cup | This is the secret to extra crispiness! |
| Salt | 1 tsp | |
| Black Pepper | 1/2 tsp | |
| Large Egg | 1 | Beaten |
| Milk | 1/4 cup | |
| Frying Oil | As needed | Vegetable, canola, or peanut oil |
| For the Honey Pepper Glaze | ||
| Honey | 1/2 cup | |
| Soy Sauce | 2 tbsp | Low sodium is recommended |
| Apple Cider Vinegar | 1 tbsp | Adds a crucial tangy balance |
| Gochujang or Sriracha | 1 tbsp | Adjust to your preferred heat level |
| Garlic Powder | 1 tsp | |
| Onion Powder | 1 tsp | |
| Freshly Ground Black Pepper | 1/2 tsp | |
| Red Pepper Flakes | Pinch | Optional, for an extra kick |
| Cornstarch Slurry | 1 tbsp cornstarch + 2 tbsp cold water | |
| For the Creamy Mac & Cheese | ||
| Elbow Macaroni | 12 oz (about 340g) | Cavatappi also works great |
| Unsalted Butter | 4 tbsp (56g) | |
| All-Purpose Flour | 1/4 cup | This is for the roux |
| Whole Milk | 2.5 cups | For ultimate creaminess |
| Salt | 1/2 tsp | |
| Black Pepper | 1/4 tsp | |
| Cayenne Pepper | Pinch | Just a little for depth, not for heat |
| Sharp Cheddar Cheese | 2 cups (8 oz / 225g) | Shred it yourself for best results! |
| Monterey Jack or Gruyère | 1 cup (4 oz / 110g) | Gruyère adds nuttiness, Jack adds creaminess |
| Grated Parmesan Cheese | 1/2 cup | |
| For Garnish | ||
| Fresh Parsley or Chives | As needed | Chopped, for a pop of color |
| Extra Shredded Cheese | As needed | For topping |

How Long Will This Take?
This is a multi-step recipe, but the results are so worth it. While it has a few components, it comes together in just over an hour, making it totally achievable for a show-stopping weeknight dinner.
- Prep time: 30 minutes
- Cook time: 40 minutes
- Total time: 1 hour 10 minutes
Step-by-Step Instructions
Let’s break this down. We’ll cook the pasta, fry the chicken, make the glaze, and then build the cheese sauce.
Step 1: Cook the Pasta
Bring a large pot of water to a rolling boil and season it generously with salt (it should taste like the sea). Add your elbow macaroni and cook according to the package directions, but pull it out when it is al dente—firm to the bite. The pasta will cook a little more in the cheese sauce, and this prevents it from getting mushy. Drain the pasta thoroughly and set it aside.
Step 2: Prepare and Fry the Crispy Chicken
In a shallow dish, whisk together the 1/2 cup flour, 1/4 cup cornstarch, 1 tsp salt, and 1/2 tsp black pepper. In a second shallow dish, beat the egg and the 1/4 cup of milk.
Pat your chicken pieces completely dry with paper towels; this is essential for a crispy crust. Dip each chicken piece first into the egg mixture, letting the excess drip off. Then, dredge it thoroughly in the flour mixture. Pro Tip: Press the flour mixture onto the chicken firmly. This is key to that super crispy, craggy coating.
Heat about 3-4 inches of oil in a heavy-bottomed pot or Dutch oven over medium-high heat to 350°F (175°C). Carefully add the chicken pieces to the hot oil. Do not overcrowd the pot! Fry in batches for 5-7 minutes, turning occasionally, until the chicken is a deep golden brown and cooked through. Remove with a slotted spoon to a wire rack to drain.
Step 3: Create the Honey Pepper Glaze
In a medium saucepan, combine the honey, soy sauce, apple cider vinegar, gochujang/sriracha, garlic powder, onion powder, and black pepper. Bring this mixture to a simmer over medium heat, stirring constantly.
Once it’s simmering, slowly whisk in the cornstarch slurry (the 1 tbsp cornstarch mixed with 2 tbsp cold water). Continue to cook and stir for just 1-2 minutes. You’ll see the sauce thicken up almost instantly into a beautiful, glossy glaze.
Remove the pan from the heat. Add your hot, crispy fried chicken pieces to the saucepan and toss gently to coat every single piece in that sticky, delicious glaze. Keep it warm.
Step 4: Make the Creamy Cheese Sauce (Roux)
In the large pot you used for the pasta (or a clean saucepan), melt the 4 tbsp of butter over medium heat. Whisk in the 1/4 cup of all-purpose flour and cook, whisking constantly, for 1-2 minutes. This is your roux, and it’s the secret to a thick, stable, and creamy cheese sauce.
Gradually, a little at a time, whisk in the 2.5 cups of milk. Pro Tip: Add the first cup of milk slowly and whisk until the mixture is completely smooth before adding the rest. This prevents any lumps from forming.
Continue whisking until the sauce comes to a simmer and has thickened enough to coat the back of a spoon. Reduce the heat to low. Stir in the salt, black pepper, and pinch of cayenne.
Now for the best part: add the shredded cheddar, Monterey Jack/Gruyère, and 1/4 cup of the Parmesan cheese. Stir gently until all the cheese is completely melted and the sauce is velvety smooth. Crucial Tip: Do this on low heat. High heat can make the cheese split or become grainy.
Step 5: Assemble and Serve Your Delight
Add your drained, cooked macaroni back into the pot with the glorious cheese sauce. Stir gently to coat every single noodle.
Spoon generous portions of the creamy mac and cheese into your serving bowls. Arrange the sticky, crispy honey pepper chicken pieces right on top.
For that extra ‘wow’ factor seen in the picture, sprinkle a little extra cheese over the top and place the bowls under your oven’s broiler for 1-2 minutes. Watch it closely! You just want the cheese to get bubbly and slightly golden. Garnish with a sprinkle of fresh parsley or chives for color and freshness, and serve immediately!

Estimated Nutritional Information
This is pure comfort food, so it’s a decadent treat! The following is an estimate per serving, assuming the dish yields 5 large servings.
- Calories: ~850 kcal
- Protein: 42 g
- Fat: 45 g (Saturated: 22 g)
- Carbohydrates: 70 g
- Sugar: 21 g
- Sodium: 1150 mg
Healthier Alternatives & Variations
Want to enjoy this Honey Pepper Chicken Mac and Cheese with a few tweaks? No problem!
- Bake the Chicken: Instead of deep-frying, make baked honey pepper chicken. Dredge the chicken as instructed, place it on a wire rack over a baking sheet, and spray generously with cooking spray. Bake at 400°F (200°C) for 20-25 minutes, or until golden and cooked through. Toss with the glaze after baking.
- Lighter Sauce: You can swap whole milk for 2% milk and use Neufchâtel cheese (often labeled “1/3 less fat”) in place of some of the full-fat cheddar for a lower-fat cheese sauce.
- Add Veggies: Stir in some steamed broccoli florets or roasted cauliflower into the finished mac and cheese for a boost of nutrients.
- Gluten-Free: This recipe adapts well! Use your favorite gluten-free 1-to-1 baking flour for the roux and chicken dredge, and swap the pasta for a good-quality gluten-free elbow macaroni.
Serving Suggestions
This dish is a rich, complete meal, so you don’t need much to go with it. A simple, bright side dish is the perfect companion to cut through the richness.
- Simple Green Salad: A crisp salad with a tangy vinaigrette is the perfect counterbalance.
- Roasted Vegetables: A side of simple roasted broccoli, green beans, or Brussels sprouts adds a nice, earthy flavor.
- Garlic Bread: Lean into the comfort-food theme and serve with a side of garlic bread for dipping into any extra cheese sauce.
- Garnish: Don’t skip the fresh parsley or chives! That little bit of fresh, green flavor really brightens up the whole dish.
Common Mistakes to Avoid
This recipe is straightforward, but here are a few things to watch out for to guarantee success.
- Grainy Cheese Sauce: This is the most common mac and cheese mistake! It happens when the heat is too high when the cheese is added. Solution: Always remove the pot from the direct heat or turn the burner to its absolute lowest setting before you stir in the shredded cheese.
- Soggy Chicken: This can happen for two reasons. Solution 1: Make sure your oil is hot enough (350°F / 175°C) before adding the chicken. Solution 2: Do not overcrowd the pan. Frying in batches ensures the oil temperature stays high, making the chicken crispy, not oily.
- Overcooked, Mushy Pasta: Remember, the pasta will continue to cook when it’s added to the hot cheese sauce. Solution: Always cook your pasta just until al dente. It should still have a firm bite when you drain it.
- Using Pre-Shredded Cheese: This is a big one. Bagged, pre-shredded cheese is coated in starches (like potato starch) to prevent clumping. This starch will make your cheese sauce grainy. Solution: Always buy blocks of cheese and shred it yourself. It only takes a few extra minutes and makes all the difference.
Storing and Reheating
This dish is best enjoyed fresh, especially the crispy chicken, but leftovers are still fantastic.
- In the Refrigerator: Store any leftovers in an airtight container in the fridge for up to 3 days. It’s best to store the chicken and mac and cheese separately, if possible, to keep the chicken from getting too soft.
- Reheating: The mac and cheese will thicken and absorb the sauce as it sits. The best way to reheat it is on the stove over low heat. Add a splash of milk and stir gently to help loosen the sauce and bring back that creamy texture. Reheat the chicken in an air fryer or a 350°F (175°C) oven for 5-8 minutes to revive its crispiness.
The Ultimate Comfort Food Mashup
This Creamy Honey Pepper Chicken Mac and Cheese is more than just a recipe; it’s an event. It’s the perfect answer for a hungry crowd, a cozy date night in, or just a Tuesday when you deserve something amazing. That combination of crispy, spicy-sweet chicken and the ultra-creamy, cheesy pasta is pure, unadulterated joy in a bowl.
We are so excited for you to try this! If you make it, please leave a comment below and rate the recipe. We’d love to hear how it turned out for you or if you made any of your own delicious variations.
Frequently Asked Questions (FAQs)
Q1. Can I make this less spicy?
Absolutely. The heat comes from the gochujang/sriracha and the red pepper flakes. You can easily reduce the amount of sriracha to 1-2 teaspoons, or omit the red pepper flakes entirely for a milder, sweeter glaze.
Q2. Can I use chicken breasts instead of thighs?
Yes, you can. Chicken breasts will work just fine, especially since they are cut into small pieces and fried. However, chicken thighs tend to stay juicier and more tender, which is why I prefer them for this recipe.
Q3. Do I really have to shred my own cheese?
I highly, highly recommend it. Pre-shredded, bagged cheese contains anti-caking agents like potato starch or cellulose, which prevent the cheese from melting smoothly. This is what causes a grainy or clumpy cheese sauce. Shredding a block of cheese yourself is the number one secret to a velvety smooth sauce.
Q4. What’s the best way to make this ahead of time?
The chicken is definitely best made fresh to preserve its crispiness. However, you can absolutely make the entire creamy mac and cheese portion 1-2 days in advance. Store it in an airtight container in the fridge. Reheat it gently on the stove, adding a splash of milk to loosen it up, then fry your chicken and assemble the bowls.
Print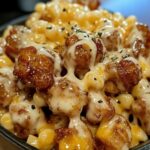
Easy Honey Pepper Chicken Mac and Cheese (Ultimate Recipe)
- Total Time: 1 hour 10 minutes
- Yield: 5 Large Servings 1x
Description
This is the ultimate comfort food mashup: the Creamy Honey Pepper Chicken Mac and Cheese Delight. We’re talking golden, audibly crispy chicken bites tossed in a vibrant, sticky honey pepper glaze. That chicken is then piled high on a bed of the creamiest, dreamiest homemade mac and cheese you’ve ever had. It’s savory, sweet, spicy, and outrageously cheesy all in one bite. This is the perfect show-stopping dinner for a cozy night in.
Ingredients
- 1.5 lbs (about 680g) Boneless, Skinless Chicken (Thighs or breasts), cut into 1-inch pieces
- 1/2 cup All-Purpose Flour
- 1/4 cup Cornstarch
- 1 tsp Salt
- 1/2 tsp Black Pepper
- 1 Large Egg, beaten
- 1/4 cup Milk
- As needed Frying Oil (Vegetable, canola, or peanut oil)
For the Honey Pepper Glaze
- 1/2 cup Honey
- 2 tbsp Soy Sauce (Low sodium recommended)
- 1 tbsp Apple Cider Vinegar
- 1 tbsp Gochujang or Sriracha
- 1 tsp Garlic Powder
- 1 tsp Onion Powder
- 1/2 tsp Freshly Ground Black Pepper
- Pinch Red Pepper Flakes (Optional)
- 1 tbsp cornstarch + 2 tbsp cold water (for slurry)
For the Creamy Mac & Cheese
- 12 oz (about 340g) Elbow Macaroni
- 4 tbsp (56g) Unsalted Butter
- 1/4 cup All-Purpose Flour
- 2.5 cups Whole Milk
- 1/2 tsp Salt
- 1/4 tsp Black Pepper
- Pinch Cayenne Pepper
- 2 cups (8 oz / 225g) Sharp Cheddar Cheese, shredded
- 1 cup (4 oz / 110g) Monterey Jack or Gruyère, shredded
- 1/2 cup Grated Parmesan Cheese
- Optional Garnish: Fresh Parsley or Chives, chopped; Extra Shredded Cheese
Instructions
- Cook Pasta: Bring a large pot of generously salted water to a boil. Add elbow macaroni and cook according to package directions until al dente (firm to the bite). Drain thoroughly and set aside.
- Prep Chicken: In a shallow dish, whisk together the 1/2 cup flour, 1/4 cup cornstarch, 1 tsp salt, and 1/2 tsp pepper. In a second dish, beat the egg and 1/4 cup milk. Pat the chicken pieces completely dry.
- Fry Chicken: Heat 3-4 inches of oil in a heavy-bottomed pot to 350°F (175°C). Dip each chicken piece first in the egg wash, then dredge thoroughly in the flour mixture, pressing to coat. Working in batches, fry for 5-7 minutes, until deep golden brown and cooked through. Remove with a slotted spoon to a wire rack.
- Make Honey Pepper Glaze: In a medium saucepan, combine honey, soy sauce, apple cider vinegar, gochujang/sriracha, garlic powder, onion powder, and black pepper. Bring to a simmer. Whisk in the cornstarch slurry (1 tbsp cornstarch + 2 tbsp cold water) and cook, stirring, for 1-2 minutes until thick and glossy.
- Glaze Chicken: Remove the glaze from the heat. Add the hot, crispy chicken pieces and toss gently to coat every piece. Keep warm.
- Make Cheese Sauce: In a large, clean pot, melt the 4 tbsp of butter over medium heat. Whisk in the 1/4 cup of flour and cook, whisking constantly, for 1-2 minutes to create a roux.
- Build Sauce: Gradually whisk in the 2.5 cups of milk, a little at a time, until smooth. Continue whisking until the sauce simmers and thickens. Reduce heat to low. Stir in the salt, black pepper, and cayenne.
- Melt Cheese: Add the shredded cheddar, Monterey Jack/Gruyère, and 1/2 cup Parmesan. Stir gently on low heat until all cheese is melted and the sauce is velvety smooth.
- Assemble and Serve: Add the cooked macaroni back into the pot with the cheese sauce and stir to combine. Spoon the mac and cheese into bowls. Top with the glazed honey pepper chicken. Garnish with fresh parsley or chives and serve immediately.
Notes
- Al Dente Pasta: Cook the pasta until al dente (firm to the bite). It will cook more in the hot cheese sauce, and this prevents it from getting mushy.
- Dry Chicken is Key: Pat your chicken pieces completely dry with paper towels; this is essential for a crispy crust that sticks.
- Fry in Batches: Do not overcrowd the pot when frying! Frying in batches keeps the oil temperature high, which is the secret to crispy, not soggy, chicken.
- Shred Your Own Cheese: For the creamiest, smoothest sauce, shred your own cheese from a block. Pre-shredded cheese has anti-caking agents that can make the sauce grainy.
- Melt Cheese on Low: Add the cheese on low heat. High heat can cause the cheese to split or become grainy.
- Optional Broil: For an extra “wow” factor, sprinkle extra cheese on the finished bowls and place them under your oven’s broiler for 1-2 minutes. Watch closely to prevent burning!
- Prep Time: 30 minutes
- Cook Time: 40 minutes
- Category: Main Course, Dinner, Pasta
- Method: Frying, Simmering
- Cuisine: American
Nutrition
- Serving Size: 1 serving (1/5th of recipe)
- Calories: 850 kcal
- Sugar: 21 g
- Sodium: 1150 mg
- Fat: 45 g
- Saturated Fat: 22 g
- Unsaturated Fat: 23 g
- Trans Fat: 0 g
- Carbohydrates: 70 g
- Fiber: 2 g
- Protein: 42 g
- Cholesterol: 180 mg