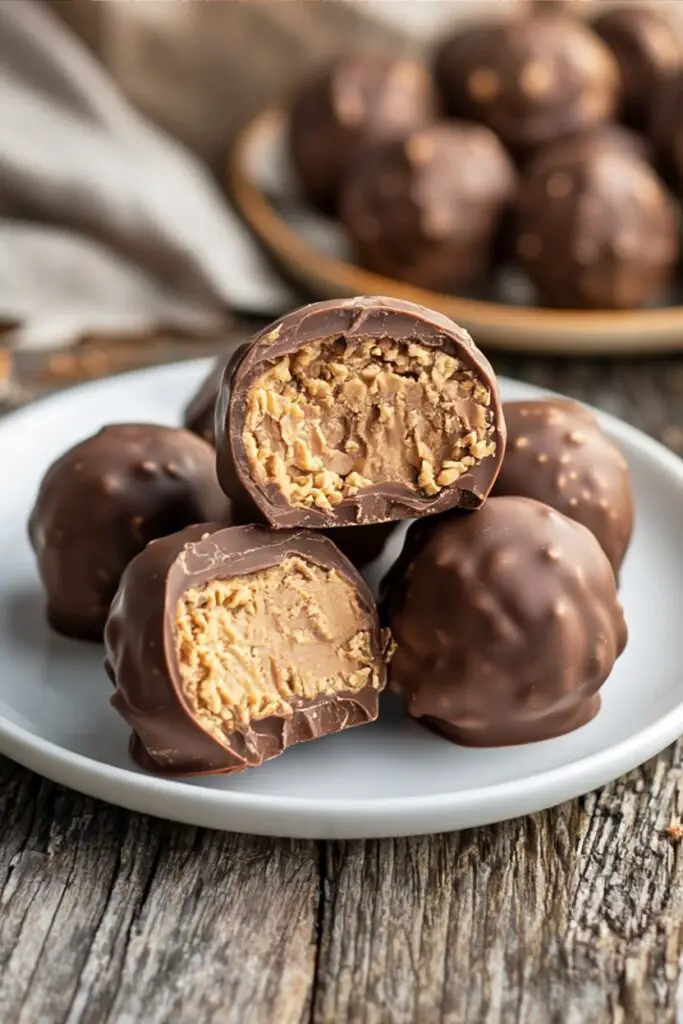
Is there anything more nostalgic than that signature “crispety, crunchety” texture of a Butterfinger bar? I remember sneaking those bright orange wrappers from my Halloween stash just to get that unique, flaky peanut butter fix. But what if I told you that you could elevate that experience into a homemade, gourmet truffle? These Butterfinger Balls are the ultimate no-bake dessert, combining the savory richness of creamy peanut butter with the sweet crunch of crushed toffee candy, all enrobed in a smooth chocolate shell.
- Ingredients
- Timing
- Step-by-Step Instructions
- Step 1: Prepare the Peanut Butter Mixture
- Step 2: Form the Truffles
- Step 3: The First Chill
- Step 4: Melt the Chocolate Coating
- Step 5: Dip and Coat
- Step 6: Final Set
- Step 7: Serve
- Nutritional Information
- Healthier Alternatives
- Serving Suggestions
- Common Mistakes to Avoid
- Storing Tips
- Conclusion
- FAQs
- Q1. Can I use crunchy peanut butter instead of creamy?
- Q2. My chocolate coating is too thick. How do I fix it?
- Q3. Can I use a different candy bar?
- Q4. Is the coconut oil necessary?
- Easy No-Bake Butterfinger Balls: A Crunchy Peanut Butter Treat
This recipe is a lifesaver during the busy holiday season or whenever a sweet tooth strikes. Unlike complicated pastries, these Butterfinger Balls require zero oven time and come together with just a handful of pantry staples. They are essentially a deconstructed candy bar turned into a bite-sized luxury. Whether you are prepping for a cookie swap or just need a sweet treat for movie night, this recipe delivers a perfect balance of textures that store-bought candies just can’t match.
Ingredients
To achieve that perfect creamy-yet-crunchy consistency, simple ingredients are key. Here is what you will need to get started.
| Ingredient | Amount/Quantity | Notes |
| Butterfinger Bars | 2 cups (crushed) | Approx. 8 fun-size bars; provides the signature crunch. |
| Creamy Peanut Butter | 1 ½ cups | Use standard commercial brands (like Jif or Skippy) for best binding. |
| Powdered Sugar | 1 ½ cups | Sifted; sweetens and stiffens the filling. |
| Vanilla Extract | 1 teaspoon | Enhances the chocolate and peanut flavors. |
| Milk Chocolate Chips | 2 cups | Or chocolate melting wafers for the coating. |
| Coconut Oil | 1 tablespoon | Optional; creates a glossy, smoother chocolate shell. |

Tools Needed: Mixing bowl, rubber spatula, baking sheet, parchment paper, microwave-safe bowl, cookie scoop.
Timing
One of the best features of this recipe is how quickly it comes together. While there is some passive chilling time, the active work is minimal.
- Prep Time: 20 minutes
- Chilling Time: 40 minutes (divided)
- Dipping Time: 15 minutes
- Total Time: 1 hour 15 minutes (This is significantly faster than baking a batch of cookies from scratch!)
Step-by-Step Instructions
Step 1: Prepare the Peanut Butter Mixture
In a large mixing bowl, combine the 2 cups of crushed Butterfinger bars, 1 ½ cups of creamy peanut butter, 1 ½ cups of powdered sugar, and 1 teaspoon of vanilla extract.
- Tip: If you have a food processor, pulse the candy bars a few times to get a mix of fine dust and small chunks. This adds a great textural contrast.
- Action: Mix firmly with a rubber spatula or use a hand mixer on low speed until a thick, uniform dough forms. The mixture should hold together easily when pressed.
Step 2: Form the Truffles
Line a baking sheet with parchment or wax paper. Use a cookie scoop or tablespoon to portion the dough so your treats are uniform in size.
- Action: Roll the dough between your palms to form smooth, round balls. Place them on the prepared baking sheet.
- Tip: If the dough is sticking to your hands, lightly grease your palms with a tiny bit of coconut oil or butter.
Step 3: The First Chill
Place the baking sheet with the rolled balls into the refrigerator. Let them chill for about 20 minutes.
- Why this matters: Chilling firms up the peanut butter, making it much easier to dip later without the balls falling apart in the warm chocolate.
Step 4: Melt the Chocolate Coating
While the balls are chilling, prepare your dipping station. In a microwave-safe bowl, combine the 2 cups of milk chocolate chips with the 1 tablespoon of coconut oil (if using).
- Action: Microwave in 30-second intervals. Stir thoroughly between each interval. Repeat until the chocolate is completely smooth and glossy.
- Caution: Do not overheat! If the chocolate gets too hot, it can seize and become grainy.
Step 5: Dip and Coat
Remove the chilled balls from the fridge. Using a fork or a dipping tool, dip each ball into the melted chocolate.
- Technique: Roll it around to ensure it is fully coated. Lift the ball out and tap the fork gently against the side of the bowl to let the excess chocolate drip off.
- Transfer: Place the coated truffle back onto the parchment-lined baking sheet.
- Optional: Before the chocolate sets, sprinkle a few extra crumbs of crushed Butterfinger on top for a professional bakery look.
Step 6: Final Set
Refrigerate the dipped balls for another 15–20 minutes, or until the chocolate shell is completely set and firm to the touch.
Step 7: Serve
Once set, they are ready to eat! Enjoy immediately or transfer them to a storage container.
Nutritional Information
These are indulgent treats, perfect for satisfying a sweet tooth. Here is an estimated nutritional breakdown per ball (assuming a batch of approx. 24 balls):
- Calories: ~160 kcal
- Fat: 9g (Saturated: 4g)
- Carbohydrates: 18g
- Sugar: 15g
- Protein: 3g
- Sodium: 60mg
Note: While high in sugar, the peanut butter provides a small boost of protein, making these a satisfying energy bite in moderation.
Healthier Alternatives
If you love the flavor profile but want to clean up the ingredients, try these swaps:
- Natural Sweeteners: Swap the powdered sugar for a powdered monk fruit or erythritol sweetener to drastically reduce the sugar content.
- Dark Chocolate: Use 70% or higher dark chocolate instead of milk chocolate. This reduces sugar and adds antioxidants.
- Natural Nut Butter: Use organic, no-stir natural peanut butter (ensure it’s not too runny) to avoid hydrogenated oils often found in commercial brands.
- Protein Boost: Add a scoop of vanilla or chocolate protein powder to the filling mixture. You may need to add a splash of almond milk to get the consistency right.
Serving Suggestions
These Butterfinger Balls are versatile crowd-pleasers. Here is how to serve them best:
- Holiday Gift Tins: Place each ball in a mini cupcake liner and arrange them in a festive tin. They make excellent edible gifts for Christmas or Valentine’s Day.
- Dessert Charcuterie: Add them to a dessert board alongside pretzels, fresh strawberries, and marshmallows for a sweet and salty spread.
- Coffee Companion: Serve chilled alongside a hot espresso or latte. The melting chocolate and creamy peanut butter pair perfectly with hot coffee.
- Ice Cream Topper: Chop up a few chilled balls and sprinkle them over vanilla bean ice cream for a gourmet sundae.
Common Mistakes to Avoid
- Seized Chocolate: Even a single drop of water can ruin your melting chocolate, turning it into a paste. Solution: Ensure your bowl and utensils are completely dry before melting.
- Dipping Warm Balls: If you skip the chilling step, the balls will disintegrate in the warm chocolate. Solution: Be patient and let them firm up in the fridge for at least 20 minutes.
- Using Oily Peanut Butter: Natural peanut butters that separate (oil on top) can make the dough too greasy and hard to roll. Solution: Use a “no-stir” variety or mix your natural peanut butter very well and perhaps add a bit more powdered sugar.
Storing Tips
- Refrigerator: For the best texture, store these in an airtight container in the fridge for up to 2 weeks. They taste amazing when chilled!
- Freezer: These freeze beautifully. Place them in a freezer-safe bag or container with parchment paper between layers. They will keep for up to 3 months. Thaw in the fridge overnight or eat them frozen for a firmer treat.
- Room Temperature: You can keep them at room temperature for 3-4 days, but if your kitchen is warm, the chocolate coating may soften and become messy.
Conclusion
These Butterfinger Balls are the definition of high-reward, low-effort baking. They capture the essence of a beloved candy bar but elevate it with a rich, homemade touch. The contrast between the crispety-crunchety interior and the snap of the chocolate shell is truly addictive.
We hope you enjoy making these sweet treats as much as we do! Try this recipe out for your next gathering and watch them disappear. If you loved this recipe, please leave a comment below and rate it! Don’t forget to subscribe to our newsletter for more easy, delicious dessert ideas delivered straight to your inbox.
FAQs
Q1. Can I use crunchy peanut butter instead of creamy?
A. Absolutely! Using crunchy peanut butter adds even more texture to the filling. However, you might find the dough slightly more crumbly to roll, so press the balls firmly together when shaping them.
Q2. My chocolate coating is too thick. How do I fix it?
A. This is common with chocolate chips. Stir in another teaspoon of coconut oil or vegetable shortening into the warm chocolate. This thins it out, making it easier to dip and giving the final shell a nicer sheen.
Q3. Can I use a different candy bar?
A. Yes! This “truffle” base works with many crunchy candy bars. Heath bars (toffee), Kit Kats, or even crushed pretzels work wonderfully if you want to experiment with different flavors.
Q4. Is the coconut oil necessary?
A. It is not strictly necessary, but it is highly recommended. It helps the chocolate melt more evenly and prevents the coating from cracking when you bite into it. If you don’t have coconut oil, vegetable shortening or a neutral oil works too.
Print
Easy No-Bake Butterfinger Balls: A Crunchy Peanut Butter Treat
- Total Time: 1 hour 15 minutes
- Yield: 24 Balls 1x
- Diet: Vegetarian
Description
Is there anything more nostalgic than that signature “crispety, crunchety” texture of a Butterfinger bar? These Butterfinger Balls are the ultimate no-bake dessert, combining the savory richness of creamy peanut butter with the sweet crunch of crushed toffee candy, all enrobed in a smooth chocolate shell. They are essentially a deconstructed candy bar turned into a bite-sized luxury. Perfect for the busy holiday season, these treats require zero oven time and come together with just a handful of pantry staples.
Ingredients
- 2 cups Butterfinger Bars, crushed (approx. 8 fun-size bars)
- 1 1/2 cups Creamy Peanut Butter
- 1 1/2 cups Powdered Sugar, sifted
- 1 teaspoon Vanilla Extract
- 2 cups Milk Chocolate Chips
- 1 tablespoon Coconut Oil (optional, for gloss)
Instructions
- Prepare the Peanut Butter Mixture: In a large mixing bowl, combine the crushed Butterfinger bars, creamy peanut butter, powdered sugar, and vanilla extract. Mix firmly with a rubber spatula or hand mixer on low until a thick, uniform dough forms that holds together when pressed.
- Form the Truffles: Line a baking sheet with parchment paper. Use a cookie scoop to portion the dough. Roll between your palms to form smooth, round balls. Place them on the prepared baking sheet.
- The First Chill: Place the baking sheet in the refrigerator for 20 minutes. This firms up the peanut butter, making it easier to dip later without falling apart.
- Melt the Chocolate: In a microwave-safe bowl, combine the milk chocolate chips and coconut oil. Microwave in 30-second intervals, stirring thoroughly between each, until completely smooth and glossy. Do not overheat.
- Dip and Coat: Remove the chilled balls from the fridge. Using a fork, dip each ball into the melted chocolate, rolling to coat. Tap the fork gently against the bowl to remove excess chocolate. Return to the baking sheet. (Optional: Sprinkle extra crumbs on top before setting).
- Final Set: Refrigerate the dipped balls for another 15–20 minutes until the chocolate shell is firm. Serve immediately or store in a container.
Notes
- Texture Tip: Pulse the candy bars in a food processor to get a mix of fine dust and small chunks for the best textural contrast.
- Sticky Hands: If the dough sticks to your palms while rolling, lightly grease your hands with a tiny bit of coconut oil or butter.
- Chilling is Key: Do not skip the first chilling step. If the balls are too warm, they will fall apart when dipped in the warm chocolate.
- Chocolate Safety: Be careful not to overheat the chocolate, or it will seize and become grainy. Stir frequently during melting.
- Prep Time: 20 minutes
- Cook Time: 40 minutes
- Category: Dessert, No-Bake, Candy
- Method: Chilling, Dipping
- Cuisine: American
Nutrition
- Serving Size: 1 ball
- Calories: 160 kcal
- Sugar: 15 g
- Sodium: 60 mg
- Fat: 9 g
- Saturated Fat: 4 g
- Unsaturated Fat: 5 g
- Trans Fat: 0 g
- Carbohydrates: 18 g
- Fiber: 1 g
- Protein: 3 g
- Cholesterol: 5 mg