What if I told you that you could bake a loaf of stunning, rustic, artisan-style bread with a shatteringly crisp crust and a soft, airy crumb, all with less than 15 minutes of active work? Many people believe that baking incredible bread at home requires a stand mixer, special techniques, and hours of kneading. This recipe is here to joyfully debunk that myth.
- What You’ll Need: Ingredients
- Timing
- Step-by-Step Instructions
- Step 1: Mix the Simple No-Knead Dough
- Step 2: The Long, Slow First Rise (The Magic Step)
- Step 3: Gently Shape the Dough
- Step 4: Preheat the Oven and Dutch Oven
- Step 5: Bake Your Artisan Loaf
- Step 6: Cool Before Slicing
- Nutritional Information
- Healthier Alternatives
- Serving Suggestions
- Common Mistakes to Avoid
- Storing and Make-Ahead Tips
- Conclusion
- FAQs
- Q1. Do I absolutely have to use a Dutch oven?
- Q2. Can I use active dry yeast instead of instant yeast?
- Q3. Why didn’t my dough rise?
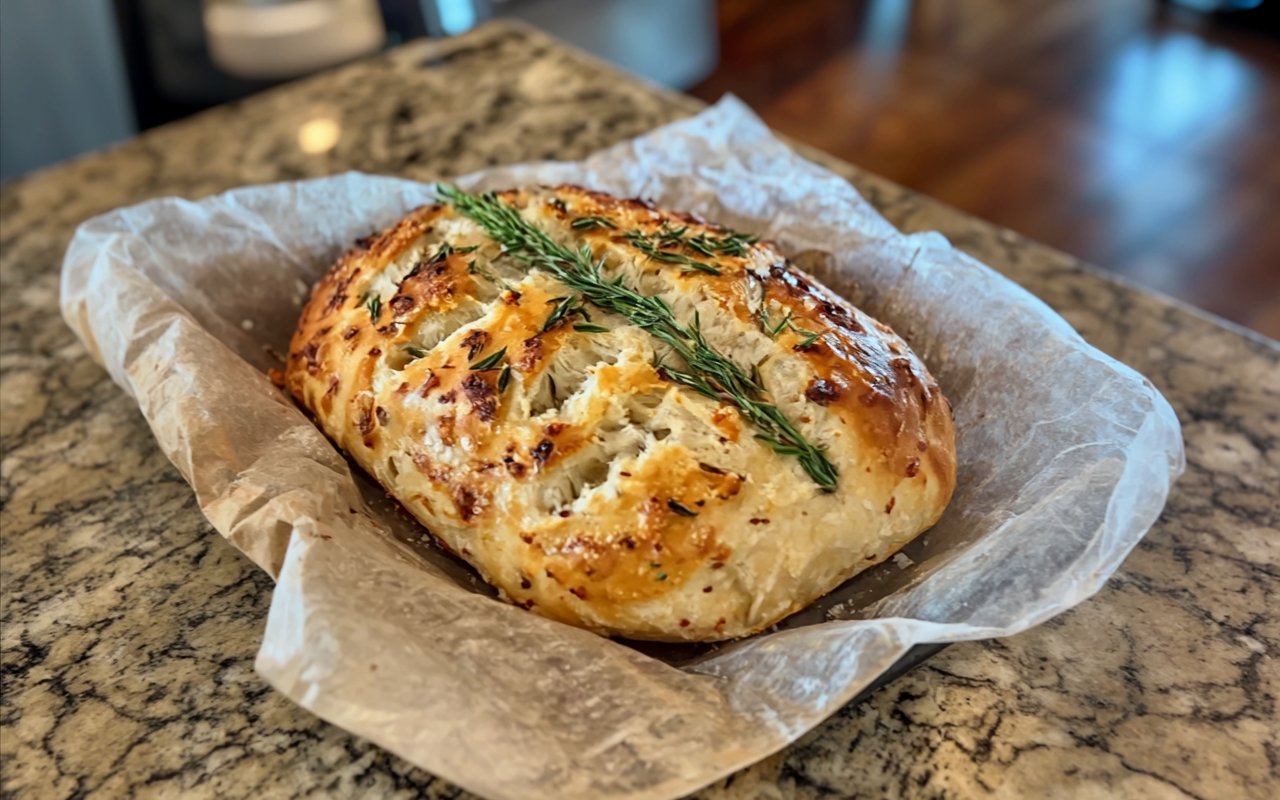
- Easy No-Knead Rosemary Garlic Bread (Artisan Style)
This Rustic No-Knead Rosemary Garlic Bread is a truly magical and foolproof recipe that lets time do all the work for you. By using a long, slow fermentation, the dough develops a complex, delicious flavour all on its own. Infused with the aromas of fresh rosemary and sweet roasted garlic, this is the perfect loaf for beginners and seasoned bakers alike. Prepare to fill your home with the intoxicating scent of freshly baked bread and discover just how easy making a spectacular loaf of no-knead bread can be.
What You’ll Need: Ingredients
This recipe uses a handful of simple, high-quality ingredients to create a truly exceptional loaf of bread.
| Ingredient | Amount/Quantity |
| All-purpose flour or bread flour | 3 cups |
| Fine sea salt | 2 tsp |
| Instant yeast | ½ tsp |
| Warm water (about 110°F/43°C) | 1 ½ cups |
| Fresh rosemary, finely chopped | 2 tbsp |
| Sweet, mashed roasted garlic | 4 cloves |
| Extra virgin olive oil (optional) | 1 tbsp |


Timing
The beauty of this recipe is that nearly all the time is completely hands-off. It’s the perfect project to start one evening and finish the next day.
- Active Preparation Time: 10 minutes
- Rise Time: 12–18 hours (first rise) + 30–40 minutes (second rise)
- Bake Time: 45 minutes
- Total Time: Approximately 13.5 to 19.5 hours
Step-by-Step Instructions
Follow these simple steps to create your own beautiful loaf of rustic, flavourful bread. The process is incredibly simple and rewarding.
Step 1: Mix the Simple No-Knead Dough
In a large bowl, whisk together the flour, salt, and instant yeast until they are evenly combined. Pour in the warm water, then add the chopped rosemary, mashed roasted garlic, and the optional olive oil. Use a spatula or wooden spoon to mix everything together until a shaggy, sticky dough forms and there are no dry patches of flour left. That’s it—no kneading required!
Step 2: The Long, Slow First Rise (The Magic Step)
Cover the bowl with plastic wrap or a clean kitchen towel. Let the dough sit on your counter at room temperature for 12 to 18 hours. During this long, slow fermentation, the yeast will work its magic, creating bubbles and developing a wonderful, complex flavour. You’ll know it’s ready when the dough has more than doubled in size, the surface is dotted with bubbles, and it smells faintly of yeast.
Step 3: Gently Shape the Dough
Lightly flour a clean work surface. Gently scrape the sticky dough out of the bowl and onto the floured surface. The dough will be bubbly and loose. Gently fold the dough over on itself once or twice to form a rough ball. There is no need to knead it; you want to keep as many of those precious air bubbles as possible! Place the shaped dough onto a large piece of parchment paper, cover it lightly with a kitchen towel, and let it rest for another 30–40 minutes.
Step 4: Preheat the Oven and Dutch Oven
About 30 minutes into the dough’s second rest, place a 5 to 6-quart Dutch oven with its lid inside your oven. Preheat the oven to 450°F (230°C). Getting the Dutch oven screaming hot is the secret to achieving that incredible oven spring and a perfectly crisp, golden crust.
Step 5: Bake Your Artisan Loaf
Once the oven and Dutch oven are fully preheated, carefully remove the hot pot from the oven. Use the parchment paper as a sling to safely lower your dough into the hot Dutch oven. Cover with the hot lid and place it back in the oven. Bake for 30 minutes with the lid on. This traps steam and helps the bread rise beautifully. After 30 minutes, remove the lid and bake for an additional 10–15 minutes, until the crust is a deep golden brown.
Step 6: Cool Before Slicing
Using heat-proof mitts, carefully transfer the baked loaf to a wire rack. As tempting as it is to slice into it immediately, let the bread cool for at least one hour before slicing. The bread is still cooking internally as it cools, and slicing it too early can result in a gummy texture.
Nutritional Information
Here is an estimated nutritional breakdown per slice, assuming the loaf is cut into 12 slices.
- Calories: 140 kcal
- Protein: 4 g
- Carbohydrates: 28 g
- Fat: 1 g
- Sodium: 390 mg
This homemade bread is naturally low in fat and free of the preservatives often found in store-bought loaves.
Healthier Alternatives
While this bread is already quite simple and wholesome, here are a few ways to adjust it:
- Add Whole Grains: For a boost of fiber and a nuttier flavour, substitute up to 1 cup of the all-purpose flour with whole wheat flour or spelt flour. This may result in a slightly denser loaf, but it will be delicious.
- Naturally Vegan: This recipe is naturally vegan as written, making it a wonderful option for everyone.
- Control the Sodium: You can slightly reduce the amount of salt if you are watching your sodium intake, though it does play a crucial role in flavour and gluten development.
Serving Suggestions
A loaf of fresh, homemade rosemary garlic bread is incredibly versatile and can be enjoyed in so many ways.
- With Dips and Spreads: Serve thick slices with good-quality olive oil for dipping, a smear of butter, or a creamy hummus.
- Alongside a Meal: This bread is the perfect companion to a hearty soup, a rustic stew, or a large pasta dinner. Use it to sop up every last delicious drop!
- For Gourmet Sandwiches: Slice the loaf for incredible sandwiches or toast it and top it with avocado, a poached egg, or melted cheese for a fantastic breakfast or lunch.
Common Mistakes to Avoid
This no-knead bread recipe is very forgiving, but here are a few tips to ensure success.
- Using Water That’s Too Hot: Water that is too hot will kill your yeast, and your dough won’t rise.
- Solution: Use warm water that feels comfortable to the touch, similar to a baby’s bath (around 110-115°F or 43-46°C).
- Not Preheating the Dutch Oven: A cold pot will not create the intense steam needed for a great crust and rise.
- Solution: Make sure your Dutch oven preheats with the oven for at least 30 minutes so it’s searing hot.
- Slicing into the Bread Too Soon: It’s the ultimate test of patience, but slicing hot bread releases all the internal steam and results in a gummy texture.
- Solution: Let the bread cool on a wire rack for at least one hour. You’ll be rewarded with a perfect crumb and texture.
Storing and Make-Ahead Tips
Here’s how to keep your artisan loaf fresh and delicious.
- Storing: For the best crust, store your cooled loaf in a paper bag or a bread box at room temperature for up to 3 days. Avoid plastic bags, which will trap moisture and make the crust soft.
- Freezing: This bread freezes beautifully. Once completely cooled, you can wrap the entire loaf (or individual slices) tightly in plastic wrap and then foil and freeze for up to 3 months. Let it thaw at room temperature.
Conclusion
Baking a loaf of stunning, rustic bread from scratch is one of the most rewarding kitchen projects you can undertake, and this No-Knead Rosemary Garlic Bread recipe makes it accessible to everyone. With just a few simple ingredients and the magic of time, you can create a loaf that is far superior to anything you can buy at the store. The aroma, the crackle of the crust, and the warm, soft crumb are a true delight.
We hope you feel inspired to bake your own loaf of artisan bread! Give this recipe a try and let us know how it turns out in the comments below. We love seeing your baking successes! Don’t forget to rate the recipe and subscribe for more easy and delicious baking inspiration.
FAQs
Q1. Do I absolutely have to use a Dutch oven?
A Dutch oven is highly recommended as it traps steam, which is what creates that signature crispy, crackly crust. However, if you don’t have one, you can get a similar effect by preheating a pizza stone or a heavy baking sheet and placing a pan of hot water on the lower rack of the oven to create steam.
Q2. Can I use active dry yeast instead of instant yeast?
Yes, you can. Active dry yeast needs to be “proofed” or activated first. Simply sprinkle the active dry yeast over the 1 ½ cups of warm water and let it sit for 5-10 minutes until it becomes foamy before adding it to the dry ingredients.
Q3. Why didn’t my dough rise?
There are a few possible culprits. Your yeast may have been expired (always check the date!), your water may have been too hot or too cold, or the room may have been too chilly. Yeast is a living organism and needs the right conditions to thrive!
Print
Easy No-Knead Rosemary Garlic Bread (Artisan Style)
- Total Time: 16 hours 30 minutes
- Yield: 12 slices 1x
Description
What You’ll Need: Ingredients. A handful of pantry staples plus rosemary, roasted garlic, and a screaming-hot Dutch oven deliver a rustic artisan loaf with a crackly crust and custardy crumb—no kneading required.
Ingredients
No-Knead Dough
- 3 cups all-purpose flour or bread flour
- 2 tsp fine sea salt
- 1/2 tsp instant yeast
- 1 1/2 cups warm water (about 110°F/43°C)
- 2 Tbsp fresh rosemary, finely chopped
- 4 cloves sweet, mashed roasted garlic
- 1 Tbsp extra virgin olive oil (optional)
Instructions
- Mix the simple no-knead dough: In a large bowl, whisk flour, salt, and instant yeast. Add warm water, rosemary, roasted garlic, and olive oil (optional). Stir until a shaggy, sticky dough forms and no dry flour remains.
- Long, slow first rise: Cover the bowl and let rest at room temperature for 12–18 hours, until more than doubled, bubbly on top, and fragrant.
- Gently shape: Lightly flour the counter. Scrape out the dough, then fold it over itself once or twice into a rough ball. Keep the air bubbles. Place on parchment, cover with a towel, and rest 30–40 minutes.
- Preheat Dutch oven: About 30 minutes into the second rest, place a 5–6 qt Dutch oven with lid in the oven and preheat to 450°F (230°C).
- Bake: Carefully lift the dough on the parchment into the hot pot. Cover and bake 30 minutes. Uncover and bake 10–15 minutes more, until deep golden and crisp.
- Cool before slicing: Transfer loaf to a wire rack and cool at least 1 hour for best texture before slicing.
Notes
Pro tips: For chewier crumb, use bread flour. Dough should be sticky—avoid extra flour. If your kitchen is cool, extend the first rise. For extra steam, mist the dough lightly before covering the pot. Add-ins like olives or lemon zest pair beautifully with rosemary and garlic.
- Prep Time: 10 minutes
- Cook Time: 45 minutes
- Category: Bread
- Cuisine: Artisan Bread
Nutrition
- Calories: 140
- Sodium: 390
- Fat: 1
- Carbohydrates: 28
- Protein: 4