What’s better than a warm, gooey chocolate chip cookie fresh from the oven? How about an entire pan of warm, gooey chocolate chip cookie goodness, ready in minutes with minimal effort? If you love the taste of classic cookies but dread scooping individual dough balls, this recipe is about to change your life.
- Ingredients
- Timing
- Step-by-Step Instructions
- Step 1: Preheat Oven and Prepare Pan
- Step 2: Combine Wet Ingredients
- Step 3: Add Eggs, Milk, and Vanilla
- Step 4: Add Dry Ingredients
- Step 5: Mix the Dough
- Step 6: Fold in Chocolate Chips
- Step 7: Spread Dough in Pan
- Step 8: Top and Bake
- Step 9: Cool Completely Before Cutting
- Nutritional Information
- Healthier Alternatives
- Serving Suggestions
- Common Mistakes to Avoid
- Storing Tips
- Conclusion
- FAQs
- Q1: Can I add nuts or other mix-ins?
- Q2: Can I use a different size pan?
- Q3: Why use melted butter instead of creamed butter?
- Q4: Can I chill the dough before baking?
- Easy Sheet Pan Chocolate Chip Cookies (Perfect for a Crowd!)
These incredible Sheet Pan Chocolate Chip Cookies deliver all the chewy, chocolatey perfection you crave, baked into one giant cookie bar. It’s the ultimate hack for parties, potlucks, or simply when you need a big batch of deliciousness fast. Forget chilling dough or waiting for multiple batches – this sheet pan cookies method is simple, fast, and yields perfectly soft and chewy results every single time. Get ready for cookie bliss!
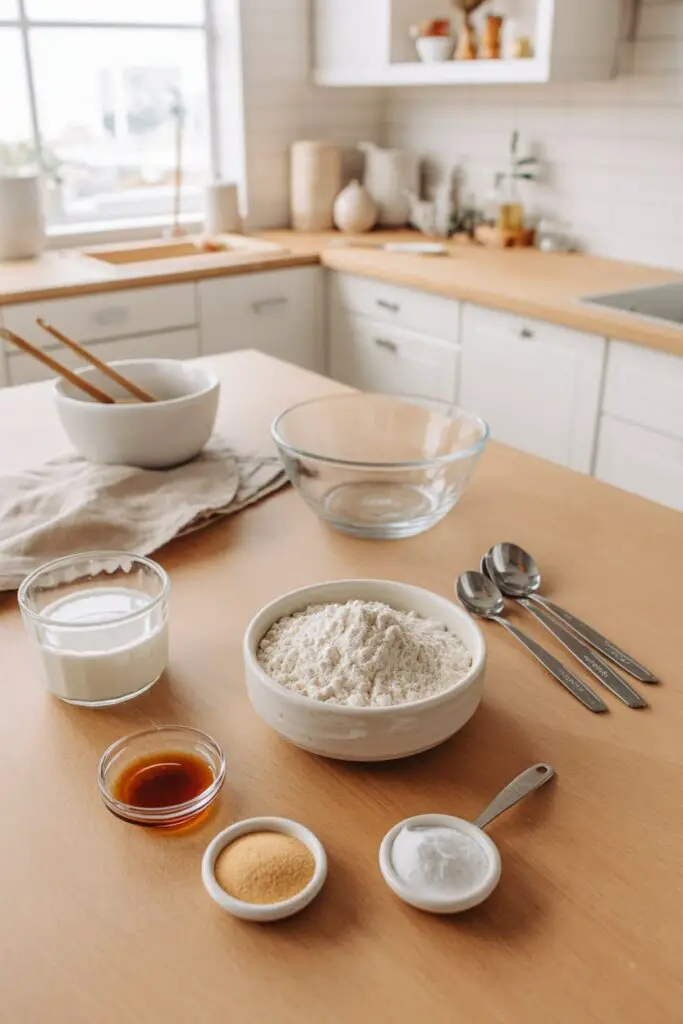
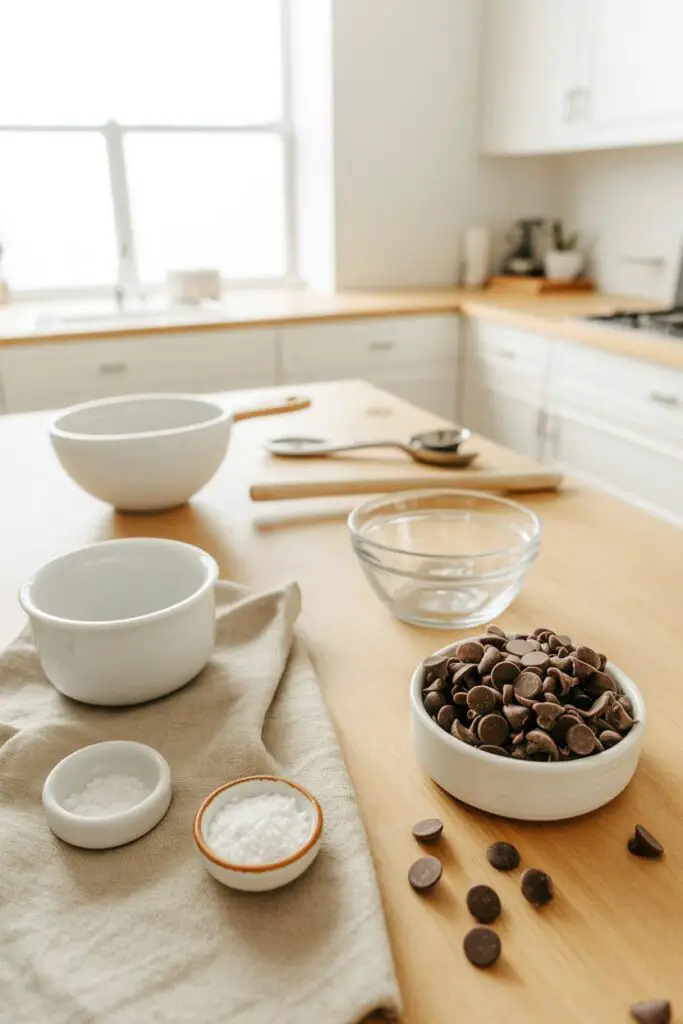
Ingredients
This recipe uses melted butter and an extra egg yolk for an incredibly chewy texture. Using room temperature eggs is recommended.
| Ingredient | Amount/Quantity | Notes |
| Unsalted Butter, melted & cooled | 1 cup (2 sticks) | Slightly cooled prevents scrambling eggs |
| Dark Brown Sugar, packed | 1 ½ cups | Provides moisture and deep flavor; light brown sugar works |
| White Granulated Sugar | 1 cup | For sweetness and crisp edges |
| Large Eggs | 2 | Room temperature recommended |
| Large Egg Yolks | 2 | Room temperature (adds richness & chewiness) |
| Whole Milk | 2 Tbsp. | Room temperature |
| Pure Vanilla Extract | 1 ½ Tbsp. | Use the good stuff! |
| All-Purpose Flour | 3 ½ cups | Spoon into cup & level, do not scoop |
| Cornstarch | 2 tsp. | Keeps the cookies tender |
| Baking Soda | 1 tsp. | For leavening |
| Baking Powder | 1 tsp. | For extra lift |
| Kosher Salt | 1 ½ tsp. | Balances sweetness; use less if using table salt |
| Chocolate Chips or Chunks | 2 cups, plus more for topping | Use your favorite type (semi-sweet, milk, dark) |

Timing
This recipe comes together remarkably fast, making it perfect for satisfying sudden cookie cravings or last-minute gatherings.
- Preparation Time: 15 minutes
- Cooking Time: 22 minutes
- Cooling Time: 30 minutes (minimum before cutting)
- Total Time: Approximately 1 hour 10 minutes
Step-by-Step Instructions
Follow these easy steps to bake a perfect pan of chewy chocolate chip cookie bars.
Step 1: Preheat Oven and Prepare Pan
First, position an oven rack in the center of your oven and preheat to 325°F (160°C). Generously spray a standard half-sheet pan (approximately 13×18 inches) with non-stick cooking spray. Alternatively, line it with parchment paper for easy removal.
- Actionable Tip: A lower oven temperature helps these large bars bake evenly without the edges getting too dark before the center is cooked.
Step 2: Combine Wet Ingredients
In a large mixing bowl, combine the slightly cooled melted butter, packed dark brown sugar, and white granulated sugar. Whisk vigorously until the mixture is smooth and well combined, ensuring there are no large clumps of brown sugar remaining.
- Actionable Tip: Whisking the sugars thoroughly into the melted butter helps create that desirable chewy texture.
Step 3: Add Eggs, Milk, and Vanilla
Add the room temperature eggs, egg yolks, milk, and vanilla extract to the butter-sugar mixture. Whisk again until everything is fully incorporated and the mixture is smooth and glossy.
- Actionable Tip: Room temperature eggs emulsify better into the batter, leading to a more uniform texture in the final cookie bars.
Step 4: Add Dry Ingredients
Add the all-purpose flour (remember to spoon and level!), cornstarch, baking soda, baking powder, and kosher salt directly into the bowl with the wet ingredients.
- Actionable Tip: For the most accurate flour measurement, gently spoon the flour into your measuring cup and then level off the top with a straight edge. Scooping directly from the bag can pack in too much flour, leading to dry bars.
Step 5: Mix the Dough
Using a sturdy rubber spatula or wooden spoon, gently fold the dry ingredients into the wet ingredients until they are mostly combined. You should still see some streaks of flour.
- Actionable Tip: Do not overmix! Mix only until the ingredients start coming together. Overmixing will develop the gluten and result in tough, cakey bars instead of chewy ones.
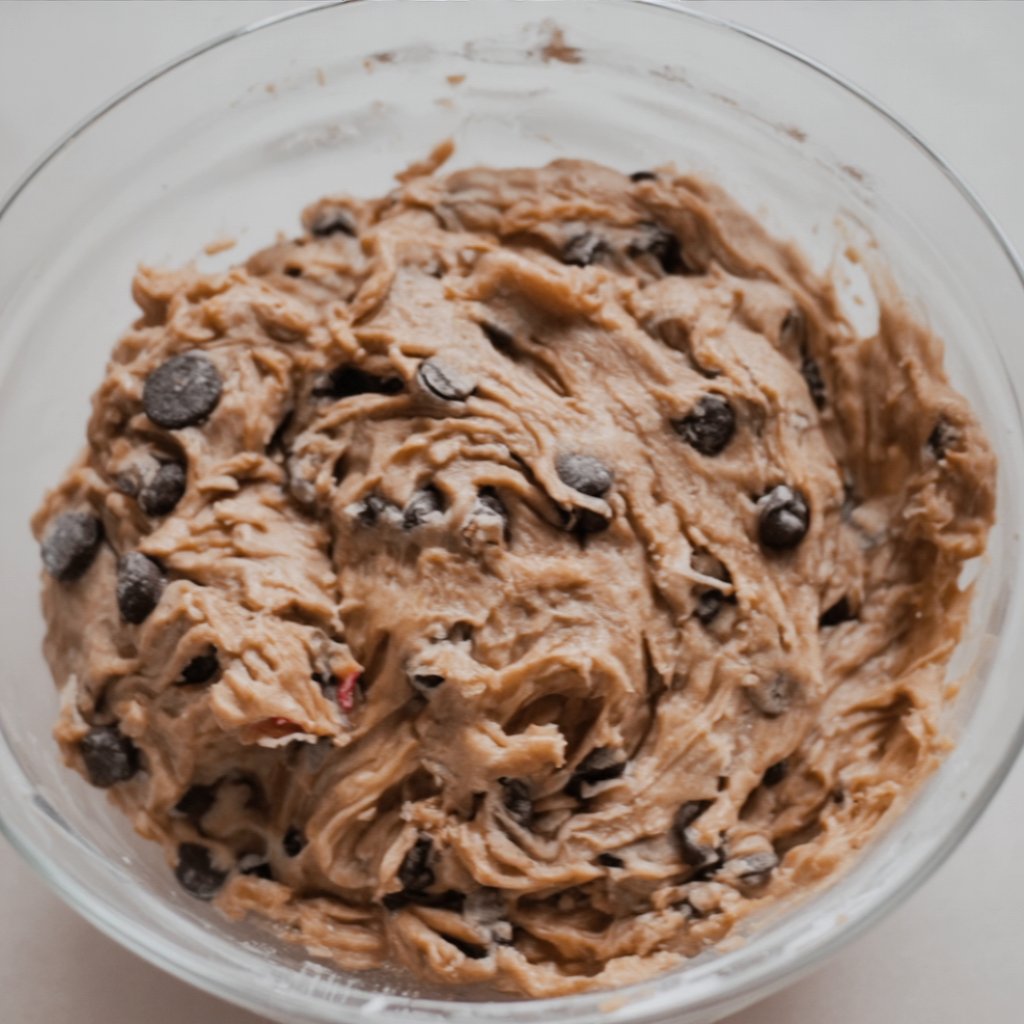
Step 6: Fold in Chocolate Chips
Add the 2 cups of chocolate chips to the bowl. Continue to fold the batter gently until the chocolate chips are evenly distributed and the last streaks of flour have just disappeared. The dough will be soft.
- Actionable Tip: Use a mix of chocolate chip sizes or chopped chocolate bars for varied texture and delicious melted pools throughout the sheet pan cookies.
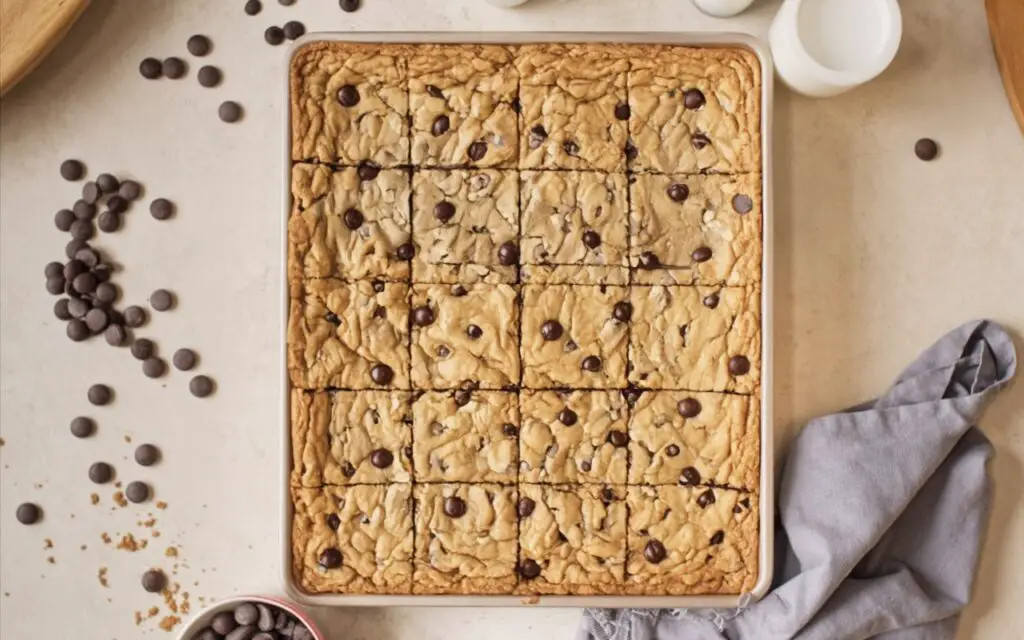
Step 7: Spread Dough in Pan
Turn the soft cookie dough out onto your prepared baking sheet. Using your hands (lightly greased if needed) or an offset spatula, press and spread the dough evenly across the entire surface of the pan, making sure it reaches all the corners and is relatively level.
- Actionable Tip: It might seem like the dough won’t cover the whole pan at first, but trust the process! Gently work it towards the edges; it will spread further as it bakes.
Step 8: Top and Bake
Sprinkle extra chocolate chips evenly over the top of the dough, if desired. Bake for approximately 22 minutes. The edges should look set and lightly golden, but the center should still look slightly soft and potentially a little underdone.
- Actionable Tip: Slightly underbaking is key for achieving that perfectly soft and chewy texture. The bars will continue to cook from the residual heat of the pan as they cool (“carry-over cooking”). If the bars look very puffy, you can gently tap the pan on the counter once or twice right after removing it from the oven to help them settle.
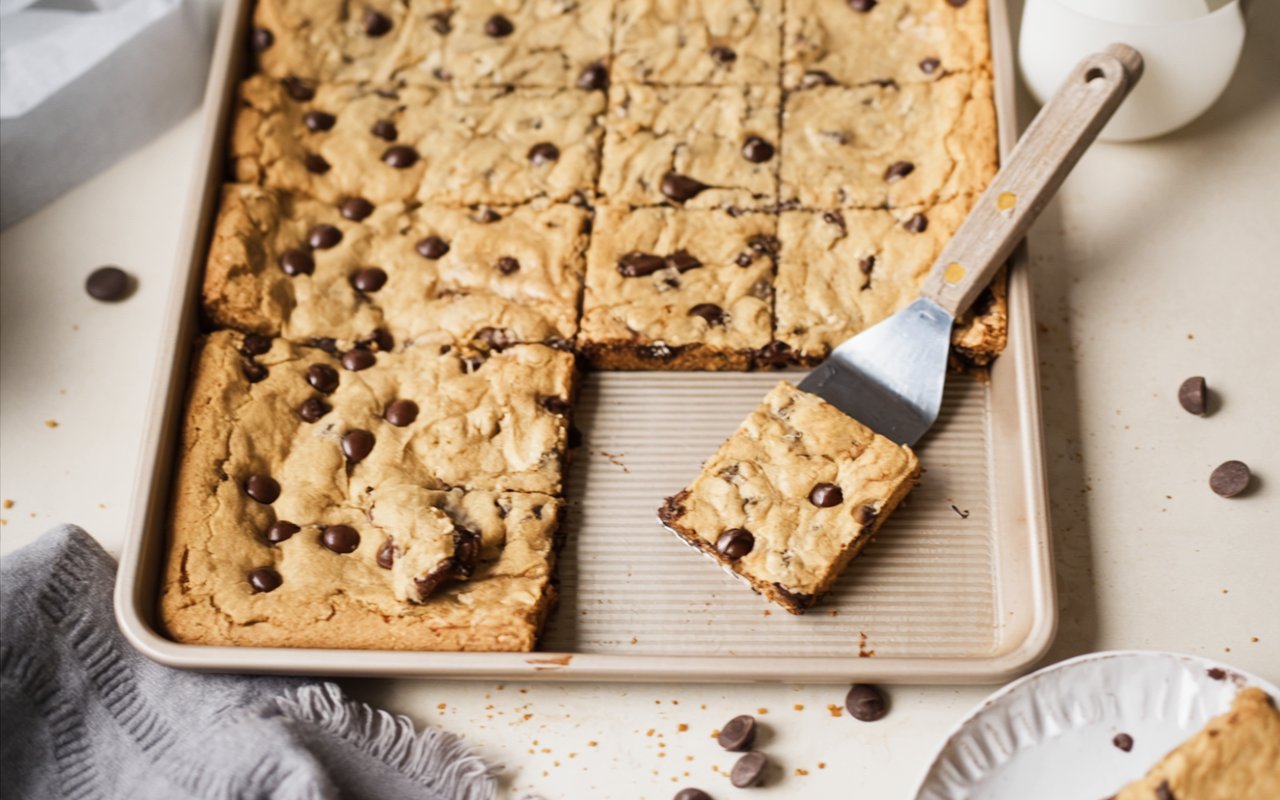
Step 9: Cool Completely Before Cutting
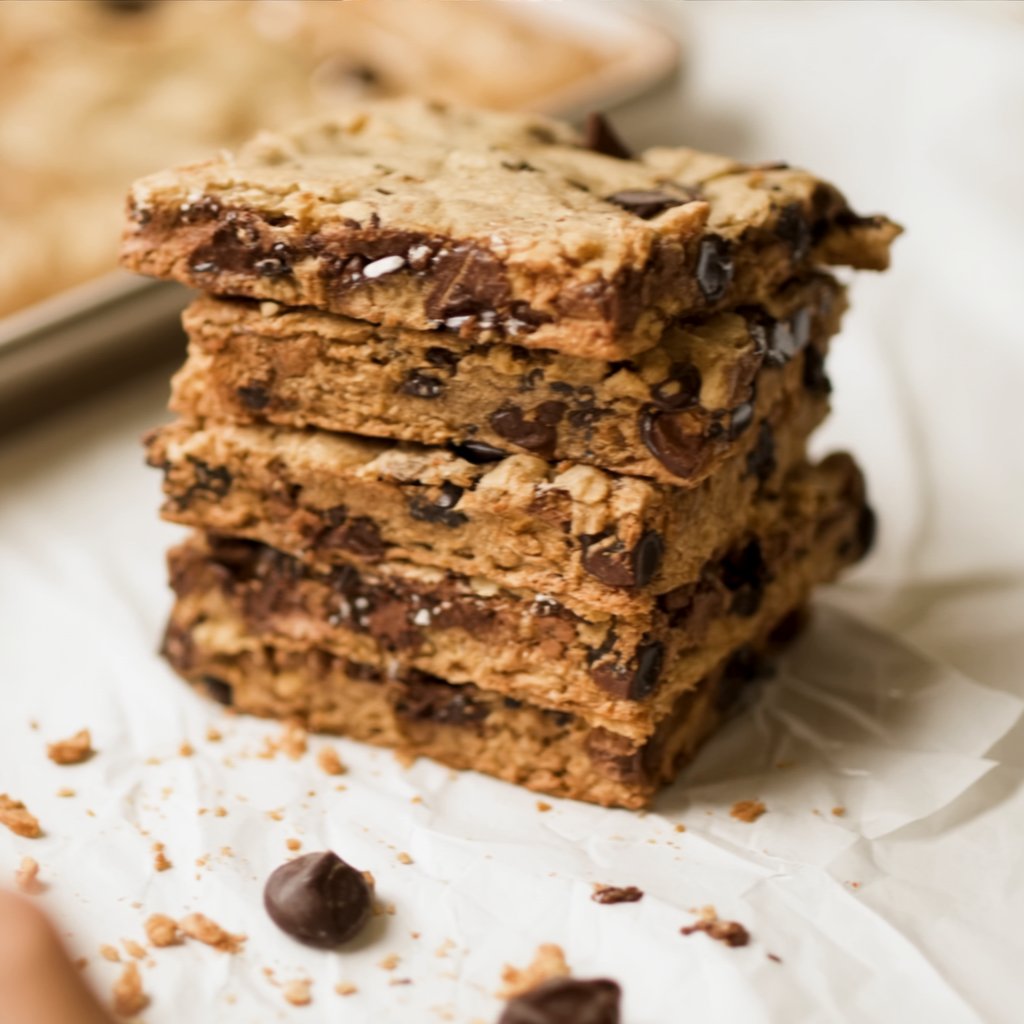

Remove the sheet pan from the oven and place it on a wire rack. Let the Sheet Pan Chocolate Chip Cookies cool completely in the pan before cutting them into squares or bars.
- Actionable Tip: This is the hardest part – waiting! But cutting into the bars while they’re warm will result in crumbly, messy squares. Cooling completely allows them to set fully for clean cuts and the perfect chewy texture.
Nutritional Information
Nutritional information will vary based on the size you cut the bars and the specific ingredients used. This section is a placeholder; please calculate based on your needs. (Expect values typical for indulgent cookies – high in sugar, carbs, and fat).
- Calories: (Estimate needed)
- Protein: (Estimate needed)
- Carbohydrates: (Estimate needed)
- Fat: (Estimate needed)
- (Consider adding sugar content)
Healthier Alternatives
While these are designed to be decadent, you can make some adjustments:
- Whole Wheat Flour: Substitute up to half of the all-purpose flour with white whole wheat flour for added fiber. The texture will be slightly denser.
- Reduce Sugar: You can experiment with slightly reducing the brown and white sugar amounts (e.g., by ¼ cup each), but significant reductions may impact the chewy texture and spread.
- Mix-Ins: Consider adding chopped nuts (like walnuts or pecans) or rolled oats along with the chocolate chips for added texture and nutrients.
Serving Suggestions
These Sheet Pan Cookies are perfect for feeding a crowd or portioning out for later.
- Party Perfect: Cut into small squares for an easy-to-serve dessert platter at parties, potlucks, or bake sales.
- Lunchbox Treat: A bar makes a wonderful sweet treat in a lunchbox.
- A La Mode: Serve a slightly warmed bar topped with a scoop of vanilla bean ice cream and a drizzle of chocolate or caramel sauce for an incredible dessert.
- Simple Pleasure: Enjoy a bar just as it is with a cold glass of milk or a hot cup of coffee.
Common Mistakes to Avoid
For perfect sheet pan cookies every time, avoid these common pitfalls:
- Overmixing the Dough: Creates tough, cakey bars. Solution: Fold the dry ingredients in gently and stop mixing as soon as the flour disappears.
- Overbaking: Results in dry, hard cookie bars. Solution: Pull the pan from the oven when the center still looks slightly soft and underdone. Remember carry-over cooking!
- Cutting While Warm: Leads to messy, crumbly bars. Solution: Be patient and let the cookie slab cool completely in the pan before attempting to slice.
- Incorrect Flour Measurement: Scooping flour directly from the bag packs too much in. Solution: Always spoon flour into the measuring cup and level it off for accurate measurement and the best texture.
Storing Tips
These bars store wonderfully, making them great for making ahead.
- Room Temperature: Once completely cooled and cut, store the bars in an airtight container at room temperature. Layer with parchment paper if stacking. They will stay soft and chewy for up to 5 days.
- Freezing: Wrap individual bars tightly in plastic wrap and then place them in a freezer-safe bag or container. Freeze for up to 3 months. Thaw at room temperature or gently warm in the microwave.
Conclusion
These Sheet Pan Chocolate Chip Cookies are the ultimate answer to easy, crowd-pleasing baking. Delivering all the chewy, chocolatey goodness of a classic cookie without the individual scooping, this recipe is a true time-saver and guaranteed winner. Perfect for any occasion that calls for a delicious, comforting treat, these bars are sure to become a staple in your baking repertoire.
Ready for the easiest batch of chocolate chip cookies ever? Give this sheet pan method a try! Let us know how much you loved them in the comments below. Don’t forget to rate the recipe and subscribe for more simple and delicious baking hacks!
FAQs
Q1: Can I add nuts or other mix-ins?
Absolutely! Feel free to fold in 1-2 cups of chopped walnuts, pecans, M&Ms, toffee bits, or other favorite mix-ins along with the chocolate chips in Step 6.
Q2: Can I use a different size pan?
This recipe is designed for a standard half-sheet pan (approx. 13×18 inches). You can use a smaller pan (like 9×13 inches), but the bars will be much thicker, and the baking time will need to be significantly increased (likely 30-40 minutes). Watch carefully for doneness.
Q3: Why use melted butter instead of creamed butter?
Melted butter contributes to a denser, chewier cookie texture, which is perfect for these bars. Creaming softened butter incorporates more air, leading to a cakier result.
Q4: Can I chill the dough before baking?
There’s no need to chill the dough for this recipe! It’s designed to be mixed and immediately pressed into the pan, making it extra quick and easy. Chilling would make it difficult to spread evenly.
Print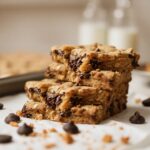
Easy Sheet Pan Chocolate Chip Cookies (Perfect for a Crowd!)
- Total Time: 1 hour 10 minutes
- Yield: 24–30 Bars 1x
Description
What’s better than a warm, gooey chocolate chip cookie? An entire pan of warm, gooey chocolate chip cookie goodness, ready in minutes with minimal effort! These incredible Sheet Pan Chocolate Chip Cookies deliver all the chewy, chocolatey perfection you crave, baked into one giant cookie bar. It’s the ultimate hack for parties, potlucks, or when you need a big batch of deliciousness fast. Forget chilling dough – this method is simple, fast, and yields perfectly soft and chewy results
Ingredients
- 1 cup (2 sticks) Unsalted Butter, melted & slightly cooled
- 1 1/2 cups Dark Brown Sugar, packed
- 1 cup White Granulated Sugar
- 2 Large Eggs, room temperature
- 2 Large Egg Yolks, room temperature
- 2 Tbsp. Whole Milk, room temperature
- 1 1/2 Tbsp. Pure Vanilla Extract
- 3 1/2 cups All-Purpose Flour, spooned & leveled
- 2 tsp. Cornstarch
- 1 tsp. Baking Soda
- 1 tsp. Baking Powder
- 1 1/2 tsp. Kosher Salt
- 2 cups Chocolate Chips or Chunks, plus more for topping
Instructions
- Preheat Oven and Prepare Pan: Position an oven rack in the center and preheat to 325°F (160°C). Generously spray a 13×18 inch half-sheet pan with non-stick cooking spray or line it with parchment paper.
- Combine Wet Ingredients: In a large bowl, whisk together the slightly cooled melted butter, packed dark brown sugar, and granulated sugar until smooth and well combined.
- Add Eggs, Milk, and Vanilla: Add the room temperature eggs, egg yolks, milk, and vanilla extract. Whisk again until fully incorporated and the mixture is smooth and glossy.
- Add Dry Ingredients: Add the all-purpose flour, cornstarch, baking soda, baking powder, and kosher salt directly into the bowl with the wet ingredients.
- Mix the Dough: Using a sturdy rubber spatula or wooden spoon, gently fold the dry ingredients into the wet ingredients until mostly combined (some streaks of flour should remain). Do not overmix.
- Fold in Chocolate Chips: Add the 2 cups of chocolate chips. Continue to fold gently until the chips are evenly distributed and the last streaks of flour have just disappeared. The dough will be soft.
- Spread Dough in Pan: Turn the soft dough out onto the prepared baking sheet. Using lightly greased hands or an offset spatula, press and spread the dough evenly across the entire pan, reaching the corners.
- Top and Bake: Sprinkle extra chocolate chips over the top of the dough. Bake for approximately 22 minutes. The edges should look set and lightly golden, but the center should still look slightly soft.
- Cool Completely Before Cutting: Remove the sheet pan from the oven and place it on a wire rack. Let the cookie bars cool completely in the pan before cutting them into squares.
Notes
- Low & Slow Bake: A lower oven temperature (325°F) helps these large bars bake evenly without the edges getting too dark before the center is cooked.
- Accurate Flour: For the best texture, gently spoon the flour into your measuring cup and level it off. Scooping directly from the bag can pack in too much flour, leading to dry bars.
- Don’t Overmix: Mix only until the ingredients start coming together. Overmixing will develop the gluten and result in tough, cakey bars instead of chewy ones.
- Underbake Slightly: Slightly underbaking is key for achieving that perfectly soft and chewy texture. The bars will continue to cook from the residual heat of the pan as they cool.
- Cooling is Crucial: Waiting for the bars to cool completely is essential! Cutting into them while warm will result in crumbly, messy squares. Cooling allows them to set fully for clean cuts.
- Prep Time: 15 minutes
- Cook Time: 22 minutes
- Category: Dessert, Cookies, Bars
- Method: Baking
- Cuisine: American
Nutrition
- Serving Size: 1 bar
- Calories: 320 kcal
- Sugar: 28 g
- Sodium: 160 mg
- Fat: 16 g
- Saturated Fat: 9 g
- Unsaturated Fat: 7 g
- Trans Fat: 0.5 g
- Carbohydrates: 42 g
- Fiber: 1.5 g
- Protein: 3 g
- Cholesterol: 50 mg