Does the thought of creating an impressive Halloween dessert send a shiver down your spine? It’s easy to feel pressured to make something that looks spectacular, but who has the time for complex, multi-day baking projects? What if you could craft a show-stopping, spooky centerpiece that looks like it took hours, but actually starts with a simple box of cake mix?
- Ingredients
- Timing
- Step-by-Step Instructions
- Step 1: Prepare Your Pans & Oven
- Step 2: Mix the Devil’s Food Batter
- Step 3: Bake and Cool the Cakes
- Step 4: Create the Blackout Frosting
- Step 5: Assemble and Frost Your Cake
- Step 6: Spin the Marshmallow Web
- Nutritional Information
- Healthier Alternatives
- Serving Suggestions
- Common Mistakes to Avoid
- Storing Tips
- Conclusion
- FAQs
- Q1. Do I have to use coffee in the cake batter?
- Q2. My black frosting looks more like dark gray. How can I get it truly black?
- Q3. Can I make this cake ahead of a party?
- Q4. Can I use a different flavor of cake mix?
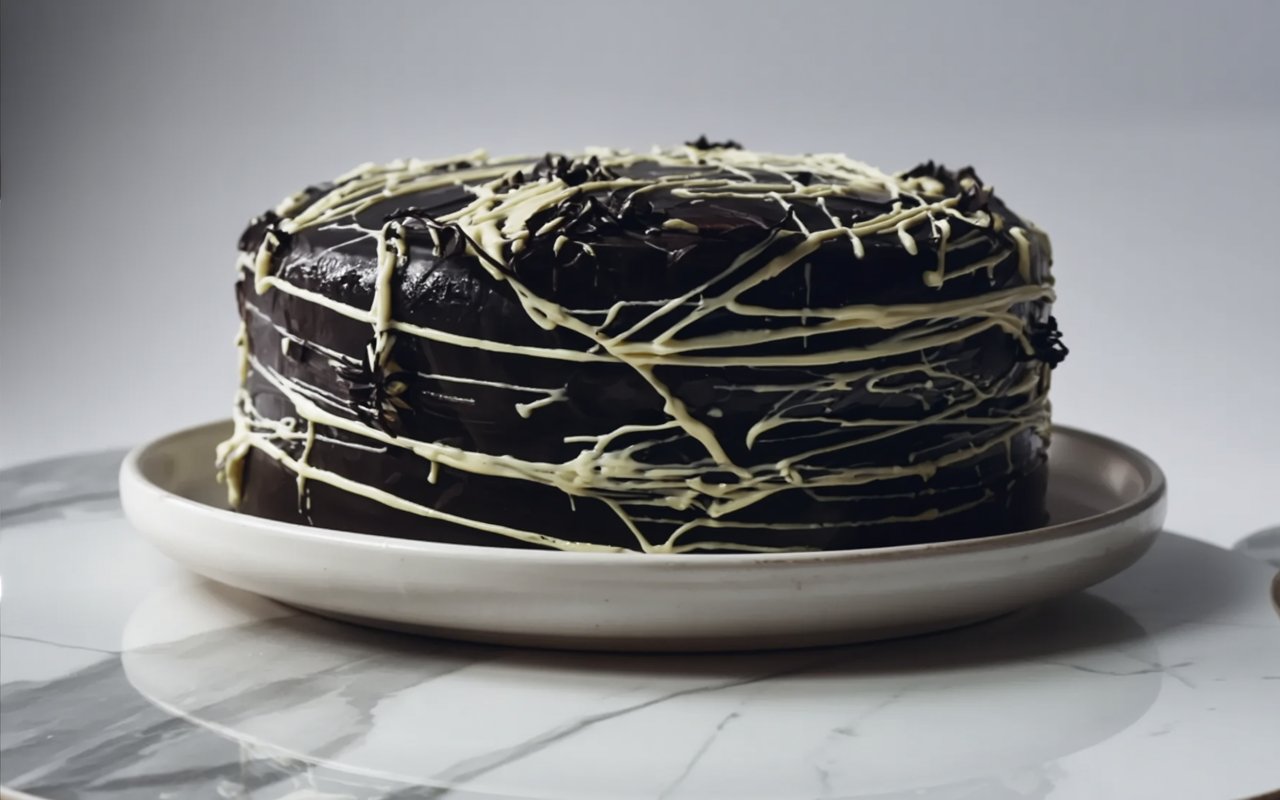
- Easy Spiderweb Cake Recipe for a Spooky Halloween Treat
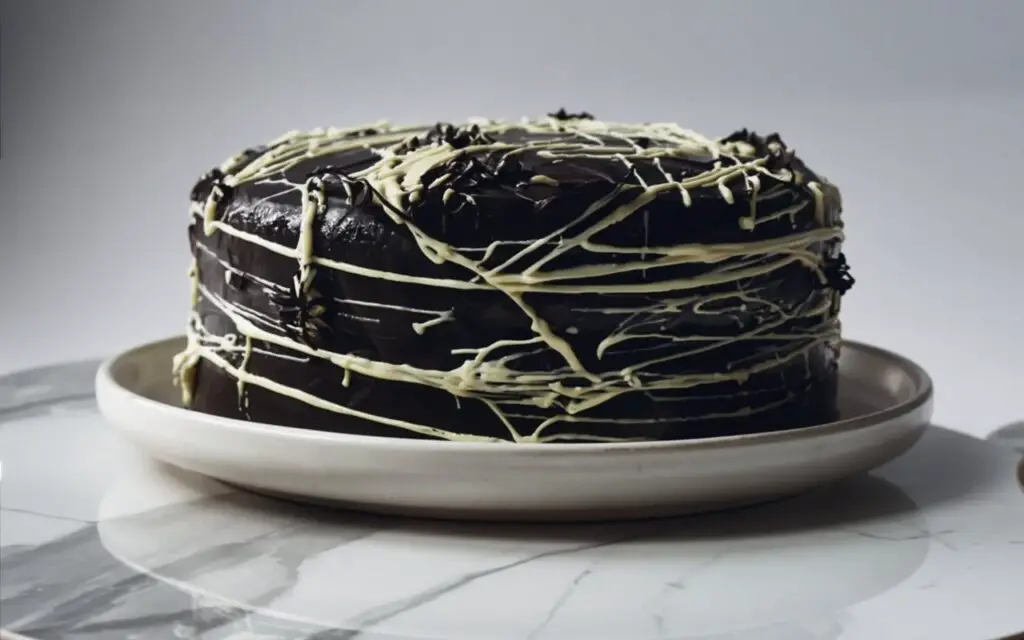
This Spiderweb Cake is the answer to your Halloween wishes. It’s a deliciously moist, deep-dark chocolate cake that delivers a huge “wow” factor with a surprisingly simple trick. The secret? Stretchy, melted marshmallows spun into an intricate, edible web. Forget complicated piping techniques; this fun, hands-on method creates an incredibly realistic and spooky effect. Get ready to impress your guests with the coolest Halloween cake on the block!
Ingredients
This recipe brilliantly doctors up a few store-bought basics to create a truly memorable dessert. The coffee in the cake batter is a secret weapon—it doesn’t make the cake taste like coffee, but it deepens the chocolate flavor into something extraordinary.
| Ingredient | Amount/Quantity |
| For the Dark Chocolate Cake: | |
| Betty Crocker™ Super Moist™ Devil’s Food Cake Mix | 1 box |
| Prepared Coffee, room temperature | 1 cup |
| Vegetable Oil | ½ cup |
| Large Eggs | 3 |
| Black Gel Food Color | 1 teaspoon (optional) |
| For the Frosting & Decoration: | |
| Betty Crocker™ Rich & Creamy Chocolate Frosting | 1 tub (16 oz) |
| Black Gel Food Color | 2 teaspoons |
| Mini Marshmallows | 1 ½ cups |
| Plastic Spiders for garnish | If desired |
Timing
This cake comes together faster than you can say “trick-or-treat,” with most of the time spent waiting for it to cool.
- Preparation Time: 20 minutes
- Cooking Time: 28 minutes
- Cooling Time: 1 hour
- Total Time: Approximately 1 hour 48 minutes (less time than it takes to watch a classic horror movie!)
Step-by-Step Instructions
Let’s get baking! Follow these steps to create a spooky masterpiece that’s as fun to make as it is to eat.
Step 1: Prepare Your Pans & Oven
First, preheat your oven to 350°F (175°C). Generously grease two 8- or 9-inch round cake pans with cooking spray or shortening. Then, line the bottom of each pan with a circle of parchment paper.
- Actionable Tip: Don’t skip the parchment paper! It’s the single best way to guarantee your cake layers will release from the pan perfectly, without any sticking or breaking.
Step 2: Mix the Devil’s Food Batter

In a large bowl, combine the cake mix, room-temperature coffee, vegetable oil, and eggs. Using an electric mixer, beat on medium speed for 2 minutes until the batter is smooth and well-combined. If you want an extra-dark, spooky cake, add 1 teaspoon of black gel food color and mix thoroughly.
- Actionable Tip: Using room-temperature ingredients (especially the eggs and coffee) helps the batter emulsify properly, creating a more uniform crumb and a tender final product.
Step 3: Bake and Cool the Cakes
Divide the batter evenly between your two prepared pans. Place them on the center rack of the oven and bake for 24 to 28 minutes. The cakes are done when a toothpick inserted into the center comes out clean and the top springs back when lightly touched. Let the cakes cool in their pans for 10 minutes before inverting them onto cooling racks to cool completely.
- Actionable Tip: Before removing the cakes from the oven, remove the pans, and carefully peel back the parchment paper. This allows steam to escape and prevents the bottoms from becoming gummy as they cool.
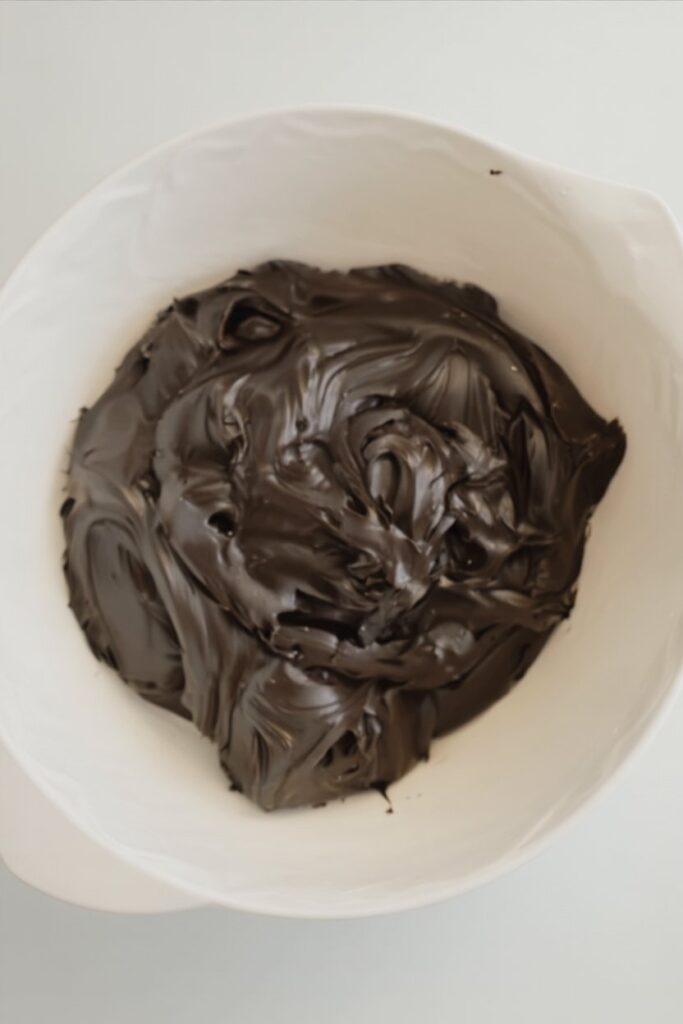
Step 4: Create the Blackout Frosting
While the cakes cool, prepare your frosting. In a medium bowl, combine the tub of chocolate frosting with 2 teaspoons of black gel food color. Beat with an electric mixer on low, then medium speed, until the color is uniform and the frosting is smooth.
- Actionable Tip: For the deepest, richest black color, use a high-quality gel food color. It’s far more concentrated than liquid coloring and won’t thin out your frosting. The color will also darken as it sits.
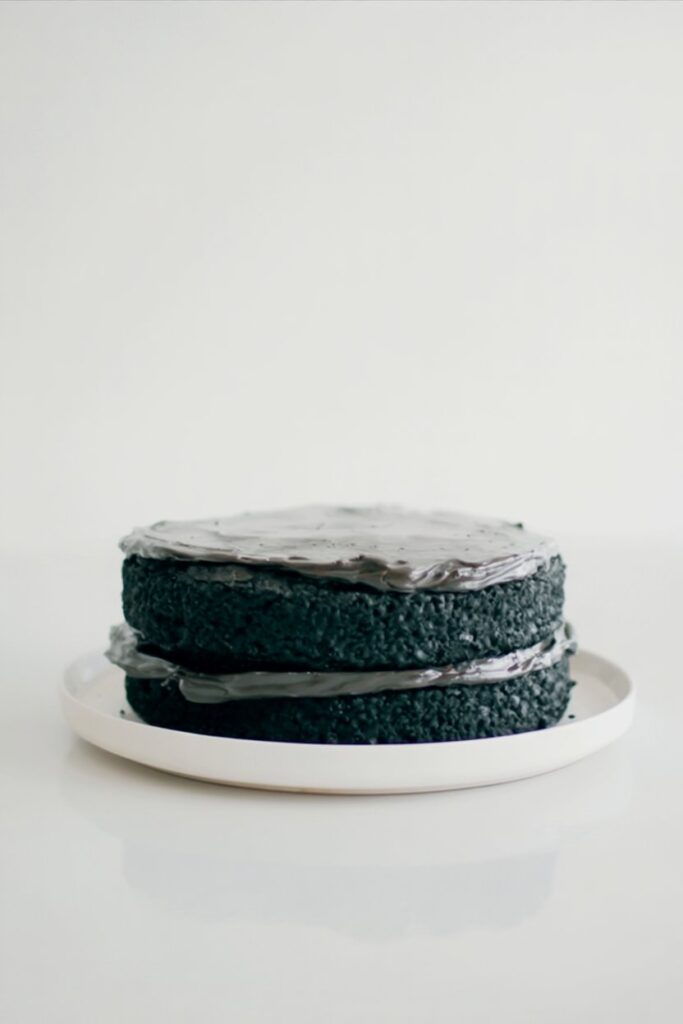
Step 5: Assemble and Frost Your Cake
Place a small dollop of frosting onto your serving plate or cake stand to act as “glue.” Center one cake layer on top. Spread about 1/4 of the frosting over the first layer. Place the second cake layer on top. Use an offset spatula or a smooth-edged knife to cover the top and sides of the entire cake with the remaining frosting.
- Actionable Tip: For a super smooth, professional finish, apply a thin “crumb coat” of frosting first. Chill the cake for 15 minutes, then apply the final, thicker layer. The chilled crumb coat traps any loose crumbs.
Step 6: Spin the Marshmallow Web
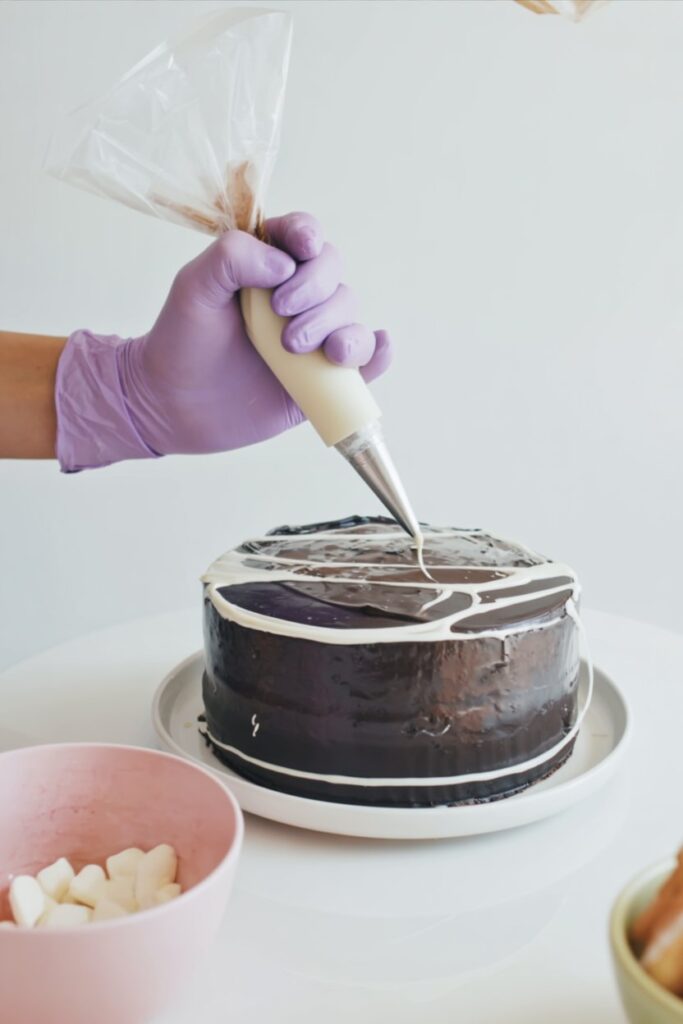
This is the fun part! Put on a pair of clean, disposable kitchen gloves. Place about 1/3 to 1/2 cup of mini marshmallows in a microwave-safe bowl and microwave on High for 10-15 seconds, just until they start to puff up. Carefully grab the warm, melted marshmallow and begin stretching it between your hands. As you pull your hands apart, stretchy strands will form. Drape and wrap these strands all over your frosted cake. Repeat this process in batches until the cake is covered in a spooky web.
- Actionable Tip: This process is sticky! Use a fresh pair of gloves for each new batch of marshmallows. If the marshmallow cools too quickly, a quick spritz of non-stick cooking spray on your gloves can help. Remember to remove any plastic spiders before serving the cake.
Nutritional Information
This is a festive dessert meant for indulgence! The nutritional information is an estimate for one slice, assuming the cake is cut into 12 servings.
- Calories: 380 kcal
- Carbohydrates: 55 g
- Protein: 3 g
- Fat: 17 g
- Saturated Fat: 5 g
- Sugar: 35 g
Healthier Alternatives
Want to make a slightly less sinful version of this spooky treat? Here are a few ideas:
- Reduce the Sugar: Use a sugar-free or reduced-sugar cake mix and frosting. The texture will be slightly different, but it’s a great option for cutting back on sugar.
- Oil Swap: Replace the vegetable oil with an equal amount of unsweetened applesauce. This will reduce the fat content and add a bit of extra moisture.
- Natural Food Coloring: For a natural black frosting, you can use black cocoa powder or activated charcoal powder instead of gel food coloring. Mix it into the chocolate frosting until you reach your desired color.
Serving Suggestions
This Spiderweb Cake is a born centerpiece for any Halloween party.
- Presentation is Key: Serve the cake on a black or orange cake stand to enhance the Halloween theme. Scatter a few candy eyeballs or gummy worms around the base for extra creepy-crawly fun.
- Perfect Pairings: A slice of this rich chocolate cake is delicious with a cold glass of milk, a scoop of vanilla bean ice cream, or a warm mug of spiced apple cider.
- Party Time: Cut the slices before guests arrive to make serving quick and easy during a busy party.
Common Mistakes to Avoid
Keep your cake from turning into a real-life horror show by avoiding these common mistakes.
- Frosting a Warm Cake: This is the number one cake decorating mistake. Solution: Be patient and ensure your cake layers are 100% cool to the touch before you even think about frosting them. Otherwise, you’ll have a melted, sliding mess.
- Over-Microwaving the Marshmallows: If you heat them for too long, they’ll become tough and burnt rather than soft and stretchy. Solution: Microwave in short 10-15 second bursts, watching them closely. You want them just puffed, not melted into a puddle.
- Not Using Gloves: Melted marshmallow is essentially hot sugar lava and is incredibly sticky. Solution: Always wear disposable kitchen gloves to protect your hands and make cleanup immensely easier.
Storing Tips
If you’re lucky enough to have leftovers, here’s how to keep your cake fresh.
- Room Temperature: This cake is best stored at room temperature. Place it in a cake carrier or cover it loosely with plastic wrap. It will stay fresh for up to 3 days. Refrigeration can dry out the cake crumb.
- Make-Ahead: You can bake the cake layers a day or two in advance. Once completely cooled, wrap them tightly in plastic wrap and store them at room temperature. Frost and decorate the day you plan to serve it for the best-looking marshmallow web.
- Freezing: The unfrosted cake layers also freeze beautifully for up to a month. Thaw them at room temperature before proceeding with the frosting and decorating.
Conclusion
This Spiderweb Cake proves that you don’t need to be a professional pastry chef to create a stunning, memorable Halloween dessert. With a box of cake mix and a bag of marshmallows, you can spin a spooky and delicious creation that will be the talk of the party. It’s a perfect baking project to do with kids and a fantastic way to add a touch of homemade magic to your celebration.
We’d love to see your spooky creations! If you make this recipe, snap a photo and share it with us in the comments below. Don’t forget to leave a rating and subscribe for more fun and easy recipes!
FAQs
Q1. Do I have to use coffee in the cake batter?
No, you can substitute the coffee with 1 cup of water or milk. However, the coffee won’t make the cake taste like coffee; it actually enhances and deepens the chocolate flavor, making it taste richer and more complex. We highly recommend trying it!
Q2. My black frosting looks more like dark gray. How can I get it truly black?
Gel food color tends to darken over time. After mixing, let the frosting sit for about 20-30 minutes, and you should see the color deepen. For an immediate, intense black, you can also mix in a tablespoon of black cocoa powder along with the gel food color.
Q3. Can I make this cake ahead of a party?
Yes! The best way to make it ahead is to bake the cake layers up to two days in advance. Let them cool completely, then wrap them well in plastic wrap and store them at room temperature. It’s best to assemble, frost, and create the marshmallow web on the day of the party for the freshest look and texture.
Q4. Can I use a different flavor of cake mix?
Absolutely! While devil’s food offers a great dark base for a spooky look, this would also be delicious with a chocolate fudge, dark chocolate, or even a vanilla cake mix if you want a white cake base. You would just need more black food coloring to dye the vanilla frosting.
Print
Easy Spiderweb Cake Recipe for a Spooky Halloween Treat
- Total Time: 1 hour 48 minutes
- Yield: 12 Servings 1x
Description
This Spiderweb Cake is the answer to your Halloween wishes! It’s a deliciously moist, deep-dark chocolate cake that delivers a huge “wow” factor with a surprisingly simple trick. The secret? Stretchy, melted marshmallows spun into an intricate, edible web. Forget complicated piping; this fun, hands-on method creates an incredibly realistic and spooky effect for the coolest Halloween cake on the block.
Ingredients
For the Dark Chocolate Cake
- box Betty Crocker™ Super Moist™ Devil’s Food Cake Mix
- cup Prepared Coffee, room temperature
- cup Vegetable Oil
- Large Eggs
- teaspoon Black Gel Food Color (optional, for extra-dark cake)
For the Frosting & Decoration
- tub ( oz) Betty Crocker™ Rich & Creamy Chocolate Frosting
- teaspoons Black Gel Food Color
- cups Mini Marshmallows
- Optional: Plastic Spiders for garnish
Instructions
- Prep Pans & Oven: Preheat oven to (). Grease and line the bottom of two 8- or 9-inch round cake pans with parchment paper.
- Mix the Batter: In a large bowl, combine the cake mix, room-temperature coffee, oil, and eggs. Beat with an electric mixer on medium speed for 2 minutes until smooth. If using, mix in 1 teaspoon of black gel food color.
- Bake and Cool: Divide the batter evenly between the prepared pans. Bake for 24 to 28 minutes, or until a toothpick inserted in the center comes out clean. Let the cakes cool in the pans for 10 minutes before inverting them onto cooling racks to cool completely.
- Create Black Frosting: In a medium bowl, combine the tub of chocolate frosting with 2 teaspoons of black gel food color. Beat with an electric mixer until the color is uniform and the frosting is smooth.
- Assemble and Frost Cake: Place one cake layer on a serving plate. Spread about 1/4 of the frosting over it. Top with the second layer. Use the remaining frosting to cover the top and sides of the entire cake.
- Spin the Marshmallow Web: Place about 1/3 cup of mini marshmallows in a microwave-safe bowl and microwave for 10-15 seconds, just until puffed. Using clean, disposable gloves, grab the warm marshmallow and stretch it between your hands to create thin strands. Drape and wrap these strands all over the cake. Repeat in batches until the cake is covered. Garnish with plastic spiders if desired.
Notes
- Perfect Release: Lining your cake pans with parchment paper is the best way to guarantee your cake layers won’t stick or break.
- Room Temp is Key: Using room-temperature ingredients (especially eggs and coffee) helps the batter mix properly, creating a more tender cake.
- Deepest Black Color: For the richest black frosting, use a high-quality gel food color, which is more concentrated than liquid coloring and won’t thin the frosting.
- Crumb Coat for Smoothness: For a super smooth finish, apply a thin “crumb coat” of frosting, chill the cake for 15 minutes, then apply the final, thicker layer.
- Web-Spinning Tip: The marshmallow web process is sticky! Use a fresh pair of disposable gloves for each new batch. A light spritz of cooking spray on your gloves can also help.
- Prep Time: 20 minutes
- Cook Time: 28 minutes
- Category: Dessert, Cake, Halloween
- Method: Baking
- Cuisine: American
Nutrition
- Serving Size: 1 slice
- Calories: 380kcal
- Sugar: 35g
- Sodium: 400mg
- Fat: 17g
- Saturated Fat: 5g
- Unsaturated Fat: 11.5g
- Trans Fat: 0.5g
- Carbohydrates: 55g
- Fiber: 2g
- Protein: 3g
- Cholesterol: 50mg