From a Hot Stove to a Cool Kitchen Counter
On a brilliantly sunny day, when the air itself seems to hum with warmth, the vibrant scent of fresh lemons can be completely intoxicating. It always sparks a desire for lemon curd, but also brings back memories of standing over a hot stove, endlessly whisking a bowl set over simmering water, terrified of scrambling the eggs. Today, with the sun beating down, I wanted that bright, homemade taste without the heat or the hassle. This is where the magic of this Thermomix lemon curd recipe comes in. It’s a completely hands-off, foolproof method that delivers silky, perfect lemon curd in minutes.
- From a Hot Stove to a Cool Kitchen Counter
- The Ingredients for Liquid Sunshine
- Timing Breakdown
- Step-by-Step Thermomix Instructions
- Step 1: Finely Grate the Lemon Zest
- Step 2: Combine and Cook the Curd
- Step 3: Check for Thickness (and Adjust if Needed)
- Step 4: Strain for a Silky Smooth Finish
- Nutritional Information
- Healthier Alternatives & Variations
- Serving Suggestions
- Common Mistakes to Avoid
- Storing Your Liquid Gold
- The Easiest, Creamiest Lemon Curd Ever
- FAQs
- Q1: Why did my lemon curd not thicken?
- Q2: Can I make this dairy-free?
- Q3: What is caster sugar and can I use regular granulated sugar?
- Q4: Do I have to strain the lemon curd?
- Q5: How do I know when the lemon curd is cooked?
- Foolproof Thermomix Lemon Curd in 15 Mins
The Ingredients for Liquid Sunshine
Making professional-quality lemon curd is all about a few simple, high-quality ingredients. The Thermomix does the hard work of emulsifying them into a smooth, vibrant, and perfectly balanced curd.
| Ingredient | Quantity | Notes |
| Lemons | 2 large | We’ll use both the zest and the juice for maximum flavour. |
| Large Eggs | 2 | Provide the richness and structure. |
| Extra Egg Yolks | 2 | The secret to an extra-creamy, luxurious texture. |
| Caster Sugar | 165g | Dissolves easily for a smooth curd. Superfine sugar is a good substitute. |
| Unsalted Butter, chilled | 80g | Use cold, cubed butter for the perfect creamy emulsion. |
| Fresh Lemon Juice | 90g (approx. 6 Tbs) | Freshly squeezed is non-negotiable for a bright, zesty taste. |


Timing Breakdown
This is where the Thermomix truly shines, turning a once laborious process into a quick and easy task.
- Preparation Time: 5 minutes
- Cooking Time: 10-12 minutes
- Total Time: Under 20 minutes
Data Insight: Traditional stovetop lemon curd recipes require 30-40 minutes of constant whisking and careful temperature monitoring. This Thermomix method is over 60% faster and completely hands-off, eliminating the risk of curdled eggs or a sore arm.
Step-by-Step Thermomix Instructions
Step 1: Finely Grate the Lemon Zest
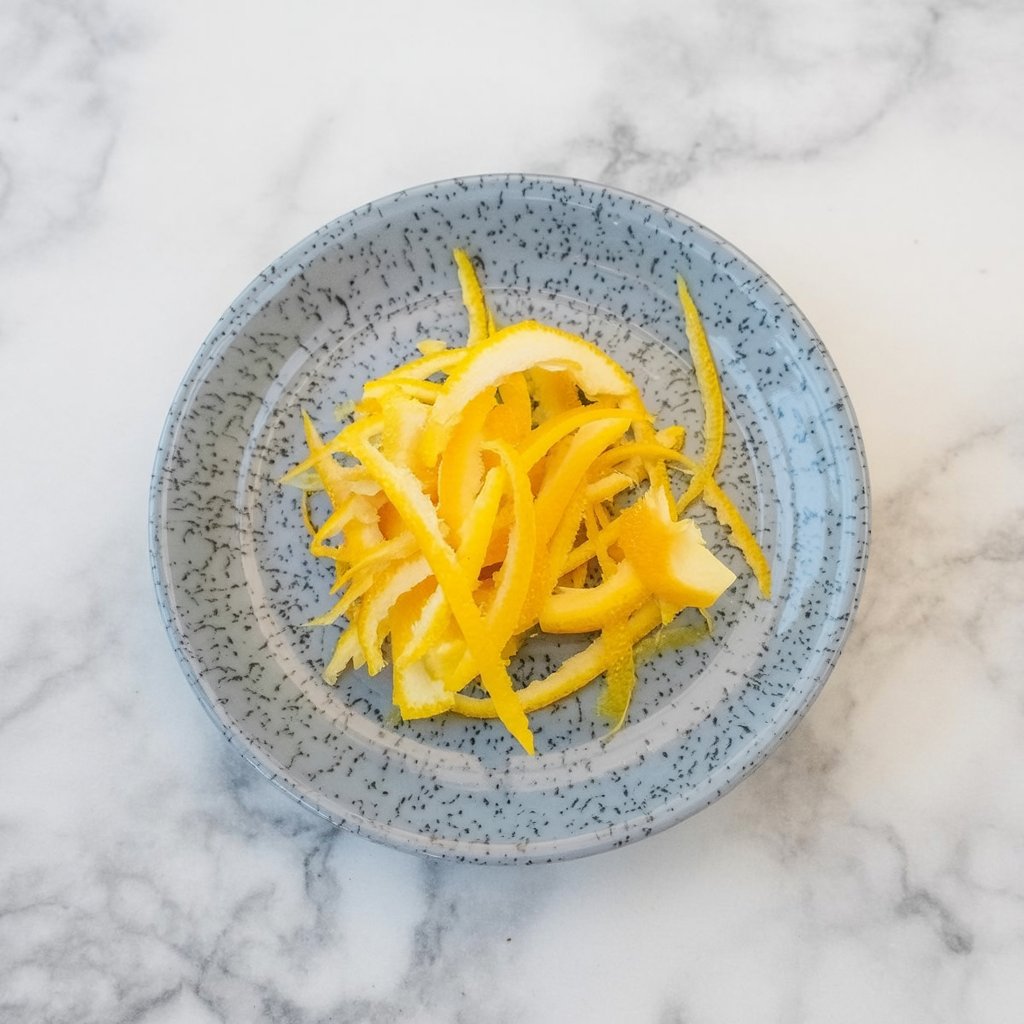

Using a vegetable peeler, remove the yellow zest from your two lemons, avoiding the white pith. Place the strips of zest into your Thermomix bowl. Secure the lid and grate on Speed 10 for 10 seconds. Scrape down the sides of the bowl with your spatula and repeat the process if necessary, until you have a very fine, fragrant zest.
Step 2: Combine and Cook the Curd
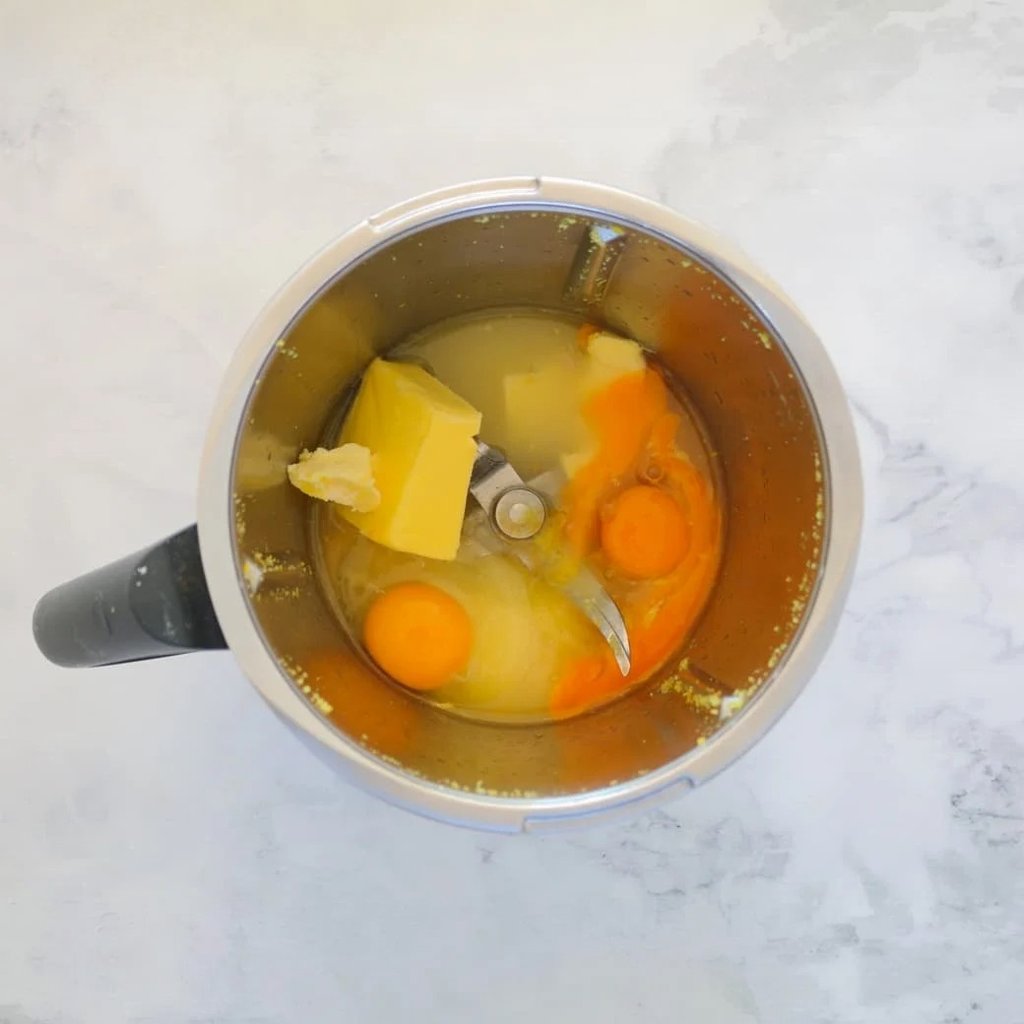
To the zest in the bowl, add the whole eggs, extra egg yolks, caster sugar, chilled and cubed unsalted butter, and the fresh lemon juice. This is the best part—no need to temper or melt anything first! Place the lid on and cook for 10 minutes / 80°C / Speed 4.
Step 3: Check for Thickness (and Adjust if Needed)
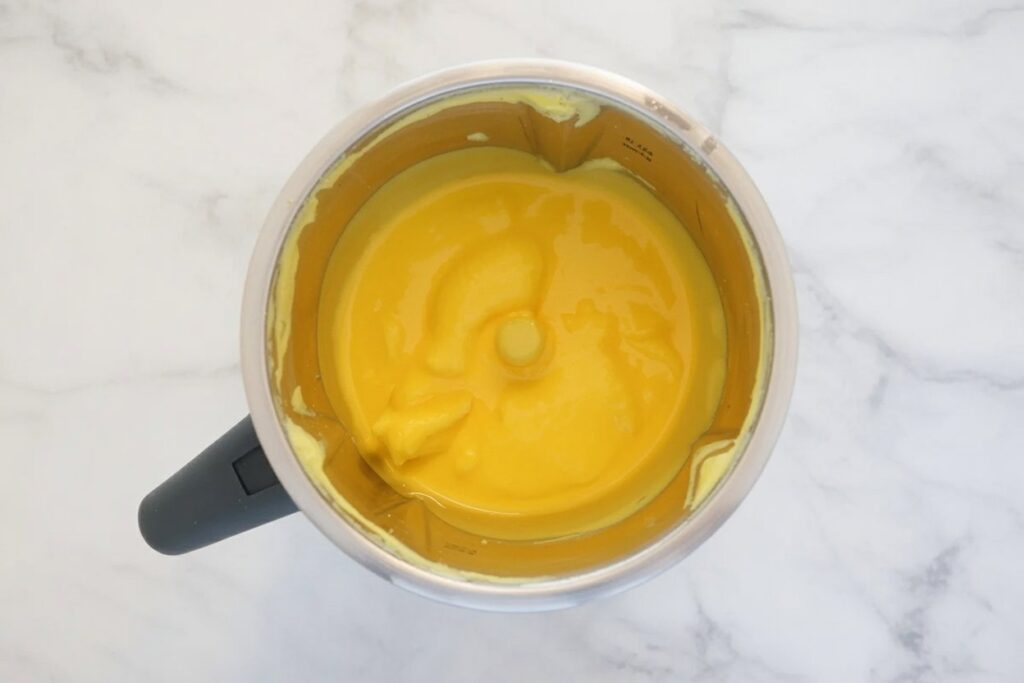
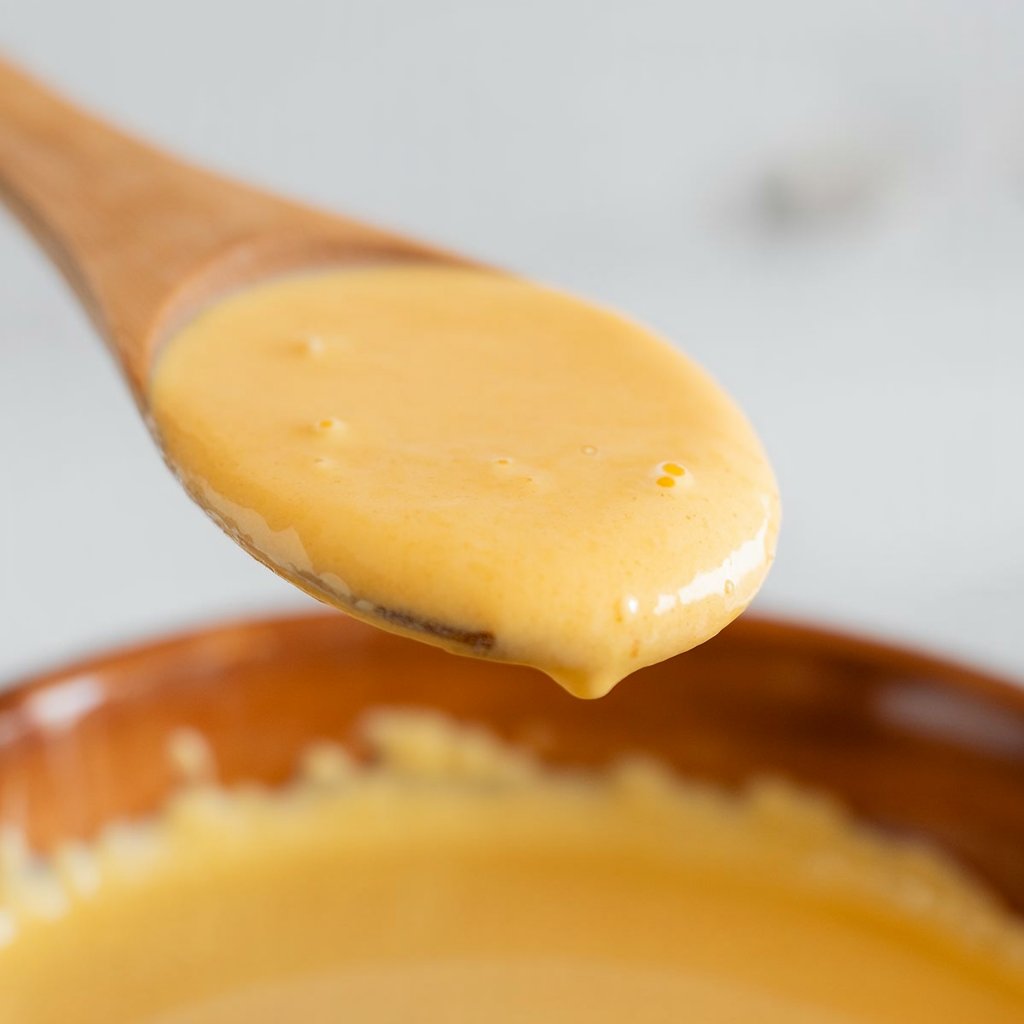
After the initial 10 minutes, check the consistency of your curd. It should be thick enough to coat the back of a spoon. If it still seems very runny (this can happen if your ingredients were extra cold), cook for a further 1-2 minutes / 90°C / Speed 4. The curd will continue to thicken significantly as it cools.
Step 4: Strain for a Silky Smooth Finish
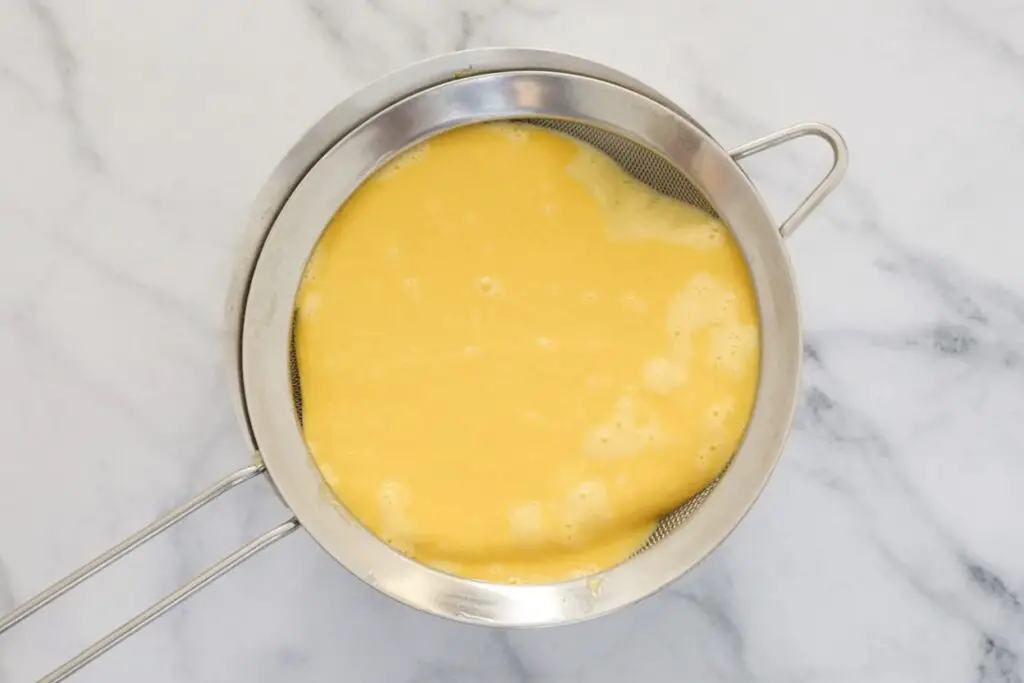
For a truly professional, silky-smooth texture, place a fine-mesh sieve over a clean bowl or your sterilized jar. Pour the hot lemon curd through the sieve to catch any remaining larger pieces of zest or the chalazae (the little white strands) from the eggs. This final step is what guarantees a luxurious final product.
Nutritional Information
This is a rich, indulgent treat best enjoyed in moderation. Here is an approximate nutritional breakdown per tablespoon.
- Calories: Approx. 65 kcal
- Fat: 4g
- Carbohydrates: 7g
- Sugar: 7g
- Protein: 1g
Disclaimer: Nutrition is estimated and can vary based on specific ingredients and serving size.
Healthier Alternatives & Variations
While this curd is a classic treat, you can easily adapt it.
- Lower Sugar: You can successfully reduce the caster sugar to 130g for a tarter curd. For a sugar-free version, use a heat-stable granular sweetener blend that measures like sugar.
- Dairy-Free: To make a dairy-free lemon curd, simply swap the unsalted butter for a high-quality, block-style plant-based butter alternative.
- Other Citrus Curds: This recipe is a perfect template for other citrus fruits! Try making it with limes, oranges, or even grapefruit. You may need to adjust the sugar depending on the sweetness of the fruit.
Serving Suggestions
A jar of homemade lemon curd in the fridge is like a secret weapon for creating instant, elegant desserts and breakfasts.
- Breakfast Boost: Swirl a spoonful into Greek yogurt or oatmeal, or spread it lavishly on toast, crumpets, or fresh scones.
- Cake & Tart Filling: Use it as a filling for lemon meringue pie, Victoria sponge cake, or bite-sized tartlets.
- Simple Dessert: Layer it in a glass with crushed shortbread biscuits and whipped cream to create a stunning lemon fool or trifle.
- Personalized Tip: My favorite quick dessert is to gently fold the lemon curd into freshly whipped cream and serve it with fresh berries. It’s simple, elegant, and absolutely divine.
Common Mistakes to Avoid
The Thermomix makes this recipe nearly foolproof, but these tips will guarantee perfection.
- “Scrambled Egg” Curd: This is the most feared outcome of stovetop curd, caused by overheating the eggs. The Thermomix’s precise temperature control at 80°C virtually eliminates this risk, gently cooking the eggs without curdling.
- Not Using Chilled Butter: Adding cold, cubed butter allows it to melt slowly and emulsify into the curd, creating a creamier, more stable result than melted butter would.
- Skipping the Strainer: Don’t skip this final step! Even with the Thermomix’s powerful grating, straining the finished curd is the secret to an impeccably smooth, professional-grade texture.
- Using Bottled Lemon Juice: The flavour of lemon curd comes almost entirely from the lemons. Using bottled juice will result in a dull, muted flavour. Freshly squeezed is the only way to go for that bright, zesty punch.
Storing Your Liquid Gold
To ensure your lemon curd stays fresh and delicious, proper storage is key.
- Sterilize Your Jars: To sterilize glass jars, wash them in hot, soapy water, rinse well, and place them in a 275∘F (130∘C) oven for 15-20 minutes until completely dry.
- Refrigeration: Pour the strained curd into the warm, sterilized jars and seal. Once cool, store it in the refrigerator. It will keep for up to 2 weeks.
- Freezing: Lemon curd freezes beautifully! Pour the cooled curd into a freezer-safe container, leaving a little space at the top for expansion. It can be frozen for up to one year. Thaw it overnight in the refrigerator before using.
The Easiest, Creamiest Lemon Curd Ever
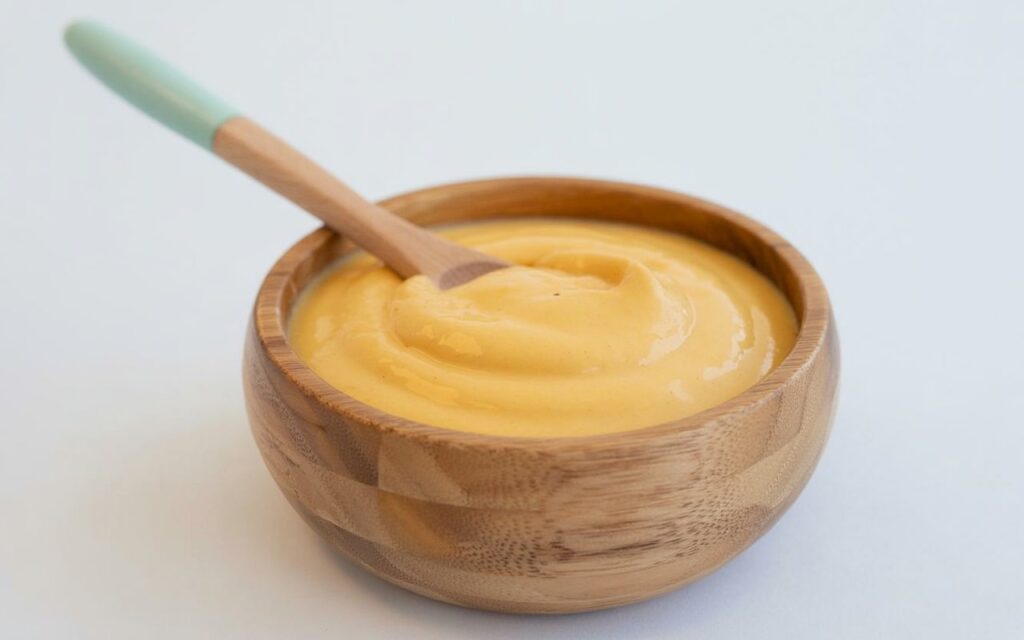
Thanks to the Thermomix, making luscious, silky lemon curd is no longer a chore. This recipe transforms a handful of simple ingredients into a jar of liquid sunshine in under 20 minutes, with virtually no effort. It’s perfectly balanced between sweet and tart, incredibly versatile, and so much more flavourful than any store-bought version. This foolproof method will make you wonder why you ever made it any other way.
We would be thrilled for you to try this recipe! Let us know how you use your homemade lemon curd by leaving a comment and a rating below. For more easy and innovative Thermomix recipes, be sure to subscribe to our blog!
FAQs
Q1: Why did my lemon curd not thicken?
There are two common reasons. First, it may not have cooked long enough or at a high enough temperature. If your curd is runny after the initial 10 minutes at 80°C, cooking it for another 1-2 minutes at 90°C should solve it. Second, remember that lemon curd thickens dramatically as it cools. It will seem quite loose when hot but will set to a perfect consistency in the fridge.
Q2: Can I make this dairy-free?
Yes, absolutely. To make a dairy-free version, simply substitute the 80g of unsalted butter with an equal amount of a high-quality, solid, plant-based butter block. The results are just as creamy and delicious.
Q3: What is caster sugar and can I use regular granulated sugar?
Caster sugar is a type of superfine sugar that dissolves very quickly, which is ideal for smooth sauces and custards. If you don’t have caster sugar, you can use regular granulated sugar. A great Thermomix trick is to place the regular sugar in the bowl first and mill it on Speed 10 for 3-5 seconds to create your own caster sugar.
Q4: Do I have to strain the lemon curd?
You don’t have to, but we highly recommend it for the best texture. Straining removes any stubborn bits of zest that didn’t fully pulverize and any tiny bits of cooked egg protein (chalazae), guaranteeing a silky, professional-quality mouthfeel.
Q5: How do I know when the lemon curd is cooked?
The Thermomix’s temperature control is very reliable. However, the visual cue is that the curd should be thick enough to coat the back of a spoon. When you draw a line through the curd on the spoon with your finger, the line should hold its shape clearly without the curd running back together.
Print
Foolproof Thermomix Lemon Curd in 15 Mins
- Total Time: 17 minutes
- Yield: 16 Tbsp (about 1 cup) 1x
Description
This silky, bright lemon curd comes together in under 20 minutes using your Thermomix—no constant whisking or curdled eggs. It’s over 60% faster than the traditional stovetop method and requires zero babysitting, yielding a smooth, professional-quality curd every time.
Ingredients
- 2 Zest of lemons (Yellow zest only; avoid white pith)
- 2 whole Eggs (Room temperature)
- 2 yolks Egg yolks (Room temperature)
- 165 g Caster sugar
- 80 g Unsalted butter (Chilled and cubed)
- 90 g Lemon juice (About 2-3 lemons≈6 Tbsp)
Instructions
Grate the Zest
- Place lemon zest strips into the Thermomix bowl.
- Secure lid; grate Speed 10 for 10 sec. Scrape down and repeat if needed, until zest is very fine.
Combine & Cook
- Add eggs, egg yolks, sugar, chilled butter, and lemon juice to the bowl.
- Cook 10 min / 80 °C / Speed 4—no need to temper.
Check & Finish
- Test consistency: it should coat the back of a spoon. If too thin, cook an additional 1–2 min / 90 °C / Speed 4.
- The curd will thicken further as it cools.
Strain for Silky Texture
- Pour hot curd through a fine-mesh sieve into a clean jar, catching any zest bits or chalazae.
Cool & Store
- Seal and refrigerate. Keeps 1–2 weeks.
Notes
-
Time Savings: Traditional stovetop lemon curd takes 30–40 min of whisking; this method is over 60% faster and hands-free.
-
Make-Ahead: Curd can be made up to one week ahead—just give a gentle stir before serving.
-
Serving Suggestions: Spread on toast, swirl into yogurt, fill cakes or tarts, or enjoy by the spoonful!
-
Troubleshooting: If curd still seems loose after cooling, whisk in a small pat of softened butter off-heat to enrich and thicken.
- Prep Time: 5 minutes
- Cook Time: 12 minutes
- Category: Dessert, Spread
- Cuisine: Baking, International Recipes
Nutrition
- Calories: 65