Is a holiday feast truly complete without a boat brimming with rich, velvety gravy? It’s the golden thread that ties the turkey, mashed potatoes, and stuffing together into one harmonious, comforting meal. Yet, so many home cooks are intimidated by gravy, fearing lumps, blandness, or a complicated process.
- Ingredients
- Timing
- Step-by-Step Instructions
- Step 1: Prepare the Drippings
- Step 2: Make the Roux
- Step 3: Whisk in the Liquid
- Step 4: Simmer and Thicken
- Step 5: Season and Serve
- Nutritional Information
- Healthier Alternatives
- Serving Suggestions
- Common Mistakes to Avoid
- Storing Tips
- Conclusion
- FAQs
- Q1: Can I make this ahead of time?
- Q2: What if I don’t have drippings?
- Q3: Can I add herbs?
- Q4: Why is my gravy pale?
- Homemade Turkey Gravy (Easy & Flavorful!)
Fear not! This Easy Turkey Gravy recipe is here to debunk the myths. It’s incredibly simple, requires just three main ingredients, and tastes infinitely better than anything from a jar or packet. Using the flavorful drippings from your roasted turkey as the base, we create a sauce that is smooth, deeply savory, and the perfect consistency. Whether it’s Thanksgiving, Christmas, or a Sunday roast, this turkey gravy will be the crowning glory of your table.
Ingredients
This recipe relies on the pure flavor of your roast turkey drippings.
| Ingredient | Amount/Quantity | Notes |
| Unsalted Butter | 4 tablespoons | Controls the saltiness |
| All-Purpose Flour | ¼ cup | The thickener for the roux |
| Strained Turkey Drippings | 2 ½ cups | From the roasting pan (see tips below) |
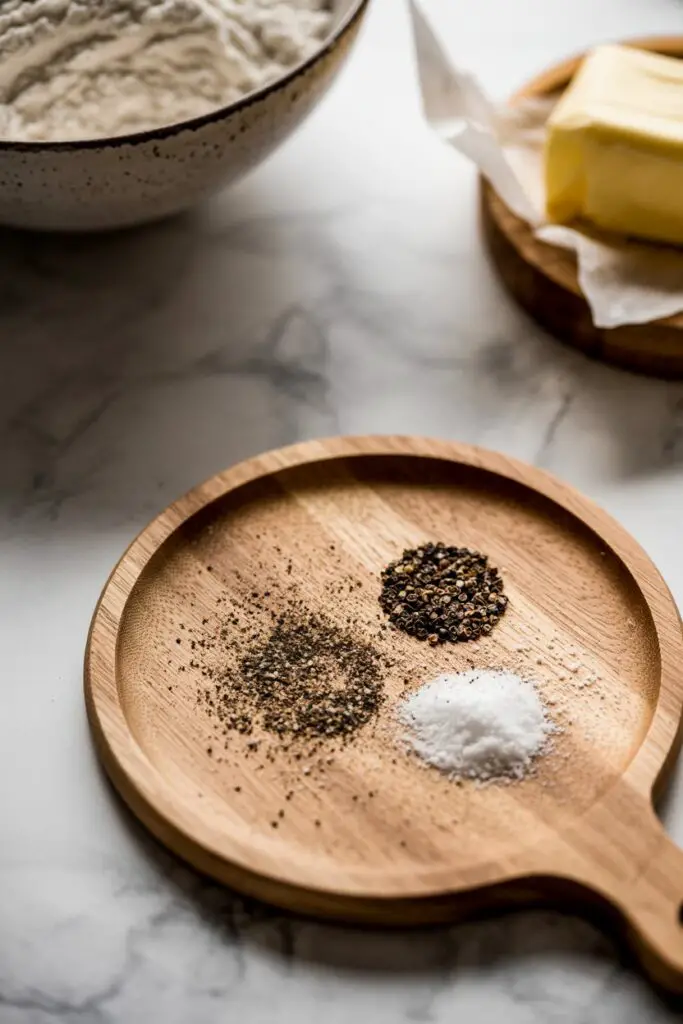
| Salt | To taste | Likely won’t need much |
| Black Pepper | To taste | Freshly ground is best |

Timing
This gravy comes together quickly while your turkey is resting, making it the perfect final touch.
- Preparation Time: 5 minutes (straining drippings)
- Cooking Time: 10 minutes
- Total Time: Approximately 15 minutes
Step-by-Step Instructions
Follow these simple steps to create a smooth, lump-free gravy that everyone will love.
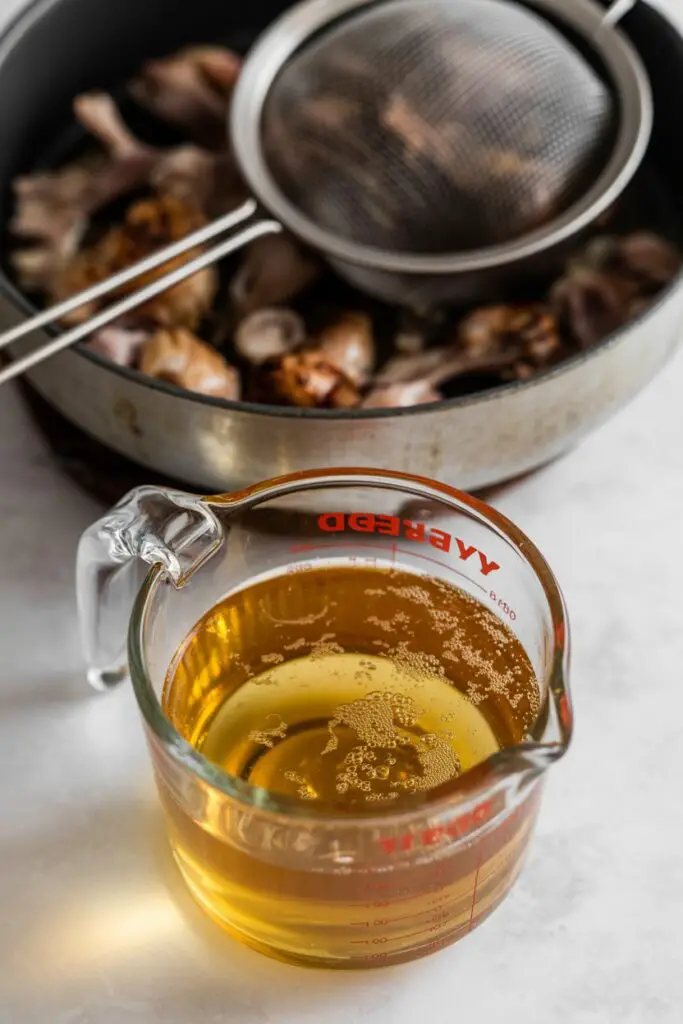
Step 1: Prepare the Drippings
Pour the juices from your turkey roasting pan through a fine-mesh sieve into a large liquid measuring cup.
- Actionable Tip: You don’t need to separate the fat! The fat in the drippings adds incredible flavor and body. If you don’t have quite enough liquid to make 2 ½ cups, simply top it up with store-bought turkey or chicken broth.
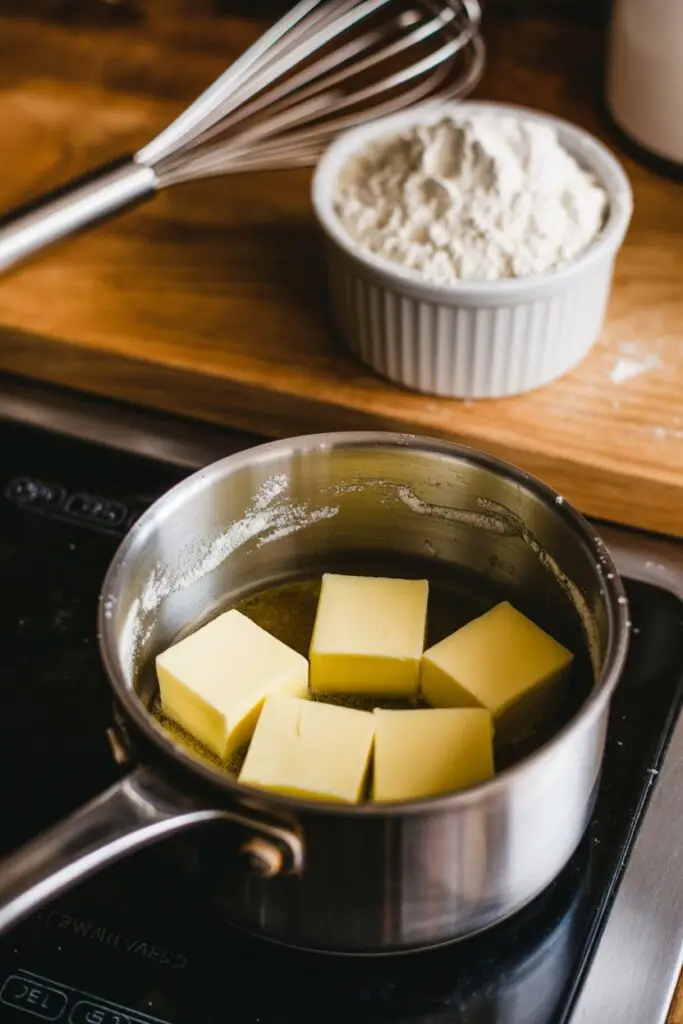
Step 2: Make the Roux
Melt the 4 tablespoons of butter in a medium saucepan over medium heat. Once melted and bubbling, sprinkle in the ¼ cup of flour. Whisk continuously for 1–2 minutes.
- Actionable Tip: This step cooks out the raw flour taste and creates a golden, bubbly paste called a roux, which will thicken your gravy without lumps.
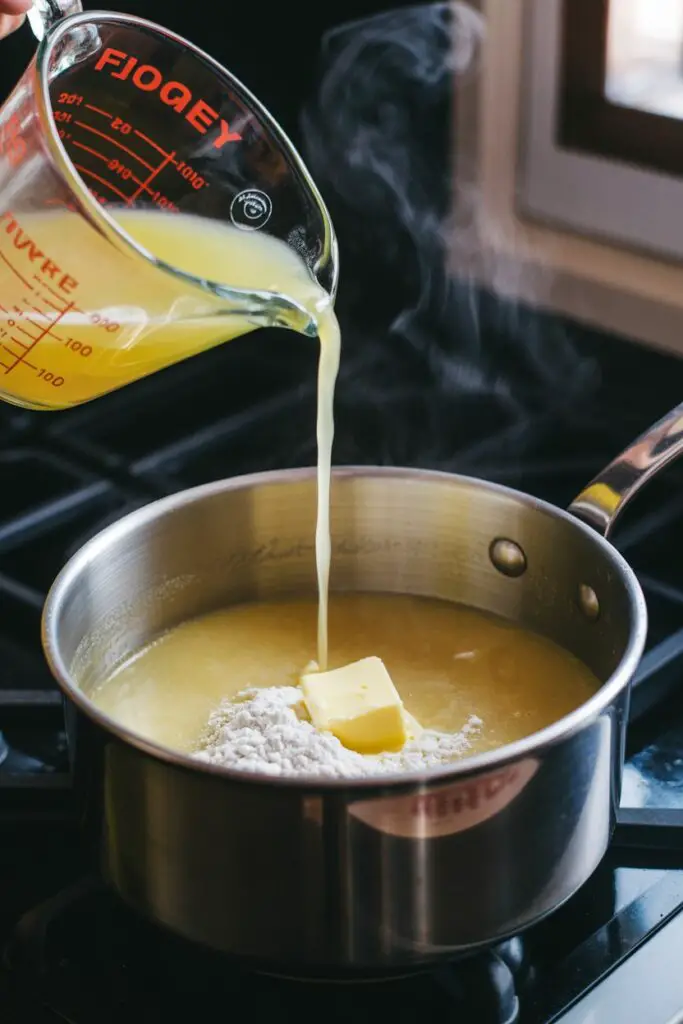
Step 3: Whisk in the Liquid
Slowly pour in the turkey drippings a little at a time, whisking constantly and vigorously.
- Actionable Tip: Adding the liquid slowly is the secret to a smooth gravy. It allows the roux to absorb the liquid evenly, preventing clumps from forming.
Step 4: Simmer and Thicken
Bring the mixture to a gentle boil. Once it bubbles, reduce the heat to low. Continue to whisk or stir gently for a few minutes until the gravy is thick, smooth, and velvety. It should coat the back of a spoon.
Step 5: Season and Serve
Taste your gravy. Season with freshly ground black pepper. Taste again before adding any salt, as the turkey drippings are often naturally salty enough. Pour into a gravy boat and serve hot!
Nutritional Information
Nutritional information is an estimate per serving (approx. ¼ cup) and varies based on the fat content of the drippings.
- Calories: Approx. 50-80 kcal
- Fat: 4-6 g
- Carbohydrates: 3-4 g
- Protein: 1-2 g
- Sodium: Variable
Healthier Alternatives
While gravy is a rich treat, you can make lighter adjustments:
- Separate Fat: Use a fat separator cup for the drippings and discard the excess fat, using only the lean juices. You may need to add a little extra butter or oil to the roux to compensate.
- Gluten-Free: Substitute the all-purpose flour with a gluten-free all-purpose flour blend or cornstarch (mix cornstarch with cold water first to make a slurry, then add to boiling liquid instead of making a roux).
- Low Sodium: If topping up with broth, choose a low-sodium variety to better control the saltiness.
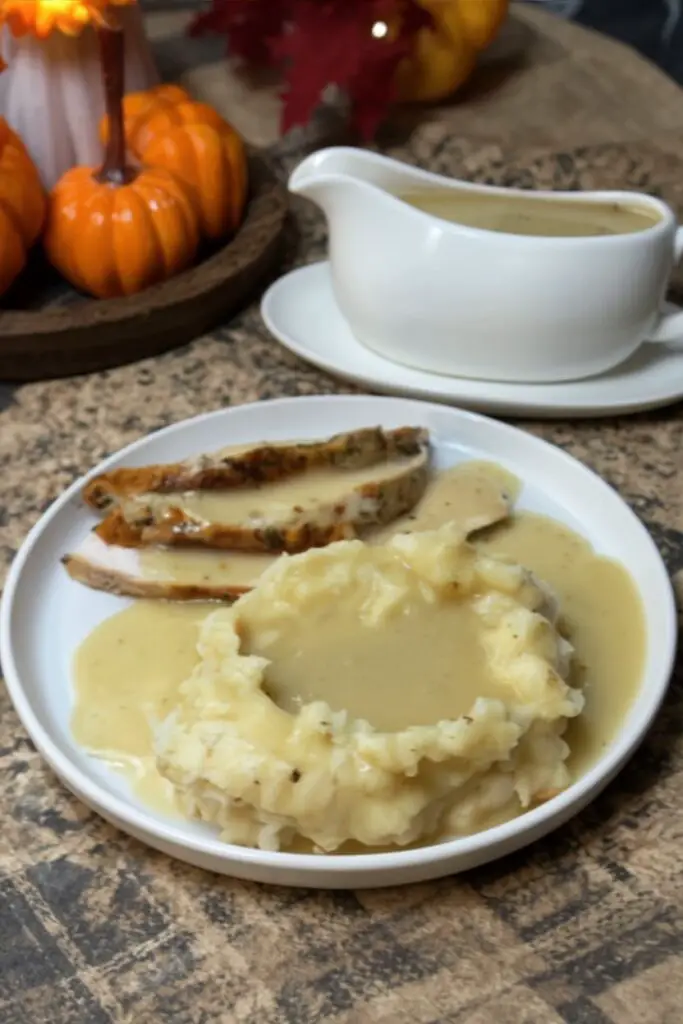
Serving Suggestions
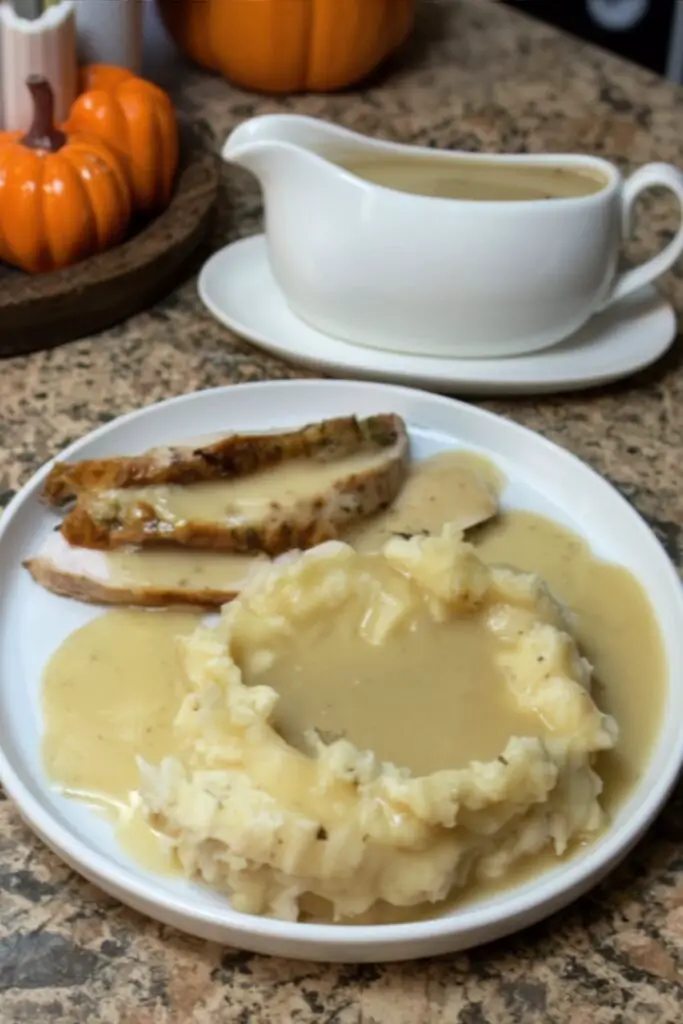
This Turkey Gravy is essential for a traditional turkey dinner!
- Mashed Potatoes: Create the perfect pool of gravy in a mound of fluffy mashed potatoes.
- Turkey & Stuffing: Drizzle generously over sliced turkey breast and savory stuffing.
- Leftovers: Use it to moisten leftover turkey sandwiches or as a sauce for a “day after” turkey pot pie.
Common Mistakes to Avoid
For perfect gravy every time, avoid these common pitfalls:
- Lumps: Caused by adding liquid too fast or not whisking enough. Solution: Add drippings slowly and whisk constantly. If lumps appear, strain the finished gravy through a sieve.
- Too Salty: Drippings can be salty. Solution: Taste before adding any extra salt. If it’s already too salty, dilute with a splash of unsalted broth, water, or a little cream.
- Too Thin: Didn’t simmer long enough or not enough flour. Solution: Let it simmer longer to reduce. Or, make a small slurry of cornstarch and cold water and whisk it into the boiling gravy.
- Too Thick: Too much flour or reduced too much. Solution: Simply whisk in a little more broth or water until it reaches your desired consistency.
Storing Tips
Make the most of your delicious gravy!
- Refrigerate: Store cooled gravy in an airtight container in the refrigerator for up to 3-4 days.
- Freeze: Gravy freezes surprisingly well! Pour cooled gravy into freezer-safe bags or containers and freeze for up to 3 months.
- Reheat: Thaw frozen gravy overnight in the fridge. Reheat gently in a saucepan over low heat, whisking constantly to bring the emulsion back together. You may need a splash of broth or water if it has thickened.
Conclusion
This Homemade Turkey Gravy proves that the best part of the meal doesn’t have to be the hardest. With just three ingredients and a few minutes of whisking, you can create a rich, flavorful sauce that elevates your entire holiday feast. It’s simple, classic, and absolutely delicious—a recipe you’ll turn to year after year.
Ready to be the gravy master? Give this recipe a try and let us know how it turned out in the comments below! We love hearing your holiday cooking stories. Don’t forget to rate the recipe and subscribe for more easy, festive ideas!
FAQs
Q1: Can I make this ahead of time?
Yes! You can make the gravy 1-2 days in advance using store-bought turkey broth (or broth made from turkey wings/necks). When you reheat it, whisk in some of the fresh drippings from your roasted turkey for that authentic flavor boost.
Q2: What if I don’t have drippings?
No problem! You can make this entire recipe using high-quality store-bought turkey or chicken stock. To add richness, you might want to brown the butter slightly in the first step or add a splash of cream at the end.
Q3: Can I add herbs?
Absolutely. Fresh herbs like chopped sage, thyme, or rosemary are wonderful additions. Stir them in right at the end or whisk them into the butter before adding the flour for a more infused flavor.
Q4: Why is my gravy pale?
The color comes from the drippings. If your drippings are light, your gravy will be too. It’s purely cosmetic! For a darker color, you can cook the roux (butter and flour) a little longer until it turns golden brown before adding liquid, or add a tiny splash of soy sauce or Worcestershire sauce.
Print
Homemade Turkey Gravy (Easy & Flavorful!)
- Total Time: 15 minutes
- Yield: 10 Servings (approx. 2.5 cups total) 1x
Description
Is a holiday feast truly complete without a boat brimming with rich, velvety gravy? This Easy Turkey Gravy recipe debunks the myth that gravy is complicated. It’s incredibly simple, requires just three main ingredients, and tastes infinitely better than anything from a jar. Using the flavorful drippings from your roasted turkey as the base, we create a sauce that is smooth, deeply savory, and the perfect consistency.
Ingredients
- 4 tablespoons Unsalted Butter
- 1/4 cup All-Purpose Flour
- 2 1/2 cups Strained Turkey Drippings (top up with broth if needed)
- To taste Black Pepper
- To taste Salt (likely won’t need much)
Instructions
-
Prepare the Drippings: Pour the juices from your turkey roasting pan through a fine-mesh sieve into a large liquid measuring cup. You don’t need to separate the fat. If you don’t have enough liquid to make 2 ½ cups, top it up with turkey or chicken broth.
-
Make the Roux: Melt the butter in a medium saucepan over medium heat. Once bubbling, sprinkle in the flour. Whisk continuously for 1–2 minutes to cook out the raw flour taste and create a golden paste.
-
Whisk in the Liquid: Slowly pour in the turkey drippings a little at a time, whisking constantly and vigorously. Adding the liquid slowly is the secret to preventing clumps.
-
Simmer and Thicken: Bring the mixture to a gentle boil. Reduce heat to low and continue to whisk or stir gently for a few minutes until the gravy is thick, smooth, and velvety enough to coat the back of a spoon.
-
Season and Serve: Taste your gravy. Season with freshly ground black pepper. Taste again before adding any salt, as the drippings are often naturally salty enough. Serve hot.
Notes
- Liquid Volume: It is crucial to measure your drippings. You need exactly 2 ½ cups of liquid for the thickener ratio to work perfectly.
- Don’t Skim the Fat: The fat in the drippings adds incredible flavor and body to the gravy, so there is no need to separate it unless you prefer a very lean gravy.
- Lump-Free Secret: The key to smooth gravy is adding the liquid slowly to the hot roux while whisking fast.
- Prep Time: 5 minutes
- Cook Time: 10 minutes
- Category: Sauce, Gravy, Holiday
- Method: Stovetop, Whisking
- Cuisine: American
Nutrition
- Serving Size: 1 serving (¼ cup)
- Calories: 65 kcal
- Sugar: 0 g
- Sodium: 150 mg
- Fat: 5 g
- Saturated Fat: 3 g
- Unsaturated Fat: 2 g
- Trans Fat: 0 g
- Carbohydrates: 3 g
- Fiber: 0 g
- Protein: 1 g
- Cholesterol: 12 mg