


Have you ever marveled at a pantry lined with gleaming jars of preserved fruits and vegetables, and wished you could do the same? The art of home canning can seem intimidating, a skill reserved for our grandparents’ generation. But what if I told you that you could easily capture the sweet, earthy flavour of carrots in a jar, creating a delicious, ready-to-eat side dish that will brighten up meals all year long?
- What You’ll Need: Ingredients
- Timing
- Step-by-Step Guide to Canning Carrots
- Step 1: Prepare Your Jars and Canner
- Step 2: Prepare the Carrots and Glaze
- Step 3: Choose Your Method: Raw Pack vs. Hot Pack
- Step 4: Fill the Jars
- Step 5: Process in a Pressure Canner
- Step 6: Cool and Check the Seals
- Nutritional Information
- Customization and Alternatives
- Serving Suggestions
- Common Mistakes to Avoid in Canning Carrots
- Storing and Make-Ahead Tips
- Conclusion
- FAQs
- Q1. Do I absolutely have to use a pressure canner for this recipe?
- Q2. What is the difference between the Raw Pack and Hot Pack methods?
- Q3. Can I use baby carrots instead of slicing large carrots?
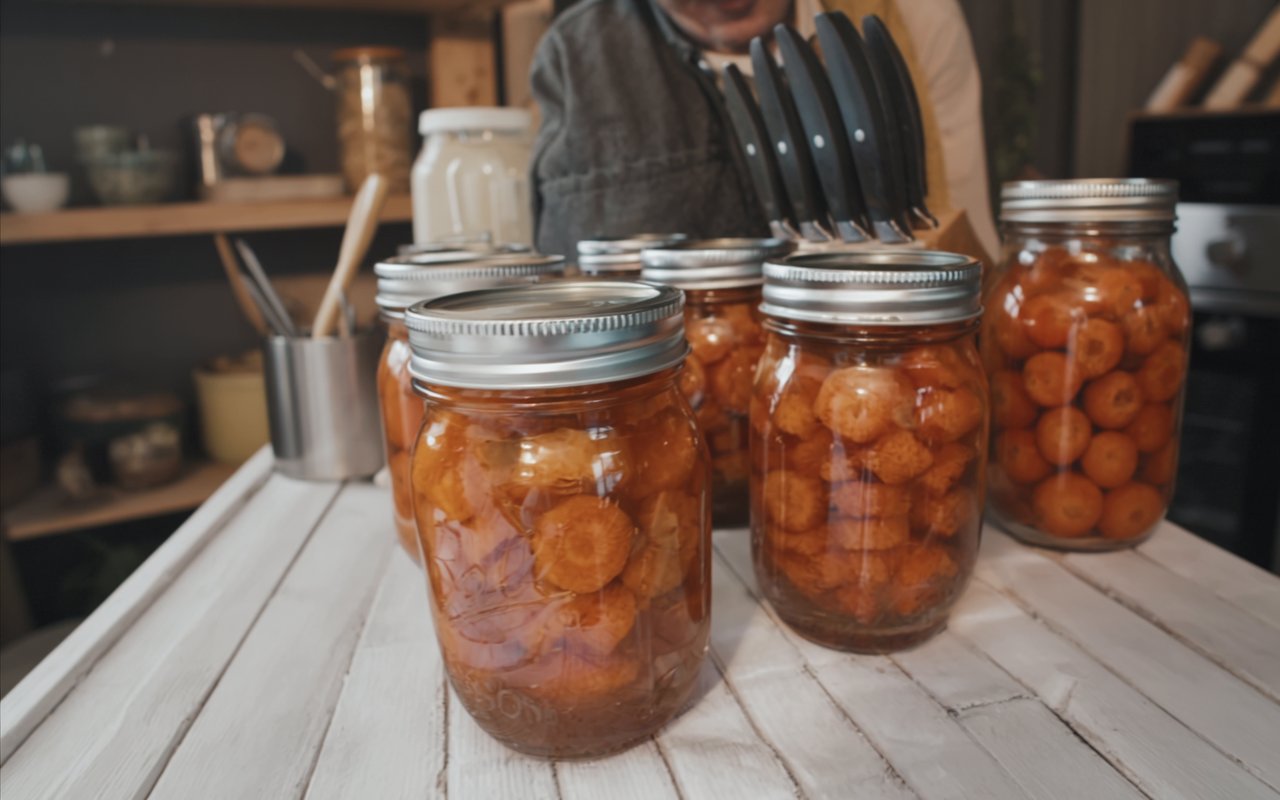
- How to Can Glazed Carrots (Easy Ball Canning Recipe)
This classic recipe from the experts at Ball is the perfect introduction to the rewarding world of food preservation. We’re going to walk you through every step of making these incredible Glazed Carrots. This simple process of canning carrots in a sweet and tangy brown sugar and orange juice brine is surprisingly straightforward. Get ready to build your confidence and stock your pantry with a side dish that’s perfect for holidays, busy weeknights, and everything in between.
What You’ll Need: Ingredients
This recipe uses just four simple ingredients to transform fresh carrots into a sweet and savory, shelf-stable side dish.
| Ingredient | Amount/Quantity |
| Fresh carrots, peeled and cut into 1- to 1½-inch coins | 6 to 9 pounds |
| Brown sugar, packed | 2 cups |
| Water | 2 cups |
| Unsweetened orange juice (no pulp) | 1 cup |

Timing
While pressure canning involves several steps, the active hands-on time is relatively short. The majority of the time is spent letting the canner do its work.
- Preparation Time: 30-40 minutes
- Processing Time: Approximately 1 hour (varies by canner)
- Total Time: Approximately 1 hour, 40 minutes
Step-by-Step Guide to Canning Carrots
This recipe requires a pressure canner. Carrots are a low-acid vegetable and cannot be safely preserved using a boiling water bath canner. Always follow your specific canner’s manufacturer instructions.
Step 1: Prepare Your Jars and Canner
Before you begin, inspect your canning jars for any nicks or cracks. Wash your jars, lids, and rings in hot, soapy water and rinse them well. Fill your pressure canner with the amount of water specified in its manual (usually 2-3 inches), place the jars inside, and bring the water to a simmer to keep the jars hot until you’re ready to fill them.
Step 2: Prepare the Carrots and Glaze
While the jars are heating, peel your carrots and slice them into uniform 1- to 1½-inch thick coins. In a large pot, combine the brown sugar, water, and orange juice for the glaze. Bring the mixture to a boil over medium-high heat, stirring until the brown sugar has completely dissolved. Once boiling, reduce the heat to a low simmer to keep the brine hot.
Step 3: Choose Your Method: Raw Pack vs. Hot Pack
You have two simple options for packing your jars:
- Raw Pack (Easiest Method): This is the quickest method. You will simply pack the raw, sliced carrots into your hot jars.
- Hot Pack (Recommended for Best Quality): This method involves pre-cooking the carrots briefly. Place the sliced carrots in a large saucepan and add water just to cover them. Bring the mixture to a boil, then reduce the heat and simmer for 5 minutes. This step helps remove air from the carrots, which can result in a better-quality final product.
Step 4: Fill the Jars
Working with one jar at a time, carefully remove a hot jar from your canner.
- For Raw Pack: Tightly pack the raw carrot coins into the hot jar.
- For Hot Pack: Use a slotted spoon to pack the hot, simmered carrots into the hot jar.
For both methods, leave a 1-inch headspace (the space between the top of the food and the rim of the jar). Ladle the hot brown sugar glaze over the carrots, making sure to maintain that 1-inch headspace. Remove any air bubbles by sliding a thin spatula or bubble remover tool around the inside of the jar. Wipe the rim of the jar with a clean, damp cloth to ensure a good seal. Center a lid on the jar and screw on the ring until it is “fingertip tight.”
Step 5: Process in a Pressure Canner
Place the filled jar back into the canner. Repeat until all jars are filled. Lock the canner lid in place, leaving the weight off the vent pipe. Turn the heat to medium-high and vent the canner by letting a steady stream of steam escape for a full 10 minutes.
After venting, place the weight on the vent pipe and bring the canner to 10 pounds of pressure. Once it reaches pressure, you must start your timer and process the jars:
- Pints: 25 minutes
- Quarts: 30 minutes
Adjust your heat as needed to maintain a constant pressure.
Step 6: Cool and Check the Seals
When the processing time is complete, turn off the heat and allow the canner to depressurize naturally. Once the pressure has returned to zero, remove the weight, wait a few minutes, and then unlock and remove the lid. Let the jars sit in the canner for another 5 minutes before removing them with a jar lifter and placing them on a towel-lined countertop. Let the jars cool undisturbed for 12 to 24 hours. You should hear the satisfying “ping” of the lids sealing. After they are cool, check the seals by pressing on the center of each lid. If it doesn’t flex, the jar is sealed.

Nutritional Information
Here is an estimated nutritional breakdown per ½ cup serving.
- Calories: ~120 kcal
- Protein: 1 g
- Carbohydrates: 30 g (Sugar: 25 g)
- Fat: 0 g
Customization and Alternatives
This recipe is delicious as is, but you can easily adapt it to your tastes.
- Reduce Sugar: You can reduce the amount of brown sugar in the glaze for a less sweet final product. A ratio of 1 cup of sugar to 2 cups of water and 1 cup of juice would still be delicious.
- Canning Plain Carrots: For a no-sugar-added option, you can follow the same packing and processing instructions but use boiling water instead of the glaze. You can add an optional ½ teaspoon of salt to each pint jar for flavour.
Serving Suggestions
Having these jars in your pantry is like having a secret weapon for quick and easy side dishes, especially around the holidays.
- Holiday Side Dish: These glazed carrots are the perfect, effortless side dish for a holiday meal. Simply open a jar, heat them gently in a saucepan, and serve alongside a roasted turkey, a holiday ham, or a pot roast.
- Weeknight Helper: On a busy weeknight, they are a fantastic way to add a vegetable to the plate. They pair beautifully with simple roasted chicken or pork chops.
- Finishing Touches: For an extra touch of flair, you can stir a pat of butter into the carrots as they heat up, and garnish with a sprinkle of fresh chopped parsley or chives before serving.
Common Mistakes to Avoid in Canning Carrots
Food safety is the top priority in home canning. Here are some crucial points to follow.
- Attempting to Use a Water Bath Canner: Carrots are a low-acid food. They do not contain enough acid to prevent the growth of bacteria that can cause botulism.
- Solution: You must use a pressure canner for this recipe. A boiling water bath canner cannot reach a high enough temperature to safely preserve low-acid vegetables like carrots.
- Incorrect Headspace: Leaving too much or too little space at the top of the jar is a common cause of seal failure.
- Solution: Use a headspace tool or a simple ruler to ensure you have exactly 1 inch of space between the top of the carrots/glaze and the rim of the jar.
- Forgetting to Vent the Canner: Venting the canner for a full 10 minutes is a critical safety step. It ensures that all the air is pushed out of the canner, creating a pure steam environment for accurate and safe processing.
- Solution: Always set a timer and let a full, strong jet of steam escape for 10 minutes before placing the weight on the vent pipe.
Storing and Make-Ahead Tips
Properly stored, your homemade glazed carrots will be a pantry staple for a long time.
- Storing: Remove the rings from your sealed jars (this prevents rust and allows you to spot a failed seal more easily). Label the lids with the contents and the date. Store the jars in a cool, dark, and dry place like a pantry or cupboard for up to 18 months.
- If a Seal Fails: If you find a jar that did not seal properly after the 24-hour cooling period, do not store it at room temperature. The contents are not shelf-stable. You can either re-process the jar with a new lid, or simply place it in the refrigerator and use the carrots within a few days.
Conclusion
Home canning is an incredibly rewarding skill that connects you to your food and allows you to enjoy the taste of the seasons all year round. This recipe for Glazed Carrots is a simple, delicious, and safe way to dip your toes into the world of pressure canning. The sweet and tangy flavour is a true delight, and the convenience of having a ready-made side dish in your pantry is unbeatable.
We are so excited for you to experience the satisfaction of canning carrots for yourself. Give this recipe a try and let us know how it goes in the comments below! We love to hear about your canning adventures. Don’t forget to rate the recipe and subscribe for more trusted and delicious food preservation guides.
FAQs
Q1. Do I absolutely have to use a pressure canner for this recipe?
Yes, 100%. Carrots are a low-acid vegetable, and for them to be safely preserved and made shelf-stable, they must be processed at a temperature higher than boiling water can reach. Only a pressure canner can achieve these necessary high temperatures.
Q2. What is the difference between the Raw Pack and Hot Pack methods?
The Raw Pack method is quicker, as you simply pack raw carrots into the jars. The Hot Pack method involves simmering the carrots for 5 minutes before packing them. Hot packing helps to remove some of the air from the vegetable, which can prevent the carrots from floating in the jar and can sometimes result in a slightly better texture and color. Both methods are safe and delicious.
Q3. Can I use baby carrots instead of slicing large carrots?
Yes, absolutely! Using whole, peeled baby carrots is a fantastic time-saving shortcut for this recipe. The processing times remain the same.
Print
How to Can Glazed Carrots (Easy Ball Canning Recipe)
- Total Time: 1 hour 40 minutes
- Yield: 6 pints (approx.) 1x
Description
What You’ll Need: Ingredients. Four simple ingredients turn fresh carrots into a sweet-&-savory, shelf-stable side. This method requires a pressure canner because carrots are low-acid. Follow your canner manual for setup and safety.
Ingredients
Glazed Carrots (Pressure Canning)
- 6–9 lb fresh carrots, peeled and cut into 1-1 1/2-inch coins
- 2 cups brown sugar, packed
- 2 cups water
- 1 cup unsweetened orange juice (no pulp)
Instructions
- Prep jars & canner: Inspect jars, lids, and rings. Wash in hot soapy water; rinse. Add 2–3 inches of water to pressure canner per manual, place jars inside, and keep jars hot at a simmer until filling.
- Make glaze: Peel and slice carrots into 1–1½-inch coins. In a large pot, combine brown sugar, water, and orange juice. Bring to a boil, stirring to dissolve sugar; reduce to a gentle simmer to keep hot.
- Choose pack method: Raw Pack (easiest): pack raw carrot coins into hot jars. Hot Pack (best quality): simmer carrot coins in water 5 minutes; drain, then pack hot carrots into hot jars.
- Fill jars: Ladle hot brown-sugar glaze over carrots, leaving 1-inch headspace. Remove air bubbles with a tool, adjust headspace, wipe rims clean, center lids, and apply rings fingertip-tight.
- Process (pressure canner): Load jars into canner. Lock lid, leave weight off, and vent steam for 10 minutes. Apply weight and bring to 10 lb pressure (or per your canner & altitude). Process Pints 25 minutes; Quarts 30 minutes, maintaining steady pressure.
- Cool & check seals: Turn off heat; allow canner to depressurize naturally to 0. Remove weight; wait a few minutes. Open lid away from you and rest jars in canner 5 minutes. Transfer to towel-lined counter; cool undisturbed 12–24 hours. Check that lids don’t flex (sealed).
- Label & store: Remove rings, wipe jars, label with date, and store in a cool, dark place. Refrigerate any unsealed jars and use within a few days.
Notes
Safety first: Carrots are low-acid; use a pressure canner—never a boiling-water bath—for shelf-stable storage. Adjust pressure for altitude and follow your canner manufacturer’s instructions. Yield varies with jar size and pack method.
- Prep Time: 35 minutes
- Cook Time: 1 hour
- Category: Preserving, Side Dish
- Cuisine: American
Nutrition
- Calories: 120
- Sugar: 25
- Carbohydrates: 30
- Protein: 1


I made this today with 6 pounds of carrots and I needed to double the sauce to have enough for every jar. Yield was 8 pints and 4 half pints. All jars sealed and smelled amazing!
Thank you for telling me how much this makes. It annoys me when I do t know how many jars to sterilize.
I also appreciate knowing to double the glaze.
Good job!