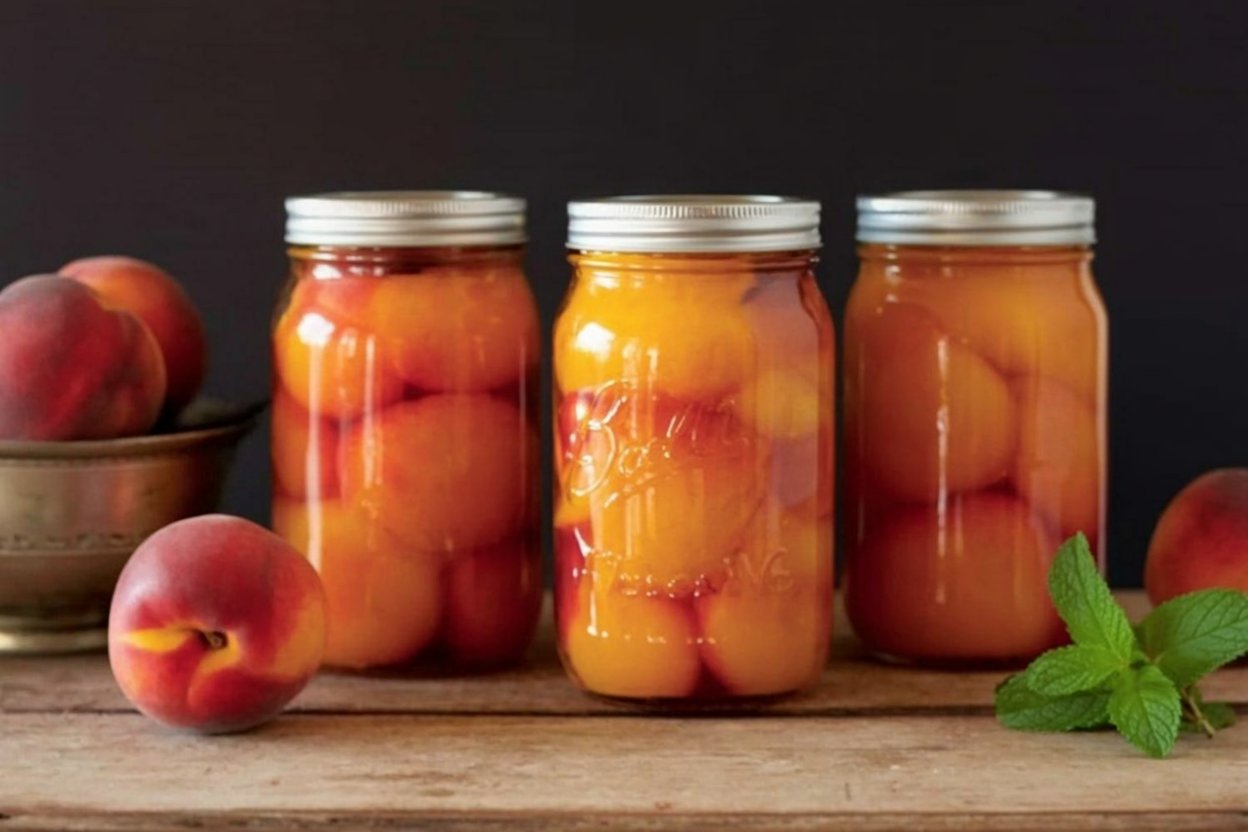
The Easiest Way to Can Peaches at Home
What if you could capture the vibrant, sun-ripened flavor of summer peaches and enjoy it all year long? It sounds like a nostalgic dream, doesn’t it? I remember watching my grandmother in her kitchen, surrounded by the sweet aroma of peaches, and thinking it was a complicated, all-day affair. But I’m here to tell you that learning how to can peaches is not only incredibly rewarding but surprisingly simple. This guide demystifies the process, breaking it down into easy-to-follow steps. Forget the store-bought cans; we’re about to preserve the pure taste of summer in a jar, and you’ll be amazed at how achievable it is.
- The Easiest Way to Can Peaches at Home
- Your Toolkit for Preserving Sunshine
- A Timeline for Your Canning Day
- Step 1: Prepare Your Canner and Jars
- Step 2: Blanch, Peel, and Slice the Peaches
- Step 3: Make the Light Syrup
- Step 4: Pack the Jars
- Step 5: Remove Air Bubbles and Seal
- Step 6: Process in the Water Bath Canner
- Step 7: Cool and Check the Seals
- Nutritional Information
- Healthier Alternatives for Your Peaches
- Serving Suggestions for Your Preserved Sunshine
- Common Mistakes to Avoid in Canning
- Storing Your Canned Treasures
- Your Gateway to Food Preservation
- Frequently Asked Questions
This isn’t just a recipe; it’s a timeless skill that connects you to your food. We will walk through the water bath canning method, a safe and straightforward technique perfect for beginners. Get ready to stock your pantry with jars of golden, sweet peaches that will brighten even the darkest winter days.
Your Toolkit for Preserving Sunshine
Here’s everything you’ll need to embark on your peach canning adventure. The list is simple, highlighting the star of the show: fresh, juicy peaches.
| Ingredient/Tool | Amount | Substitution Suggestions & Notes |
| Fresh Peaches | ~17 lbs | Choose freestone peaches like Red Globe or Elberta for easy pitting. This makes about 7 quarts. |
| Lemon Juice | 1/4 cup | Bottled lemon juice is recommended for its consistent acidity level, which is crucial for safety. |
| Water | 6 cups (+ more for canner & blanching) | For the light syrup. You can adjust the water-to-sugar ratio for different syrup consistencies. |
| Granulated Sugar | 1 1/2 cups | Use honey or maple syrup for a different flavor profile, though it may alter the color slightly. |
| Ice | A large bowlful | Essential for the ice bath to stop the cooking process after blanching. |
| Canning Jars, Lids, and Rings | 7 quart-sized or 14 pint-sized | Ensure they are clean and free of nicks or cracks. |
| Water Bath Canner with Rack | 1 | A large, deep stockpot with a rack at the bottom can work in a pinch. |
| Jar Lifter, Canning Funnel, Bubble Popper/Headspace Tool | 1 set | These tools are highly recommended for safety and ease of use. |
A Timeline for Your Canning Day
Canning is a process, but it’s a manageable one. Here’s a breakdown of the time you’ll need.
- Prep time: 45 minutes (washing, blanching, peeling, and slicing)
- Processing time: 30 minutes (for quarts)
- Total time: Approximately 1 hour 45 minutes (plus cooling time)
While it takes a bit of time, this process is about 30% more efficient than many multi-step jam or jelly recipes, making it a great entry point into the world of preserving.
Step 1: Prepare Your Canner and Jars
Fill your water bath canner about halfway with water and begin heating it over medium-high heat. You want it to be simmering, not boiling, when you add your jars. Wash your jars, lids, and rings in hot, soapy water and rinse well. Place the clean jars on the rack in the canner to keep them hot. This prevents the jars from breaking when you fill them with hot peaches and syrup. Place the lids in a small saucepan of hot (not boiling) water.
Step 2: Blanch, Peel, and Slice the Peaches
Bring a large pot of water to a rolling boil. While it heats, prepare a large bowl of ice water. Gently place a few peaches at a time into the boiling water for 30-60 seconds. Using a slotted spoon, immediately transfer them to the ice bath. The skins should now slip off easily. Peel the peaches, cut them in half, and remove the pits. You can leave them in halves or slice them. To prevent browning, place the peeled peaches in a bowl of cool water mixed with the 1/4 cup of lemon juice.
Step 3: Make the Light Syrup
In a separate saucepan, combine the 6 cups of water and 1 1/2 cups of sugar. Heat over medium heat, stirring until the sugar is completely dissolved. Keep the syrup hot. This light syrup perfectly complements the natural sweetness of the peaches without overpowering them.
Step 4: Pack the Jars
Using the jar lifter, carefully remove one hot jar from the canner, pouring the water back into the canner. Place the jar on a towel-lined counter. Using your canning funnel, pack the peach slices or halves, cavity-side down, into the hot jar. You can pack them tightly, but don’t smash them. Ladle the hot syrup over the peaches, leaving a ½-inch headspace at the top of the jar.
Step 5: Remove Air Bubbles and Seal
Slide your bubble popper tool or a thin wooden skewer around the inside of the jar to release any trapped air bubbles. Check the headspace again and add more syrup if needed to maintain the ½-inch space. Wipe the rim of the jar with a clean, damp cloth to ensure a good seal. Center the hot lid on the jar and screw on the ring until it is “fingertip tight”—just snug enough that your fingertips can’t turn it anymore.
Step 6: Process in the Water Bath Canner
Carefully place the filled jar back into the canner using the jar lifter. Repeat until all jars are filled. Ensure the water level is at least 1-2 inches above the tops of the jars, adding more hot water if necessary. Place the lid on the canner and bring the water to a full rolling boil. Once boiling, start your timer. Process quart jars for 30 minutes and pint jars for 25 minutes (adjust for altitude).
Step 7: Cool and Check the Seals
When the processing time is up, turn off the heat, remove the canner lid, and let the jars sit in the hot water for 5 minutes. This helps prevent siphoning (loss of liquid from the jars). Carefully remove the jars from the canner with the jar lifter and place them on a towel-lined counter. Leave them undisturbed for 12-24 hours. You will likely hear a “ping” sound as the jars cool and the lids seal. After 24 hours, check the seals by pressing on the center of the lid. If it doesn’t flex, the jar is sealed.

Nutritional Information
Here is an approximate nutritional breakdown for a ½-cup serving of canned peaches in light syrup:
- Calories: ~90 kcal
- Protein: ~1g
- Carbohydrates: ~23g
- Fat: ~0g
- Fiber: ~1.5g
- Sugar: ~21g
Canned peaches are a good source of Vitamin C and Vitamin A. By canning them yourself, you control the amount of sugar, making them a healthier option than many commercial brands.
Healthier Alternatives for Your Peaches
One of the greatest benefits of home canning is control over the ingredients.
- Sugar-Free Option: You can safely can peaches in plain water or unsweetened fruit juice (like apple or white grape juice) instead of syrup. The texture may be slightly softer, but the natural peach flavor will shine.
- Reduced Sugar Syrup: Feel free to reduce the sugar in the syrup further. An extra-light syrup can be made with about ¾ cup of sugar to 6 cups of water.
- Natural Sweeteners: You can experiment with honey or maple syrup. A general rule is to use about half the amount of honey as you would sugar, as it’s sweeter.
Serving Suggestions for Your Preserved Sunshine
Your beautiful jars of canned peaches are incredibly versatile.
- A Simple Treat: Enjoy them straight from the jar for a quick, delicious snack.
- Breakfast Boost: Spoon them over yogurt, oatmeal, pancakes, or waffles.
- Delicious Desserts: They are the perfect base for a classic peach cobbler, crisp, or pie.
- Savory Pairings: Surprisingly, they pair wonderfully with savory dishes like grilled pork chops or chicken.
- Blended into Smoothies: Add a couple of peach slices to your morning smoothie for a taste of summer.
Common Mistakes to Avoid in Canning
To ensure your canning journey is safe and successful, avoid these common errors:
- Using Overripe or Bruised Peaches: Always start with firm, ripe, unblemished fruit for the best quality and safety.
- Ignoring Headspace: Incorrect headspace can lead to a failed seal. Use a headspace tool for accuracy.
- Forgetting to Remove Air Bubbles: Trapped air can also interfere with sealing and may cause the fruit to discolor.
- Overtightening the Rings: This can prevent air from escaping during processing, which can cause the seals to fail or even the jars to break. “Fingertip tight” is the golden rule.
- Not Adjusting for Altitude: If you live above 1,000 feet, you must increase your processing time. Check with your local extension office for specific recommendations.

Storing Your Canned Treasures
Proper storage is key to enjoying your canned peaches for months to come.
- Cool, Dark, and Dry: Store your sealed jars in a pantry, cupboard, or basement away from direct sunlight and temperature fluctuations.
- Remove the Rings: Once the jars are sealed and cooled, you can remove the screw rings. This prevents rust and makes it easier to spot a failed seal.
- Label and Date: Always label your jars with the contents and the date they were canned.
- Shelf Life: When properly stored, canned peaches will maintain their best quality for at least one year.
Your Gateway to Food Preservation
Learning how to can peaches is a rewarding skill that fills your pantry with the delicious taste of summer and gives you a deep sense of accomplishment. This step-by-step guide proves that with a little time and care, anyone can master the art of preserving. The flavor of a home-canned peach is unparalleled, and the process connects you to the food you eat in a truly meaningful way.
I invite you to try this timeless recipe and discover the joy of canning for yourself. Share your experiences, questions, or your favorite way to enjoy canned peaches in the comments below. For more guides on preserving and from-scratch cooking, be sure to subscribe to our blog!
Frequently Asked Questions
Do I have to use a water bath canner?
For high-acid foods like peaches, a water bath canner is the recommended method for safe preservation. A pressure canner is not necessary for this recipe.
Why do I need to add lemon juice?
Lemon juice increases the acidity of the peaches, which helps to prevent the growth of bacteria and ensures the canned product is safe to eat.
What is a “freestone” peach?
Freestone peaches have flesh that easily separates from the pit, making them much easier to prepare for canning. “Clingstone” peaches have flesh that clings to the pit.
What happens if a jar doesn’t seal?
If a jar doesn’t seal within 24 hours, you can either reprocess it with a new lid, or simply store it in the refrigerator and eat the peaches within a few days.
Can I reuse canning lids?
No, the sealing compound on canning lids is designed for a single use. You must use new lids each time you can. The rings, however, can be reused.