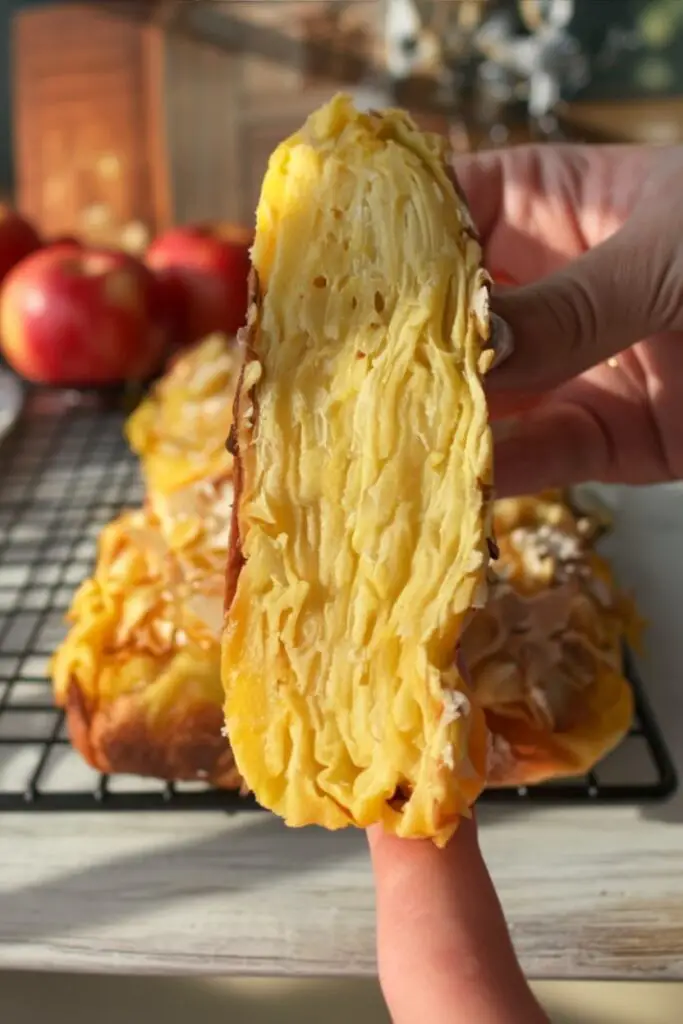
Have you ever wished for a dessert that is 90% fruit and 10% pure magic? I remember the first time I stumbled upon the concept of a Gâteau Invisible in a small French cookbook. The idea challenged everything I knew about baking: adding so many apples that the batter virtually disappears. I was skeptical that it would hold together, but the result was a revelation. This Invisible Apple Cake is less of a traditional sponge and more of a sophisticated, custard-like delight where thin layers of caramelized Honey Crisp apples take center stage.
- Ingredients
- Timing
- Step-by-Step Instructions
- Step 1: Prepare Your Station
- Step 2: Slice the Apples Thinly
- Step 3: Whip the Eggs and Sugar
- Step 4: Add the Wet Ingredients
- Step 5: Incorporate Dry Ingredients
- Step 6: Coat the Apples
- Step 7: Layer the Loaf Pan
- Step 8: The Final Pour and Top
- Step 9: Bake and Cool
- Nutritional Information
- Healthier Alternatives
- Serving Suggestions
- Common Mistakes to Avoid
- Storing Tips
- Conclusion
- FAQs
- Q1. Can I use a different type of fruit?
- Q2. Why is my cake soggy in the middle?
- Q3. Do I really need a mandoline?
- Invisible Apple Cake: The Ultimate Melty French Apple Dessert
If you are looking for a dessert that feels light yet indulgent, this is it. The batter transforms into a creamy binding agent, allowing the apples to melt into one another, creating a seamless stack of fruity goodness. Whether you are hosting a festive holiday gathering or just craving a cozy treat by the fireplace, this recipe delivers a high-end bakery experience right in your own kitchen. Let’s dive into how to make this stunning, melt-in-your-mouth treat.
Ingredients
To achieve that perfect balance of structure and creaminess, precise measurements are key. Here is what you will need:
| Ingredient | Quantity | Notes |
| Honey Crisp Apples | 4 large (approx. 1.5 lbs) | Peeled, cored, and thinly sliced |
| Eggs | 2 large | Room temperature for better mixing |
| Granulated Sugar | ⅓ cup | Adds sweetness and aids caramelization |
| Milk | ½ cup | Warmed slightly |
| Unsalted Butter | 2 tablespoons | Melted and cooled slightly |
| Vanilla Extract | 1 teaspoon | Or fresh vanilla bean for speckles |
| All-Purpose Flour | ½ cup | Provides just enough structure |
| Salt | ¼ teaspoon | Balances the sweetness |
| Baking Powder | 1 teaspoon | Gives a slight lift |
| Cinnamon | ½ teaspoon (Optional) | Adds warmth to the flavor profile |
| Sliced Almonds | Handful (Optional) | For a crunchy, bakery-style topping |
Timing
This recipe requires a bit of patience during the prep and cooling stages, but the actual hands-on time is quite manageable.
- Prep Time: 20 minutes
- Cook Time: 50–60 minutes
- Cooling Time: 30 minutes (Essential for setting the texture)
- Total Time: Approx. 1 hour 50 minutes
Step-by-Step Instructions
Step 1: Prepare Your Station
Start by preheating your oven to 350°F (177°C). Take an 11×5 inch loaf pan and line it with parchment paper. This step is crucial because the cake is very moist, and parchment ensures you can lift it out easily without breaking those beautiful layers.
- Safety Tip: We will be using a mandoline next. Never use a mandoline without the hand guard. Serious injuries can happen in a split second. If you don’t have a guard, please slice carefully by hand.
Step 2: Slice the Apples Thinly

Peel and core your Honey Crisp apples. Using your mandoline set to the thinnest setting (about 1/8 inch), slice the whole apples into uniform rings. If you are using a knife, try to be as consistent as possible. The thinner the apples, the more “invisible” the batter becomes, melting into the fruit layers. Set these beautiful rings aside.
Step 3: Whip the Eggs and Sugar
In a large mixing bowl, crack in the two eggs and add the ⅓ cup of sugar. Using an electric mixer, beat them together for about 1–2 minutes. You are looking for the mixture to thicken slightly and turn a pale yellow color. This incorporates air and ensures a light texture.
Step 4: Add the Wet Ingredients
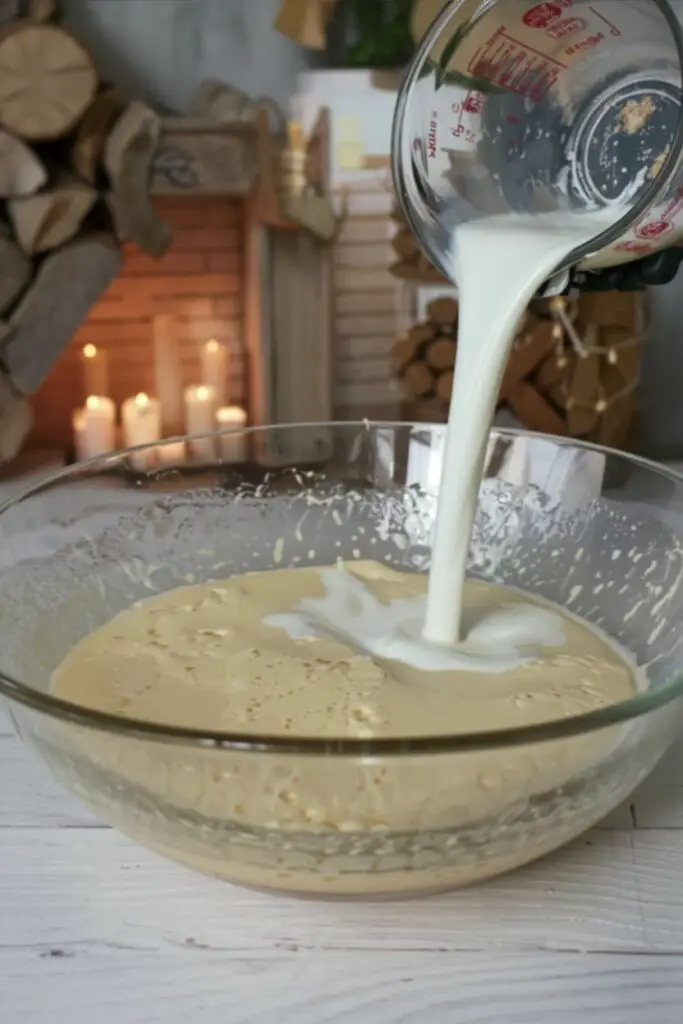
Pour in the warmed milk, melted butter, and vanilla extract. The warmth of the milk helps keep the butter liquid and emulsifies the batter smoothly. Mix gently until everything is combined. The aroma of vanilla and butter should already be filling your kitchen.
Step 5: Incorporate Dry Ingredients
Add the flour, salt, baking powder, and cinnamon (if using) to the wet mixture. Mix just until the flour streaks disappear.
- Tip: Do not overmix at this stage. Overworking the flour can develop gluten, making the cake rubbery instead of tender.
Step 6: Coat the Apples
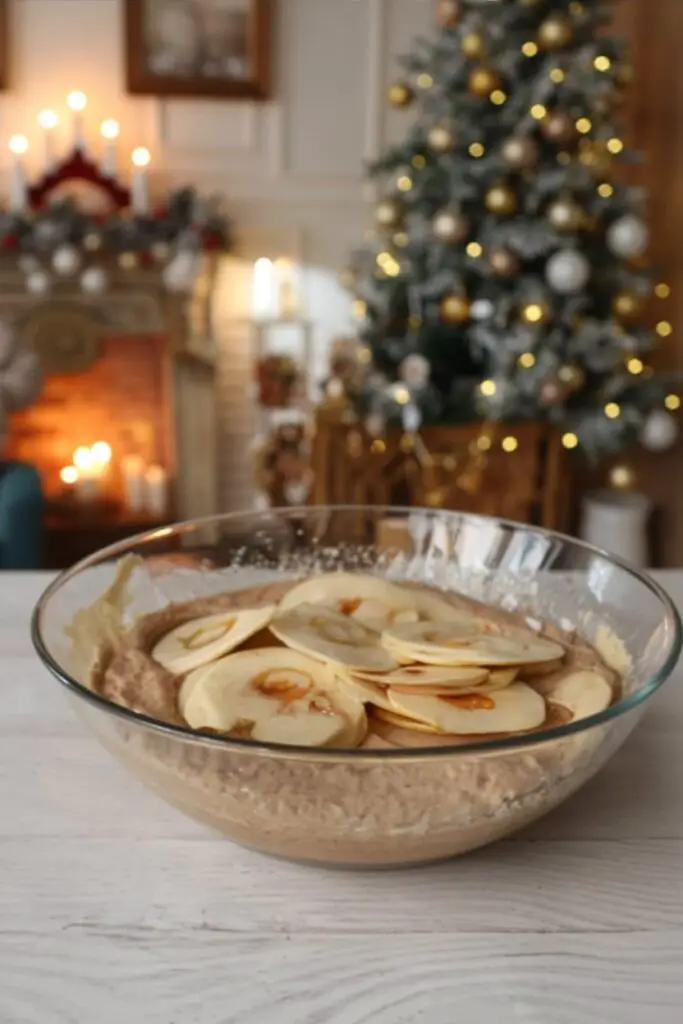
This is the fun part! Toss the sliced apples into the bowl with the batter. Use your hands or a spatula to gently fold them in, ensuring every single apple slice is coated in the batter. It might look like there isn’t enough batter, but trust the process—it’s exactly right.
Step 7: Layer the Loaf Pan
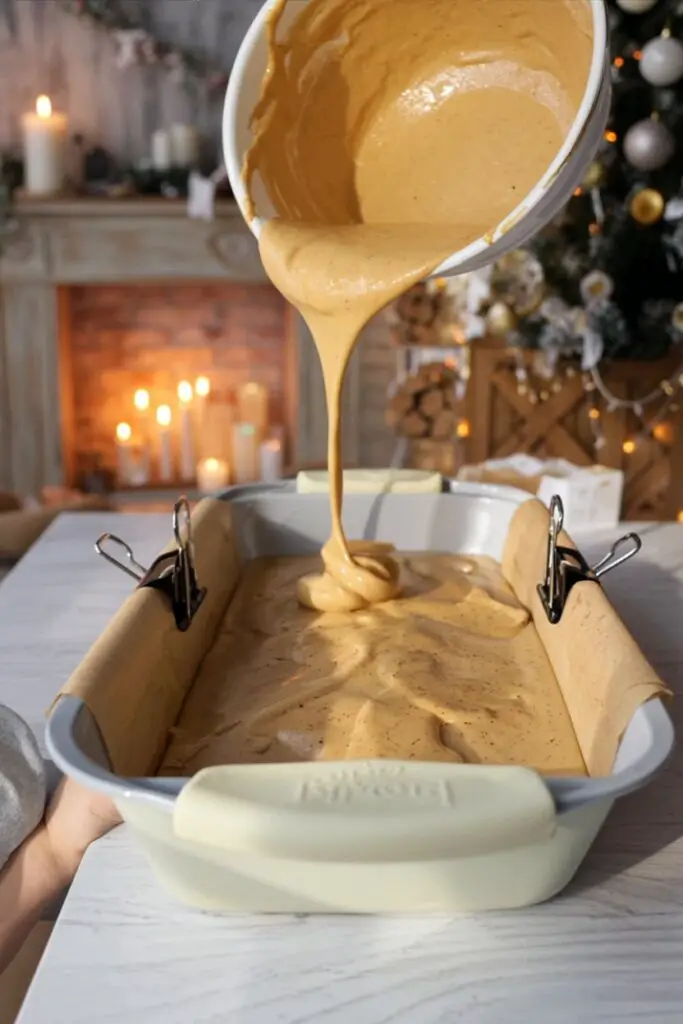
With clean hands, pick up small stacks of coated apple rings and arrange them into your prepared loaf pan. Layer them evenly, pressing down slightly as you go, until the pan is full to the top.
Step 8: The Final Pour and Top
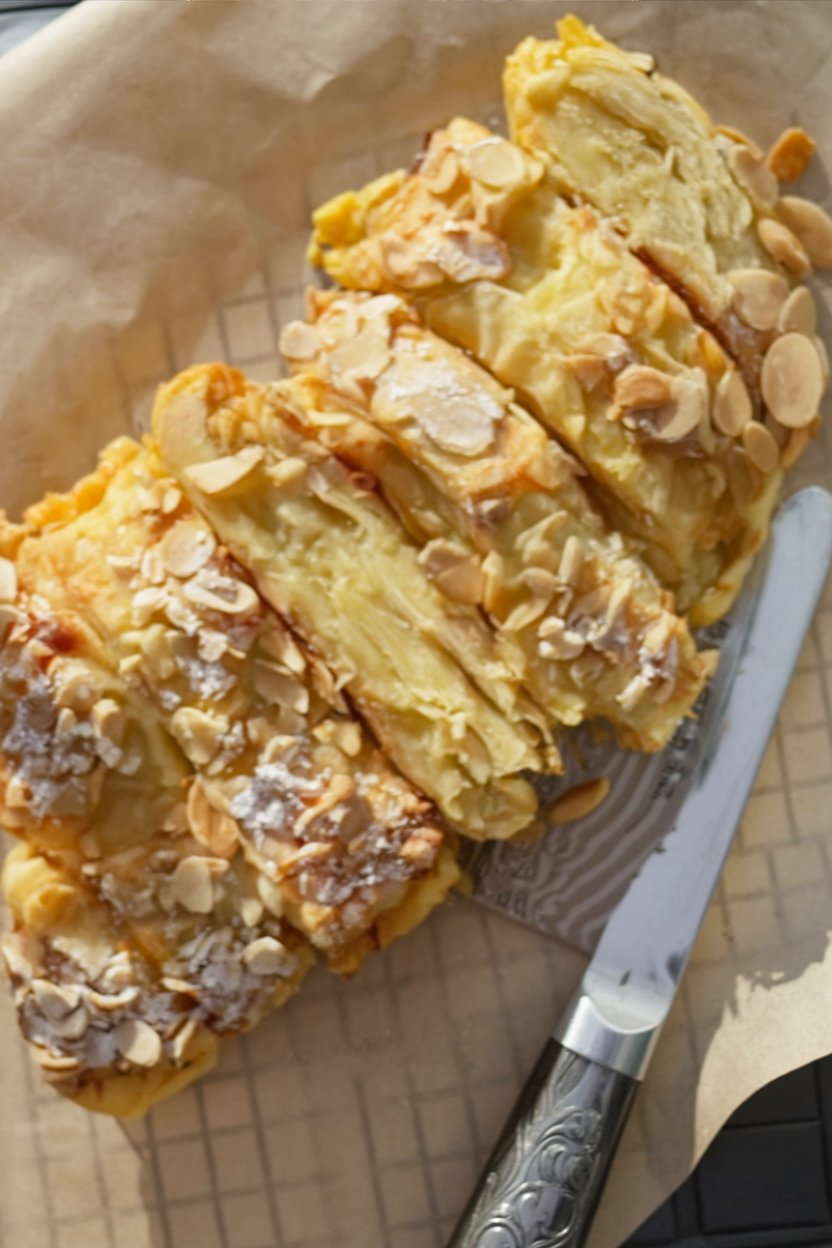
You will likely have a little bit of batter left in the bottom of the bowl. Pour this remaining batter over the apples in the pan and give the pan a gentle shake to distribute it. If you want a professional finish, sprinkle the sliced almonds on top now. They toast beautifully in the oven and add a lovely crunch.
Step 9: Bake and Cool

Place the pan in the center of your oven and bake for 50–60 minutes. The top should be lightly golden, and a toothpick inserted into the center should come out clean (free of raw batter, though it may be moist from apples).
- Crucial Step: Once baked, let the cake cool in the pan on a wire rack for at least 30 minutes. If you try to slice it while hot, it will be a mushy mess! It needs this time to set into that gorgeous custard texture.
Nutritional Information
This Invisible Apple Cake is surprisingly lighter than traditional butter cakes because the bulk of the volume comes from fruit. Here is an estimated breakdown per slice (assuming 8 slices):
- Calories: ~160 kcal
- Carbohydrates: 28g
- Fat: 5g
- Protein: 3g
- Fiber: 2g
- Sugar: 18g (Natural fruit sugars + added sugar)
Note: Apples are a great source of Vitamin C and fiber, making this a smarter choice for a sweet craving.
Healthier Alternatives
If you are looking to tweak this recipe to fit specific dietary needs, here are a few tested modifications:
- Low Sugar: You can swap the granulated sugar for a granular sweetener like erythritol or monk fruit. Since apples provide natural sweetness, the result is still delicious.
- Gluten-Free: Substitute the all-purpose flour with a high-quality 1:1 Gluten-Free Baking Flour blend. Because there is so little flour in the recipe, the texture change is minimal.
- Dairy-Free: Use almond milk or oat milk instead of cow’s milk, and swap the butter for melted coconut oil or a vegan butter alternative. The coconut oil adds a subtle, tropical fragrance that pairs well with cinnamon.
Serving Suggestions
While this cake is stunning on its own, the right pairing can elevate it to a restaurant-quality dessert.
- The Classic: A simple dusting of powdered sugar right before serving highlights the golden almond crust.
- Á La Mode: Serve a warm slice with a scoop of high-quality vanilla bean ice cream. The contrast between the warm, soft apple layers and the cold, creamy ice cream is perfection.
- Decadent: Drizzle homemade salted caramel sauce over the top. The salt cuts through the sweetness of the apples beautifully.
- Drink Pairing: This pairs wonderfully with a hot espresso or a spiced chai tea latte, perfect for a cozy afternoon break.
Common Mistakes to Avoid
To ensure your Gâteau Invisible turns out perfectly every time, watch out for these common pitfalls:
- Slicing Apples Too Thick: If the slices are thick, they won’t layer compactly, and you lose the custard effect.
- Solution: Use a mandoline or take your time with a sharp knife to get paper-thin slices.
- Cutting Too Soon: This is the most common mistake. The cake needs to solidify as it cools.
- Solution: Patience is a virtue! Wait the full 30 minutes (or even chill it in the fridge) before slicing.
- Using Mealy Apples: Soft apples like Red Delicious can turn to mush in the oven.
- Solution: Stick to crisp varieties like Honey Crisp, Fuji, or Granny Smith (if you prefer tartness).
Storing Tips
This cake actually tastes even better the next day as the flavors meld.
- Refrigerator: Store leftovers in an airtight container in the fridge for up to 3 days. The texture will become firmer, almost like a bread pudding.
- Freezing: You can freeze individual slices wrapped tightly in plastic wrap and then foil. Thaw in the fridge overnight.
- Reheating: To revive that fresh-baked texture, warm a slice in the oven at 350°F for about 10 minutes. You can also microwave it for 20–30 seconds, though it will be softer.
Conclusion
This Invisible Apple Cake is a testament to the idea that simple ingredients can create extraordinary results. By letting the fruit take the lead, you create a dessert that is moist, flavorful, and texturally unique. It’s the kind of recipe that looks impressive but is secretly easy to pull off—my favorite kind of baking!
Whether you enjoy it as a light afternoon snack or a dressed-up holiday dessert, I hope this recipe brings a little warmth to your table. Try it out and let us know in the comments how it turned out for you! Did you add the almonds or try a different spice? We’d love to hear your feedback. Don’t forget to rate the recipe and subscribe to our blog for more delicious, creative recipes delivered straight to your inbox.
FAQs
Q1. Can I use a different type of fruit?
Yes! This “invisible” technique works well with firm pears as well. You can even do a mix of apple and pear. Just ensure whatever fruit you choose is firm enough to hold its shape during slicing and baking. Avoid soft fruits like peaches or berries, which release too much water.
Q2. Why is my cake soggy in the middle?
If the cake is soggy, it likely wasn’t baked long enough, or the apples released too much juice. Every oven is different, so if the top is browning but the center is still wet, cover the top loosely with foil and bake for an additional 10–15 minutes. Also, ensure you let it cool completely to set.
Q3. Do I really need a mandoline?
While not strictly “required,” a mandoline makes a huge difference in the texture. Achieving uniform, 1/8-inch slices by hand is difficult and time-consuming. The uniformity ensures even cooking and those beautiful, tight layers that define a Gâteau Invisible. If using a knife, sharpen it well and go slowly.
Print
Invisible Apple Cake: The Ultimate Melty French Apple Dessert
- Total Time: 1 hour 50 minutes
- Yield: 8 Slices 1x
- Diet: Vegetarian
Description
Have you ever wished for a dessert that is 90% fruit and 10% pure magic? This Gâteau Invisible is less of a traditional sponge and more of a sophisticated, custard-like delight where thin layers of caramelized Honey Crisp apples take center stage. The batter transforms into a creamy binding agent, allowing the apples to melt into one another for a seamless stack of fruity goodness.
Ingredients
-
4 large Honey Crisp Apples (approx. 1.5 lbs), peeled, cored, and thinly sliced
-
2 large Eggs, room temperature
-
1/3 cup Granulated Sugar
-
1/2 cup Milk, warmed slightly
-
2 tablespoons Unsalted Butter, melted and cooled slightly
-
1 teaspoon Vanilla Extract
-
1/2 cup All-Purpose Flour
-
1/4 teaspoon Salt
-
1 teaspoon Baking Powder
-
1/2 teaspoon Cinnamon (Optional)
-
Handful Sliced Almonds (Optional)
Instructions
-
Prepare Station: Preheat oven to 350°F (177°C). Line an 11×5 inch loaf pan with parchment paper.
-
Slice Apples: Peel and core apples. Using a mandoline set to 1/8 inch (or a sharp knife), slice apples into uniform rings.
-
Whip Eggs & Sugar: In a large bowl, beat eggs and sugar for 1–2 minutes until slightly thickened and pale yellow.
-
Add Wet Ingredients: Pour in warm milk, melted butter, and vanilla. Mix gently to combine.
-
Incorporate Dry Ingredients: Add flour, salt, baking powder, and cinnamon. Mix just until flour streaks disappear. Do not overmix.
-
Coat Apples: Toss apple slices into the batter. Use hands to gently fold until every slice is coated.
-
Layer the Pan: Arrange stacks of coated apple rings evenly into the loaf pan, pressing down slightly until full.
-
Top and Bake: Pour any remaining batter over the apples. Sprinkle with sliced almonds. Bake for 50–60 minutes until the top is golden and a toothpick comes out clean.
-
Cool: Let the cake cool in the pan on a wire rack for at least 30 minutes to set the custard texture before slicing.
Notes
- Mandoline Safety: Always use the hand guard when using a mandoline to slice the apples thinly and safely.
- Temperature Matters: Use warm milk to help keep the melted butter liquid and emulsify the batter smoothly.
- Crucial Cooling: Do not skip the 30-minute cooling time! If you slice it hot, it will be mushy. It needs this time to set into a gorgeous custard texture.
- Apple Choice: Honey Crisp apples are excellent for maintaining structure and flavor, but other firm baking apples work well too.
- Prep Time: 20 minutes
- Cook Time: 60 minutes
- Category: Dessert, Cake
- Method: Baking
- Cuisine: French
Nutrition
- Serving Size: 1 slice
- Calories: 160 kcal
- Sugar: 18 g
- Sodium: 80 mg
- Fat: 5 g
- Saturated Fat: 2 g
- Unsaturated Fat: 3 g
- Trans Fat: 0 g
- Carbohydrates: 28 g
- Fiber: 2 g
- Protein: 3 g
- Cholesterol: 50 mg