Have you ever found yourself craving something sweet and decadent well past dinnertime, but the thought of turning on your oven felt like too much work? Enter the microwave mug cake—a single-serving dessert marvel that has exploded in popularity for a good reason. In just a few short minutes, you can whip up a warm, fluffy cake that satisfies even the fiercest sugar cravings. It’s the ultimate solution for those seeking easy and quick desserts without the cleanup or commitment of a full-size bake.
- Gathering Your Essentials: Ingredients and Equipment
- Step-by-Step: Crafting the Perfect Mug Cake
- Step 1: Combine Dry Ingredients
- Step 2: Add Wet Ingredients
- Step 3: Microwave Magic
- Step 4: Cool and Devour
- Tips for a Fabulous Texture
- Flavor Variations and Fun Twists
- Frequently Asked Questions (FAQ)
- Storing and Reheating
- Why Mug Cakes are an “Easy and Quick Desserts” Essential
- Beyond the Basics: Making Mug Cakes a Social Experience
- Quick Recipe Roundup: More Mug Cake Ideas
- Conclusion: Microwave Magic at Your Fingertips
- Microwave Mug Cake: The Fastest Way to Indulge in Easy and Quick Desserts

In this article, you’ll discover how to make the perfect microwave mug cake, from choosing the right mug to experimenting with flavors. Whether you’re a busy professional, a college student in a dorm, or just someone who loves immediate gratification, the mug cake might become your new best friend. Let’s explore why these mini cakes have won hearts everywhere and how you can master them at home.
Why Mug Cakes Reign Supreme
Let’s begin by looking at what makes mug cakes so appealing:
- Speed: Most microwave mug cakes can be mixed and cooked in under five minutes. This is a game-changer if you’re juggling work, family, or last-minute dessert demands.
- Single Serving: No more worrying about leftover cake that tempts you for days. Mug cakes are designed for personal portions, so you can indulge guilt-free.
- Minimal Cleanup: All mixing happens in a single mug, meaning you don’t have to scrub bowls, pans, or mixers afterward.
- Versatility: From chocolate lava cakes to fruit cobbler-style mugs, the possibilities are endless. You can tailor each mug cake to your preference, making it perfect for households with varying tastes.
Given these benefits, it’s no wonder mug cakes have secured their spot among the champions of easy and quick desserts. They’re ideal for spontaneous sweet cravings, late-night study breaks, or fun family activities where everyone can customize their own treat.
Gathering Your Essentials: Ingredients and Equipment

Before you nuke a cake in your microwave, make sure you have the correct tools and ingredients at hand. Here’s a quick guide:
Key Ingredients (typical chocolate mug cake example):
- 4 tablespoons all-purpose flour
- 2–3 tablespoons sugar (adjust to taste)
- 2 tablespoons unsweetened cocoa powder (for a chocolate base)
- 1/4 teaspoon baking powder (helps with rising)
- Pinch of salt (enhances flavor)
- 3 tablespoons milk (dairy or non-dairy)
- 1 tablespoon oil (vegetable or melted butter)
- Optional: 1 tablespoon of chocolate chips for extra gooeyness
Equipment:
- A microwave-safe mug (8–12 ounces typically works best to prevent overflow).
- A microwave (ideally 700–1000 watts).
- A fork or small whisk for mixing.
Remember that your microwave’s power can affect cooking times. If your microwave is on the lower-watt side, your cake might take slightly longer to cook. If it’s very powerful, you’ll need to watch carefully to prevent overbaking.
Step-by-Step: Crafting the Perfect Mug Cake
Step 1: Combine Dry Ingredients
- Choose Your Mug: Pick a sturdy ceramic mug with enough room for the cake to rise without spilling over. Aim for at least an inch of headspace at the top.
- Mix Dry Ingredients: Add flour, sugar, cocoa powder, baking powder, and a pinch of salt directly into the mug. Stir well with a fork or small whisk to break up any lumps.
Step 2: Add Wet Ingredients
- Pour in Milk: Start with 3 tablespoons of your preferred milk (cow’s milk, almond milk, oat milk—whatever you have on hand).
- Incorporate Oil: Drizzle in 1 tablespoon of vegetable oil or melted butter. The oil helps keep the cake moist.
- Stir Thoroughly: Mix the batter until no pockets of dry flour remain. This is also your opportunity to add extras like chocolate chips or a swirl of peanut butter for extra flavor.
Step 3: Microwave Magic
- Cook Time: Microwave on high for roughly 60–90 seconds, depending on your microwave’s wattage. Keep an eye on the cake: if it starts to rise dangerously close to the mug’s edge, pause the microwave, let it fall a bit, and then continue.
- Check Doneness: The top should look set but not dry. You can insert a toothpick or the tip of a knife into the center—if it comes out mostly clean (a few moist crumbs are okay), your cake is done.
- Avoid Overcooking: Mug cakes can turn rubbery fast if microwaved too long. Start with the lower end of the time range, check it, and give it a few more seconds if needed.
Step 4: Cool and Devour
- Let It Rest: Carefully remove your mug from the microwave (it will be hot!). Let the cake cool for at least 1 minute. The heat in the mug continues to cook the cake slightly, and biting in too early could burn your tongue.
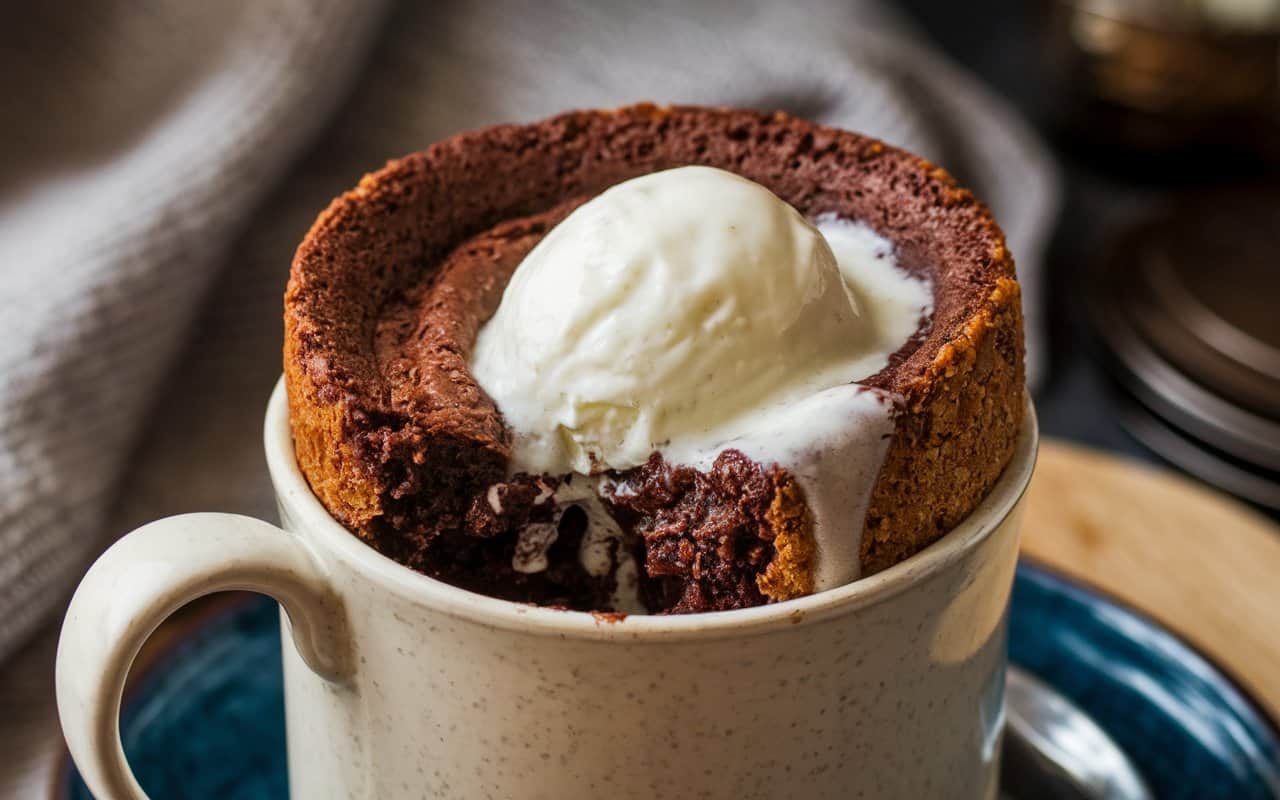
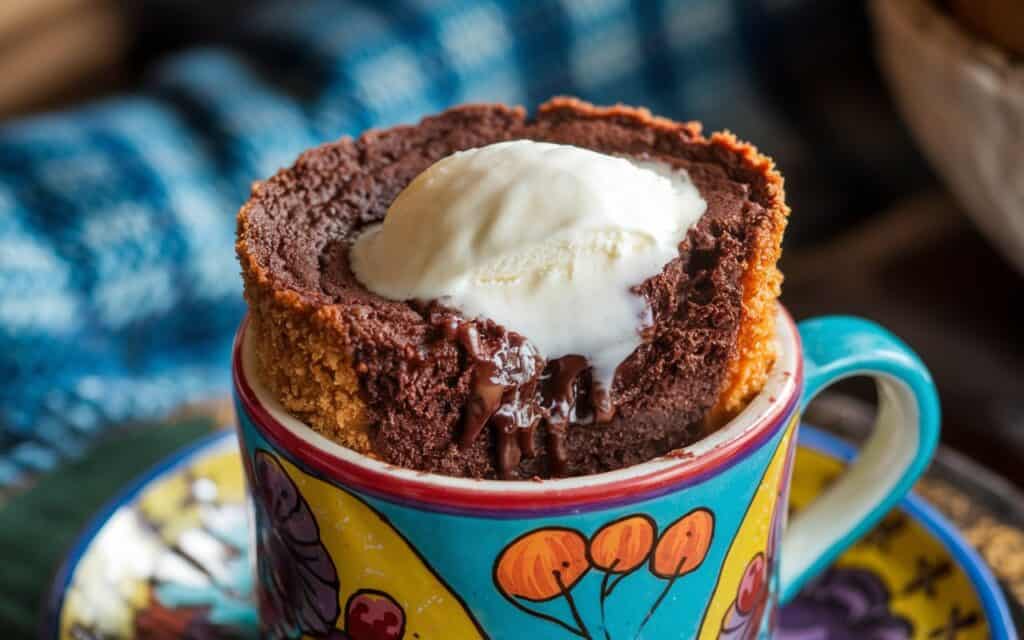
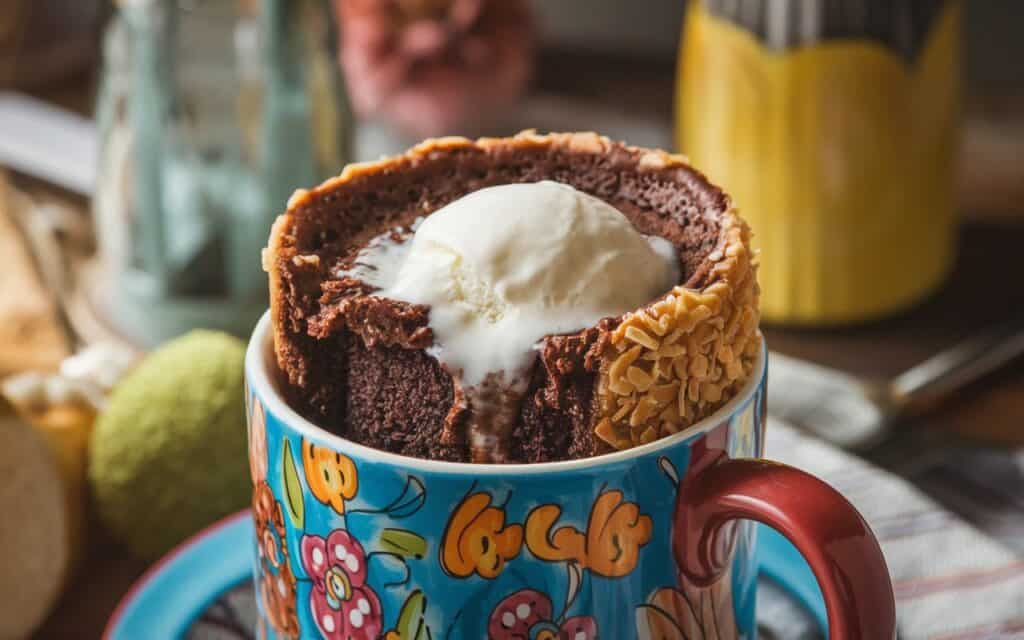
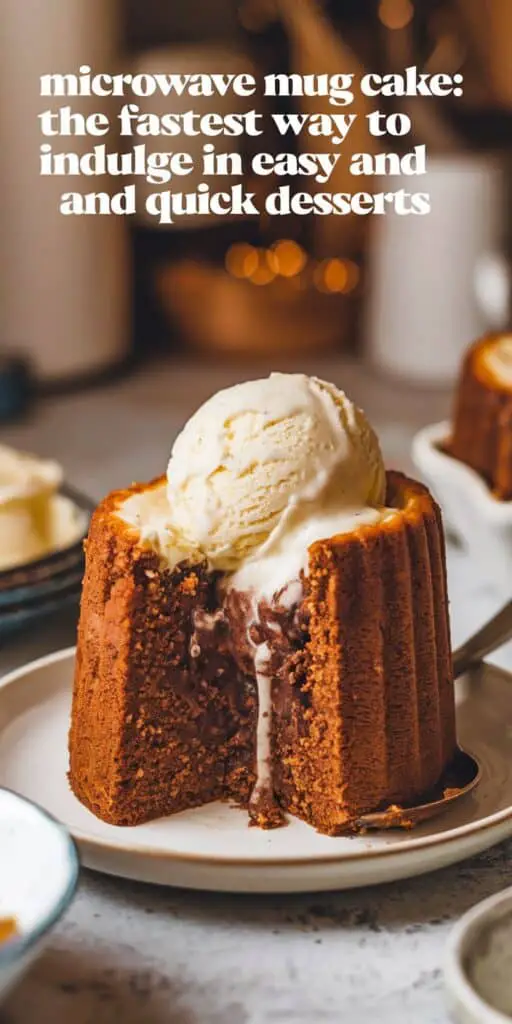
- Garnish: If desired, top your mug cake with a scoop of ice cream, whipped cream, chocolate sauce, or fresh berries. A sprinkle of powdered sugar can also give it a charming finishing touch.
- Enjoy: Grab a spoon and revel in the warm cake that you whipped up in mere minutes.
Tips for a Fabulous Texture
Mug cakes have a reputation for becoming rubbery or dense if not done carefully. Here’s how to achieve a tender crumb:
- Don’t Over-Stir: Once the ingredients are combined, resist the urge to keep mixing. Overworking the batter can result in a tough texture.
- Check at Intervals: Instead of zapping the cake for 90 seconds straight, consider pausing at the 60-second mark to see how it’s doing. This incremental approach prevents overbaking.
- Be Mindful of Ingredients: Adding an egg to a single mug cake can make it spongy. Many mug cake recipes skip the egg entirely for a fluffier result.
- Use Fresh Baking Powder: Old or expired baking powder may not provide the lift your cake needs, leading to a flat or dense outcome.
Flavor Variations and Fun Twists
One of the best parts about mug cakes is their adaptability. You can create an array of flavors based on your mood or the ingredients you have on hand.
- Vanilla Mug Cake
- Skip the cocoa powder and increase the flour by a tablespoon. Add 1 teaspoon of vanilla extract.
- Optional add-ins: sprinkles for a funfetti vibe, or a dollop of jam in the center.
- Peanut Butter Chocolate
- After stirring in your wet ingredients, drop a spoonful of peanut butter in the batter. Gently swirl it around.
- Top with crushed peanuts for an extra crunch.
- Berry Burst
- Mix a handful of fresh or frozen berries into a vanilla or chocolate base. This adds moisture and a fruity tang.
- Consider a quick drizzle of lemon glaze (powdered sugar + lemon juice) on top for contrast.
- Molten Lava Style
- Push a piece of chocolate (or a chocolate truffle) into the center of your batter before microwaving. It’ll melt in the middle and ooze out when you dig your spoon in.
Frequently Asked Questions (FAQ)
- Why Did My Mug Cake Overflow?
- Most likely, the mug was too small, or the cake rose higher than expected. Try a larger mug or reduce the batter slightly.
- How Can I Prevent a Rubber-Like Texture?
- Don’t microwave the cake for too long, and avoid adding an entire egg if the recipe doesn’t call for it. Also, let the cake rest for a minute or two after microwaving.
- Is There a Way to Make It Healthier?
- You can experiment with whole wheat flour, reduced sugar, or sugar substitutes. Coconut oil instead of vegetable oil can also add a healthier twist, albeit with a subtle coconut flavor.
- Can I Use Baking Soda Instead of Baking Powder?
- In a pinch, yes, but you’ll need an acidic ingredient (like buttermilk or yogurt) to activate it. Baking powder is generally simpler to use in mug cakes.
- How Long Does It Stay Fresh?
- Mug cakes are best eaten immediately. You can cover and refrigerate leftovers, but the texture might become denser upon reheating.
Storing and Reheating
Mug cakes are designed for immediate consumption—part of their charm is the hot, fresh-out-of-the-oven (or microwave) aspect. If you must store it, cover the mug with plastic wrap or foil and place it in the fridge. Reheating might make the texture denser, so if possible, enjoy it straight away.
For those who love meal prep or quick-fix options, consider pre-measuring the dry ingredients into small containers. That way, when the craving strikes, you’ll simply pour them into your mug, add the wet ingredients, and microwave. In less than two minutes, dessert is on the table—or more accurately, in the mug.
Why Mug Cakes are an “Easy and Quick Desserts” Essential
The concept of easy and quick desserts is all about cutting down on time and complexity while still delivering on flavor and satisfaction. Mug cakes fit this description perfectly. You skip the usual steps of greasing cake pans, measuring out large quantities, and waiting for extended baking times. There’s no need to worry about slicing or storing a multi-serving cake. Instead, you get instant gratification.
This convenience also extends to skill level. If you’ve felt intimidated by baking or simply haven’t had the time to practice, mug cakes offer a low-pressure entry point. Mistakes are minimal, and if something goes wrong, you haven’t wasted a ton of ingredients. Plus, you can easily try again on your next craving without major cleanup.
Beyond the Basics: Making Mug Cakes a Social Experience
Why keep all the fun to yourself? Mug cakes can be a fantastic group activity, whether it’s a family night, a child’s sleepover, or a casual get-together with friends. Lay out a “mug cake bar” with an assortment of toppings like mini chocolate chips, caramel pieces, shredded coconut, or even sliced bananas. Let everyone assemble their own batter in individual mugs, pop them in the microwave, and watch the excitement as each person’s cake emerges.
It’s also a playful way to encourage creativity. One friend might swirl in Nutella, another might layer in cookie butter, while someone else might opt for a swirl of jam. In just a few minutes, you’ll have an array of personalized treats—no oven required.
Quick Recipe Roundup: More Mug Cake Ideas
- Carrot Mug Cake: Combine shredded carrot, a pinch of cinnamon, and a tablespoon of crushed pineapple with a vanilla-based batter.
- Cinnamon Roll Mug Cake: Increase sugar slightly, add cinnamon and a swirl of brown sugar. Drizzle with a quick cream cheese icing.
- Cookies and Cream: Fold crushed chocolate sandwich cookies into a vanilla base. Top with cookie crumbs.
- Chai Spice: Mix in ground ginger, cinnamon, cardamom, and a splash of brewed chai tea for a warm, spiced cake.
Each variation only takes a matter of minutes to whip up—yet yields a fresh, flavorful dessert experience.
Conclusion: Microwave Magic at Your Fingertips
There’s no denying it—microwave mug cakes are a brilliant invention for anyone who loves dessert but hates the fuss. In a few minutes, you can transform a handful of pantry staples into a warm, satisfying treat. This method epitomizes easy and quick desserts like no other, making it a staple for busy weeknights, impromptu sweet cravings, or fun group dessert bars.
Now that you know the basics—choosing the right mug, mixing the batter carefully, and watching the microwave time—you’re set to indulge at a moment’s notice. Whether you go for classic chocolate, a vanilla-based cake bursting with sprinkles, or a creative flavor experiment, the possibilities are limitless. Embrace the flexibility, enjoy the speed, and let your taste buds revel in the simple pleasure of a freshly “baked” cake without the oven. Grab your mug, your fork, and your favorite toppings, and discover just how effortless (and delicious) life can be when dessert is a mere 90 seconds away.
Print
Microwave Mug Cake: The Fastest Way to Indulge in Easy and Quick Desserts
- Total Time: 4 minutes
- Yield: 1 1x
Description
Whip up a decadent single-serving chocolate mug cake in just minutes using your microwave. This ultra-quick dessert boasts a moist, fluffy texture with a rich chocolate flavor, making it the perfect treat for when time (and patience) is scarce.
Ingredients
- 4 tbsp All-purpose flour
- 4 tbsp Granulated sugar
- 2 tbsp Unsweetened cocoa powder
- 1/4 tsp Baking powder
- A pinch Salt
- 3 tbsp Milk
- 2 tbsp Vegetable oil
- 1/4 tsp Vanilla extract
- 2 Chocolate chips (For extra indulgence)
Instructions
Mix Dry Ingredients:
- In a microwave-safe mug, combine the all-purpose flour, granulated sugar, cocoa powder, baking powder, and a pinch of salt. Stir until evenly mixed.
Add Wet Ingredients:
- Pour in the milk, vegetable oil, and vanilla extract. Mix thoroughly until a smooth batter forms, ensuring there are no lumps.
Incorporate Extras:
- If desired, fold in the chocolate chips or your favorite mix-ins.
Microwave:
- Microwave the mug on high for 1 minute 30 seconds. Check doneness—the cake should be set around the edges with a slightly moist center. If needed, microwave in 10-second bursts until done, being careful not to overcook.
Cool and Enjoy:
- Allow the mug cake to cool for about 1 minute before digging in. Enjoy straight from the mug for the ultimate quick dessert experience.
Notes
- Microwave wattages vary, so adjust cooking time as needed for your appliance.
- Enjoy the mug cake warm for the best texture and flavor.
- Experiment with different add-ins such as nuts, berries, or a dollop of peanut butter for a personalized twist.
Enjoy your Microwave Mug Cake—a fast, fuss-free way to indulge in a rich, chocolaty dessert whenever the craving strikes!
- Prep Time: 2 minutes
- Cook Time: 1 minute
- Category: Dessert
- Cuisine: American
Nutrition
- Calories: 350