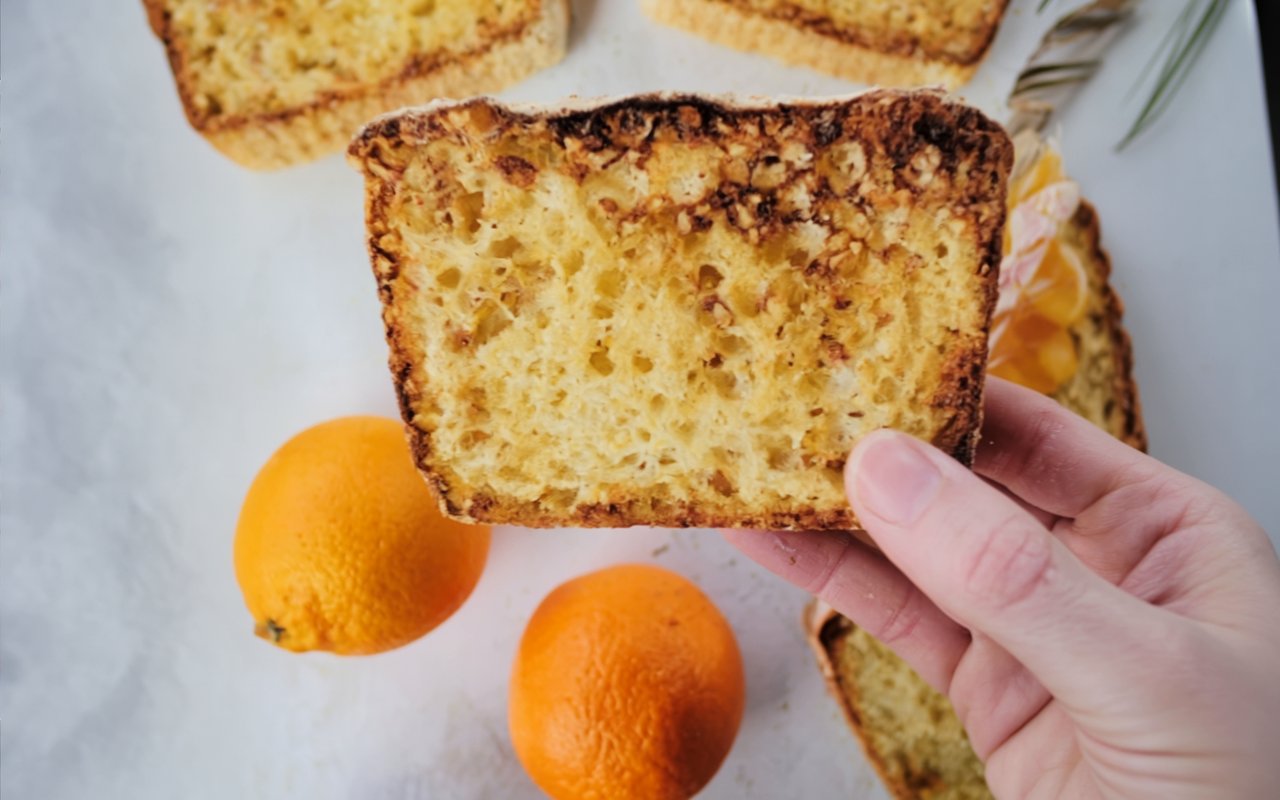
All the Nooks and Crannies, None of the Work
There is nothing quite like the warm, comforting aroma of freshly baked bread filling a home. For many, however, the idea of baking with yeast is intimidating—it seems to involve complex steps, precise timing, and lots of kneading. What if you could bake a loaf of artisan-style bread, famous for its incredible “nooks and crannies” texture, with just one bowl and absolutely no kneading required?
- All the Nooks and Crannies, None of the Work
- The Simple Ingredients for No-Knead Magic
- Your Timeline to the Perfect Toasting Bread
- Step 1: Mix Your One-Bowl Dough
- Step 2: Prepare the Loaf Pan
- Step 3: Let the Dough Rise
- Step 4: Bake Your Loaf
- Step 5: Cool and Slice
- Estimated Nutritional Information
- Healthier Swaps & Delicious Variations
- Perfect Serving Suggestions
- Common Mistakes to Avoid
- Storing Your Homemade Bread
- The Easiest Yeast Bread You’ll Ever Bake
- Frequently Asked Questions
- Q1: What’s the difference between instant yeast and active dry yeast?
- Q2: My dough didn’t rise. What did I do wrong?
- Q3: How do I get more of those famous “nooks and crannies”?
- Q4: Can I bake this in a different pan?
- No-Knead English Muffin Bread Recipe
This is not a dream. This no-knead English Muffin Bread recipe is the answer. It’s a revolutionary, ridiculously easy method for creating a soft, chewy loaf that has all the delightful texture of a classic English muffin, but in a convenient, sliceable form. Get ready to conquer your fear of yeast and bake the most amazing bread for toasting you’ve ever had.
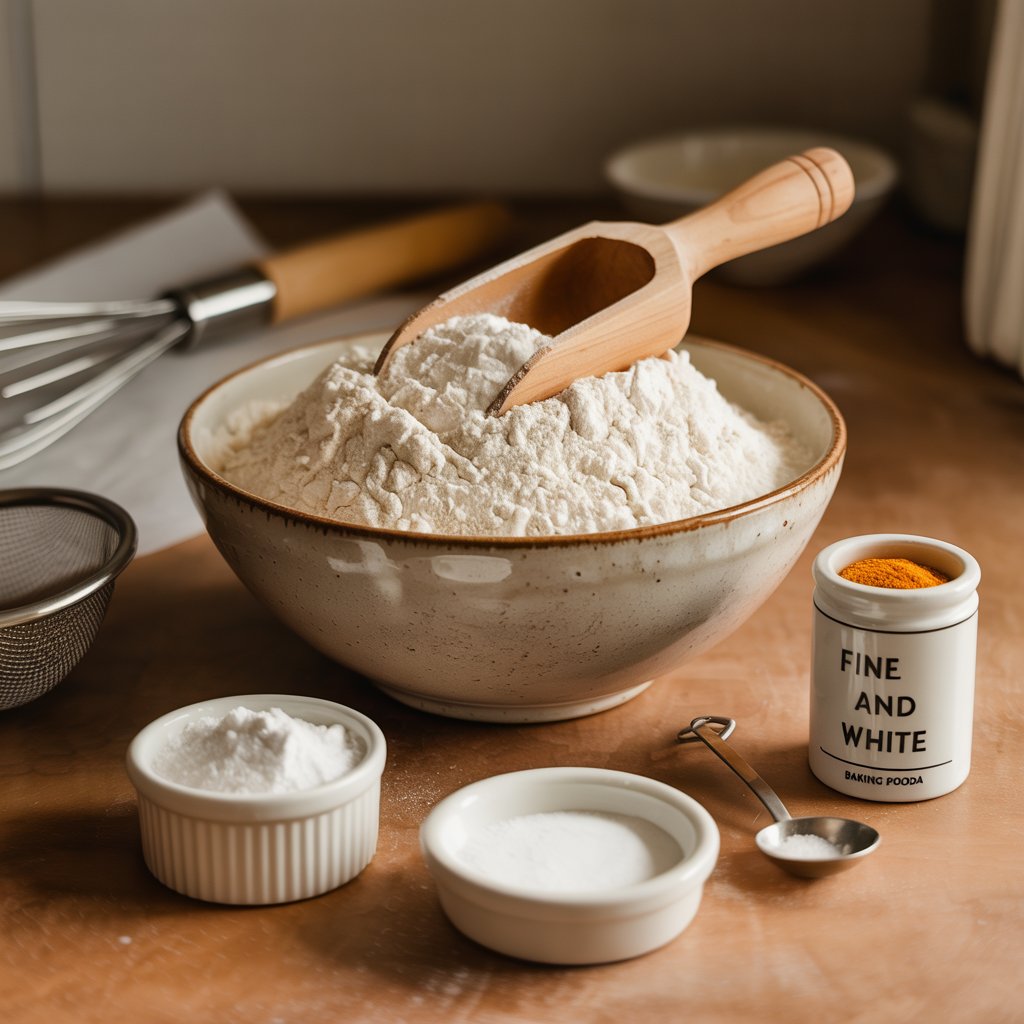
The Simple Ingredients for No-Knead Magic
The beauty of this recipe is its simplicity. You only need a handful of basic pantry staples to create this extraordinary loaf.
| Ingredient | Amount | Notes |
| Instant Yeast | 2 ¼ teaspoons | Also known as rapid-rise yeast. See FAQs if you only have active dry yeast. |
| Honey | ¾ tablespoon | Adds a touch of sweetness and helps feed the yeast. |
| Milk | 1 cup | Warmed to about 43°C (110°F). The warmth helps activate the yeast. |
| Water | ⅓ cup | Also warmed to about 43°C (110°F). |
| All-Purpose Flour | 2 ¼ cups | The foundation for the bread’s soft texture. |
| Baking Powder & Baking Soda | ¼ tsp & ⅛ tsp | These help create the signature “nooks and crannies” texture. |
| Salt | ¾ teaspoon | Crucial for flavor and controlling the yeast. |
| Cornmeal | For dusting | Provides that classic English muffin finish and prevents sticking. |

Your Timeline to the Perfect Toasting Bread
This yeast bread comes together much faster than traditional loaves, making it perfect for a weekend morning.
- Prep Time: 10 minutes
- Rise Time: 45 minutes
- Cook Time: 15-20 minutes
- Total Time: Approximately 1 hour 20 minutes
Baking Science 101: No-knead bread recipes are a game-changer. They rely on a wetter, stickier dough (what we call a “shaggy” dough) and a warm environment to develop the gluten structure that gives bread its chew, all without any of the hard work of kneading.
Step 1: Mix Your One-Bowl Dough
This is the best part—it’s almost unbelievably easy. In a large bowl, add all of your ingredients: the instant yeast, honey, warm milk, warm water, flour, baking powder, baking soda, and salt. Using a Danish dough whisk, a sturdy wooden spoon, or a spatula, simply stir everything together until it’s just combined and no dry streaks of flour remain. The result will be a very wet and sticky “shaggy” dough. That’s exactly what you want!
Step 2: Prepare the Loaf Pan
Take a standard 9×5 inch loaf pan and spray it thoroughly with nonstick cooking spray. Sprinkle a generous amount of cornmeal into the pan. Tilt and tap the pan, rotating it until the bottom and all four sides are coated in a fine layer of cornmeal. This gives the bread its classic finish and ensures it won’t stick.
Step 3: Let the Dough Rise
Scrape the wet, shaggy dough from your bowl into the prepared loaf pan. It will be sticky, so use your spatula to spread it out roughly. Spray the top of the dough with a little more nonstick spray, then cover the pan loosely with plastic wrap. Let the dough rise in a warm, draft-free place for about 45 minutes, or until the top of the dough has risen to the rim of the pan.
Pro-Tip for the Perfect Rise: My favorite trick is to create a proofing box in my oven. Turn your oven on to its lowest temperature for just a few minutes until it reaches about 38°C (100°F). Then, turn the oven OFF, and place your covered dough inside to rise. It’s the perfect warm, cozy environment.
Step 4: Bake Your Loaf
Once the dough has risen, remove the plastic wrap and sprinkle the top of the loaf with another dusting of cornmeal. Preheat your oven to 220°C (425°F). Bake the bread for 15 to 20 minutes. For a softer crust, bake closer to 15 minutes. For a crisper, more golden-brown crust, bake for the full 20 minutes.
Step 5: Cool and Slice

Remove the bread from the oven and let it cool in the pan on a wire rack for at least 20 minutes. This is an important step that allows the internal structure of the bread to set. After 20 minutes, you can carefully remove the loaf from the pan to continue cooling. For the best texture, wait until it is mostly cool before slicing.
Estimated Nutritional Information
Here is an approximate nutritional breakdown per slice (assuming 12 slices).
- Calories: 125 kcal
- Carbohydrates: 25g
- Protein: 4g
- Fat: 1g
- Sugar: 2g
Disclaimer: This is an estimate and will vary based on your specific ingredients.
Healthier Swaps & Delicious Variations
This simple loaf is a wonderful canvas for creativity.
- Blueberry English Muffin Bread: Gently fold in 1 cup of fresh or frozen blueberries when you are mixing the shaggy dough for a delicious, fruity twist.
- Whole Wheat Flour: For a nuttier flavor and more fiber, you can substitute 1 cup of the all-purpose flour with whole wheat flour. You may need to add an extra tablespoon or two of water as whole wheat flour is more absorbent.
- Make it Vegan: Simply swap the honey for an equal amount of maple syrup and use a plant-based milk like unsweetened almond or oat milk.
Perfect Serving Suggestions
This bread was born to be toasted!
- The Ultimate Toast: Slicing and toasting this bread is a must. The heat brings those nooks and crannies to life, creating the perfect pockets for melted butter and your favorite jam or honey.
- Avocado Toast: It makes a fantastic, sturdy base for avocado toast, topped with a sprinkle of everything bagel seasoning.
- Eggs Benedict Base: Use a toasted slice as the perfect foundation for a classic Eggs Benedict, soaking up all that delicious hollandaise sauce.
Common Mistakes to Avoid
- Killing the Yeast: Yeast is a living organism. If your milk and water are too hot (much above 46°C / 115°F), you can kill it, and your bread won’t rise. Use a thermometer or test it with your wrist—it should feel like warm bathwater.
- An Improper Rise: Not giving the dough enough time to rise, or leaving it in a cold, drafty spot, will result in a dense loaf without the signature light texture. Make sure it has risen to the top of the pan before baking.
- Slicing it Too Hot: As tempting as it is, slicing into bread straight from the oven can cause it to be gummy and doughy inside. Letting it cool for at least 20 minutes allows the steam to settle and the crumb to set properly.
Storing Your Homemade Bread
Proper storage will keep your loaf fresh and delicious.
- At Room Temperature: Once completely cooled, store the bread in a bread box or a paper bag at room temperature. It’s best enjoyed within 2-3 days. Avoid the refrigerator, as it can actually make the bread go stale faster.
- Freezing: This bread freezes beautifully. Let the loaf cool completely, then slice it. Place the slices in a freezer-safe zip-top bag, removing as much air as possible. It will keep for up to 3 months. You can pull out a slice and pop it directly into the toaster!
The Easiest Yeast Bread You’ll Ever Bake
This No-Knead English Muffin Bread recipe is a true revelation. It delivers all the comforting satisfaction and incredible texture of a classic English muffin in an easy, sliceable loaf, all with just one bowl and a few minutes of your time. It’s the perfect recipe to build your bread-baking confidence and fill your home with that unforgettable aroma.
We can’t wait for you to try this incredibly simple recipe. Let us know how your first loaf turns out in the comments below! For more easy and delicious baking recipes, be sure to subscribe.
Frequently Asked Questions
Q1: What’s the difference between instant yeast and active dry yeast?
Instant yeast (or rapid-rise) has finer granules and can be mixed directly in with the dry ingredients. Active dry yeast has larger granules and needs to be “proofed” or activated first. To use active dry yeast in this recipe, you would sprinkle it over the warm milk and water with the honey and let it sit for 5-10 minutes until it becomes foamy, then proceed with the recipe.
Q2: My dough didn’t rise. What did I do wrong?
There are two common culprits. First, your yeast may have expired. Always check the date on the package. Second, the liquid you used might have been too hot, which kills the yeast. Ensure your milk and water are just warm to the touch, not hot.
Q3: How do I get more of those famous “nooks and crannies”?
The signature texture comes from the wet, sticky dough and the combination of yeast, baking soda, and baking powder. Don’t be tempted to add more flour to make the dough less sticky—the high moisture content is key! A good, strong rise in a warm place also helps create that airy structure.
Q4: Can I bake this in a different pan?
A 9×5 inch loaf pan is ideal for this recipe’s volume. You could try an 8×4 inch pan, but you would need to watch it closely as it might rise higher and require a slightly longer baking time. You could also divide the dough between two mini loaf pans.
Print
No-Knead English Muffin Bread Recipe
- Total Time: 1 hour 20 minutes
- Yield: 12 slices 1x
Description
The iconic nooks-and-crannies texture you love in English muffins—now in a quick, no-knead loaf. Minimal effort, big flavor, and perfect for toasting.
Ingredients
Dough
- 2 1/4 tsp instant yeast (also called rapid-rise yeast)
- 3/4 Tbsp honey (adds slight sweetness & feeds yeast)
- 1 cup milk (warmed to about 43°C (110°F))
- 1/3 cup water (warmed to about 43°C (110°F))
- 2 1/4 cups all-purpose flour (the base for a soft crumb)
- 1/4 tsp baking powder
- 1/8 tsp baking soda
- 3/4 tsp salt (for flavor and yeast control)
To Finish
- cornmeal (for dusting pan and top)
Instructions
- Step 1 – Mix the one-bowl dough: In a large bowl, combine instant yeast, honey, warm milk, warm water, flour, baking powder, baking soda, and salt. Stir with a Danish whisk, wooden spoon, or spatula until no dry streaks remain. The dough will be very wet and sticky—that’s perfect.
- Step 2 – Prepare the loaf pan: Coat a 9×5-inch loaf pan with nonstick spray. Sprinkle in cornmeal and rotate to coat the bottom and sides.
- Step 3 – First rise: Scrape the shaggy dough into the pan. Lightly mist the top with spray and cover loosely with plastic. Let rise in a warm, draft-free spot for about 45 minutes, or until the dough reaches the rim of the pan.
- Pro tip: Make a quick proofing box by preheating your oven on its lowest setting for a few minutes until ~38°C (100°F), then turning it off. Place the covered pan inside to rise.
- Step 4 – Bake: Remove the plastic. Dust the top with more cornmeal. Bake at 220°C (425°F) for 15–20 minutes: the shorter time for a softer crust, the longer time for a deeper golden, crisper crust.
- Step 5 – Cool & slice: Cool in the pan on a rack for at least 20 minutes to set the structure. Loosen and lift out to finish cooling. Slice when mostly cool for the best crumb. Toast to serve.
Notes
- Baking Science 101: No-knead doughs are wetter and rely on time and warmth to develop gluten without kneading, creating that signature open crumb.
- Active dry yeast: whisk into the warm milk and water with the honey and rest 5–10 minutes until foamy, then proceed.
- For extra flavor, swap up to 1/2 cup of the milk for buttermilk; if batter seems too stiff, add 1–2 Tbsp water.
- Prep Time: 10 minutes
- Cook Time: 20 minutes
- Category: Bread, Breakfast
- Cuisine: American
Nutrition
- Calories: 125
- Sugar: 2
- Fat: 1
- Carbohydrates: 25
- Protein: 4