Do you remember the best part of school lunches? It wasn’t the rectangle pizza or the mystery meat; it was the dessert. Specifically, the warm, chewy, and incredibly rich Peanut Butter Lunch Lady Cookie Bars. There is a reason this recipe has reached legendary status in the realm of comfort food. It transports you back to the cafeteria tray line, where the kind lady in the hairnet would hand over a square of pure peanut butter bliss.
- Ingredients
- Timing
- Step-by-Step Instructions
- Step 1: Preheat and Prep
- Step 2: Melt the Butters
- Step 3: Create the Wet Base
- Step 4: Add Dry Ingredients
- Step 5: Spread and Bake
- Step 6: Whip the Frosting
- Step 7: Frost and Serve
- Nutritional Information
- Healthier Alternatives
- Serving Suggestions
- Common Mistakes to Avoid
- Storing Tips
- Conclusion
- FAQs
- Q1. Can I use almond butter instead of peanut butter?
- Q2. What size pan should I use?
- Q3. Can I add chocolate chips?
- Q4. Why are my bars dry?
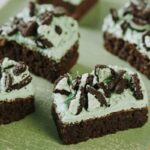
- Peanut Butter Lunch Lady Cookie Bars: The Ultimate Nostalgic Treat
These bars are the definition of “old school” baking—simple, unpretentious, and unapologetically delicious. Unlike complex modern pastries, this sheet pan dessert relies on pantry staples like hearty oats (if added) or just a solid flour base, creamy peanut butter, and plenty of butter. If you are looking for a recipe that yields a soft, cake-like cookie base topped with a fudgy, sweet frosting, you have found it. Let’s recreate that cafeteria magic right in your own kitchen.
Ingredients
To achieve that authentic, dense, and chewy texture, you need the right ratio of fats to dry ingredients. Here is everything you need to whip up a batch.
| Ingredient | Amount | Notes |
| All-Purpose Flour | 2 cups | The structure of the bar; measure correctly (spoon and level). |
| Granulated Sugar | 2 cups | Provides sweetness and helps with the tender crumb. |
| Peanut Butter | 1½ cups | Creamy works best for that smooth, nostalgic texture. (Divided use). |
| Butter | 3 sticks | Unsalted is preferred to control sodium. Melted. |
| Baking Soda | 1 tsp | The leavening agent for a slight rise. |
| Salt | 1 tsp | Balances the sweetness and enhances the peanut flavor. |
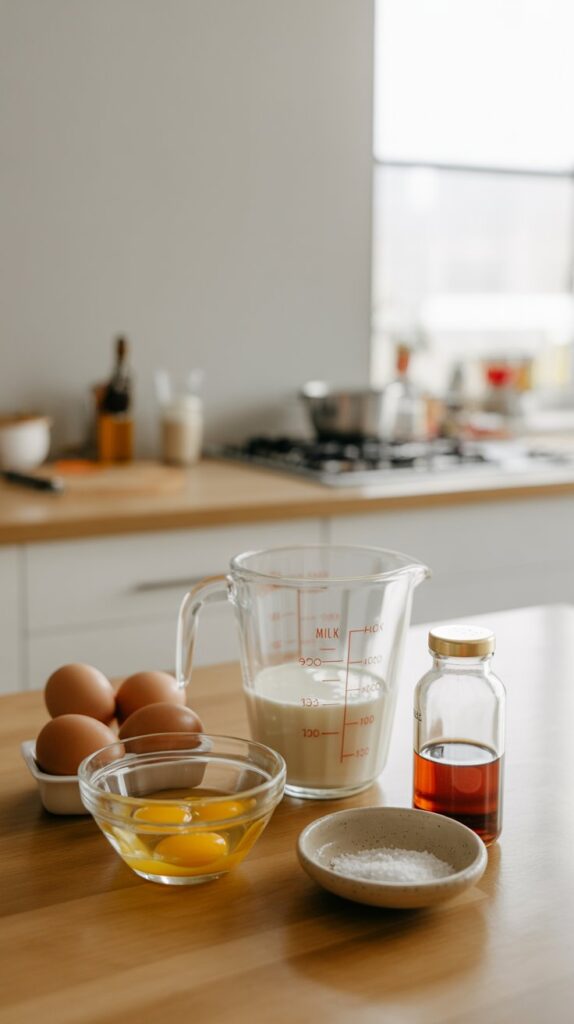
| Eggs | 2 large | Room temperature eggs incorporate better. |
| Milk | ½ cup | Adds moisture to the batter (plus extra for frosting). |
| Vanilla Extract | 1 tsp | Pure vanilla extract creates a warm aroma. |
| Powdered Sugar | As needed | Required for the frosting step (per instructions). |

Timing
One of the best things about these Peanut Butter Lunch Lady Cookie Bars is how quickly they come together. They are perfect for last-minute potlucks or late-night cravings.
- Prep Time: 15 minutes
- Cook Time: 15–18 minutes
- Cooling Time: 20 minutes (essential for frosting)
- Total Time: ~50 minutes (About 30% faster than baking multiple batches of individual cookies).
Step-by-Step Instructions
Follow these simple steps to replicate the classic cafeteria style dessert. The key is mixing the wet ingredients while warm to slightly dissolve the sugar before adding the dry ingredients.
Step 1: Preheat and Prep
Heat your oven to 375°F (190°C). While the oven warms, take a rimmed sheet pan (jelly roll pan size works great, approx 10×15 inches) and grease it generously with butter or cooking spray. This ensures the bars slide out easily later.
Step 2: Melt the Butters
In a large saucepan or a microwave-safe bowl, melt the butter and the peanut butter together. Stir constantly until the mixture is completely smooth and glossy.
- Tip: If doing this on the stove, keep the heat on low. You want them melted, not boiling.
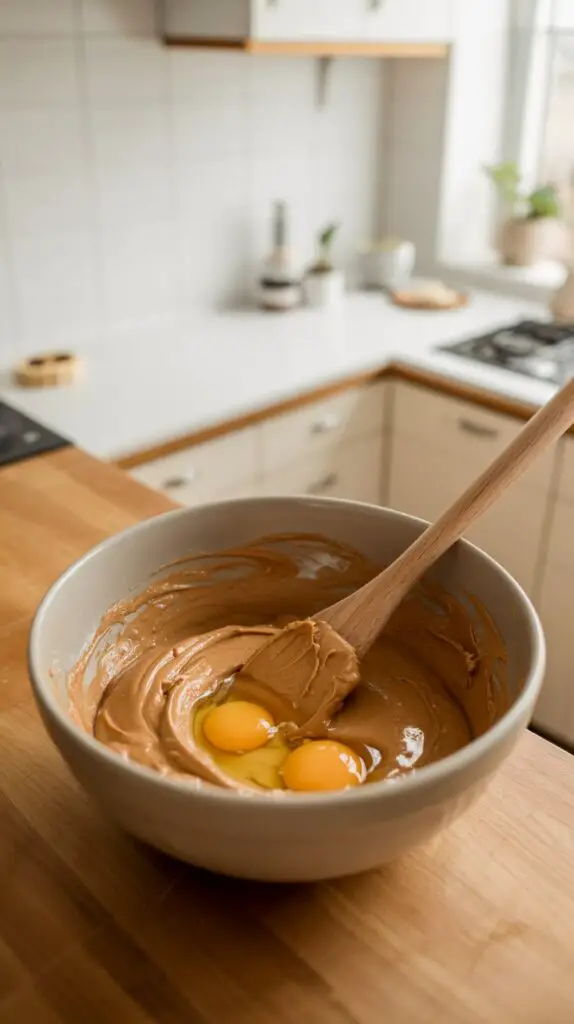
Step 3: Create the Wet Base
Remove the mixture from the heat. Stir in the granulated sugar first, mixing until combined. Then, add the eggs, milk, and vanilla extract. Whisk briskly to ensure the eggs don’t scramble in the warm mixture. The batter should look glossy and thick.
Step 4: Add Dry Ingredients
Mix in the flour, baking soda, and salt. Switch to a spatula or wooden spoon and fold the ingredients together just until the flour streaks disappear.
- Tip: Be careful not to overmix at this stage; overworking the gluten can make the bars tough rather than tender.
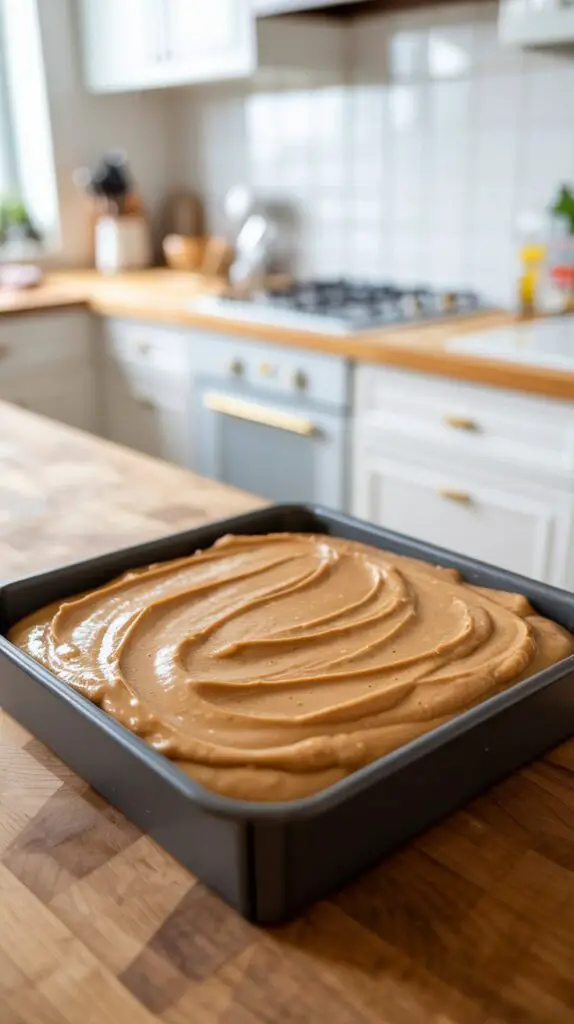
Step 5: Spread and Bake
Spread the batter evenly into your prepared sheet pan. Use an offset spatula to push the batter all the way to the corners. Bake for 15–18 minutes. You are looking for the edges to be slightly golden and the center to be set.
- Tip: Do not overbake! They continue to firm up as they cool. A toothpick should come out mostly clean.
Step 6: Whip the Frosting
While the bars are baking (or cooling slightly), prepare the frosting. In a medium bowl, whisk together powdered sugar (start with about 1 cup and adjust for consistency), a splash of milk, vanilla, and a dollop of peanut butter until smooth and creamy.
- Tip: The frosting should be pourable but thick enough to hold its shape.
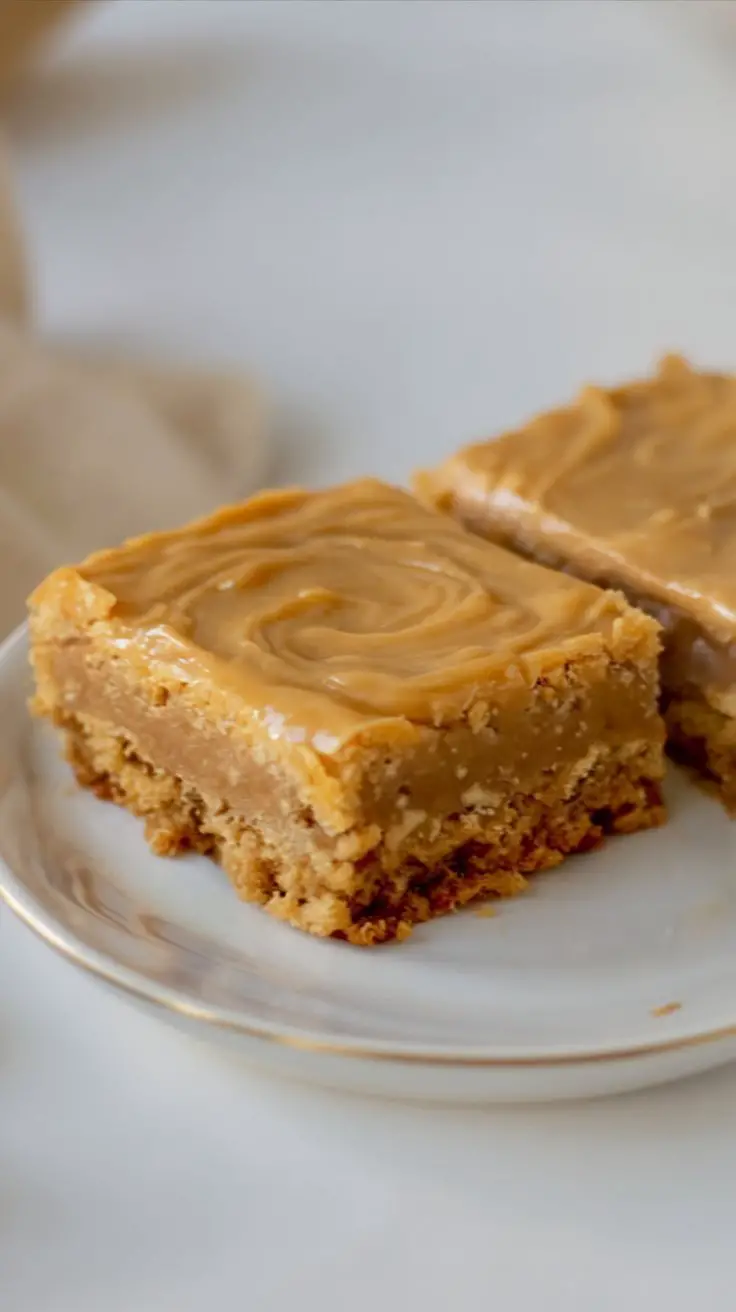
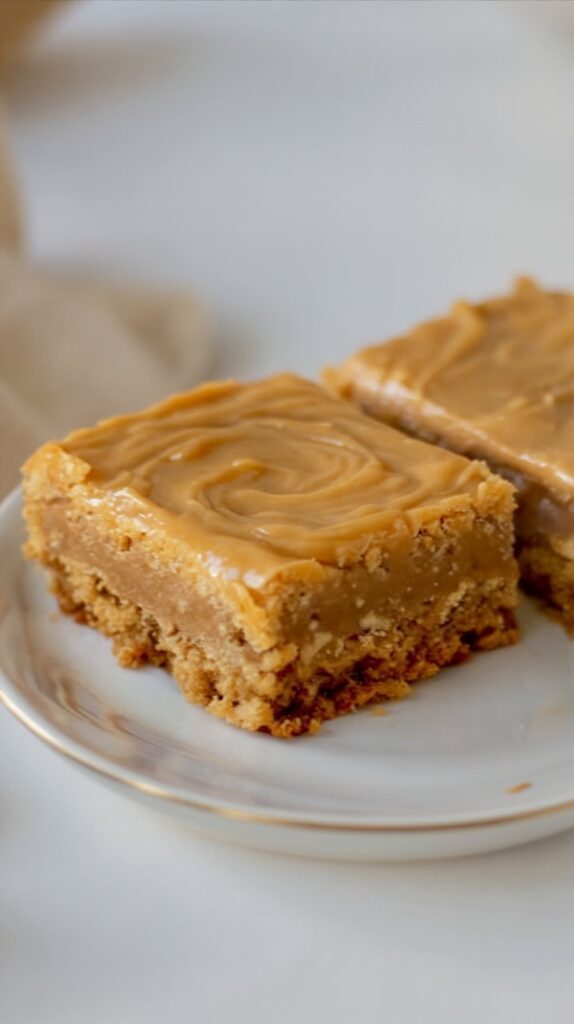
Step 7: Frost and Serve
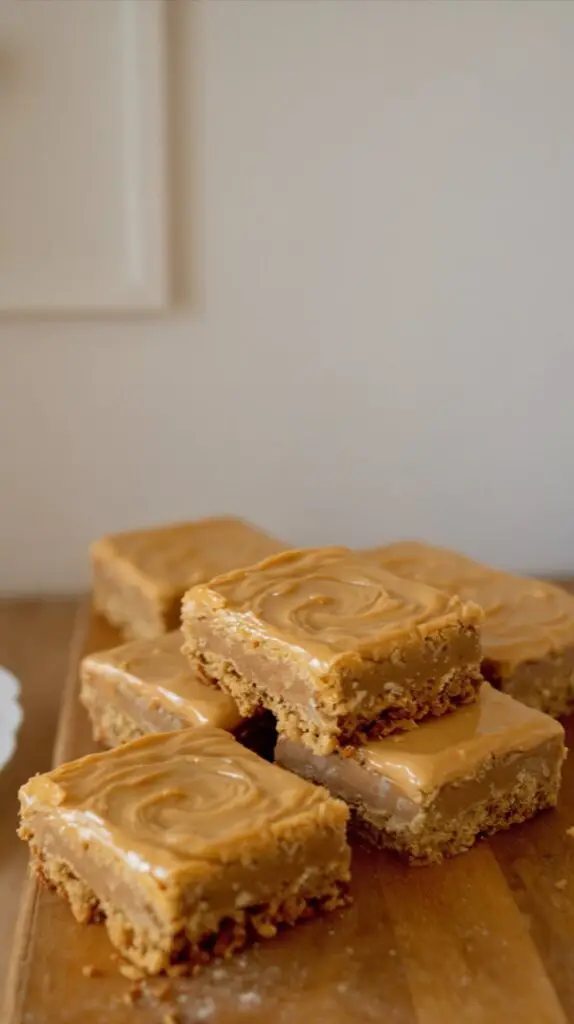
Spread the warm frosting over the warm bars. Doing this while the bars are still slightly warm allows the frosting to melt slightly and bond with the cookie base. Let set for at least 20 minutes so the frosting creates a slight crust. Slice into squares and serve.
Nutritional Information
These bars are a rich indulgence. Here is an estimated nutritional breakdown per serving (assuming 24 bars):
- Calories: ~320 kcal
- Total Fat: 18g (Saturated Fat: 9g)
- Carbohydrates: 36g (Sugar: 24g)
- Protein: 5g
- Sodium: 200mg
Note: These are high-energy treats thanks to the generous amount of peanut butter and butter.
Healthier Alternatives
If you want to enjoy the flavor of Peanut Butter Lunch Lady Cookie Bars with a slightly better nutritional profile, try these swaps:
- Whole Wheat Flour: Swap half of the all-purpose flour for white whole wheat flour. This adds fiber without making the bars too dense.
- Natural Peanut Butter: Use natural peanut butter (just peanuts and salt) to reduce added oils and sugars. Note: You may need to add a pinch more salt.
- Reduce Sugar: You can reduce the granulated sugar in the batter by 1/2 cup. The bars will be slightly less chewy but still sweet enough, especially with the frosting.
- Apple Sauce: Swap half of the butter for unsweetened applesauce to significantly cut down on saturated fat.
Serving Suggestions
These bars are versatile and crowd-pleasing. Here is how to serve them up:
- Classic Style: Serve simply with a tall glass of ice-cold milk. The creaminess of the milk cuts through the rich peanut butter perfectly.
- À La Mode: Warm a bar in the microwave for 10 seconds and top with a scoop of vanilla bean ice cream.
- Coffee Companion: These make an excellent mid-morning treat alongside a black coffee or an espresso.
- Garnishes: Before the frosting sets, sprinkle with crushed peanuts or chocolate sprinkles for extra texture and visual appeal.
Common Mistakes to Avoid
To ensure your bars come out exactly like the ones from the school cafeteria, avoid these pitfalls:
- Overbaking: This is the number one mistake. If you bake them until they look hard, they will be rock-solid once cooled. Solution: Pull them out when the center still looks slightly underdone.
- Using Crunchy Peanut Butter: While tasty, crunchy peanut butter can make the batter crumbly and harder to spread. Solution: Stick to creamy commercial peanut butter (like Jif or Skippy) for the best consistency.
- Frosting a Hot Pan: If the bars are piping hot right out of the oven, the frosting will melt into a glaze and disappear. Solution: Let the bars cool for about 10 minutes—warm enough to spread, but not hot enough to melt.
Storing Tips
These bars actually taste better the next day as the flavors meld.
- Room Temperature: Store leftovers in an airtight container on the counter for up to 3 days. Use wax paper between layers to prevent the frosting from sticking.
- Refrigerator: If you prefer a fudgier texture, store them in the fridge for up to 1 week.
- Freezing: These freeze beautifully. Cut them into squares, wrap individually in plastic wrap, and freeze for up to 3 months. Reheat: Thaw on the counter for an hour before eating.
Conclusion
There you have it—the secret to making the iconic Peanut Butter Lunch Lady Cookie Bars. This recipe is a testament to the fact that sometimes, the simplest ingredients make the most memorable meals. Whether you are baking for a school bake sale, a family gathering, or just to satisfy a wave of nostalgia, these bars deliver comfort in every bite.
Try it out and let us know! Did these taste just like you remember? Leave a comment below, rate the recipe, and subscribe to our blog for more retro recipes and sweet treats delivered straight to your inbox.
FAQs
Q1. Can I use almond butter instead of peanut butter?
Yes, you can substitute almond butter or cashew butter in a 1:1 ratio. The flavor profile will change, losing that classic “lunch lady” taste, but the texture will remain similar.
Q2. What size pan should I use?
This recipe is designed for a rimmed baking sheet (jelly roll pan), typically around 10×15 inches. If you use a standard 9×13 pan, the bars will be much thicker and will require significantly more baking time (add 5-8 minutes).
Q3. Can I add chocolate chips?
Absolutely. This base is very similar to a blonde brownie. You can fold in semi-sweet chocolate chips into the batter before baking, or sprinkle them on top of the frosting for a chocolate-peanut butter combo.
Q4. Why are my bars dry?
Dry bars are usually the result of overmeasuring the flour or overbaking. Make sure to spoon your flour into the measuring cup and level it off, rather than scooping directly from the bag (which packs the flour down). Also, watch the oven timer closely!
Print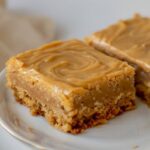
Peanut Butter Lunch Lady Cookie Bars: The Ultimate Nostalgic Treat
- Total Time: 50 minutes
- Yield: 24 bars 1x
Description
Warm, chewy, and rich with nostalgic cafeteria vibes, these peanut butter cookie bars bake in one sheet pan and get finished with a fudgy peanut butter frosting. Simple pantry staples, big payoff.
Ingredients
Bars
- 1 1/2 cups creamy peanut butter (divided use)
- 3 sticks unsalted butter (melted)
- 2 cups granulated sugar
- 2 large eggs (room temperature)
- 1/2 cup milk
- 1 tsp pure vanilla extract
- 2 cups all-purpose flour (spooned & leveled)
- 1 tsp baking soda
- 1 tsp fine salt
Frosting
- 1 1/2 cups powdered sugar (sifted; more as needed)
- 2 Tbsp creamy peanut butter
- 3 Tbsp milk (plus more as needed)
- 1/2 tsp pure vanilla extract
Instructions
- Preheat & pan. Heat oven to 375°F (190°C). Grease a 10×15-inch rimmed sheet pan (jelly roll pan).
- Melt butter & peanut butter. In a saucepan (low heat) or microwave-safe bowl, melt 3 sticks butter with 1½ cups peanut butter, stirring until smooth.
- Make wet base. Off heat, stir in sugar. Whisk in eggs, milk, and vanilla until glossy. (Work briskly so the warm mixture doesn’t scramble the eggs.)
- Add dry ingredients. Fold in flour, baking soda, and salt just until no dry streaks remain—do not overmix.
- Bake. Spread batter evenly in prepared pan. Bake 15–18 minutes until edges are lightly golden and center is just set. Do not overbake.
- Frosting. Whisk powdered sugar, 2 Tbsp peanut butter, milk, and vanilla until smooth and pourable (adjust sugar/milk as needed).
- Frost & set. Spread frosting over warm bars so it melts slightly and bonds. Cool at least 20 minutes, then slice into 24 squares.
Notes
For clean cuts, chill 20–30 minutes before slicing. Add 1 cup quick oats to batter for an old-school cafeteria variation. Store covered at room temp 2 days or refrigerate up to 5 days.
- Prep Time: 15 minutes
- Cook Time: 18 minutes
- Category: Bars, Dessert
- Cuisine: American
Nutrition
- Calories: 320
- Sugar: 24
- Sodium: 200
- Fat: 18
- Saturated Fat: 9
- Carbohydrates: 36
- Fiber: 1
- Protein: 5
- Cholesterol: 45