Capture Summer in a Jar: A Santa Fe Story
Every late summer in Santa Fe, New Mexico, the farmers’ markets overflow with treasures. The air buzzes with the scent of roasting green chiles, and crates are piled high with dusty green tomatillos. My grandmother taught me that this abundance was a gift meant to be enjoyed not just for a season, but all year long. She believed the best way to honor a harvest was to preserve it. This is where the magic of canning salsa verde comes into play.
- Capture Summer in a Jar: A Santa Fe Story
- Ingredients for Your Salsa Verde Bounty
- Your Canning Day Timeline
- Part 1: Making the Roasted Salsa Verde
- Step 1: Prepare Your Canning Equipment
- Step 2: Roast the Vegetables
- Step 3: Blend the Salsa
- Step 4: Simmer the Salsa
- Part 2: Water Bath Canning the Salsa
- Estimated Nutritional Information
- Customizing Your Salsa Verde
- Serving Your Homemade Salsa
- Common (and Critical) Canning Mistakes to Avoid
- Storing Your Preserves
- A Taste of Summer, All Year Long
- Frequently Asked Questions
- Q1: Is it really necessary to use bottled lime juice instead of fresh?
- Q2: My salsa separated in the jar. Is it still safe to eat?
- Q3: Why can’t I add corn or beans to this recipe for canning?
- Q4: My jar didn’t seal. What do I do now?
- Safe & Easy Canning Salsa Verde
Is it possible to capture that vibrant, tangy, fire-roasted flavor of fresh salsa verde and safely store it on your pantry shelf for the cold months ahead? Absolutely. This tested recipe isn’t just about making salsa; it’s about preserving memories. Forget the bland, overly-sweet store-bought stuff. We’re going to walk through how to make a delicious roasted tomatillo salsa and how to can it safely, so you can enjoy the taste of summer anytime you wish.
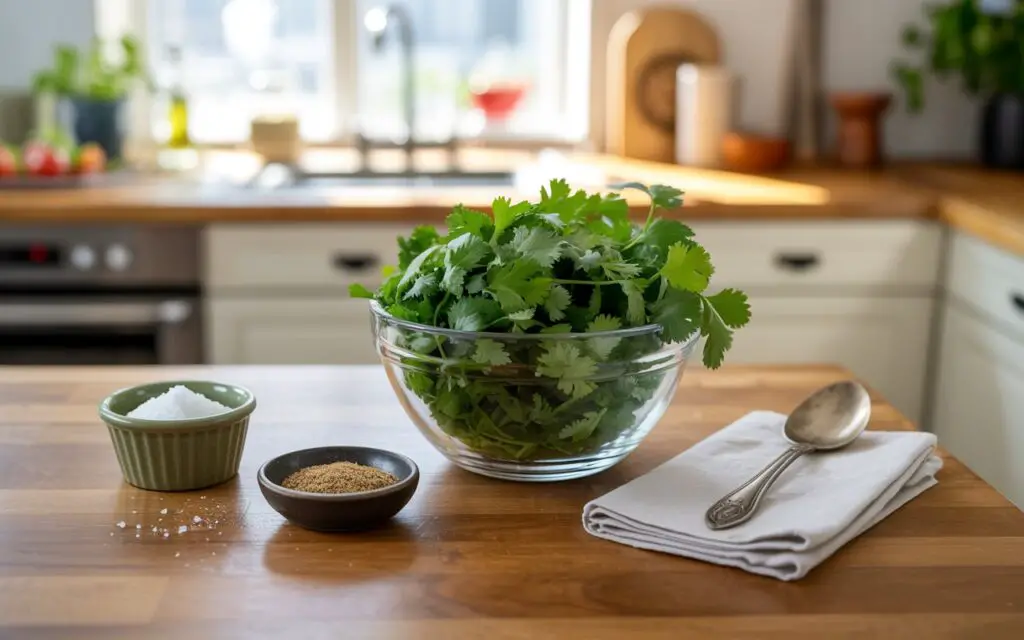
Ingredients for Your Salsa Verde Bounty
This recipe makes a large batch, perfect for canning and sharing. Roasting the vegetables first creates a deep, smoky flavor that makes this salsa unforgettable.
| Ingredient | Amount | Notes |
| Tomatillos | 8 pounds | Husks removed and rinsed well to remove the sticky residue. |
| White Onions | 4 medium | Cut into wedges. White or yellow onions work best for their mild flavor. |
| Jalapeño Chiles | 4 chiles | Or use serrano peppers for more heat. Adjust the quantity to your spice preference. |
| Garlic | 6 cloves | Peeled and left whole for roasting. |
| Fresh Lime Juice | 1 cup | Crucial for safety. Bottled lime juice is recommended for its consistent acidity. |
| Fresh Cilantro | ½ cup | Chopped. Adds that classic, bright salsa verde flavor. |
| Kosher Salt | 2 tsp | Optional, but highly recommended to enhance the flavors. |
| Black Pepper | 1 tsp | Optional, freshly ground for a touch of spice. |
| Ground Cumin | ½ tsp | Optional, for a warm, earthy undertone. |

Your Canning Day Timeline
Canning is a process, but a deeply rewarding one. Plan for an afternoon in the kitchen to complete this project from start to finish.
- Prep & Roasting Time: 45 minutes
- Salsa Making & Simmering: 20 minutes
- Canning & Processing Time: 40 minutes
- Total Time: Approximately 1 hour 45 minutes
Data Insight: Preserving produce at its peak can save you over 50% compared to buying specialty salsas out of season, and you control the ingredients and salt content.
Part 1: Making the Roasted Salsa Verde
Step 1: Prepare Your Canning Equipment
Before you start the salsa, prepare your water bath canner. Place your clean pint jars (this recipe yields about 6-7 pints) on a rack in the canner. Fill the jars and the canner with hot water until the jars are covered. Turn on the heat to bring it to a simmer (around 82°C / 180°F). Keep your jars hot until you’re ready to fill them. Place your lids in a small saucepan of water and bring to a simmer; do not boil.
Step 2: Roast the Vegetables
Preheat your oven’s broiler to high. Spread the husked tomatillos, onion wedges, and whole jalapeños on a large, rimmed baking sheet. Place the pan under the broiler for 5-7 minutes, until the vegetables are blistered and blackened in spots. Flip them over and broil for another 5-7 minutes. Add the whole garlic cloves for the last 2 minutes of broiling to soften them without burning.
Step 3: Blend the Salsa
Carefully transfer the roasted vegetables and any juices from the pan to a large pot or Dutch oven. Add the crucial 1 cup of lime juice, the chopped cilantro, and the optional salt, pepper, and cumin. Use an immersion blender to blend the salsa to your desired consistency. I prefer it slightly chunky. If you don’t have an immersion blender, you can work in batches using a regular blender.
Step 4: Simmer the Salsa
Bring the salsa to a boil over medium-high heat, then reduce the heat and let it simmer gently for 10 minutes. This helps the flavors meld and ensures the salsa is hot when it goes into the jars.
Part 2: Water Bath Canning the Salsa
Step 5: Fill Your Jars
Using a jar lifter, carefully remove one hot jar at a time from your canner, pouring the water back into the pot. Place the jar on a towel-lined counter. Use a funnel to ladle the hot salsa into the hot jar, leaving a ½-inch headspace (the space between the top of the salsa and the rim of the jar).
Step 6: Remove Air Bubbles and Seal
Slide a bubble remover tool or a thin wooden skewer around the inside of the jar to release any trapped air bubbles. Wipe the rim of the jar with a clean, damp cloth to ensure a good seal. Center a hot lid on the jar and screw on the band until it is fingertip-tight. Do not overtighten.
Step 7: Process the Jars
Using the jar lifter, carefully place the filled jar back into the simmering water in the canner. Repeat the process until all jars are filled. Ensure the jars are covered by at least 1-2 inches of water. Place the lid on the canner and bring the water to a full rolling boil. Once boiling, start your timer and process the pint jars for 20 minutes. (Adjust for altitude if you live above 1,000 feet).
Step 8: Cool and Check the Seals
When the processing time is up, turn off the heat, remove the canner lid, and let the jars sit in the hot water for 5 minutes. Then, remove the jars with the lifter and place them on a towel-lined counter. Let them cool, undisturbed, for 12-24 hours. You will hear satisfying “ping” sounds as the lids seal. After they’ve cooled, press the center of each lid. If it doesn’t flex, the jar is sealed.
Estimated Nutritional Information

Here is an approximate nutritional breakdown per 2-tablespoon serving.
- Calories: 15 kcal
- Carbohydrates: 3g
- Protein: 0.5g
- Fat: 0.2g
- Fiber: 1g
- Sodium: 65mg (if using optional salt)
- Vitamin C: Approx. 10% of DV
Customizing Your Salsa Verde
While canning recipes require careful adherence to ratios for safety, you can make minor adjustments.
- Heat Level: The easiest way to customize is by adjusting the peppers. For a milder salsa, use fewer jalapeños and be sure to remove the seeds and membranes. For a hotter salsa, use spicier serrano or even habanero peppers.
- Salt Control: This recipe is safe to can without salt. The salt is purely for flavor, so feel free to reduce it or leave it out entirely to meet your dietary needs.
Serving Your Homemade Salsa
The best part! Enjoy your shelf-stable salsa verde all year long.
- Classic Dip: Serve with your favorite tortilla chips.
- Enchilada Sauce: Use it as the base for delicious green chile chicken or bean enchiladas.
- Taco Topping: Drizzle it over carnitas, grilled fish, or black bean tacos.
- Breakfast Boost: Spoon it over scrambled eggs or a breakfast burrito.
Common (and Critical) Canning Mistakes to Avoid
Canning is a science. Follow the rules for a safe and delicious result.
- Altering the Recipe: DO NOT add more low-acid ingredients like extra onions, garlic, or peppers. This recipe has been tested to ensure its acidity is safe for water bath canning. Adding more low-acid vegetables can make it unsafe.
- Not Using Enough Acid: The 1 cup of lime juice is not optional. It is essential for raising the acidity to a level that prevents the growth of botulism bacteria. Use bottled juice for its reliable pH level.
- Incorrect Headspace: Leaving too much or too little headspace can cause the jars to not seal properly. Use a ruler to measure the ½-inch space precisely.
- Ignoring Processing Time: The 20-minute processing time in a rolling boil is critical to kill any potential spoilage organisms. Start your timer only after the water is at a full boil.
Storing Your Preserves
- Check the Seal: After 24 hours, remove the screw bands and try to lift the jar by the lid. If the lid stays on, it’s sealed. Any unsealed jars should be refrigerated immediately and used within a week.
- Store Properly: Label your sealed jars with the contents and date. Store them in a cool, dark, dry place like a pantry or cupboard. For best quality, use within 12-18 months.
A Taste of Summer, All Year Long
There is immense satisfaction in stocking your pantry with beautiful jars of homemade food. This roasted tomatillo salsa verde is more than just a condiment; it’s a connection to the seasons and a testament to the joy of home preservation. By following these tested safety guidelines, you can confidently capture the bright, smoky flavors of summer to enjoy whenever you please.
Ready to fill your pantry? Give this canning salsa verde recipe a try! Let us know how it goes in the comments below, and please leave a review. For more tested preserving recipes, be sure to subscribe to our newsletter.
Frequently Asked Questions
Q1: Is it really necessary to use bottled lime juice instead of fresh?
For canning, yes. While fresh lime juice is great for fresh salsa, its acidity (pH level) can vary widely from fruit to fruit. Bottled lime juice is standardized to a consistent pH level, which is critical for ensuring the overall acidity of the salsa is high enough to be safely canned in a water bath canner.
Q2: My salsa separated in the jar. Is it still safe to eat?
Yes, some separation is completely normal with homemade salsa. The solids and liquids can separate during storage. As long as the jar is still sealed properly, just give it a good shake or stir after opening, and it will be perfectly fine to eat.
Q3: Why can’t I add corn or beans to this recipe for canning?
Corn, beans, and other vegetables like bell peppers are low-acid foods. Adding them to this recipe would lower the overall acidity and make it unsafe for water bath canning. To enjoy salsa with these additions, can the salsa verde as written and simply stir in your corn or beans after you open a jar to serve it.
Q4: My jar didn’t seal. What do I do now?
Don’t panic! An unsealed jar is not a failure, you just can’t store it on the shelf. You have two options: 1) Refrigerate it immediately and use the salsa within one week, or 2) You can re-process it within 24 hours. To do this, check the jar rim for nicks, use a new lid, and process it for the full 20 minutes again.
Print
Safe & Easy Canning Salsa Verde
- Total Time: 1 hour 25 minutes
- Yield: 8 Pints 1x
Description
Bright, tangy salsa verde made from fresh tomatillos, onions, chiles, garlic, and cilantro, then safely preserved in a water bath so you can enjoy authentic Mexican flavors year-round. No pressure canner required—just a large pot, some clean jars, and this foolproof method.
Ingredients
- 8 lb Tomatillos (Husks removed rinsed)
- 4 medium White onions (Cut into wedges)
- 4 Jalapeño or serrano chiles (Stemmed leave seeds for more heat)
- 6 cloves Garlic (Peeled)
- 1 cup Fresh lime juice (Bottled lime juice recommended for safety)
- 1/2 cup Fresh cilantro leaves (chopped)
- 2 tsp Kosher salt (Optional enhances flavor)
- 1 tsp Black pepper (Optional)
- 1/2 tsp Ground cumin (Optional)
Instructions
Sterilize Jars & Prepare Canner:
- Wash jars, lids, and bands in hot soapy water and rinse well.
- Place jars in a water-bath canner or large pot filled with simmering water; keep hot until ready to fill.
- Bring canner water to a gentle boil.
Cook the Salsa:
- In a large stockpot, combine tomatillos, onion, chiles, and garlic. Add just enough water to cover the bottom (about ½ cup).
- Bring to a boil, reduce heat, and simmer 10 minutes until tomatillos soften.
Purée & Season:
- Carefully transfer cooked vegetables to a blender. Add lime juice and cilantro; purée until mostly smooth (leave some texture).
- Return purée to the pot. Stir in salt, pepper, and cumin (if using). Bring back to a simmer for 5 minutes, stirring occasionally.
Fill & Seal Jars:
- Remove jars from hot water (use jar lifter). Drain water.
- Place a funnel on a jar and ladle salsa, leaving ½-inch headspace.
- Wipe jar rims with a clean damp cloth. Center a lid on each jar, screw on band fingertip-tight.
Process in Water Bath:
- Lower jars back into the canner rack. Ensure jars are covered by at least 1 inch of water.
- Bring to a full rolling boil, cover, and process for 15 minutes (adjust for altitude: add 1 minute per 1,000 ft above sea level).
- Turn off heat; let jars sit 5 minutes in the water.
Cool & Store:
- Remove jars with lifter and place on a towel to cool undisturbed 12 – 24 hours.
- After cooling, check seals (lids should not flex when pressed). Label jars with date and store in a cool, dark place for up to 12 months.
Notes
-
Safety Tip: Always use bottled lime juice for canning to ensure proper acidity.
-
Adjust Heat: Remove seeds for milder salsa or add more chiles for extra kick.
-
Texture: For chunkier salsa, pulse less in the blender.
-
Low-Sodium: Omit salt if desired; add salt at serving.
-
Altitude Adjustment: Increase processing time by 1 minute per 1,000 ft above 1,000 ft elevation.
-
Use: Ideal accompaniment for tacos, grilled meats, or as a dipping sauce. Enjoy your homemade salsa verde year-round!
- Prep Time: 30 minutes
- Cook Time: 15 minutes
- Category: Condiments, Sauces
- Cuisine: Mexican, Preserves
Nutrition
- Calories: 20