Finding a good gluten-free bread is hard enough, but finding an easy recipe that gives you a soft, fluffy loaf with a beautiful crust? That can feel like the real challenge. For years, baking gluten-free bread meant complicated flour blends, sticky doughs, and often disappointing, dense results. But what if you could have the perfect “set it and forget it” loaf?
- Ingredients for This Gluten-Free Loaf
- Timing
- Step-by-Step Instructions
- Step 1: Add Wet Ingredients and Seasonings
- Step 2: Add Dry Ingredients
- Step 3: Program Your Bread Machine
- Step 4: Scrape the Corners (The Pro-Tip!)
- Step 5: Cool the Loaf Completely
- Nutritional Information
- Healthier Alternatives
- Serving Suggestions
- Common Mistakes to Avoid
- Storing Tips
- Conclusion
- FAQs
- Q1. Why do I have to scrape the pan?
- Q2. Can I use a different gluten-free flour blend?
- Q3. Can I make this recipe without a bread machine?
- Q4. My machine doesn’t have a custom or gluten-free setting. What do I use?
- Q5. Why is my bread gummy in the middle?
- The Best Bob’s Red Mill 1:1 Bread Machine Recipe
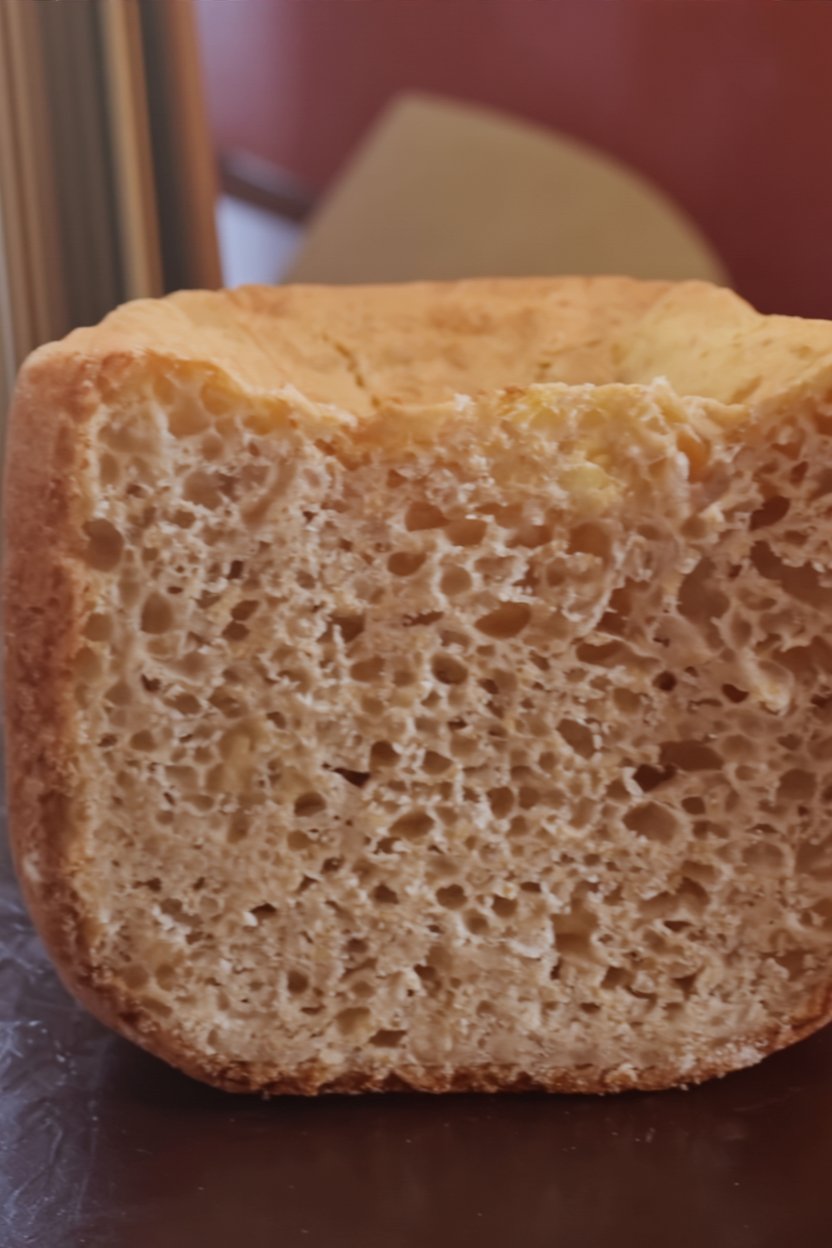
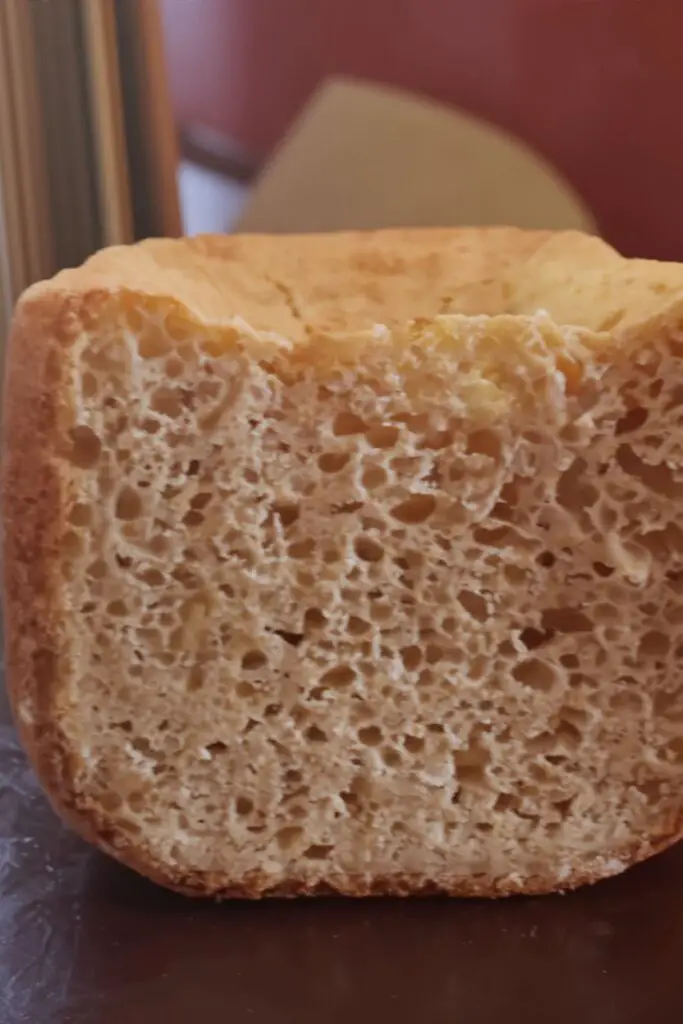
This Bob’s Red Mill 1:1 Bread Machine Recipe is a total game-changer. It’s specifically designed to work with that popular blue bag of flour, creating a tender, moist, and delicious sandwich bread with an open crumb. This is the simple, “dump and go” gluten-free bread machine recipe you’ve been searching for. Get ready to enjoy real, homemade bread again!
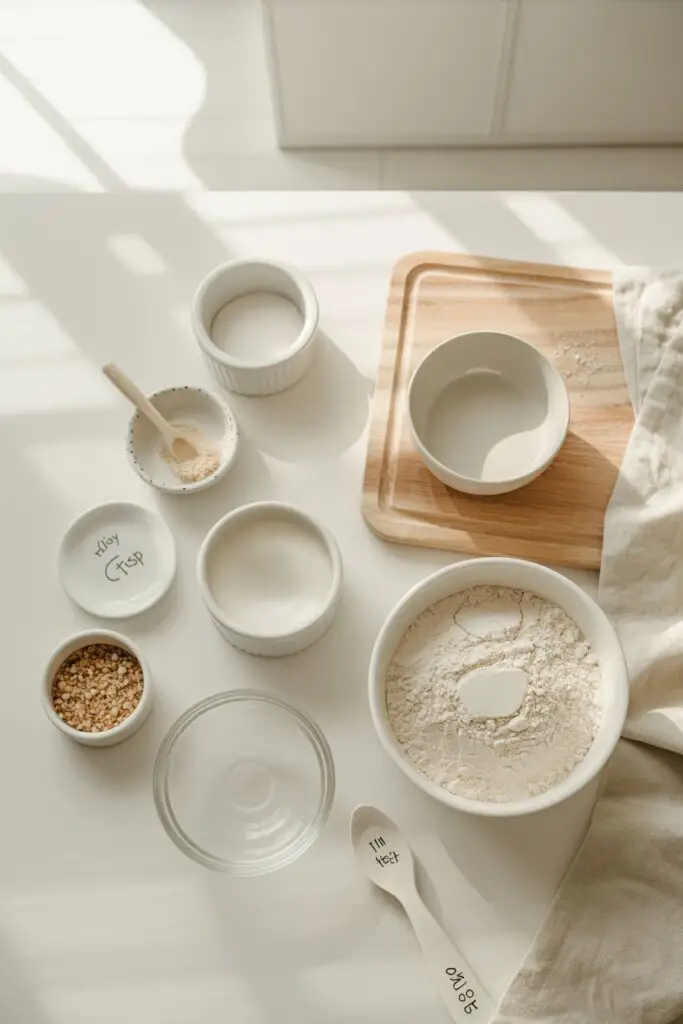
Ingredients for This Gluten-Free Loaf
This recipe relies on a specific order and room-temperature ingredients to give the yeast the best environment to work.
| Ingredient | Amount/Quantity |
| Apple cider vinegar | 1 teaspoon |
| Oil (vegetable, canola, or olive) | 1 ½ tablespoons |
| Large eggs | 3, room temperature |
| Water | 8 ounces (1 cup), room temperature |
| Milk (almond, coconut, or dairy) | 4 ounces (½ cup), room temperature |
| Kosher salt | 1 teaspoon |
| Granulated sugar | 1 tablespoon |
| Bob’s Red Mill 1:1 Gluten Free Flour | 17 ounces (about 3 ¾ cups + 1 tbsp) |
| Active dry yeast | 1 tablespoon |

Timing
This recipe is mostly hands-off, letting your machine do all the work. The cooling time is the most important part!
- Prep time: 10 minutes
- Machine time: 3 hours 5 minutes (using the ideal custom program)
- Cooling time: 1 hour 40 minutes (This is essential!)
- Total time: Approximately 4 hours 55 minutes
Step-by-Step Instructions
Step 1: Add Wet Ingredients and Seasonings
Place the bread pan from your machine on the counter. Add the first seven ingredients in the order listed: apple cider vinegar, oil, room-temperature eggs, room-temperature water, room-temperature milk, salt, and sugar. Gently stir this wet mixture together.
Step 2: Add Dry Ingredients
Carefully spoon the 17 ounces of Bob’s Red Mill 1:1 Gluten Free Flour on top of the liquid mixture. Place it gently so it “floats” on top. Use your finger or a spoon to make a small well or indent in the center of the flour. Pour the yeast into this well.
- Tip: The goal is to keep the yeast dry and separate from the wet ingredients until the machine’s cycle begins.
Step 3: Program Your Bread Machine
This recipe works best with a custom program. If your machine allows it, set it for the following:
- Preheat: 20 minutes
- Knead: 20 minutes
- Rise: 70 minutes
- Bake: 75 minutes at 375°F
If a customized program is not possible, your next best options are the “Gluten-Free” setting or the shortest “White Bread” setting your machine has.
Step 4: Scrape the Corners (The Pro-Tip!)
Set a timer for 5 minutes after the machine’s knead cycle begins. Use a rubber spatula to go around the corners of the pan and scrape down any dry flour, pushing it into the wet dough ball. Gluten-free flour is heavy and sometimes needs this little bit of help to fully incorporate.
Step 5: Cool the Loaf Completely
Once the baking cycle is complete, let the bread sit in the pan (removed from the machine) for 10 minutes. After 10 minutes, carefully transfer the loaf to a wire rack to cool.
- This is the most important step: You must let the bread cool until it is at room temperature and no longer feels moist to the touch. This can take 1.5 to 2 hours. Gluten-free bread continues to set its starches as it cools. If you cut it while it’s warm, it will be a gummy, dense mess.
Nutritional Information
Nutritional values are estimates and will vary based on your specific ingredients and milk choice. This is an estimation for one slice (assuming 16 slices per loaf).
- Calories: ~160 kcal
- Protein: 4 g
- Carbohydrates: 28 g
- Fat: 4 g
- Fiber: 2 g
(This bread is a great source of structure and flavor from the eggs, and it’s naturally dairy-free when using a plant-based milk.)
Healthier Alternatives
This recipe is already gluten-free and can easily be dairy-free, but here are a few other adjustments you can make.
- Dairy-Free: As noted, this recipe works perfectly with almond milk, coconut milk, or even just more water.
- Lower Sugar: You can swap the 1 tablespoon of sugar for a 1:1 baking substitute like monk fruit or allulose. The yeast will still have plenty to feed on.
- Egg-Free (Vegan): This is an advanced swap, as the 3 eggs provide critical structure. You can try replacing them with 3 “flax eggs” (3 tbsp ground flaxseed + 9 tbsp water, whisked and set for 5 mins), but be aware the loaf will be significantly denser and more “gummy.”
Serving Suggestions
This loaf’s soft texture and tight crumb make it the perfect multi-purpose bread.
- The Ultimate Sandwich: It’s sturdy enough to hold up to your favorite sandwich fillings without crumbling.
- Perfect Toast: This bread toasts beautifully! Slather it with butter and jam.
- Avocado Toast Base: It’s the ideal, broad canvas for a loaded avocado toast with a “everything bagel” seasoning.
- French Toast: Slices that are a day or two old make incredible gluten-free French toast.
Common Mistakes to Avoid
- Cutting the bread while it’s hot. This is the #1 mistake. It will be gummy and seem undercooked.
- Solution: Be patient! Wait until it is 100% cooled to room temperature before slicing with a long, thin, serrated knife.
- The yeast touches the water too soon. This can cause the yeast to activate prematurely.
- Solution: Follow Step 2 carefully. Create the flour “mountain” and place the yeast in a small “crater” on top, away from the liquid.
- Using cold ingredients. Cold milk, eggs, or water will shock the yeast and kill your rise, resulting in a dense, short “brick” of bread.
- Solution: Use room-temperature ingredients. You can set your eggs and milk on the counter for 30 minutes before you start.
- Forgetting to scrape the corners. This is a common bread machine problem, especially with heavy GF flours.
- Solution: Set a 5-minute timer! A quick scrape with a spatula ensures all your flour is incorporated, preventing dry, crumbly corners.
Storing Tips
Gluten-free bread is notorious for drying out quickly. Here’s how to keep it fresh:
- Store: Store the cooled loaf in an airtight bag or container at room temperature for up to 2 days.
- Freeze: This is the best way to store it. Pre-slice the entire cooled loaf, then place the slices in a freezer-safe bag. You can pull out one slice at a time.
- Reheat: Frozen slices are perfect for toasting! You can also microwave a slice for 15-20 seconds to soften it for a sandwich.
Conclusion
This Bob’s Red Mill 1:1 Bread Machine Recipe is your key to effortless, delicious, and fluffy homemade gluten-free bread. It’s a reliable, “dump and go” recipe that takes the guesswork out of GF baking. Finally, you can enjoy a sturdy, soft sandwich loaf that doesn’t crumble.
We hope you enjoy this loaf as much as our family does! Try it out and let us know in the comments how it turned out for you. What’s your family’s favorite gluten-free bread machine recipe?
FAQs
Q1. Why do I have to scrape the pan?
Gluten-free batters are often heavier and stickier than wheat dough. Sometimes, the machine’s paddle can’t reach the flour in the very corners of the pan, leaving dry, unmixed patches. A quick scrape 5 minutes into the knead cycle solves this and ensures a perfectly mixed loaf.
Q2. Can I use a different gluten-free flour blend?
I do not recommend it. This recipe—with its specific liquid, egg, and yeast ratios—is formulated exclusively for the Bob’s Red Mill 1:1 Gluten-Free Flour (the blue bag). Other blends have different starch-to-flour ratios or different gums (or no gums) and will not behave the same way.
Q3. Can I make this recipe without a bread machine?
It is not recommended. This recipe creates a very wet, sticky batter that is not designed to be kneaded by hand. It relies on the machine’s paddle and contained pan to mix and bake properly.
Q4. My machine doesn’t have a custom or gluten-free setting. What do I use?
If you don’t have a “Gluten-Free” setting, your best bet is to use the shortest “White Bread” or “Basic” setting possible. If that setting has a long rise, it might over-proof, so watch it carefully.
Q5. Why is my bread gummy in the middle?
You cut it too soon! Gluten-free bread is held together by starches (like tapioca and potato starch) that don’t fully “set” until they are cool. Even if it feels cool on the outside, it can still be 200°F on the inside. Wait until it is completely at room temperature.
Print
The Best Bob’s Red Mill 1:1 Bread Machine Recipe
- Total Time: 4 hours 55 minutes
- Yield: 1 Loaf (16 Slices) 1x
- Diet: Gluten Free
Description
This Bob’s Red Mill 1:1 Bread Machine Recipe is a total game-changer. It’s specifically designed to work with that popular blue bag of flour, creating a tender, moist, and delicious sandwich bread with an open crumb. This is the simple, “dump and go” gluten-free bread machine recipe you’ve been searching for. Get ready to enjoy real, homemade bread again!
Ingredients
- 1 teaspoon Apple cider vinegar
- 1 1/2 tablespoons Oil (vegetable, canola, or olive)
- 3 Large eggs, room temperature
- 8 ounces (1 cup) Water, room temperature
- 4 ounces (1/2 cup) Milk (almond, coconut, or dairy), room temperature
- 1 teaspoon Kosher salt
- 1 tablespoon Granulated sugar
- 17 ounces (about 3 3/4 cups + 1 tbsp) Bob’s Red Mill 1:1 Gluten Free Flour
- 1 tablespoon Active dry yeast
Instructions
-
Add Wet Ingredients and Seasonings: Place the bread pan from your machine on the counter. Add the first seven ingredients in the order listed: apple cider vinegar, oil, room-temperature eggs, room-temperature water, room-temperature milk, salt, and sugar. Gently stir this wet mixture together.
-
Add Dry Ingredients: Carefully spoon the 17 ounces of Bob’s Red Mill 1:1 Gluten Free Flour on top of the liquid mixture, creating a “float” on top.
-
Use your finger or a spoon to make a small well or indent in the center of the flour. Pour the 1 tablespoon of active dry yeast into this well.
-
Program Your Bread Machine: Place the pan into your machine. Use a custom program if available (Preheat: 20 mins, Knead: 20 mins, Rise: 70 mins, Bake: 75 mins at 375°F).
-
If a custom program is not possible, your next best options are the “Gluten-Free” setting or the shortest “White Bread” setting.
-
Scrape the Corners: Set a timer for 5 minutes after the machine’s knead cycle begins. Use a rubber spatula to go around the corners of the pan and scrape down any dry flour, pushing it into the wet dough ball.
-
Cool the Loaf Completely: Once the baking cycle is complete, let the bread sit in the pan (removed from the machine) for 10 minutes.
-
After 10 minutes, carefully transfer the loaf to a wire rack. You must let the bread cool completely until it is at room temperature (this can take 1.5 to 2 hours) before slicing.
Notes
- Yeast Separation: The goal in Step 3 is to keep the yeast dry and separate from the wet ingredients until the machine’s cycle begins.
- Scraping is Key: Gluten-free flour is heavy and sometimes needs the help in Step 6 to fully incorporate.
- Cooling is Essential: Do not skip the 1.5-2 hour cooling time! Gluten-free bread continues to set its starches as it cools. If you cut it while it’s warm, it will be a gummy, dense mess.
- Prep Time: 10 minutes
- Cook Time: 3 hours 5 minutes
- Category: Bread, Gluten-Free
- Method: Bread Machine
- Cuisine: American
Nutrition
- Serving Size: 1 slice
- Calories: 160 kcal
- Sugar: 2 g
- Sodium: 160 mg
- Fat: 4 g
- Saturated Fat: 0.5 g
- Unsaturated Fat: 3.5 g
- Trans Fat: 0 g
- Carbohydrates: 28 g
- Fiber: 2 g
- Protein: 4 g
- Cholesterol: 35 mg