What’s the official scent of fall? It has to be the smell of warm baked apples and cinnamon drifting from the oven. While apple pie is a classic, let’s be honest—making a perfect crust is time-consuming. This is where the Easy Apple Crisp comes to the rescue.
- Ingredients for Cinnamon Apple Crisp
- Recipe Timing
- Step 1: Preheat Oven and Prepare Your Dish
- Step 2: Create the Spiced Apple Filling
- Step 3: Mix the Dry Topping Ingredients
- Step 4: Cut in the Cold Butter
- Step 5: Assemble Your Easy Apple Crisp
- Step 6: Bake to Golden, Bubbly Perfection
- Step 7: Cool and Let the Sauce Thicken
- Nutritional Information (Estimate)
- Healthier Alternatives
- Serving Suggestions
- Common Mistakes to Avoid
- Storing Tips
- Conclusion
- FAQs (Frequently Asked Questions)
- Q1. What are the best apples for apple crisp?
- Q2. Can I use quick oats instead of rolled oats?
- Q3. Can I add nuts to the topping?
- Q4. Why is my apple filling so watery?
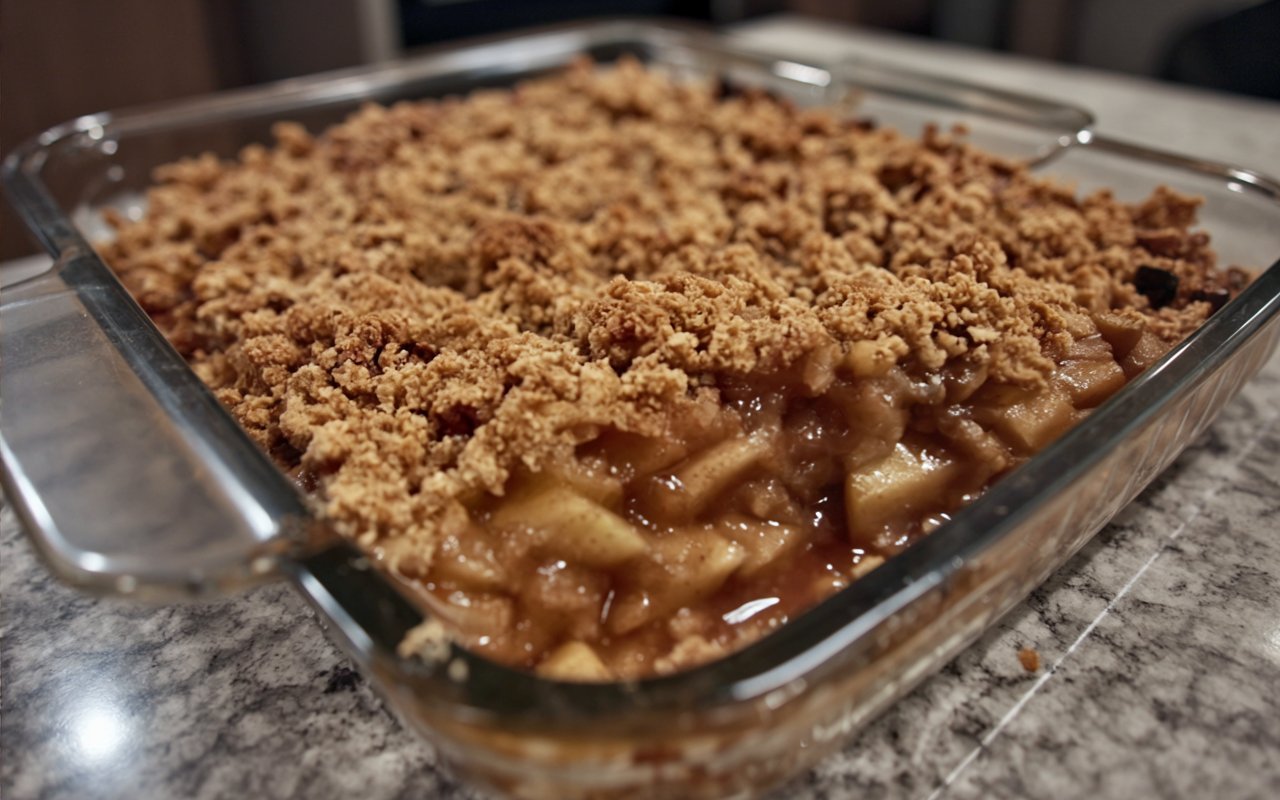
- The Best Easy Apple Crisp (Cinnamon Oat Topping)
This Easy Cinnamon Apple Crisp recipe gives you all the reward with none of the fuss. We’re talking tender, juicy apples swimming in a warm, spiced sauce, all buried under a crunchy, buttery cinnamon oat topping. It’s the ultimate comforting fall dessert, and it’s practically foolproof. You get all the homemade, rustic charm of an apple crumble with an even better, crunchier streusel top.
Ingredients for Cinnamon Apple Crisp
This recipe is all about simple, high-quality ingredients. The key is using firm baking apples that won’t turn to mush and cold butter for the topping.
| Component | Ingredient | Amount/Quantity |
| Apple Filling | Baking Apples (Granny Smith, Honeycrisp, or a mix) | 6-7 cups, peeled, cored, & sliced |
| Granulated Sugar | 1/4 cup (50g) | |
| Packed Brown Sugar | 1/4 cup (55g) | |
| All-Purpose Flour | 1 tablespoon (thickens the sauce) | |
| Ground Cinnamon | 1 1/2 teaspoons | |
| Ground Nutmeg | 1/4 teaspoon (optional) | |
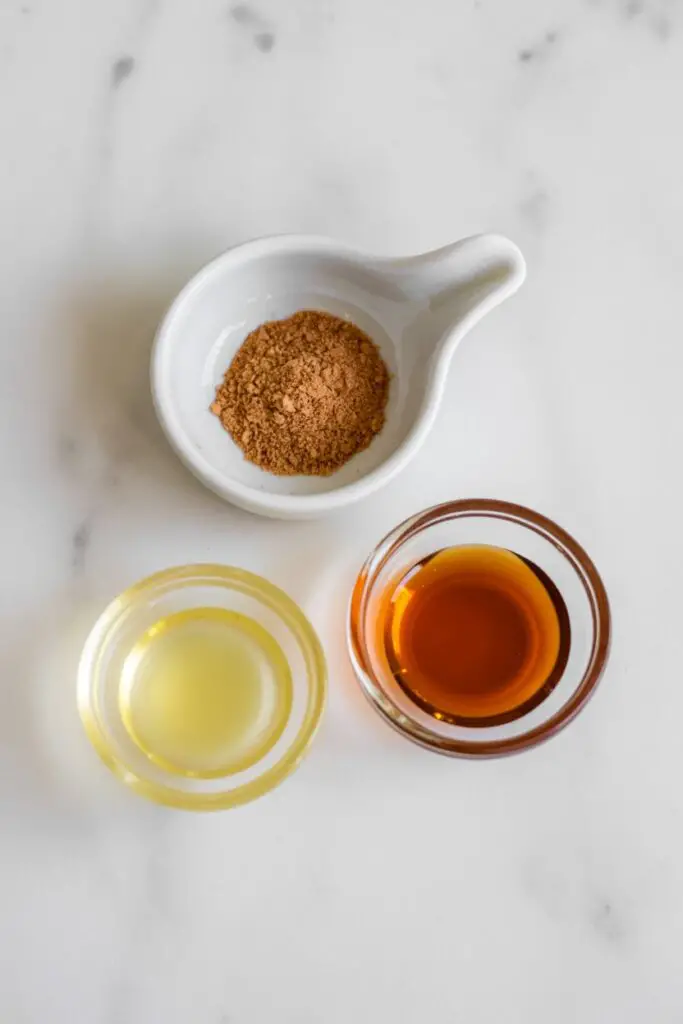
| Lemon Juice | 1 tablespoon | |
| Pure Vanilla Extract | 1 teaspoon | |
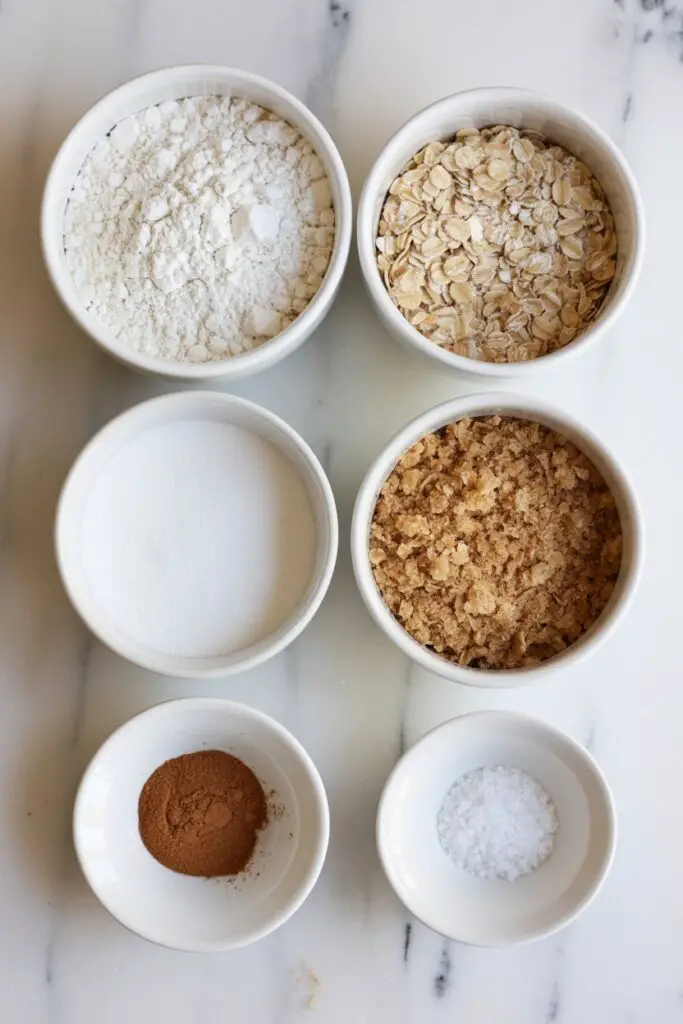
| Crisp Topping | All-Purpose Flour | 1 cup (130g) |
| Old-Fashioned Rolled Oats | 1 cup (80g) (not instant) | |
| Packed Brown Sugar | 3/4 cup (165g) | |
| Ground Cinnamon | 1/2 teaspoon | |
| Salt | 1/2 teaspoon | |
| Cold Unsalted Butter | 1/2 cup (113g), cut into small cubes |


Recipe Timing
This dessert comes together in just over an hour, with most of that time being hands-off baking. It’s about 75% faster than making a traditional two-crust apple pie.
- Prep time: 20 minutes (for peeling, slicing, and mixing)
- Cook time: 35-45 minutes
- Cooling time: 15 minutes (this is a crucial step!)
- Total Time: 1 hour 15 minutes
Step 1: Preheat Oven and Prepare Your Dish
First, let’s get your oven working. Preheat it to 375°F (190°C). Grab your 9×13 inch glass baking dish (or a similar 3-quart dish) and lightly grease it. This prevents the sugary, delicious apple filling from sticking.
Step 2: Create the Spiced Apple Filling
In a large bowl, add your peeled and sliced apples. Pour the 1 tablespoon of lemon juice over them and toss immediately. Pro Tip: This is a crucial step to prevent the apples from browning while you prepare the other ingredients.
Now, add the granulated sugar, 1/4 cup brown sugar, 1 tablespoon flour, 1 1/2 teaspoons cinnamon, vanilla, and the optional nutmeg. Toss everything together until every single apple slice is evenly coated in that beautiful, spiced mixture.
Step 3: Mix the Dry Topping Ingredients
In a separate medium bowl, it’s time to make the “crisp” part. Whisk together the 1 cup of all-purpose flour, old-fashioned rolled oats, 3/4 cup brown sugar, 1/2 teaspoon cinnamon, and salt. Mixing the dry ingredients first ensures the cinnamon and salt are evenly distributed.
Step 4: Cut in the Cold Butter
Take your cold, cubed butter (it must be cold!) and add it to the dry topping mixture. Using your fingertips, a pastry cutter, or two forks, “cut” the butter into the flour. Rub and pinch the butter and flour together until the mixture looks like coarse, lumpy crumbs, with some pieces the size of small peas. Crucial Tip: Do not overmix or let the butter melt! You want those little butter pockets—that’s what makes the topping crunchy, not bready.
Step 5: Assemble Your Easy Apple Crisp
Pour the entire apple filling mixture into your prepared baking dish and spread it into an even layer. Now, generously sprinkle the crisp topping all over the apples. Make sure you cover it from edge to edge; don’t be shy!
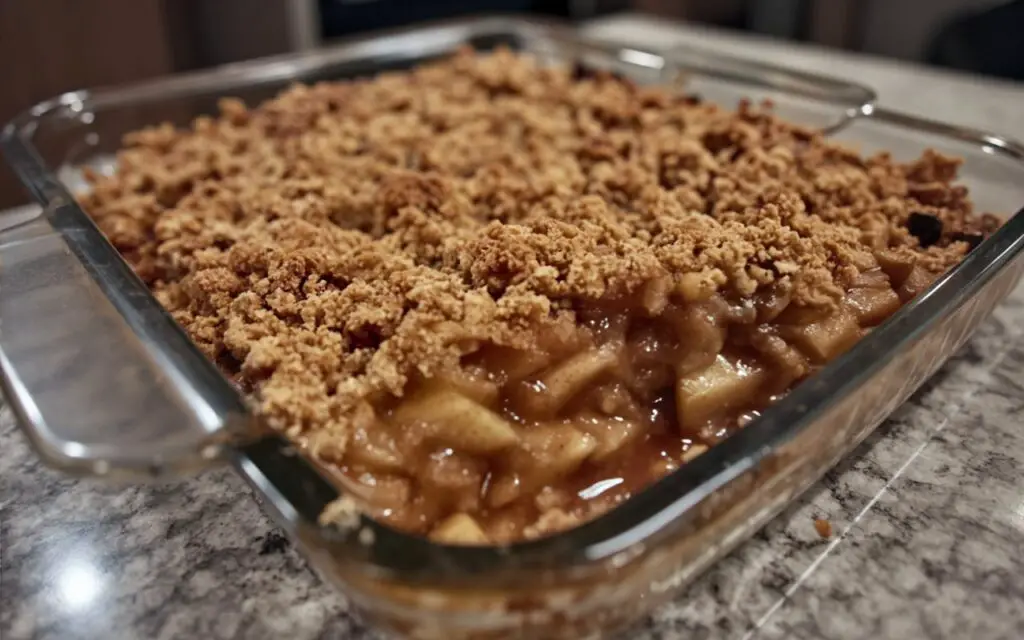
Step 6: Bake to Golden, Bubbly Perfection
Place the dish in your preheated oven. Bake for 35-45 minutes. You’ll know it’s done when the topping is a deep golden brown and the apple filling is hot, thick, and bubbling up around the edges of the dish. Your kitchen will smell absolutely incredible!
Step 7: Cool and Let the Sauce Thicken
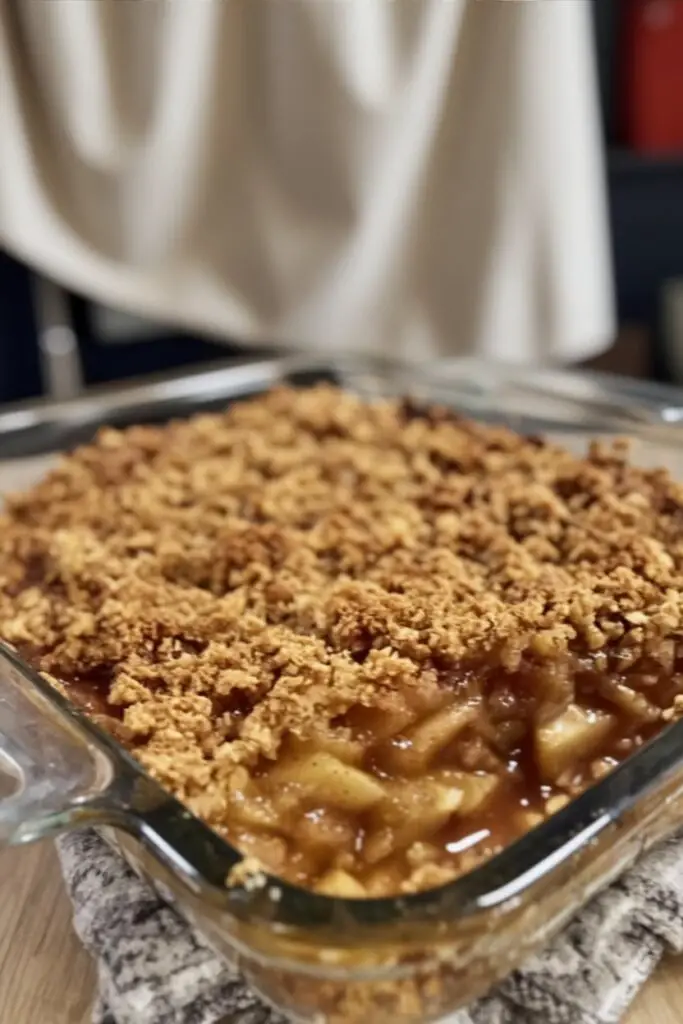
This is the hardest part: waiting. Let the apple crisp cool on a wire rack for at least 15 minutes before serving. This step is essential as it allows the hot, bubbly juices (which you thickened with that 1 tablespoon of flour) to cool and thicken into a perfect, velvety sauce.
Nutritional Information (Estimate)
Please note this is an estimate, assuming the crisp is divided into 12 servings.
- Calories: 290 kcal
- Protein: 3 g
- Carbohydrates: 50 g
- Fat: 10 g (Saturated: 6 g)
- Sugar: 28 g
- Fiber: 4 g
This dessert is a wonderful source of soluble fiber from the old-fashioned rolled oats and Vitamin C from the apples!
Healthier Alternatives
This recipe is easy to adapt to your dietary needs while keeping it delicious.
- For a Gluten-Free Apple Crisp: This is an easy swap! Use a good 1-to-1 gluten-free baking blend in place of the all-purpose flour (in both the filling and topping). Also, make sure your old-fashioned oats are certified gluten-free.
- For a Vegan Apple Crisp: Simply use your favorite brand of plant-based stick butter (make sure it’s cold and cubed) in place of the dairy butter. The rest of the ingredients are already vegan.
- For a Lower-Sugar Version: You can easily reduce the granulated and brown sugar in the apple filling (Step 2) by half, especially if you’re using sweeter apples like Honeycrisp. We recommend keeping the sugar amount in the topping, as it’s essential for creating the correct “crisp” texture.
Serving Suggestions
This Easy Apple Crisp is a star, but it loves a partner. The classic pairing is a scoop of vanilla bean ice cream, which melts into the warm, saucy apples.
For a tangy contrast, try a dollop of unsweetened fresh whipped cream or even a spoonful of plain Greek yogurt. And if you want to be truly decadent, a warm drizzle of caramel sauce over the top is pure magic. This is the perfect dessert for a cozy family dinner, a Thanksgiving gathering, or any festive fall occasion.
Common Mistakes to Avoid
- A Soggy Topping: This is the #1 enemy of an apple crisp! It usually happens for two reasons: the butter was too warm, or the mixture was overmixed into a paste.
- Solution: Use cold butter, straight from the fridge, and mix just until coarse crumbles form.
- A Watery, Runny Filling: The filling should be a thick, rich sauce, not a watery puddle.
- Solution: Do not skip the 1 tablespoon of flour in the filling (it’s the thickener). Most importantly, you must let the crisp rest for 15 minutes after baking. This allows the sauce to set.
- Using the Wrong Apples: If you use a “soft” apple like a Red Delicious, you’ll end up with a pan of applesauce.
- Solution: Stick to firm baking apples. Granny Smith is the classic choice for its tartness. A mix of Granny Smith and a sweet-firm apple like Honeycrisp or Golden Delicious is our top recommendation.
Storing Tips
- To Store: Cover any leftovers tightly with plastic wrap or transfer to an airtight container. Store in the refrigerator for up to 4 days. The topping will naturally soften a bit as it sits.
- To Reheat: The best way to revive the “crisp” is in the oven. Warm a serving in a 350°F (175°C) oven for 10-15 minutes, or until warmed through. A microwave works, but the topping will remain soft.
- Make-Ahead Tip: You can assemble the unbaked crisp 1 day ahead. Prepare the filling and topping, but store them in separate airtight containers in the fridge. If you put the topping on the raw apples overnight, it will get soggy. When ready to bake, pour the filling into the dish, sprinkle on the cold topping, and bake as directed (it may need an extra 5 minutes).
Conclusion
This Easy Cinnamon Apple Crisp is the ultimate fall comfort food, delivering all the flavor of a classic apple pie with half the effort. That contrast between the warm, tender, spiced apples and the crunchy, buttery oat topping is simply irresistible. It’s a reliable, crowd-pleasing dessert that’s perfect for bakers of all skill levels.
We hope you enjoy making and savoring this dish as much as we do. Try it out and let us know in the comments how it turned out for you! We’d love to hear your feedback or any personal twists you added. Don’t forget to rate the recipe and subscribe to our blog for more delicious, easy recipes!
FAQs (Frequently Asked Questions)
Q1. What are the best apples for apple crisp?
As the recipe notes, you need a firm baking apple that holds its shape. Our top picks are Granny Smith (for a classic tart flavor) or a combination of Granny Smith and a sweeter, firm apple like Honeycrisp, Braeburn, or Golden Delicious.
Q2. Can I use quick oats instead of rolled oats?
We don’t recommend it. Quick oats are thinner, absorb liquid differently, and tend to get pasty when baked. Old-fashioned rolled oats are what give the topping its signature chewy, crunchy texture.
Q3. Can I add nuts to the topping?
Absolutely! Adding 1/2 cup of chopped pecans or walnuts to the dry topping mixture (in Step 3) is a fantastic idea. It adds another layer of nutty flavor and crunch.
Q4. Why is my apple filling so watery?
This usually happens for two reasons. First, you might have skipped the 1 tablespoon of flour in the filling, which is the magic thickener. Second, you didn’t let the crisp rest for at least 15 minutes after baking. That resting period is when the molten-hot sauce cools down and thickens into a perfect, velvety consistency.
Print
The Best Easy Apple Crisp (Cinnamon Oat Topping)
- Total Time: 1 hour 15 minutes
- Yield: 12 Servings 1x
Description
This Easy Cinnamon Apple Crisp recipe gives you all the reward of a classic fall dessert with none of the fuss of making pie crust. Tender, juicy apples swim in a warm, spiced sauce, all buried under a crunchy, buttery cinnamon oat topping. It’s the ultimate comforting fall dessert, practically foolproof, and delivers homemade, rustic charm with an irresistibly crunchy streusel top.
Ingredients
For the Apple Filling
- 6–7 cups Baking Apples (Granny Smith, Honeycrisp, or a mix), peeled, cored, & sliced
- 1/4 cup (50g) Granulated Sugar
- 1/4 cup (55g) Packed Brown Sugar
- 1 tablespoon All-Purpose Flour
- 1 1/2 teaspoons Ground Cinnamon
- 1/4 teaspoon Ground Nutmeg (optional)
- 1 tablespoon Lemon Juice
- 1 teaspoon Pure Vanilla Extract
For the Crisp Topping
- 1 cup (130g) All-Purpose Flour
- 1 cup (80g) Old-Fashioned Rolled Oats (not instant)
- 3/4 cup (165g) Packed Brown Sugar
- 1/2 teaspoon Ground Cinnamon
- 1/2 teaspoon Salt
- 1/2 cup (113g) Cold Unsalted Butter, cut into small cubes
Instructions
-
Preheat Oven and Prepare Dish: Preheat oven to 375°F (190°C). Lightly grease a 9×13 inch glass baking dish.
-
Create the Spiced Apple Filling: In a large bowl, add the sliced apples. Immediately pour the lemon juice over them and toss to prevent browning. Add the granulated sugar, 1/4 cup brown sugar, 1 tablespoon flour, 1 1/2 teaspoons cinnamon, vanilla, and optional nutmeg. Toss until all apple slices are evenly coated.
-
Mix Dry Topping Ingredients: In a separate medium bowl, whisk together the 1 cup all-purpose flour, rolled oats, 3/4 cup brown sugar, 1/2 teaspoon cinnamon, and salt.
-
Cut in Cold Butter: Add the cold, cubed butter to the dry topping mixture. Using fingertips, a pastry cutter, or two forks, cut the butter into the flour until the mixture resembles coarse crumbs with some pea-sized pieces. Do not overmix or let the butter melt.
-
Assemble the Crisp: Pour the apple filling into the prepared baking dish and spread evenly. Sprinkle the crisp topping generously and evenly over the apples, covering completely.
-
Bake: Place the dish in the preheated oven. Bake for 35-45 minutes, until the topping is deep golden brown and the apple filling is hot and bubbling around the edges.
-
Cool Before Serving: Let the apple crisp cool on a wire rack for at least 15 minutes before serving. This allows the sauce to thicken properly.
Notes
- Prevent Browning: Tossing the apples with lemon juice immediately after slicing is crucial to prevent them from turning brown.
- Keep Butter Cold: For the topping, the butter must be cold! Work it into the dry ingredients quickly until crumbly. Little butter pockets are what make the topping crisp, not bready.
- Don’t Overmix Topping: Stop mixing the topping once it reaches a coarse crumb texture. Overmixing will melt the butter.
- Cooling is Crucial: Letting the crisp cool for at least 15 minutes is essential. This allows the hot, bubbly juices to cool and thicken into a perfect, velvety sauce.
- Prep Time: 20 minutes
- Cook Time: 40 minutes
- Category: Dessert
- Method: Baking
- Cuisine: American
Nutrition
- Serving Size: 1 serving (1/12th of crisp)
- Calories: 290 kcal
- Sugar: 28 g
- Sodium: 105 mg
- Fat: 10 g
- Saturated Fat: 6 g
- Unsaturated Fat: 4 g
- Trans Fat: 0.3 g
- Carbohydrates: 50 g
- Fiber: 4 g
- Protein: 3 g
- Cholesterol: 25 mg