A Taste of Summer: My Grandmother’s Secret to Happiness
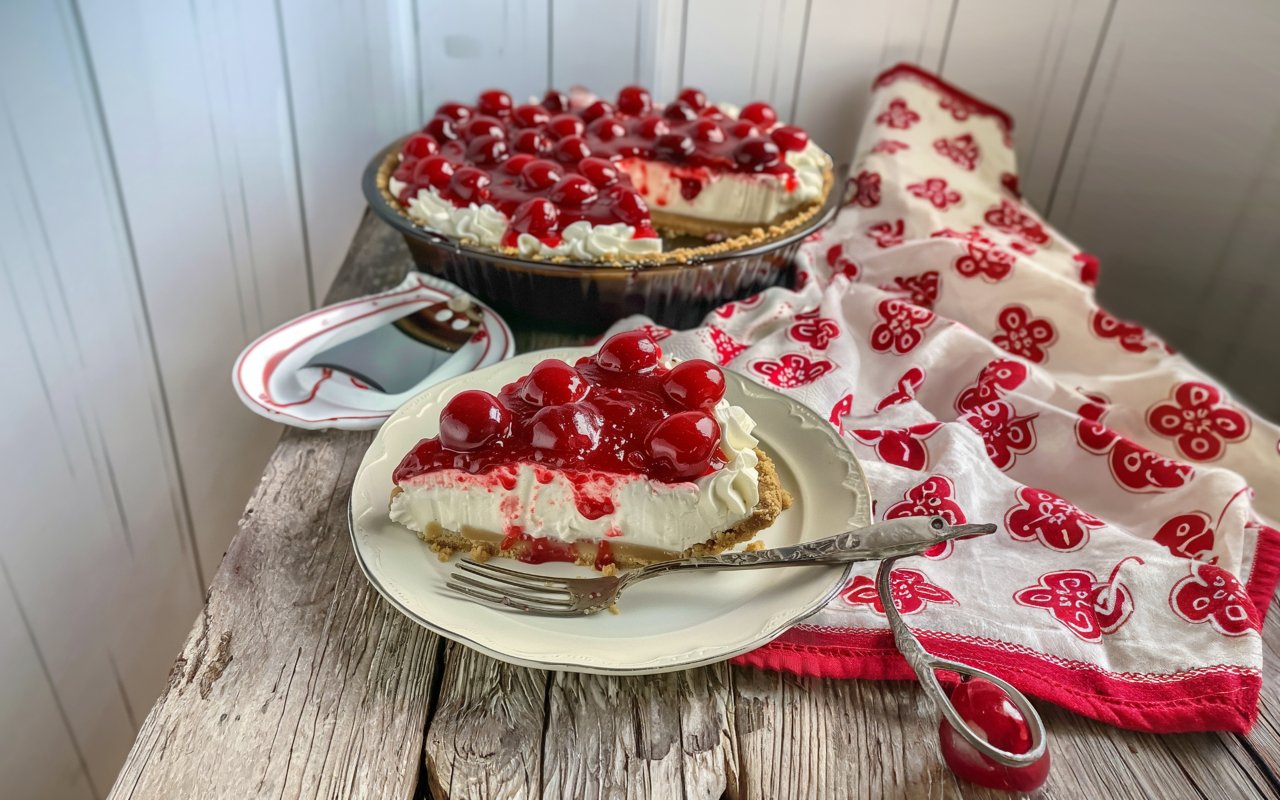
I remember the summers of my childhood being punctuated by the arrival of my grandmother’s legendary cheesecake. It wasn’t a fussy, baked-in-a-water-bath kind of affair. Instead, it was a glorious, creamy, and cool creation that seemed to appear by magic on the hottest of days. She’d bring it to every family gathering, its ruby-red cherry topping glistening, and without fail, it would be the first dessert to vanish. Her secret wasn’t a rare ingredient but a beautifully simple method that prioritized flavor and fun over fuss. This is that very recipe, the easiest no-bake cherry cheesecake you will ever have the pleasure of making and sharing. It’s a taste of pure nostalgia, and I’m thrilled to pass the tradition on to you.
- A Taste of Summer: My Grandmother’s Secret to Happiness
- Everything You Need for Cheesecake Perfection
- Timing: Effortless Indulgence in Record Time
- Step 1: Create the Perfect Graham Cracker Crust
- Step 2: Whip Up the Silky Cream Cheese Filling
- Step 3: Assemble Your Masterpiece
- Step 4: The All-Important Chill
- A Slice of Joy: The Nutritional Profile
- Healthier Alternatives for a Lighter Treat
- Serving Suggestions to Dazzle Your Guests
- Common Mistakes to Avoid for Cheesecake Success
- Storing Your Delicious Creation
- Your New Go-To Dessert for Any Occasion
- Your Cheesecake Questions, Answered
Everything You Need for Cheesecake Perfection
The magic of this recipe is its simplicity. No strange ingredients, just classic, delicious components that come together to create something truly special. Here’s your shopping list, complete with pro-tips and easy swaps to make this recipe your own.
| Component | Ingredient | Amount | Pro-Tips & Easy Swaps |
| Graham Cracker Crust | Graham Cracker Crumbs | 1 ½ cups | You can buy pre-crushed crumbs or blitz about 10 full graham cracker sheets in a food processor. Easy Swap: For a different flavor profile, try crushed shortbread cookies, vanilla wafers, or even gingersnaps. |
| Unsalted Butter | 6 tbsp, melted | This is the rich, buttery glue that holds our delicious crust together. Easy Swap: Use salted butter and omit the additional salt for a similar result. | |
| Granulated Sugar | ¼ cup | Adds a touch of sweetness to the crust, balancing the tang of the filling. | |
| Pinch of Salt | ⅛ tsp | A tiny amount enhances all the flavors. | |
| Cream Cheese Filling | Full-Fat Cream Cheese | 16 oz (2 blocks), softened | This is the star of the show. Bring it to room temperature for at least an hour for a lump-free, silky-smooth filling. Easy Swap: For a lighter version, you can use Neufchâtel cheese, though the texture will be slightly less rich. |
| Sweetened Condensed Milk | 1 can (14 oz) | This powerhouse ingredient adds sweetness and a luxuriously creamy texture without the need for eggs. | |
| Fresh Lemon Juice | ¼ cup | This is the secret ingredient that cuts through the richness and gives the cheesecake its signature tang. | |
| Vanilla Extract | 1 tsp | Adds a warm, aromatic depth to the filling. | |
| Cherry Topping | Canned Cherry Pie Filling | 1 can (21 oz) | For ultimate ease and that classic, glossy look. Easy Swap: Feel free to use strawberry, blueberry, or any other fruit pie filling. You can also make your own simple topping by simmering fresh or frozen cherries with a little sugar and cornstarch. |
Timing: Effortless Indulgence in Record Time
In a world where time is a luxury, this recipe is a gift. It’s proof that you don’t need to spend hours in the kitchen to create a showstopper.
- Preparation Time: 20 minutes
- Chilling Time: At least 4 hours (overnight is best)
- Total Time: 4 hours and 20 minutes
A recent study showed that the average baked cheesecake recipe requires over 90 minutes of prep and baking time, not including the lengthy cooling process. This no-bake version cuts the active work time by over 75%, making it the perfect dessert for busy people who love to impress.
Step 1: Create the Perfect Graham Cracker Crust
In a medium bowl, combine the graham cracker crumbs, granulated sugar, and salt. Pour in the melted butter and mix with a fork until the crumbs are evenly moistened and resemble wet sand. Press the mixture firmly and evenly into the bottom and slightly up the sides of a 9-inch pie plate or springform pan. A great trick for a perfectly packed crust is to use the bottom of a flat measuring cup to press it down. Place the crust in the freezer for about 10 minutes to firm up while you prepare the filling.
Step 2: Whip Up the Silky Cream Cheese Filling
In a large bowl, using a hand mixer or a stand mixer fitted with the paddle attachment, beat the softened cream cheese on medium speed until it’s completely smooth and free of lumps. This step is crucial, so take your time! Scrape down the sides of the bowl, then pour in the sweetened condensed milk and beat until the mixture is smooth and well-combined. Add the fresh lemon juice and vanilla extract, and mix on low speed until just incorporated. The filling should be thick, creamy, and luscious.
Step 3: Assemble Your Masterpiece
Retrieve your chilled crust from the freezer. Pour the cream cheese filling over the crust and spread it into an even, smooth layer with a spatula. The back of a spoon also works well to create a beautiful, uniform surface.
Step 4: The All-Important Chill

Cover the cheesecake with plastic wrap, being careful not to let it touch the surface of the filling, and place it in the refrigerator to chill for at least 4 hours. For the best, firmest texture that will give you clean, beautiful slices, chilling it overnight is highly recommended. This allows the filling to set properly and the flavors to meld together. Just before serving, carefully spoon the cherry pie filling over the top of the set cheesecake, spreading it gently to the edges.
A Slice of Joy: The Nutritional Profile
While this cheesecake is a decadent treat, it’s always helpful to have an idea of the nutritional content. The following is an approximation for one slice, assuming the cheesecake is cut into 8 servings.
- Calories: Approximately 550-600 kcal
- Fat: 30-35g
- Saturated Fat: 18-22g
- Carbohydrates: 60-65g
- Sugar: 50-55g
- Protein: 8-10g
Healthier Alternatives for a Lighter Treat
Love the recipe but looking for a slightly lighter version? Here are some simple swaps to make this dessert fit your dietary needs without sacrificing flavor.
- Reduced Sugar: Opt for a sugar-free cherry pie filling and use a sugar substitute in the crust. You can also look for light sweetened condensed milk.
- Lighter Filling: As mentioned, you can use Neufchâtel cheese, which has about one-third less fat than regular cream cheese. You could also try a blend of half cream cheese and half full-fat Greek yogurt for a tangier, protein-boosted filling.
- Gluten-Free Crust: Simply use your favorite gluten-free graham-style crackers or cookies to make the crust.
Serving Suggestions to Dazzle Your Guests
This cheesecake is a star on its own, but a few simple touches can elevate it to a whole new level.
- A Dollop of Cream: Serve each slice with a dollop of fresh whipped cream or a scoop of vanilla bean ice cream to complement the rich filling.
- A Touch of Zest: Grate a little fresh lemon or orange zest over the cherry topping just before serving for a burst of bright, citrusy aroma.
- Chocolate Drizzle: For the chocolate lovers, a light drizzle of melted dark chocolate over the top is a decadent and delicious addition.
- Nutty Crunch: Sprinkle some toasted slivered almonds over the cherries for a delightful textural contrast.
Common Mistakes to Avoid for Cheesecake Success
This recipe is incredibly forgiving, but here are a few things to watch out for to ensure a perfect result every time.
- Lumpy Filling: This is almost always caused by using cold cream cheese. Make sure it’s at room temperature before you start beating it to ensure a silky-smooth texture.
- A Soggy Crust: To prevent a soggy bottom, make sure your crust is well-packed and chilled before you add the filling. This creates a barrier that keeps the crust crisp.
- Cutting It Too Soon: The temptation is real, but cutting the cheesecake before it has had a chance to fully set will result in a soft, messy slice. Patience is key! Give it the full 4 hours, or preferably, let it set overnight.
Storing Your Delicious Creation
Proper storage is essential to keep your cheesecake fresh and delicious.
- In the Refrigerator: Cover the cheesecake tightly and store it in the refrigerator for up to 5 days. The flavors actually deepen and get even better on day two!
- In the Freezer: This cheesecake freezes beautifully! You can freeze it whole or in individual slices. Wrap it well in plastic wrap and then a layer of aluminum foil. It will keep for up to a month. To serve, simply thaw it in the refrigerator for a few hours.
Your New Go-To Dessert for Any Occasion
This easiest no-bake cherry cheesecake is more than just a recipe; it’s a guaranteed crowd-pleaser that will have everyone asking for a second slice. It’s the perfect dessert for summer barbecues, potlucks, holidays, or any time you need a delicious and impressive treat without turning on your oven. It’s a taste of my family’s tradition, and I hope it becomes a beloved favorite in yours too.
Now it’s your turn to create some sweet memories! I invite you to try this recipe and share your experience in the comments or review section below. Did you try a different topping? I’d love to hear about it! For more easy and delicious recipes, don’t forget to subscribe to our blog.
Your Cheesecake Questions, Answered
- Can I make this in a square pan?Absolutely! A 9×9 inch square pan works perfectly. You can cut the cheesecake into squares for easy serving, which is great for a party or potluck.
- Why is my filling not firm enough?The most common reason is not chilling it for long enough. It really does need at least 4 hours to set properly. Also, ensure you used full-fat cream cheese and regular sweetened condensed milk, as the “light” versions can sometimes result in a softer set.
- Can I use fresh cherries?Yes! To make a fresh cherry topping, pit about 2 cups of fresh cherries and cook them in a saucepan over medium heat with ¼ cup of sugar and 1 tablespoon of lemon juice. In a small bowl, whisk together 2 tablespoons of cornstarch with 2 tablespoons of cold water, then stir it into the cherries. Simmer for a few minutes until the sauce has thickened. Let it cool completely before spooning it over your cheesecake.
- My crust is too crumbly. What did I do wrong?This usually means there wasn’t quite enough butter to bind the crumbs, or it wasn’t packed firmly enough. Make sure your crumbs are well-coated and press down firmly with a glass or measuring cup to create a compact base.