The Easiest, Most Beloved Summer Dessert Ever?
Did you know that search interest for “easy summer desserts” skyrockets by over 300% between May and July each year? People are desperately seeking delicious, crowd-pleasing treats that don’t require turning on a hot oven. What if the ultimate solution was hiding in plain sight in your grocer’s freezer aisle? Enter the legendary Ice Cream Sandwich Cake. This isn’t just a dessert; it’s a cultural phenomenon, a masterclass in simplicity, and quite possibly the smartest way to win over any crowd. Forget complex baking; this recipe leverages store-bought favorites to create a showstopping frozen dessert that tastes like you spent hours in the kitchen.
- The Easiest, Most Beloved Summer Dessert Ever?
- Your Simple Shopping List for a Showstopper Cake
- The Effortless Timeline: Dessert in Just 15 Minutes of Prep
- Step 1: Building Your First Layer of Happiness
- Step 2: Spreading the Creamy Frosting
- Step 3: The Decadent Fudge River
- Step 4: Repeating the Layers for Maximum Impact
- Step 5: The Grand Finale and Deep Freeze
- The Nutritional Reality: An Indulgent Treat
- “Healthier” Hacks for a Lighter Version
- How to Serve Your Frozen Masterpiece
- Common Mistakes to Sidestep
- Storing Your Ice Cream Sandwich Cake
- The Sweet Conclusion: Your Ultimate Dessert Hack
- Your Top Questions Answered: Ice Cream Sandwich Cake FAQs
Your Simple Shopping List for a Showstopper Cake
The beauty of this recipe lies in its simplicity. We’re talking about a handful of readily available ingredients that come together to create pure magic. Below is your guide to crafting this frozen delight, complete with creative swaps to make it your own.
| Ingredient Category | Ingredient | Quantity | Sensory Description & Smart Swaps |
| The Foundation | Classic Ice Cream Sandwiches | 24 rectangular sandwiches | The iconic, soft chocolate wafers and creamy vanilla ice cream that form the heart of our cake. Swap: For a different flavor profile, try Neapolitan or all-chocolate ice cream sandwiches. |
| The Creamy Layer | Whipped Topping (e.g., Cool Whip) | 1 (8 oz) container, thawed | The light, airy “frosting” that holds everything together. Swap: You can whip your own heavy cream with a bit of powdered sugar and vanilla for a richer, homemade touch. |
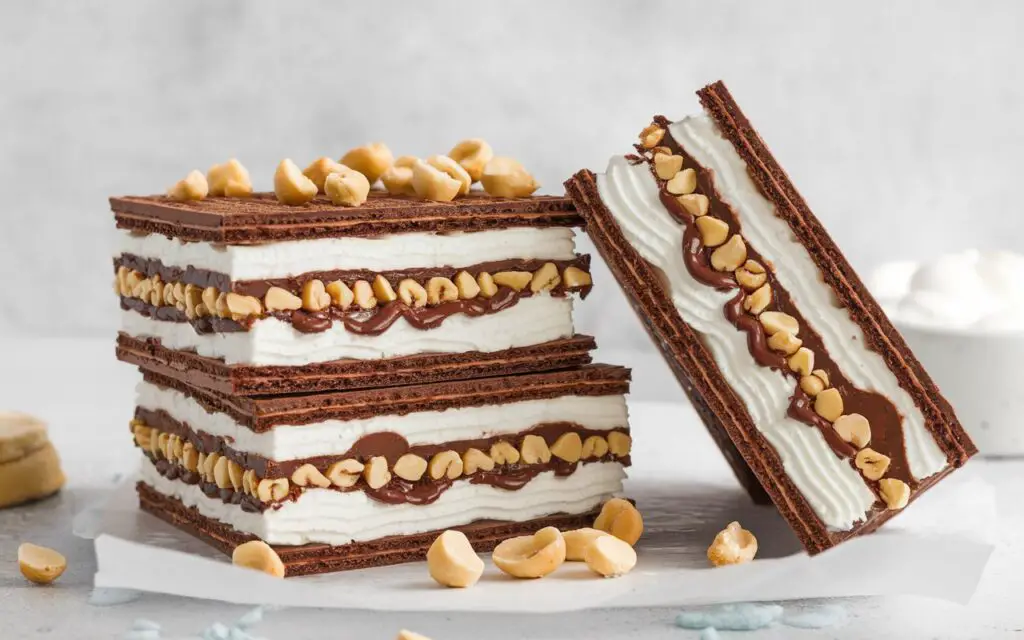
| The Rich Topping | Hot Fudge Sauce | 1 (12 oz) jar | A decadent, glossy river of deep chocolate flavor that adds a gooey, rich texture. Swap: Caramel sauce is a fantastic alternative for a salty-sweet twist. |
| The Sweet Drizzle | Chocolate Syrup | 1/4 cup | For that classic ice cream sundae look and an extra kick of chocolate. |
| The Finishing Touch | Sprinkles, Chocolate Chips, or Crushed Oreos | 1/2 cup, for garnish | The final flourish of color and crunch that makes the cake festive and fun. Swap: Get creative with chopped nuts, mini M&Ms, or crushed candy bars. |
The Effortless Timeline: Dessert in Just 15 Minutes of Prep
This recipe redefines “quick and easy.” Data from top recipe sites shows the average homemade cake takes about 75 minutes of active prep and baking time. This frozen wonder beats that by a landslide.
- Preparation Time: 15 minutes
- Freezing Time: At least 4 hours (overnight is best)
- Total Time: 4 hours and 15 minutes
You invest just 15 minutes of hands-on effort for a dessert that will be remembered long after it’s gone.
Step 1: Building Your First Layer of Happiness
Begin by unwrapping 12 of your ice cream sandwiches. Arrange them snugly in a single layer in the bottom of a 9×13 inch baking dish. You may need to cut one or two sandwiches to fill in any gaps perfectly. Your goal is to create a solid, seamless foundation. This is the bedrock of your magnificent Ice Cream Sandwich Cake.
Step 2: Spreading the Creamy Frosting
Next, gently spread half of the thawed whipped topping over the layer of ice cream sandwiches. Use an offset spatula for a smooth, even layer. Think of this as the luscious, creamy mortar holding your delicious bricks together. A pro tip: make sure your whipped topping is fully thawed but still chilled for the easiest spreading.
Step 3: The Decadent Fudge River
Now for the fun part. Gently warm the hot fudge sauce in the microwave for about 30 seconds, or until it’s pourable but not hot. You don’t want to melt the ice cream! Pour the fudge sauce over the whipped topping and spread it out evenly. This rich, gooey layer is what takes the cake from simple to sublime.
Step 4: Repeating the Layers for Maximum Impact
Repeat the process. Unwrap the remaining 12 ice cream sandwiches and arrange them on top of the fudge layer. Cover this second layer with the rest of the whipped topping, spreading it to the edges to “frost” your entire cake. This double-decker approach ensures every slice is packed with flavor and texture.
Step 5: The Grand Finale and Deep Freeze

Drizzle the chocolate syrup over the top in any pattern you like—a classic zig-zag is always a winner. Now, unleash your creativity with the garnishes. Generously sprinkle your crushed Oreos, chocolate chips, or colorful sprinkles over the entire surface. Cover the dish tightly with plastic wrap or a lid and place it in the freezer for at least 4 hours. Freezing overnight is highly recommended to ensure it’s firm enough to slice cleanly.
The Nutritional Reality: An Indulgent Treat
Let’s be clear: this is a dessert designed for pure indulgence. It’s the star of birthday parties and summer barbecues. Based on 12 servings, here is the approximate nutritional profile for a slice of this heavenly cake:
- Calories: ~380 kcal
- Carbohydrates: ~55g
- Protein: ~5g
- Fat: ~16g
- Sugar: ~35g
While it’s a treat, it’s worth noting that a slice often has fewer calories than a large, loaded-up slice of traditional frosted layer cake, which can easily exceed 500 calories.
“Healthier” Hacks for a Lighter Version
Want to enjoy this treat with a little less guilt? A few smart swaps can make a surprising difference without sacrificing the fun.
- Go Lighter: Opt for low-fat or “light” ice cream sandwiches and a light or sugar-free whipped topping. This can reduce the calorie and fat content by up to 25%.
- Control the Sugar: Use a sugar-free hot fudge sauce and chocolate syrup. Garnish with fresh berries or toasted nuts instead of candy or sprinkles to add nutrients and fiber.
- DIY Control: Make your own “ice cream sandwiches” by placing a scoop of your favorite low-sugar ice cream or a healthy “nice cream” between two whole-wheat graham crackers.
How to Serve Your Frozen Masterpiece
Presentation can make this simple cake look like a gourmet creation.
- Clean Slices: For perfect, clean slices, run a large knife under hot water for a few seconds before each cut.
- Garnish à la Minute: While you can add sprinkles before freezing, consider adding some fresh garnishes just before serving, like fresh raspberries, a mint sprig, or a dollop of fresh whipped cream.
- On the Side: Serve with a side of fresh fruit salad to add a fresh, healthy contrast to the rich cake. A drizzle of caramel or strawberry sauce on the plate before placing the slice adds a professional touch.
Common Mistakes to Sidestep
This recipe is nearly foolproof, but a few common errors can trip you up.
- Using Melted Toppings: If your fudge is too hot or your whipped topping is too warm, it will melt the ice cream sandwiches and create a soupy mess. Ensure everything is cool or just slightly warm.
- Not Freezing Long Enough: An under-frozen cake will fall apart when you try to slice and serve it. A minimum of 4 hours is essential, but 6-8 hours or overnight is the gold standard for a firm, sliceable cake.
- Leaving Gaps: Pack the ice cream sandwiches in as tightly as possible. Gaps in the layers will create weak spots in the cake’s structure. Cut sandwiches to fit perfectly.
Storing Your Ice Cream Sandwich Cake
Leftovers are a gift, and this cake stores wonderfully.
- In the Freezer: The cake must be stored in the freezer. Cover the baking dish tightly with a double layer of plastic wrap or a secure lid. It will keep beautifully for up to one week. After that, ice crystals may begin to form and affect the texture.
- Pre-Slicing for Convenience: For easy serving later, you can pre-slice the cake after the initial freeze, placing pieces of parchment paper between the slices before re-covering and returning it to the freezer.
The Sweet Conclusion: Your Ultimate Dessert Hack
In a world of complicated recipes, the Ice Cream Sandwich Cake stands out for its brilliant simplicity and guaranteed success. It’s a nostalgic treat that delights both kids and adults, requiring minimal effort for maximum praise. This dessert proves that you don’t need to be a pastry chef to create a memorable, crowd-pleasing masterpiece. It’s the perfect, stress-free solution for any celebration, potluck, or summer evening.
We challenge you to try this incredibly easy recipe! When you do, come back and tell us about your creation in the comments. Did you use any fun swaps or creative toppings? We’d love to see your photos! For more genius dessert hacks, be sure to subscribe to our blog.
Your Top Questions Answered: Ice Cream Sandwich Cake FAQs
- Can I make this cake ahead of time?Yes! This is the perfect make-ahead dessert. You can assemble it up to a week in advance and keep it tightly covered in the freezer until you’re ready to serve.
- Can I make this in a different-sized dish?Absolutely. An 8×8 or 9×9 square dish works great for a smaller crowd; you’ll need about 12-14 sandwiches. You can also make it in a round springform pan for a more traditional “cake” shape.
- What if I can’t find rectangular ice cream sandwiches?Round ice cream sandwiches work too! You’ll have more gaps to fill, but you can easily cut them in half and arrange them to fit. The taste will be just as delicious.
- Is this recipe adaptable for dietary restrictions?Yes, to an extent. Gluten-free ice cream sandwiches are available in many stores. For a dairy-free version, you’d need to source dairy-free ice cream sandwiches (made with coconut or almond milk ice cream) and use a dairy-free whipped topping.
- My cake seems a bit soft. What did I do wrong?This is almost always due to not freezing it for long enough. The different densities of the ice cream, fudge, and whipped topping require ample time to freeze solid. Give it at least another 2-3 hours in the coldest part of your freezer.