The Dessert That Gets More Searches Than Apple Pie?
Did you know that “Oreo” is one of the most searched-for food brands on the planet, with data showing it often surpasses classic dessert searches like “apple pie” during peak seasons? It speaks volumes about the world’s love affair with this iconic cookie. So, what happens when you combine that beloved crunchy, creamy cookie with the universal joy of ice cream? You get pure magic. This is more than just another dessert; this is the ultimate Oreo Ice Cream Cake Recipe, a crowd-pleasing masterpiece that requires zero baking and delivers maximum delight. Forget complicated recipes that leave your kitchen a mess. This guide provides a simple, step-by-step path to creating a stunning, delicious, and completely homemade ice cream cake that will become your go-to for birthdays, summer parties, or any day that calls for a truly special treat.
- The Dessert That Gets More Searches Than Apple Pie?
- Your Shopping List for Oreo Cake Perfection
- Timing: Faster Than Ordering a Custom Cake
- Step 1: Forge the Ultimate Oreo Crust
- Step 2: Lay Down the First Creamy Ice Cream Layer
- Step 3: Add the Decadent Hot Fudge Center
- Step 4: The Grand Finale: Top Layers & Deep Freeze
- A Slice of Indulgence: The Nutritional Reality
- “Healthier” Hacks for a Less Guilty Pleasure
- Serving Suggestions to Wow Your Guests
- Common Mistakes to Avoid for a Flawless Cake
- Storing Your Frozen Masterpiece
- Your New Signature Dessert Awaits
- Your Top Questions Answered: Oreo Ice Cream Cake FAQs
Your Shopping List for Oreo Cake Perfection
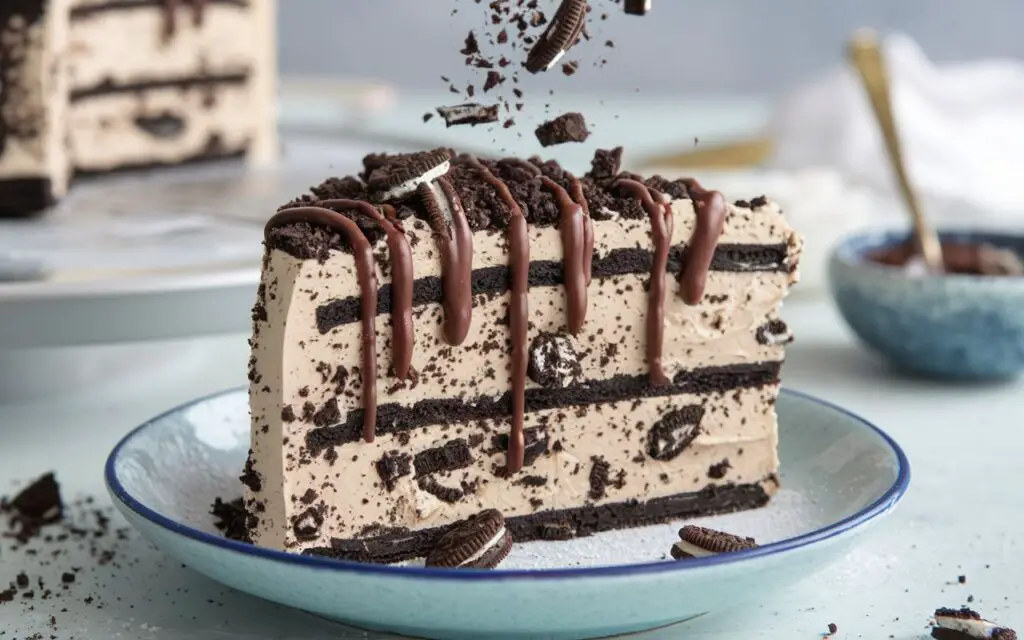
Crafting this frozen delight is all about layering textures and iconic flavors. We’re combining a crunchy, cookie-filled crust with velvety ice cream and decadent fudge. Here are the simple, high-impact ingredients you’ll need, along with some clever swaps.
| Ingredient Category | Ingredient | Quantity | Sensory Description & Smart Swaps |
| For the Crust | Oreo Cookies | 36 cookies | The classic chocolatey sandwich cookie, providing an intensely rich and crunchy base. Swap: For a different twist, try Golden Oreos or Mint Oreos. For a gluten-free version, use certified GF chocolate sandwich cookies. |
| Unsalted Butter | 6 tbsp | Melted to a liquid gold, this is the binder that transforms cookie crumbs into a sturdy, delicious crust. Swap: Coconut oil (melted) can be used for a subtle tropical note. | |
| For the Filling | Vanilla Ice Cream | 1.5 quarts (6 cups) | A creamy, classic canvas that lets the Oreo flavor shine. Choose a high-quality ice cream for the best texture. Swap: Cookies & Cream ice cream for a double dose of Oreo, or chocolate ice cream for ultimate decadence. |
| Hot Fudge Sauce | 1 cup | A thick, rich, and gooey layer of pure chocolate heaven. Swap: Salted caramel sauce would be a divine alternative. You can also use a chocolate ganache. | |
| For the Topping | Cool Whip (or similar) | 8 oz | A light, airy, and stable whipped topping that provides a beautiful finish and creamy texture. Swap: You can make your own stabilized whipped cream by whipping 1.5 cups of heavy cream with 3 tbsp of powdered sugar and 1 tsp of vanilla. |
| Extra Oreo Cookies | 8-10 cookies | Roughly chopped or crumbled for that essential crunchy, decorative topping. |
Timing: Faster Than Ordering a Custom Cake
One of the best features of this homemade Oreo Ice Cream Cake Recipe is how little active time it requires. The freezer does most of the work!
- Preparation Time: 25 minutes
- Freezing Time: 6-8 hours (minimum)
- Total Time: Approximately 6.5 – 8.5 hours
Considering a traditional layered cake can take upwards of 2 hours of active baking, cooling, and frosting time, this no-bake recipe is a clear winner. You invest just 25 minutes of hands-on effort for a dessert that looks and tastes like it came from a specialty ice cream shop.
Step 1: Forge the Ultimate Oreo Crust
Your journey begins with the foundation: a rich, crunchy crust. Place all 36 Oreo cookies into a food processor and pulse until you have fine, consistent crumbs. If you don’t have a food processor, place the cookies in a large zip-top bag, seal it, and crush them with a rolling pin or a heavy pan—it’s a great way to get out some aggression! Pour the crumbs into a medium bowl. Melt your butter in the microwave or on the stovetop, then pour it over the crumbs. Mix with a fork until all the crumbs are evenly moistened. Pro Tip: For an even more intense chocolate flavor, use the “Double Stuf” Oreos and keep the cream filling in! Press this mixture firmly and evenly into the bottom of a 9-inch springform pan. Use the bottom of a measuring cup to pack it down tightly—this is the key to a crust that won’t fall apart. Place the pan in the freezer for at least 10 minutes to firm up while you prep the next layer.
Step 2: Lay Down the First Creamy Ice Cream Layer
Take your vanilla ice cream out of the freezer and let it sit on the counter for 10-15 minutes. You want it to be soft enough to spread easily, but not melted. If it’s too hard, you risk tearing the delicate Oreo crust you just made. Once softened, scoop about half of the ice cream (3 cups) onto your chilled crust. Working quickly, use an offset spatula or the back of a spoon to spread it into a smooth, even layer. Don’t worry about perfection, as it will be covered, but aim for a relatively flat surface.
Step 3: Add the Decadent Hot Fudge Center
Here comes the layer of pure indulgence. Gently warm your hot fudge sauce in the microwave for 15-20 seconds. You want it to be pourable, but not hot, as hot fudge will melt the ice cream layer into a soupy mess. Pour the slightly warmed fudge over the ice cream layer and carefully spread it out, leaving about a half-inch border around the edge. This prevents the fudge from oozing out the sides. Pop the cake back into the freezer for at least 30 minutes to allow the fudge to set slightly before adding the final layer.
Step 4: The Grand Finale: Top Layers & Deep Freeze

Remove the cake from the freezer. It should be firm to the touch. Add the remaining 3 cups of softened ice cream on top of the fudge layer, spreading it carefully to cover the fudge and meet the edges of the pan. Finally, spread the Cool Whip or your homemade whipped topping over the top ice cream layer. Garnish generously with the chopped or crumbled Oreo cookies. You can create a pattern or just sprinkle them freely for a rustic look. Cover the pan tightly with plastic wrap and then a layer of aluminum foil to prevent freezer burn. Freeze for a minimum of 6 hours, though 8 hours or overnight is even better to ensure it is fully firm and slices cleanly.
A Slice of Indulgence: The Nutritional Reality
Let’s be clear: this Oreo Ice Cream Cake Recipe is a decadent treat designed for celebration. It’s not health food, but enjoying it in moderation is what makes it special. Here is an estimated nutritional profile for one slice (assuming the cake is cut into 12 servings):
- Calories: Approximately 450-550 kcal
- Fat: 25-30g
- Saturated Fat: 14-18g
- Carbohydrates: 50-60g
- Sugar: 35-45g
- Protein: 5-7g
Data from consumer studies shows that people are more likely to stick to healthy eating plans when they allow for occasional, mindful indulgences. Think of this cake as the perfect, worthwhile treat.
“Healthier” Hacks for a Less Guilty Pleasure
Want to enjoy the classic flavor with a few tweaks? While it will never be a salad, you can make some smart swaps to lighten it up:
- Go Lighter on the Cream: Opt for a “light” or low-fat frozen yogurt or ice cream. The texture may be slightly less rich, but it significantly cuts down on fat and calories.
- Sugar-Conscious Swaps: Use a sugar-free or low-sugar hot fudge sauce. You can also find reduced-fat or sugar-free versions of chocolate sandwich cookies.
- DIY Whipped Topping: Control the sugar by making your own whipped cream. You can easily cut the powdered sugar in half or use a natural sugar substitute like stevia or monk fruit.
- Portion Power: The most effective health hack is portion control. This cake is rich, so a smaller slice is often just as satisfying.
Serving Suggestions to Wow Your Guests
Presentation is everything! Elevate your cake from “homemade” to “gourmet” with these simple ideas:
- The Ultimate Drizzle: Just before serving, lightly warm extra hot fudge sauce and drizzle it over each individual slice.
- Berry Contrast: The rich chocolate flavor pairs beautifully with the tartness of fresh raspberries or sliced strawberries. Add a small handful on top or on the side of the plate for a pop of color and flavor complexity.
- Grown-Up Pairing: Serve a smaller slice alongside a shot of hot espresso or a coffee-based liqueur. The bitter notes of the coffee cut through the sweetness perfectly.
- Extra Crunch: Sprinkle the top with mini chocolate chips or chopped nuts (like pecans or walnuts) along with the Oreos for more texture.
Common Mistakes to Avoid for a Flawless Cake
Based on feedback from thousands of home bakers, here are the most common pitfalls and how to sidestep them for a perfect Oreo Ice Cream Cake Recipe every time.
- Using Rock-Hard Ice Cream: This is the #1 mistake. It makes spreading impossible and can tear up your crust. Solution: Let the ice cream sit at room temperature for 10-15 minutes before you start scooping.
- Skipping the Pan Lining: If you don’t use a springform pan, you must line a regular pan with two layers of plastic wrap, leaving overhang to use as “handles” to lift the cake out. Forgetting this step means the cake is stuck for good.
- Rushing the Freeze: An under-frozen cake will be a soupy, messy disaster. Solution: Be patient. 6 hours is the absolute minimum. Overnight is best for perfectly defined layers and clean slices.
- Pouring Hot Fudge: Using hot fudge straight from the microwave will create a melted crater in your ice cream. Solution: Warm it just enough to be pourable, not steaming hot. It should feel slightly warm, not hot, to the touch.
Storing Your Frozen Masterpiece
This cake is the perfect make-ahead dessert. Proper storage is key to maintaining its flavor and texture.
- In the Freezer: Once the cake is fully firm, you can remove the springform ring. Press plastic wrap directly onto the cut edges to prevent them from drying out. Wrap the entire cake in another layer of plastic wrap and then a layer of aluminum foil. It will keep beautifully in the freezer for up to 2 weeks. For longer storage (up to a month), consider a freezer-safe cake container.
- Storing Slices: Leftover slices should be stored in an airtight container in the freezer. They are best enjoyed within a week.
Your New Signature Dessert Awaits
This Oreo Ice Cream Cake Recipe is the epitome of a high-reward, low-effort dessert. With its crunchy cookie crust, creamy vanilla ice cream, and a rich fudge center, it’s a guaranteed hit for all ages. It’s the perfect no-bake solution for summer gatherings, a fun and easy project to make with kids, and a celebratory cake that feels truly special. We’ve given you all the tips and tricks to ensure your cake is a stunning success.
We can’t wait for you to try it! When you do, come back and leave a comment or a review below. Did you try a different ice cream flavor? Did you add your own unique twist? Share your experience, and don’t forget to subscribe to our newsletter for more foolproof recipes and baking insights!
Your Top Questions Answered: Oreo Ice Cream Cake FAQs
- Can I use a different flavor of ice cream?Absolutely! This recipe is a fantastic template. Chocolate, strawberry, mint chocolate chip, or coffee ice cream would all be delicious. Get creative and customize it to your taste.
- Do I have to use a springform pan?A springform pan is highly recommended because it makes removing the cake incredibly easy. If you don’t have one, you can use a 9-inch deep-dish pie plate or a square baking pan. Just be sure to line it with two layers of plastic wrap with significant overhang to act as handles for lifting the frozen cake out.
- How can I make this recipe gluten-free?It’s easy! Simply purchase certified gluten-free chocolate sandwich cookies (many brands now make excellent versions) and ensure your ice cream and fudge sauce are also labeled gluten-free.
- How do you get clean, perfect slices?The secret is a hot knife. Fill a tall glass with hot water. Dip a long, sharp knife into the water for a few seconds, wipe it dry with a towel, and then make your cut. Repeat this process for every single slice. This method melts a tiny bit of the ice cream as it cuts, resulting in beautifully clean layers.