Few desserts encapsulate both elegance and simplicity like crème brûlée. With its velvety custard base hidden beneath a glassy layer of caramelized sugar, each spoonful offers a delightful contrast of textures and flavors. The moment you gently tap the top, hearing that satisfying crack, you know you’re about to indulge in something special. What might surprise you is just how accessible crème brûlée can be at home, even if you’re in search of easy and quick desserts. This recipe merges traditional French flair with a straightforward, foolproof process. By the end, you’ll have the confidence to whip up this luxurious treat any time a sweet craving hits—or whenever you want to impress friends and family.
- Gathering Your Ingredients and Tools
- Step 1: Creating the Custard Base
- Step 2: Setting Up the Water Bath
- Step 3: Baking the Custards
- Step 4: Chilling the Custards
- Step 5: The Grand Finale—Caramelizing the Sugar
- Tips, Variations, and Flavor Twists
- Serving Suggestions
- Frequently Asked Questions (FAQ)
- Why Crème Brûlée Fits “Easy and Quick Desserts” (With a Touch of Patience)
- Storing and Sharing the Sweetness
- Conclusion: Embrace the Sweet Satisfaction
- Ultimate Crème Brûlée: A Luxurious Twist on Easy and Quick Desserts
Why Crème Brûlée Is Timeless

Crème brûlée, meaning “burnt cream” in French, dates back centuries. It’s believed to have originated in France, though some culinary historians point to similar custard desserts popping up in other European countries around the same era. Still, the version we’ve come to know and love—infused with vanilla, baked gently, then topped with a crisp sugar crust—remains a quintessential French classic.
Part of the dessert’s allure lies in its simplicity. There are no extravagant flavorings or toppings in the traditional version—just cream, egg yolks, sugar, and vanilla. This minimalism, however, amplifies each component’s role, resulting in a pure, creamy mouthfeel that’s sweet enough to be indulgent, yet not cloying. When you add the crackly caramelized sugar topping, it becomes a sensory experience as well as a culinary delight.
Gathering Your Ingredients and Tools
Before diving into the custard-making process, ensure you have everything ready:
| Ingredient | Quantity | Notes |
|---|---|---|
| Heavy Cream (or Double Cream) | 2 cups (480ml) | Provides richness and silky texture |
| Egg Yolks | 5 large | Use fresh, high-quality eggs for best flavor |
| Granulated Sugar | 1/2 cup (100g) + extra | 1/2 cup for the custard; extra for caramelizing top |
| Vanilla Extract (or 1 vanilla bean) | 1 teaspoon | Real vanilla bean seeds add extra elegance |
| Pinch of Salt | Optional | Helps balance sweetness |
Essential Tools:
- Ramekins (4 to 6 ounces each): You’ll need 4–6, depending on their size.
- Large Baking Dish: The ramekins will sit in this dish for a water bath (bain-marie).
- Kitchen Torch or Broiler: For caramelizing the sugar.
- Mixing Bowls, Whisk, and Measuring Cups.
- Kettle or Saucepan: To heat water for the bain-marie.
Step 1: Creating the Custard Base
- Warm the Cream: In a medium saucepan, pour your heavy cream and add a teaspoon of vanilla extract (or scrape the seeds from a vanilla bean pod and add both seeds and pod). Gently heat over medium-low until you see small bubbles forming along the edges—do not let it boil. Infusing the cream with vanilla at this stage enriches the final flavor.
- Mix Egg Yolks and Sugar: Meanwhile, in a separate mixing bowl, whisk together 5 egg yolks and 1/2 cup (100g) of sugar. Whisk until the mixture turns pale yellow and slightly thickened. This step helps to dissolve the sugar and incorporate some air into the yolks.
- Temper the Eggs: Remove the saucepan from the heat. Slowly drizzle the warm cream into the egg yolk-sugar mixture, whisking continuously. This process is called tempering—it gradually raises the egg yolks’ temperature, preventing them from scrambling. Pouring the cream all at once would cook the yolks in an uneven, clumpy way.
- Combine Completely: Once you’ve streamed in all the cream, you’ll have a smooth custard base. If you notice any lumps or foam, you can strain it through a fine mesh sieve into another bowl or large measuring cup, ensuring a silky result.
Step 2: Setting Up the Water Bath
- Preheat Your Oven: Set it to 325°F (160°C). This gentle heat is essential for baking the custard evenly.
- Arrange Ramekins: Place your ramekins in a large baking dish or roasting pan. Leave some space between them so hot water can circulate.
- Fill with Custard: Carefully pour the custard mixture into each ramekin, filling them nearly to the top (but not overflowing). The mixture might still be quite liquid, so move slowly to avoid spills.
- Pour Hot Water: Boil water (in a kettle or on the stovetop). Slowly pour the hot water into the baking dish around the ramekins until the water level reaches halfway up their sides. This water bath ensures a consistent, gentle heat that prevents the custard from curdling.
Step 3: Baking the Custards
- Bake: Transfer the baking dish to your preheated oven. Bake for 30–35 minutes, although the timing can vary depending on the ramekins’ size. Look for the edges of the custard to be set while the center still jiggles slightly when tapped.
- Avoid Over-Baking: Crème brûlée should not be fully solid in the middle when you remove it from the oven. Over-baked custard can become rubbery or grainy. The residual heat continues to cook it slightly as it cools.
- Careful Removal: Using oven mitts, remove the baking dish. Let the ramekins sit in the water bath for a few minutes before transferring them to a cooling rack. This step reduces the risk of splashing hot water.
Step 4: Chilling the Custards
- Initial Cool: Allow the custards to cool at room temperature for about 30 minutes. They’ll firm up more during this time.
- Refrigerate: Cover each ramekin with plastic wrap (or place them all in a large covered container) and refrigerate for at least 4 hours. Overnight is even better for a well-set, deeply chilled custard.
- Optional Flavor Development: If you want a twist, you can add citrus zest, espresso powder, or a dash of liqueur to the custard base before baking. However, the classic vanilla stands beautifully on its own.
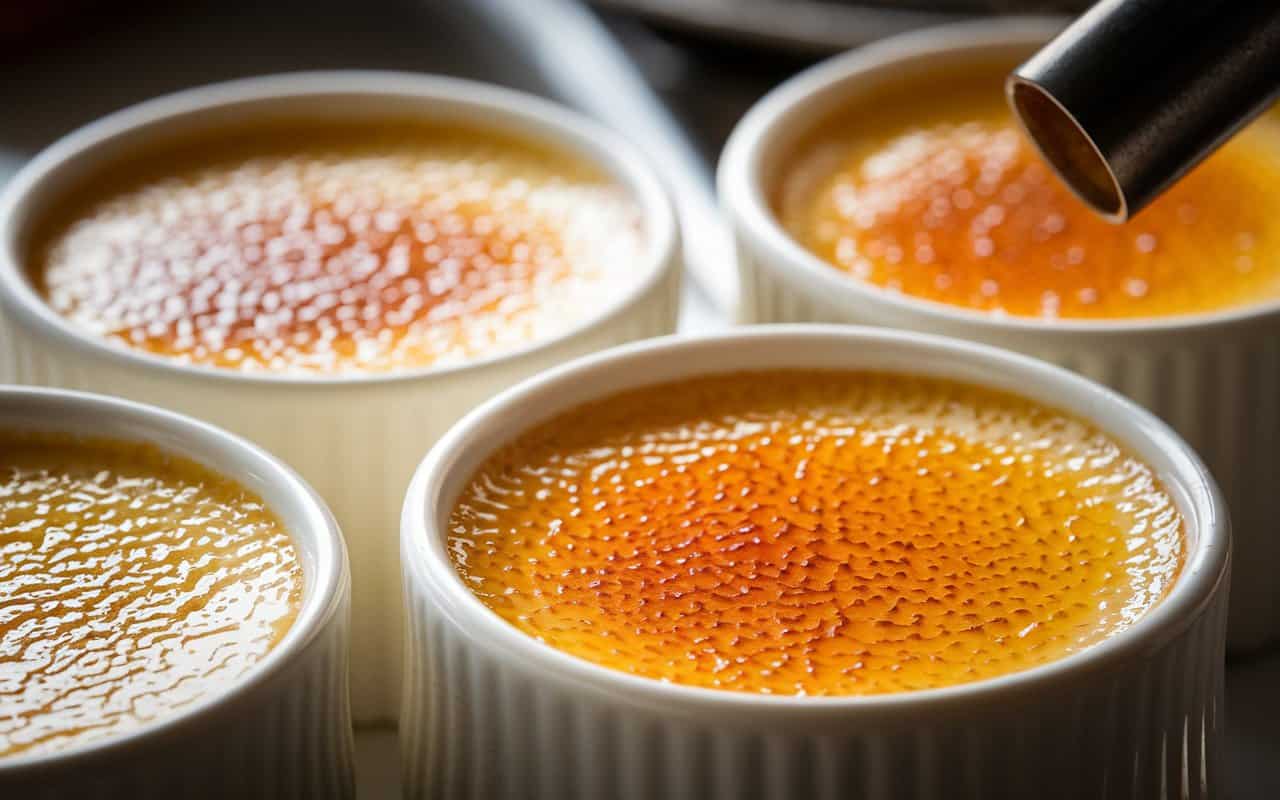
Step 5: The Grand Finale—Caramelizing the Sugar

When you’re ready to serve, it’s time to turn that smooth custard into a show-stopping dessert by adding a crackly sugar crust.
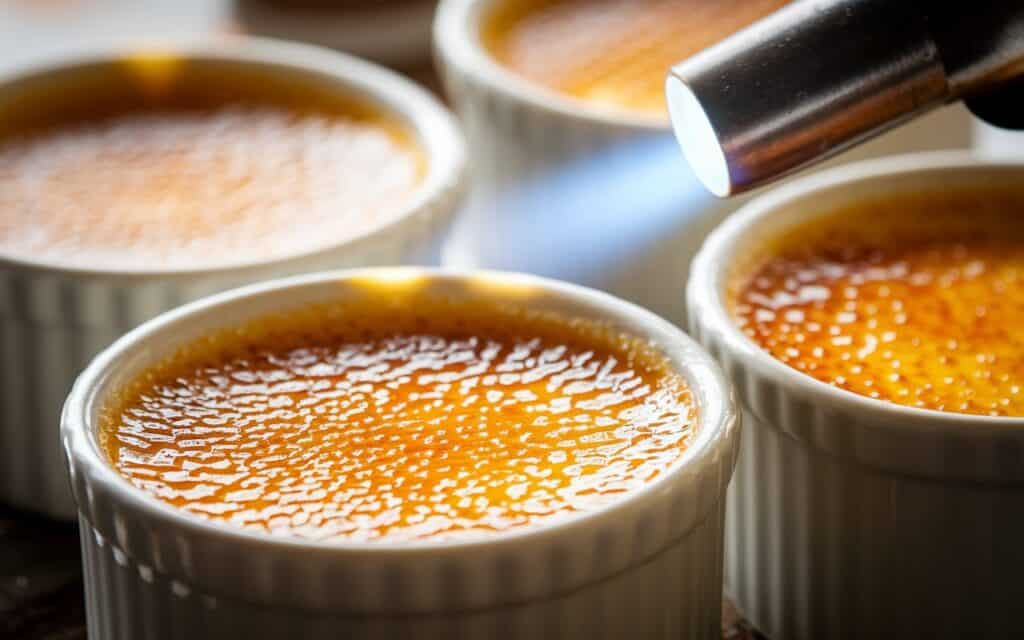
- Sprinkle Sugar: Take your chilled ramekins out of the fridge. Blot away any moisture on the custard’s surface with a paper towel to help the sugar adhere. Sprinkle about 1 teaspoon of granulated sugar evenly across the top of each custard. Swirl and tilt the ramekin to distribute the sugar in a thin layer.
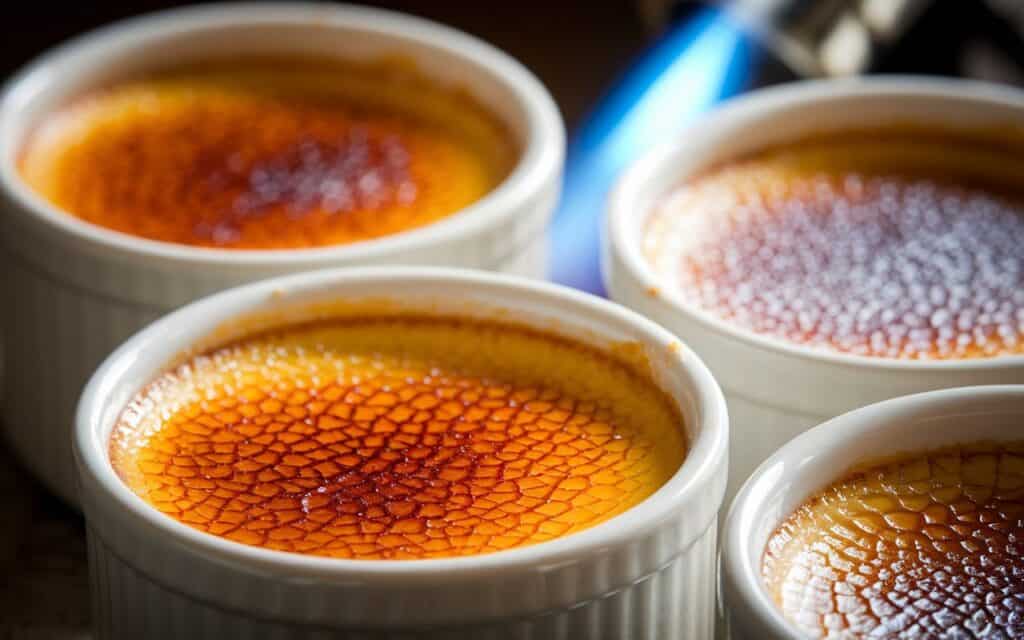
- Use a Kitchen Torch: The easiest method is with a handheld butane kitchen torch. Ignite the torch and move it across the sugar in small circles. The sugar will start to melt, bubble, and eventually caramelize. Aim for a golden-brown color; be cautious not to blacken it. This step takes about 30 seconds per custard.
- Broiler Method: If you don’t have a torch, set your oven’s broiler to high. Place the sugared ramekins on a baking sheet close under the broiler. Watch very carefully. The sugar can go from caramelized to burnt in seconds. Remove them as soon as you see bubbles and a toasted hue.
- Cool Briefly: Allow the caramelized sugar to harden for about 1 minute before digging in. The hallmark “crack” when you tap your spoon is the payoff for your patience.
Tips, Variations, and Flavor Twists
- Espresso Crème Brûlée
- Whisk a spoonful of instant espresso powder into the warm cream. This creates a subtle coffee flavor that pairs beautifully with the caramel topping.
- Citrus Infusion
- Zest a lemon or orange into the cream. The bright citrus notes complement the creamy custard, creating a fresh spin on the classic.
- Chocolate Crème Brûlée
- Melt a few ounces of dark chocolate into the warm cream for a rich cocoa kick. The sugar crust still provides a delightful contrast.
- Dairy-Free Option
- Swap heavy cream with full-fat coconut milk or a barista-style almond cream. The final texture might be slightly different, but with proper chilling, you can still achieve a velvety mouthfeel.
Serving Suggestions
Once your sugar crust is beautifully caramelized, consider the following finishing touches:
- Fresh Berries: Raspberries, strawberries, or blueberries add a pop of color and refreshing sweetness.
- Mint Leaf Garnish: A single sprig of mint on top can elevate the visual appeal.
- Side Pairings: Serve with shortbread cookies or a crisp wafer for an extra textural element.
- Beverage Pairings: A cup of strong coffee or black tea cuts through the richness. Dessert wines, like a Sauternes or late-harvest Riesling, provide a sweet harmony.
Frequently Asked Questions (FAQ)
- Why Did My Custard Turn Grainy?
- Possibly over-baking or setting the oven temperature too high. The water bath should prevent direct heat from curdling the custard. Also, ensure you tempered the egg yolks slowly.
- Can I Re-Brûlée Leftovers?
- Ideally, you’ll want to serve crème brûlée soon after caramelizing the sugar for the crispest top. If you must store leftovers, the sugar crust will soften. You could reapply sugar and torch again, but the custard beneath may not stay as firm.
- What if I Don’t Have Ramekins?
- Small, oven-safe dishes or mason jars can work. Adjust the baking time based on depth. Thinner custards bake faster, deeper ones need more time.
- How Long Will These Keep in the Fridge?
- You can store the baked (but not yet caramelized) custards for up to 3 days, covered. Caramelize sugar just before serving.
- Can I Use Fewer Egg Yolks or Whole Eggs?
- Using whole eggs changes the texture, making it less silky. The traditional ratio leans heavily on yolks for that rich, custard consistency.
Why Crème Brûlée Fits “Easy and Quick Desserts” (With a Touch of Patience)
At first glance, crème brûlée might not seem like it belongs among easy and quick desserts because of the water bath, the torching, and the overnight chill. However, the actual hands-on work is minimal—whisking eggs, warming cream, and combining them require just a few minutes. The rest is waiting, which is passive time you can spend focusing on other tasks or simply relaxing. In fact, you could argue that crème brûlée is an excellent make-ahead dessert for dinner parties; do all the prep work a day in advance, then perform the dramatic sugar torching right before dessert is served.
Additionally, for those who might be new to homemade custards, crème brûlée offers a relatively forgiving approach compared to some other classic pastries or confections. The water bath helps regulate temperature, making it less likely you’ll end up with scrambled eggs, so long as you watch your oven timing. The sugar caramelization can feel like a fancy flourish, but it’s surprisingly straightforward with the right tools.
Storing and Sharing the Sweetness
Crème brûlée might be best enjoyed fresh, but you can store the un-torched custards in the refrigerator for a couple of days. If you’re planning a big gathering, simply multiply the recipe and use two baking dishes. Your guests will be enchanted by the notion that you’ve prepared a sophisticated French dessert. At the same time, you’ll know it was a breeze to put together—just a bit of stirring, a gentle bake, and a quick chill.
For an impressive photo-worthy moment, caramelize the sugar in front of your guests. The dramatic flicker of the kitchen torch and the aroma of caramelizing sugar can amplify the experience, turning your dessert presentation into a memorable event. Let everyone crack through their own sugar crust, and you’ll likely hear that universal “oh, wow” as the first spoonful disappears.
Conclusion: Embrace the Sweet Satisfaction

Crème brûlée stands as a testament to the fact that not all fancy desserts require elaborate steps or special training. With just a few staple ingredients, a watchful eye during baking, and a quick flash of heat for the topping, you create a dessert that’s simultaneously elegant and comforting. Each spoonful combines the gentle sweetness of the custard with the crunchy caramel that’s so iconic, reminding you why this dish is revered worldwide.
Even if you’re partial to simpler recipes or short on time, crème brûlée can slip neatly into your repertoire of easy and quick desserts—particularly if you let the oven and fridge do most of the work. So go ahead, gather your ramekins, treat yourself to high-quality cream and eggs, and discover how effortless it can be to serve up a classic French indulgence in your own kitchen. Once you hear that first crack of caramel, you’ll know the short wait was well worth it. Bon appétit!
Print
Ultimate Crème Brûlée: A Luxurious Twist on Easy and Quick Desserts
- Total Time: 3 hours
- Yield: 4 1x
Description
Indulge in a classic French dessert with a modern, luxurious twist. This Ultimate Crème Brûlée features a rich, silky custard infused with vanilla, topped with a perfectly caramelized sugar crust. Quick to prepare yet impressively decadent, it’s the ideal finale to any meal.
Ingredients
- 2 cups Heavy cream (Use high-quality cream for a rich custard)
- 1 Vanilla bean* (Split lengthwise and scrape seeds or use 2 tsp vanilla extract instead)
- 5 large (Egg yolks At room temperature)
- 1/2 cup Granulated sugar (Divided: 1/2 cup for custard and extra for topping)
- Pinch Salt (Enhances flavor)
Instructions
Preheat and Infuse:
- Preheat your oven to 325°F (163°C).
- In a small saucepan, heat the heavy cream with the split vanilla bean (or set aside the extract if using) over medium heat until it just begins to simmer. Remove from heat and let infuse for 10 minutes.
Whisk Custard Base:
- In a mixing bowl, vigorously whisk together the egg yolks, 1/2 cup granulated sugar, and a pinch of salt until the mixture is smooth and slightly pale.
Temper and Strain:
- Slowly drizzle the warm cream into the egg mixture while continuously whisking to temper the eggs.
- If using vanilla extract, stir it in at this point.
- Strain the custard through a fine sieve into a clean bowl to remove any solids.
Fill Ramekins and Bake:
- Divide the strained custard evenly among the 4 prepared ramekins.
- Place the ramekins in a baking dish and carefully pour boiling water into the dish until it reaches halfway up the sides of the ramekins.
- Bake for 35–40 minutes, or until the custard is set around the edges but still slightly wobbly in the center.
Chill:
- Remove the ramekins from the water bath and let them cool to room temperature.
- Cover and refrigerate for at least 2 hours (or overnight) to fully set.
Caramelize the Top:
- Just before serving, sprinkle an even, thin layer of granulated sugar over each custard.
- Use a kitchen torch to melt and caramelize the sugar until it forms a crisp, golden crust. Alternatively, place the ramekins under a broiler for 2–3 minutes, watching closely to prevent burning.
Serve:
- Allow the caramelized sugar to harden for a minute before serving. Enjoy your luxurious crème brûlée immediately, optionally garnished with fresh berries or a mint leaf.
Notes
- For best results, ensure the custard is thoroughly chilled before caramelizing the sugar.
- A kitchen torch offers greater control for an even, crispy top; if using a broiler, keep a close eye on the dessert.
- For an extra luxurious twist, consider adding a splash (1–2 tsp) of Grand Marnier to the custard mixture.
- This dessert pairs beautifully with a light dusting of powdered sugar, fresh berries, or a sprig of mint.
Enjoy your Ultimate Crème Brûlée—a rich, indulgent finale that transforms a classic dessert into a sumptuous treat!
- Prep Time: 15 minutes
- Cook Time: 40 minutes
- Category: Dessert
Nutrition
- Calories: 320