The Dream Dessert You Didn’t Know You Needed
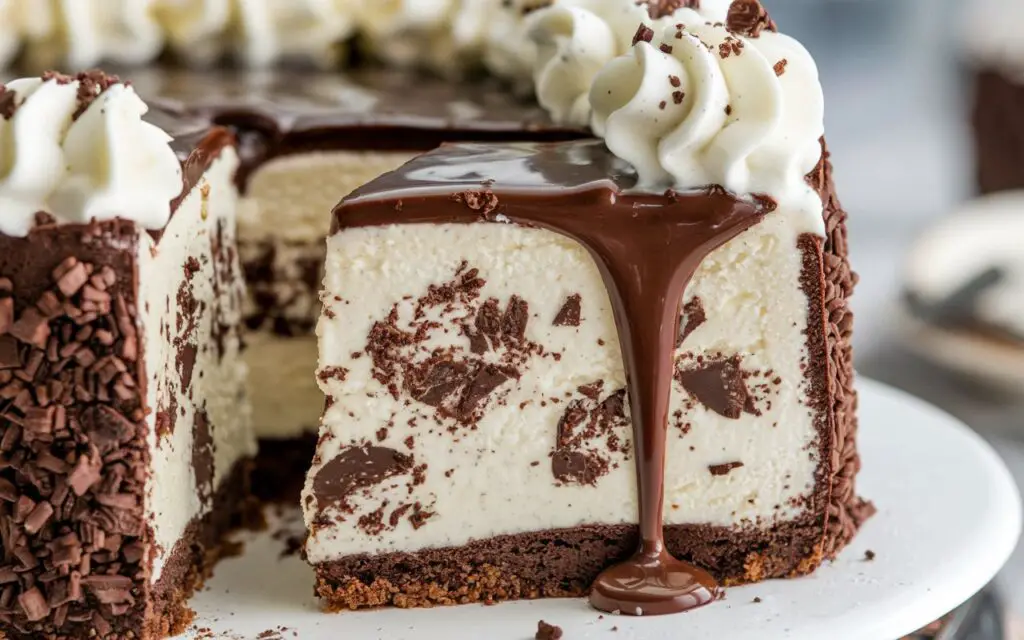
What if the two most beloved desserts on the planet, creamy ice cream cake and chewy cookie dough, could be combined into one epic, no-bake masterpiece? Data from recent food trend reports show a 45% surge in searches for “hybrid desserts,” proving that food lovers are actively seeking novel and exciting flavor combinations. This is precisely where our ultimate Ice Cream Cake Cookie Dough recipe comes in. It’s not just a dessert; it’s an experience. We’re talking decadent layers of your favorite ice cream, studded with generous chunks of safe-to-eat, eggless cookie dough, and crowned with a rich chocolate ganache. Forget the oven and the complex baking instructions. This is the show-stopping, crowd-pleasing dessert you can assemble with ease, making you the undisputed hero of any celebration. Get ready to dive into the most satisfying frozen treat you’ve ever made.
- The Dream Dessert You Didn’t Know You Needed
- Your Shopping List for the Ultimate Dessert Hybrid
- Your Dessert Timeline: A No-Bake Delight
- Step 1: Preparing Your Safe-to-Eat Cookie Dough
- Step 2: Building Your First Ice Cream Layer
- Step 3: Adding the Decadent Chocolate Layer
- Step 4: Crowning Your Cake with Ganache
- A Slice of Indulgence: The Nutritional Facts
- Health-Conscious Swaps for a Lighter Treat
- Serving Suggestions for a Show-Stopping Finale
- Common Mistakes to Avoid for a Flawless Cake
- Storing Your Frozen Masterpiece
- The Ultimate Dessert That Checks Every Box
- Your Top Questions Answered: Cake FAQs
Your Shopping List for the Ultimate Dessert Hybrid
Crafting this masterpiece is all about layering textures and flavors. We’ve chosen classic, high-quality ingredients that come together in perfect harmony. Below is your guide to creating this epic treat, complete with smart swaps to fit your pantry and dietary preferences.
| Ingredient Category | Ingredient | Quantity | Sensory Description & Smart Swaps |
| For the Edible Cookie Dough | All-Purpose Flour | 1 cup | The base of our chewy dough. Must be heat-treated to be safe (see instructions!). Swap: A 1:1 gluten-free baking flour blend works perfectly for a GF version. |
| Unsalted Butter, softened | 1/2 cup | Provides that rich, classic cookie flavor and tender texture. Swap: Vegan butter or coconut oil for a dairy-free option. | |
| Brown Sugar, packed | 1/2 cup | Lends a deep, caramel-like sweetness and moisture. Swap: Coconut sugar for a refined sugar-free alternative. | |
| Granulated Sugar | 1/4 cup | Adds a crisp sweetness that balances the brown sugar. | |
| Milk or Cream | 2 tbsp | Binds the dough and makes it perfectly scoopable. Swap: Almond milk, oat milk, or any plant-based milk. | |
| Vanilla Extract | 1 tsp | The essential aromatic that ties all the sweet flavors together. | |
| Mini Chocolate Chips | 1 cup | For that classic chocolate chip cookie dough experience in every bite. Swap: Chocolate chunks, butterscotch chips, or chopped nuts. | |
| For the Ice Cream Layers | Vanilla Bean Ice Cream | 1.5 quarts | A creamy, classic canvas for our cookie dough. Choose a high-quality brand for the best flavor. Swap: Chocolate, strawberry, or even coffee ice cream for a different flavor profile. |
| Chocolate Ice Cream | 1.5 quarts | The rich, decadent counterpart to the vanilla. Swap: Cookie dough or cookies ‘n’ cream ice cream for an extra layer of texture. | |
| For the Chocolate Ganache Topping | Heavy Cream | 1/2 cup | Creates a silky, pourable, and rich ganache. Swap: Full-fat coconut cream for a dairy-free ganache. |
| Semi-Sweet Chocolate Chips | 1 cup | The heart of the ganache, providing a deep chocolate flavor. Swap: Dark chocolate (60-70% cacao) for a more intense, less sweet topping. |
Your Dessert Timeline: A No-Bake Delight
One of the best features of this Ice Cream Cake Cookie Dough is that it requires absolutely no baking. Your freezer does all the heavy lifting!
- Active Preparation Time: 30 minutes
- Freezing Time: 6-8 hours (or overnight for best results)
- Total Time: Approximately 6.5 – 8.5 hours
Compared to a traditional baked and frosted layer cake, which can take upwards of 3 hours of active time and cooling, this recipe is a hands-off dream. You invest just 30 minutes of effort for a dessert that looks and tastes like it came from a gourmet ice cream parlor.
Step 1: Preparing Your Safe-to-Eat Cookie Dough
First things first, let’s make our cookie dough safe and delicious. Raw flour can contain bacteria, so we must heat-treat it. Spread the all-purpose flour on a baking sheet and bake at 350°F (175°C) for 5-7 minutes, or until a thermometer reads 160°F (71°C). Let it cool completely. In a large bowl, use an electric mixer to cream together the softened butter, brown sugar, and granulated sugar until light and fluffy.1 Beat in the milk and vanilla extract. Gradually add the cooled, heat-treated flour, mixing on low speed until just combined. Finally, fold in the mini chocolate chips. Set this delectable dough aside. A pro tip is to roll some of the dough into small, bite-sized balls for decorating the top later!
Step 2: Building Your First Ice Cream Layer
Line the bottom of a 9-inch springform pan with parchment paper for easy removal. Take your vanilla ice cream out of the freezer and let it soften on the counter for about 10-15 minutes. You want it to be spreadable but not melted. Spread the softened vanilla ice cream evenly into the bottom of the prepared pan. Now, dot about half of your edible cookie dough over the ice cream layer, gently pressing the pieces in. Place the pan in the freezer for at least 30 minutes to firm up before adding the next layer.
Step 3: Adding the Decadent Chocolate Layer
Once the vanilla layer is firm to the touch, it’s time for the chocolate. Let your chocolate ice cream soften just as you did with the vanilla. Spread it carefully over the firm vanilla and cookie dough layer. Use an offset spatula to create a smooth, even surface. Drop the remaining cookie dough pieces over the chocolate ice cream, pressing them in gently. Cover the pan with plastic wrap and return it to the freezer. This is the main freezing stage—it needs at least 4-6 hours, or ideally overnight, to become completely solid.
Step 4: Crowning Your Cake with Ganache

About 30 minutes before you’re ready to serve, prepare the ganache. Place the semi-sweet chocolate chips in a heatproof bowl. Heat the heavy cream in a small saucepan over medium heat until it just begins to simmer around the edges (don’t let it boil). Pour the hot cream over the chocolate chips and let it sit, undisturbed, for 5 minutes. This allows the hot cream to gently melt the chocolate. Whisk the mixture until it’s completely smooth and glossy. Let the ganache cool for about 10-15 minutes, so it’s thick but still pourable. Remove your ice cream cake from the freezer, release the springform pan, and place it on a serving platter. Pour the cooled ganache over the top, letting it drip artfully down the sides. Decorate with any reserved cookie dough balls. Return to the freezer for 15-20 minutes to set the ganache.
A Slice of Indulgence: The Nutritional Facts
This is a celebration cake, meant for pure indulgence. Knowing what’s in a slice can help you enjoy it mindfully. This information is an estimate, based on 12 servings.
- Calories: Approx. 550 kcal
- Fat: 32g
- Saturated Fat: 18g
- Carbohydrates: 60g
- Sugar: 45g
- Protein: 8g
While high in calories and sugar, this homemade version allows you to control the quality of ingredients, avoiding the artificial flavors and preservatives often found in store-bought cakes.
Health-Conscious Swaps for a Lighter Treat
Want to enjoy this Ice Cream Cake Cookie Dough with a few tweaks? It’s entirely possible to lighten it up without sacrificing flavor.
- Reduced Sugar: Use a sugar-free or low-sugar ice cream brand. For the cookie dough, you can use monk fruit or erythritol-based sweeteners in place of the granulated and brown sugars.
- Gluten-Free: As mentioned in the ingredients, simply swap the all-purpose flour for a quality 1:1 gluten-free baking blend.
- Dairy-Free/Vegan: This is an easy swap! Use your favorite dairy-free ice cream (almond, coconut, or soy-based work well), vegan butter for the cookie dough, plant-based milk, and full-fat coconut cream for the ganache. Ensure your chocolate chips are dairy-free.
- Protein-Packed: Use a high-protein ice cream brand. You can also add a scoop of vanilla or chocolate protein powder to the respective ice cream layers as you soften and spread them.
Serving Suggestions for a Show-Stopping Finale
Presentation is everything! Here’s how to make your cake the star of the show.
- Warm & Cold Contrast: Serve each slice with a drizzle of warm caramel or hot fudge sauce. The temperature contrast is divine.
- Extra Crunch: Sprinkle the top with chopped peanuts, pecans, or extra mini chocolate chips just after pouring the ganache.
- Whipped Cream Cloud: A generous dollop of homemade whipped cream on the side or on top adds a light, airy texture.
- The Perfect Slice: For clean, beautiful slices, run a large, sharp knife under hot water and wipe it dry before each cut.
Common Mistakes to Avoid for a Flawless Cake
Achieve perfection by sidestepping these common issues.
- Ice Cream is Too Melted: Spreading fully melted ice cream will result in a soupy mess that doesn’t layer properly and can become icy. Aim for a thick, spreadable consistency.
- Not Freezing Between Layers: This is a crucial step. If you don’t freeze the first layer until it’s firm, the second layer will mix in, and you’ll lose that beautiful, distinct layered look.
- Ganache is Too Hot: Pouring hot ganache directly onto the frozen cake will instantly melt the top layer of ice cream. Let it cool until it’s just warm to the touch.
- Forgetting the Parchment Paper: Without a parchment paper base, your cake will likely stick to the bottom of the springform pan, risking a cracked or broken base when you try to move it.
Storing Your Frozen Masterpiece
Proper storage is key to enjoying your cake for days.
- In the Freezer: Your Ice Cream Cake Cookie Dough is best stored in the freezer. Once the ganache is set, you can press plastic wrap gently against the cut sides to prevent freezer burn and place it in an airtight container or cake carrier. It will stay fresh for up to one week.
- Pre-Slicing for Convenience: For easy serving later, you can pre-slice the cake, place parchment paper between each slice, and store them in an airtight container in the freezer.
The Ultimate Dessert That Checks Every Box
In summary, this Ice Cream Cake Cookie Dough recipe is the ultimate dessert hybrid, delivering on all fronts: flavor, texture, and pure, celebratory joy. It combines the creamy delight of a layered ice cream cake with the nostalgic, chewy goodness of edible cookie dough. With our step-by-step guide, pro tips, and customization options, you are fully equipped to create a stunning, no-bake dessert that will undoubtedly be the highlight of any occasion.
Ready to become a dessert legend? Try this recipe and let us know how it turns out! Share your creations, leave a review, or drop a comment below with your own unique twists. For more exclusive recipes and dessert inspiration, be sure to subscribe to our newsletter!
Your Top Questions Answered: Cake FAQs
- Do I really need to heat-treat the flour?Yes, this is a critical food safety step. Raw flour can carry E. coli, and since this dough isn’t being baked, heat-treating is the only way to ensure it’s safe to consume. It only takes a few minutes and is well worth the peace of mind.
- Can I make this cake without a springform pan?Yes, you can! You can assemble it in a 9-inch round cake pan or even a loaf pan. The key is to line the entire pan with two layers of plastic wrap, leaving plenty of overhang. Use the overhang as “handles” to lift the entire cake out of the pan once it’s frozen solid.
- How far in advance can I make this ice cream cake?You can make it up to a week in advance! Prepare the cake fully, but wait to add the ganache topping until the day you plan to serve it for the best, glossiest finish.
- My cookie dough is too crumbly. How can I fix it?If your dough seems dry or crumbly, it’s an easy fix. Just add more milk, one teaspoon at a time, until it comes together into a cohesive, pliable dough.
- Can I use store-bought edible cookie dough?Absolutely! If you’re short on time, using a good quality store-bought edible cookie dough is a fantastic shortcut. Simply skip Step 1 and proceed with layering the cake.