We all face that mid-afternoon slump or late-night craving where the sweet tooth demands attention, but our health goals beg to differ. What if I told you that you could have a decadent, chocolate-covered treat that actually fuels your body rather than weighing it down? Enter these No Bake Chocolate Peanut Butter Balls.
- Ingredients List
- Timing
- Step-by-Step Instructions
- Step 1: Prepare the Peanut Butter Mixture
- Step 2: Form the Balls
- Step 3: Chill in the Refrigerator
- Step 4: Melt the Chocolate
- Step 5: Dip the Balls
- Step 6: Refrigerate Again
- Step 7: Enjoy!
- Nutritional Information
- Healthier Alternatives
- Serving Suggestions
- Common Mistakes to Avoid
- Storing Tips
- Conclusion
- FAQs
- Q1. Can I use regular peanut butter instead of powdered?
- Q2. My dough is too sticky to roll. What should I do?
- Q3. Is this recipe Keto-friendly?
- Q4. Can I use vanilla Greek yogurt?
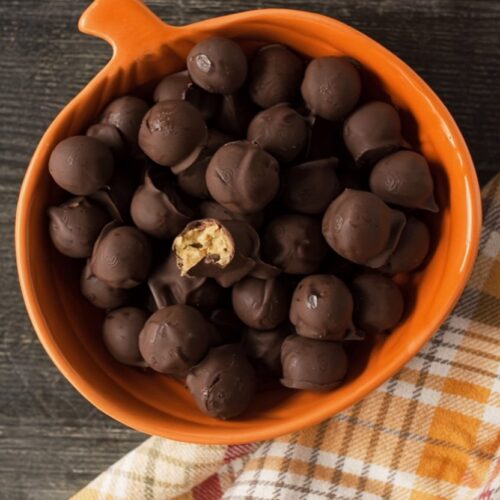
- 3-Ingredient No Bake Chocolate Peanut Butter Balls (High Protein)
This isn’t your average sugary confection. By swapping traditional peanut butter for powdered peanut butter and using protein-packed Greek yogurt as the binder, we create a “dough” that is incredibly high in protein and low in calories. Coated in sugar-free chocolate, these bites are the ultimate guilt-free indulgence. Whether you are a fitness enthusiast looking for a post-workout snack or a parent seeking a healthier dessert for the kids, this recipe is a game-changer. Let’s dive into how you can whip up this 3-ingredient miracle in under an hour!
Ingredients List
The beauty of this recipe lies in its simplicity. You likely have most of these items in your pantry already. Here is exactly what you need.
| Ingredient | Amount/Quantity | Notes |
| Powdered Peanut Butter | 3/4 cup | Brands like Great Value or PB2 work perfectly. |
| Fat-Free Greek Yogurt | 4 oz | Plain is best to control sweetness; provides the creamy texture. |
| Chocolate Baking Chips | 80 chips | Lily’s Milk Chocolate Style (sugar-free) is recommended. |

Timing
Because this recipe requires no baking, it comes together very quickly. The majority of the time is hands-off while the balls set in the refrigerator.
- Prep Time: 10 minutes
- Chill Time: 30 minutes (divided)
- Active Dipping Time: 5 minutes
- Total Time: ~45 minutes (Faster than baking a batch of cookies!)
Step-by-Step Instructions
Follow these steps to ensure your peanut butter balls have the perfect texture and a smooth chocolate finish.
Step 1: Prepare the Peanut Butter Mixture
Combine the 3/4 cup of powdered peanut butter and 4 oz of fat-free Greek yogurt in a medium-sized mixing bowl. Stir the ingredients vigorously until they form a thick, dough-like consistency.
- Tip: You are looking for a texture similar to playdough. If it feels too dry and crumbly, add a tiny splash of extra yogurt. If it’s too sticky, sprinkle in a bit more powder.
Step 2: Form the Balls
Once the mixture is uniform, scoop small amounts of the dough and use your palms to roll them into smooth balls. Aim for about 10-12 balls to ensure they are bite-sized and easy to dip. Place the formed balls onto a baking sheet lined with parchment paper or a silicone mat. This prevents sticking and makes cleanup a breeze.
Step 3: Chill in the Refrigerator
Transfer the baking sheet to the refrigerator immediately. Let the balls chill for at least 15 minutes.
- Why this matters: This step is crucial. Chilling firms up the yogurt and peanut powder mixture, ensuring the balls hold their shape when dipped into the warm chocolate.
Step 4: Melt the Chocolate
While the balls are chilling, place the Lily’s Milk Chocolate Style Baking Chips in a microwave-safe bowl. Heat in 30-second intervals. Stir thoroughly between each interval. Continue this process until the chocolate is silky smooth and fully melted.
- Tip: Be patient here! Chocolate can scorch easily. If it looks mostly melted, just keep stirring; the residual heat will melt the remaining lumps.
Step 5: Dip the Balls
Remove the chilled balls from the refrigerator. Using a fork or a toothpick, dip each ball into the melted chocolate. Roll it around to ensure it is fully coated in that glossy goodness. Lift the ball up and allow any excess chocolate to drip back into the bowl before placing it back on the parchment paper.
Step 6: Refrigerate Again
Once all the balls are coated, return the baking sheet to the refrigerator. Let them chill for a final 15 minutes. This sets the chocolate shell, giving you that satisfying “snap” when you bite into the soft center.
Step 7: Enjoy!
Your No Bake Chocolate Peanut Butter Balls are now ready! Serve them immediately as a dessert or pack them for a midday energy boost.

Nutritional Information
This recipe is a powerhouse of nutrition compared to standard truffles. Here is the estimated breakdown per ball (assuming a batch of 12):
- Calories: ~45 kcal
- Protein: 4.5 g
- Carbohydrates: 5 g (Net Carbs: ~3 g)
- Fat: 1.5 g
- Sugar: < 1 g
- Insight: By using powdered peanut butter (which has 85% less fat than traditional peanut butter) and Greek yogurt, you achieve a high-protein-to-calorie ratio, making these an excellent post-workout recovery snack.
Healthier Alternatives
While this recipe is already diet-friendly, here are a few ways to customize it for specific needs:
- Vegan Option: Swap the Greek yogurt for a thick coconut yogurt or almond milk yogurt. Ensure you use dairy-free chocolate chips.
- Extra Crunch: Mix a tablespoon of crushed peanuts or crispy rice cereal into the dough before rolling to add texture.
- Sweetener Boost: If you find the plain yogurt too tangy, add a teaspoon of honey, maple syrup, or a few drops of liquid stevia to the dough mixture.
- Dark Chocolate Lover: Replace the milk chocolate chips with 70% dark chocolate or Lily’s Dark Chocolate chips for a richer antioxidant profile and a less sweet finish.
Serving Suggestions
These treats are versatile. Here is how to serve them up:
- The Coffee Companion: Serve two balls alongside a hot espresso or black coffee. The bitterness of the coffee pairs beautifully with the creamy peanut butter.
- Party Platter: Arrange them on a platter with strawberries and pretzel sticks for a sweet-and-salty dessert board.
- Frozen Treat: Eat them straight out of the freezer for a texture that resembles a chocolate-covered ice cream bite!
Common Mistakes to Avoid
To ensure your batch turns out perfect, watch out for these pitfalls:
- Overheating the Chocolate: This creates a grainy, clumpy mess. Solution: Microwave in short bursts and stir more than you think is necessary.
- Skipping the Chill Time: If the dough is warm, it may fall apart in the warm chocolate. Solution: Don’t rush the fridge steps; the structural integrity depends on the cold!
- Using “Runny” Yogurt: Some yogurts are very watery. Solution: Use a thick Greek-style yogurt. If yours is watery, strain off the liquid whey before measuring.
Storing Tips
Because these contain yogurt, they cannot be stored in the pantry like regular cookies.
- Refrigerator: Store leftovers in an airtight container in the fridge for up to 1 week. They maintain their texture perfectly.
- Freezer: These freeze exceptionally well! Place them in a freezer-safe bag or container for up to 3 months.
- Thawing: You can eat them frozen (they won’t be rock hard) or let them sit at room temperature for 5 minutes before eating.
Conclusion
Healthy eating doesn’t mean saying goodbye to your favorite flavors. These No Bake Chocolate Peanut Butter Balls prove that with a few smart ingredient swaps—like powdered peanut butter and Greek yogurt—you can enjoy a rich, chocolaty treat that supports your wellness goals. They are easy to make, fun to eat, and absolutely delicious.
Try it out and let us know! Did you stick to the classic recipe or add a crunchy twist? We’d love to hear your feedback in the comments below. Don’t forget to rate the recipe and subscribe to our blog for more delicious, healthy recipes delivered straight to your inbox.
FAQs
Q1. Can I use regular peanut butter instead of powdered?
Yes, you can, but the texture and nutritional profile will change significantly. Regular peanut butter is much higher in fat and calories. If you use it, you may need to add oat flour or coconut flour to the mixture to get it to a rollable dough consistency, as it won’t absorb the yogurt the same way powder does.
Q2. My dough is too sticky to roll. What should I do?
This usually happens if the yogurt has a high moisture content. simply add more powdered peanut butter, one tablespoon at a time, until the dough is firm enough to handle. Alternatively, wet your hands slightly with water or oil before rolling to prevent sticking.
Q3. Is this recipe Keto-friendly?
Yes, it can be! Powdered peanut butter is low in carbs, and if you use a keto-friendly yogurt (low sugar) and Lily’s chocolate chips (sweetened with stevia/erythritol), this fits perfectly into a low-carb or Keto diet.
Q4. Can I use vanilla Greek yogurt?
Absolutely. Using vanilla Greek yogurt will add a sweeter, more dessert-like flavor to the filling. Just keep in mind that flavored yogurts often contain added sugars, which will change the nutritional count slightly.
3-Ingredient No Bake Chocolate Peanut Butter Balls (High Protein)

Equipment
- Mixing Bowl
- Baking Sheet
- Parchment paper or silicone mat
- Microwave-safe Bowl
Ingredients
Peanut Butter Core
- 3/4 cup powdered peanut butter Great Value or PB2
- 4 oz fat-free Greek yogurt plain
Coating
- 80 chips chocolate baking chips Lily’s Milk Chocolate Style (sugar-free)
Instructions
- Prepare the Peanut Butter Mixture: Combine the powdered peanut butter and Greek yogurt in a mixing bowl. Stir vigorously until they form a thick, dough-like consistency. (Tip: It should feel like playdough).
- Form the Balls: Scoop small amounts of dough and roll into smooth balls with your palms. Aim for 10-12 balls. Place them on a baking sheet lined with parchment paper.
- Chill: Transfer the baking sheet to the refrigerator immediately. Chill for at least 15 minutes to firm up the mixture.
- Melt the Chocolate: Place the chocolate chips in a microwave-safe bowl. Heat in 30-second intervals, stirring thoroughly between each, until silky smooth.
- Dip the Balls: Remove chilled balls from the fridge. Using a fork, dip each ball into the melted chocolate to coat. Allow excess to drip off before placing back on the parchment paper.
- Refrigerate Again: Return the baking sheet to the refrigerator for a final 15 minutes to set the chocolate shell.