Can we talk about the lie that is most store-bought gluten-free bread? Crumbly. Dry. Vaguely cardboard-flavored. Somehow both dense and falling apart at the same time. I spent years buying loaf after disappointing loaf before I finally snapped and decided to make my own easy gluten-free sandwich bread. One recipe. One loaf pan. And it changed everything.
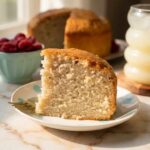
This bread is soft. It holds together when you pick up a sandwich. It toasts into something golden and crisp. And it rises — actually, visibly, beautifully rises — which, if you’ve ever tried gluten-free baking, you know is basically a miracle.
What I Wish Someone Had Told Me Before My First Loaf
I’m putting this right up front because gluten-free bread has a few quirks, and knowing them before you start makes the difference between a gorgeous loaf and a brick.
The dough is wet. Like, really wet. If you’re expecting a ball of dough you can knead and shape, stop right there. Gluten-free bread dough is more like a thick, sticky batter. That’s exactly right. Don’t add more flour trying to “fix” it.
Your yeast must be alive. If it doesn’t foam after 5 minutes in warm milk, it’s dead. Toss it and grab a new packet. No foam = no rise = a dense, sad loaf.
Temperature matters more than you think. The milk needs to be around 110°F — warm to the touch but not hot. Too hot kills the yeast. Too cool and it won’t activate. I keep a kitchen thermometer nearby; it’s saved me more than once.
Don’t slice warm bread. I know. I know. But gluten-free bread is still setting its structure as it cools. Cutting into it too early gives you a gummy interior. Let it cool completely on a wire rack. Walk away. Make some coffee. Come back.
Skipping the vinegar. That teaspoon of apple cider vinegar isn’t random — it reacts with the baking process to give the bread a better rise and a more tender crumb. It’s a small move with a big impact.
Everything Going Into This Loaf
For the Bread
| Ingredient | Amount | Why It Matters |
|---|---|---|
| Gluten-free all-purpose flour | 3 cups | Must contain xanthan gum — it’s the glue that holds everything together |
| Active dry yeast | 2¼ tsp (1 packet) | The life force — gives you that real-bread rise |
| Sugar or honey | 1½ tbsp | Feeds the yeast and adds a hint of warm sweetness |
| Salt | 1½ tsp | Flavor and structure — never skip |
| Warm milk | 1¼ cups (~110°F) | Activates the yeast; creates a tender, soft crumb |
| Neutral oil | ¼ cup | Canola or vegetable — keeps things moist without competing flavors |
| Large eggs, room temp | 2 | Binding and richness — the backbone of the dough |
| Apple cider vinegar | 1 tsp | The secret weapon for a better rise and softer texture |
Optional Toppings
| Ingredient | Notes |
|---|---|
| Egg wash or milk | For a glossy, bakery-worthy golden crust |
| Sesame or poppy seeds | A pretty, nutty finishing touch |

From Bowl to Beautiful Loaf in Five Steps
Prep time: 15 minutes | Rise time: 45–60 minutes | Bake time: 45–55 minutes | Total: about 2 hours (mostly hands-off)
Most of that time is waiting. The actual hands-on work? Fifteen minutes, tops.
Step 1: Wake Up the Yeast
In a small bowl, combine the warm milk and sugar (or honey). Stir gently. Sprinkle the yeast over the surface and just… leave it alone. In about 5 minutes, it should be foamy, bubbly, and alive. This is your green light. If it sits there doing nothing, your yeast is dead — start over with a fresh packet and double-check your milk temperature.
Step 2: Build the Dough
In a large mixing bowl, whisk together the gluten-free flour and salt. Pour in the activated yeast mixture, oil, eggs, and apple cider vinegar.
Mix on medium speed for 2–3 minutes until everything comes together into a smooth, thick batter. It’ll look wetter than any bread dough you’ve seen before — that’s exactly how it’s supposed to look. Resist the urge to add more flour. Trust the process.
Step 3: Let It Rise
Grease a 9×5-inch loaf pan generously. Scoop the dough in and smooth the top with a wet spatula (the wet spatula trick prevents sticking — you’ll thank me).
Cover loosely with a clean towel or plastic wrap and set it in a warm spot. Let it rise for 45–60 minutes until it’s visibly puffed and sitting just above the rim of the pan. This is the quiet, magical part. Your kitchen will smell faintly of yeast and warmth, and it’s kind of wonderful.
Pro tip: If your house is cool, turn your oven on to 200°F for 2 minutes, turn it off, and let the dough rise inside with the door cracked. Perfect warm environment.
Step 4: Bake to Golden Perfection
Preheat your oven to 375°F. If you want that gorgeous bakery sheen, brush the top of the risen loaf lightly with egg wash or milk and scatter sesame or poppy seeds over it.
Slide it into the oven and bake for 45–55 minutes. You’re looking for a deep golden-brown top and a hollow sound when you tap the loaf. If the top is browning too fast, loosely tent a piece of foil over it for the last 15 minutes. No drama, easy fix.
Step 5: The Hardest Part — Waiting
Let the bread cool in the pan for 10 minutes. Then gently turn it out onto a wire rack.
Here’s where discipline matters: let it cool completely before slicing. Fully. All the way. The interior is still firming up, and cutting too soon gives you a dense, gummy texture that doesn’t represent how good this bread actually is. Give it at least 45 minutes. Then slice, and watch a real, actual, beautiful crumb reveal itself.

What Each Slice Is Bringing to the Table
Per slice (based on 12 slices per loaf):
| Nutrient | Amount |
|---|---|
| Calories | ~160 |
| Total Fat | 6g |
| Saturated Fat | 1g |
| Cholesterol | 30mg |
| Sodium | 320mg |
| Carbohydrates | 24g |
| Fiber | 1.5g |
| Sugar | 3g |
| Protein | 3g |
Comparable to regular sandwich bread in calories and macros — but without the gluten. And because you’re making it yourself, there are no preservatives, gums you can’t pronounce, or weird fillers.
How to Eat This Loaf (Let Me Count the Ways)
- Toasted with salted butter melting into every pore — the simplest and maybe the best way
- As proper sandwich bread — turkey, avocado, crisp lettuce, the works — it holds up beautifully
- Thick-cut for French toast on a lazy weekend morning, soaked in cinnamon-vanilla custard
- Sliced thin and toasted into crostini for dips, bruschetta, or a cheese board
- Still-warm with a slick of honey butter that pools into the crumb — absolutely dreamy
Your Kitchen Is About to Smell Like an Actual Bakery
I still remember pulling my first successful loaf out of the oven and just standing there staring at it. Golden. Tall. Real bread — and I made it without a single grain of wheat. It felt like I’d unlocked something.
This easy gluten-free sandwich bread isn’t fussy. It doesn’t need a bread machine or specialty equipment. It asks for one bowl, one loaf pan, a little patience, and about fifteen minutes of actual effort. And what you get back is a loaf that tastes like bread is supposed to taste — soft inside, golden outside, and worth every single minute.
Make it this weekend. Slice into it. Send me a photo of that crumb. Leave a comment, rate the recipe, tell me what you put on your first slice. And subscribe — because I’ve got more gluten-free baking coming, and every single recipe is built to actually work.
You’ve completely got this.
Print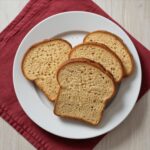
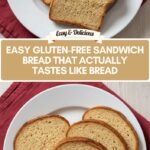
Easy Gluten-Free Sandwich Bread
A soft, tender, golden-crusted gluten-free sandwich bread that rises beautifully and holds together for sandwiches, toast, and more. No bread machine needed — just one bowl, one loaf pan, and about 15 minutes of hands-on time.
- Total Time2 hours
- Yield12 slices 1x
Ingredients
For the Bread
- 3 cups gluten-free all-purpose flour (with xanthan gum)
- 2 1/4 tsp active dry yeast (1 packet)
- 1 1/2 tbsp sugar or honey
- 1 1/2 tsp salt
- 1 1/4 cups warm milk (about 110°F)
- 1/4 cup neutral oil (canola or vegetable oil)
- 2 large eggs (room temperature)
- 1 tsp apple cider vinegar
Optional Toppings
- Egg wash or milk for brushing
- Sesame seeds or poppy seeds
Instructions
- Activate the Yeast: In a small bowl, combine warm milk and sugar. Sprinkle yeast over the top and let sit for about 5 minutes until foamy.
- Mix the Dough: In a large mixing bowl, whisk together gluten-free flour and salt. Add the yeast mixture, oil, eggs, and apple cider vinegar. Mix on medium speed for 2–3 minutes until smooth and thick. The dough will be wetter than traditional bread dough — that’s normal.
- Rise: Transfer the dough into a greased 9×5-inch loaf pan and smooth the top with a wet spatula. Cover loosely and let rise in a warm place for 45–60 minutes, until visibly puffed.
- Bake: Preheat oven to 375°F (190°C). Brush the top lightly with milk or egg wash if desired and add seeds. Bake for 45–55 minutes, until golden brown and the loaf sounds hollow when tapped. If browning too quickly, loosely cover with foil.
- Cool: Let cool in the pan for 10 minutes, then transfer to a wire rack. Allow to cool completely before slicing for best texture.
Notes
Make sure your gluten-free flour blend contains xanthan gum — if it doesn’t, add 1 teaspoon. Eggs and milk should be at room temperature for the best rise. The dough will be much wetter than traditional wheat bread dough; this is normal and correct. Do not add extra flour. Store at room temperature in an airtight bag for 2–3 days, or slice and freeze for up to 3 months. Toast slices directly from the freezer.
- Prep Time: 15 minutes
- Cook Time: 50 minutes
- Category: Bread, Breakfast, Snack
- Cuisine: American
Nutrition
- Calories: 160
- Sugar: 3
- Sodium: 320
- Fat: 6
- Saturated Fat: 1
- Carbohydrates: 24
- Fiber: 1.5
- Protein: 3
- Cholesterol: 30