



Making your own apple cider vinegar at home is easier than you’d think, and it’s one of the most satisfying, low-waste kitchen projects around. Homemade apple cider vinegar is a naturally fermented vinegar made from just apples (or even apple scraps), sugar, and water, transformed over a couple of months into a tangy, probiotic-rich vinegar with that cloudy, live “mother.” It’s a fantastic way to use up excess apples or to put peels and cores to good use instead of tossing them, a true zero-waste solution. The process is almost entirely hands-off (the fermentation does the work), and the result is a delicious, healthy vinegar you can use in dressings, sauces, drinks, and more. Once you make your own, you’ll love having a jar of homemade, live vinegar on hand.
The beauty of this project is how little you need and how forgiving it is. Whole diced apples or saved scraps, a bit of sugar, and filtered water are all it takes. Wild yeasts and bacteria do the rest, first fermenting the sugars into alcohol, then converting that alcohol into vinegar. With a little patience and a daily stir in the early stages, you get a raw, unfiltered apple cider vinegar that’s far more alive and flavorful than most store-bought bottles, and you made it yourself from what might otherwise have been compost.
Why this works
A few key principles are what make this fermentation succeed, and they’re worth understanding.
The apples (or scraps) provide the sugars and wild cultures. Apples and their peels naturally carry the wild yeasts and bacteria that drive fermentation, so filling your vessel halfway with diced apples or saved scraps gives the ferment both flavor and its natural starter cultures. Using scraps like skins and cores is what makes this such a great zero-waste use for the parts of the apple you’d normally discard.
The sugar feeds the fermentation. Added in a simple ratio (about 1 tablespoon per cup of water, or 1 cup per gallon), the sugar gives the wild yeasts food to convert first into alcohol and then, by the bacteria, into acetic acid, which is what makes vinegar tart. It’s essential to the two-stage fermentation, most of the sugar is consumed in the process, so the finished vinegar isn’t sweet.
Airflow and darkness keep it healthy. Covering the vessel with a breathable material (rather than a sealed lid) lets the ferment breathe and take in the oxygen the vinegar-making bacteria need, while keeping out bugs and debris. Keeping it in a dark spot at warm room temperature, and stirring daily in the early stage, discourages mold and encourages a healthy ferment. An optional splash of finished raw vinegar can help kick-start the culture.
And time is the real ingredient. Vinegar can’t be rushed, over the course of two to three months, the flavor develops from sweet apple water to fully tart, complex vinegar. Tasting along the way lets you stop when it reaches the tartness you like.
What goes in
You need very little, and the quantities scale to whatever vessel you use.

You’ll need diced apples or apple scraps (skins and cores, which you can collect and freeze over time), sugar, and filtered water, plus an optional splash of finished raw apple cider vinegar to help inoculate the culture.
A few notes. This is a ratio-based recipe, not a fixed one: fill your chosen vessel (a quart jar, half-gallon jar, or gallon crock) about halfway with apples or scraps, then add filtered water to nearly fill it, and stir in sugar at about 1 tablespoon per cup of water (or 1 cup per gallon). Use filtered (not chlorinated) water, since chlorine can inhibit fermentation. And a breathable cover (like cloth or a coffee filter secured with a band) is important, not a sealed lid.
How to make it
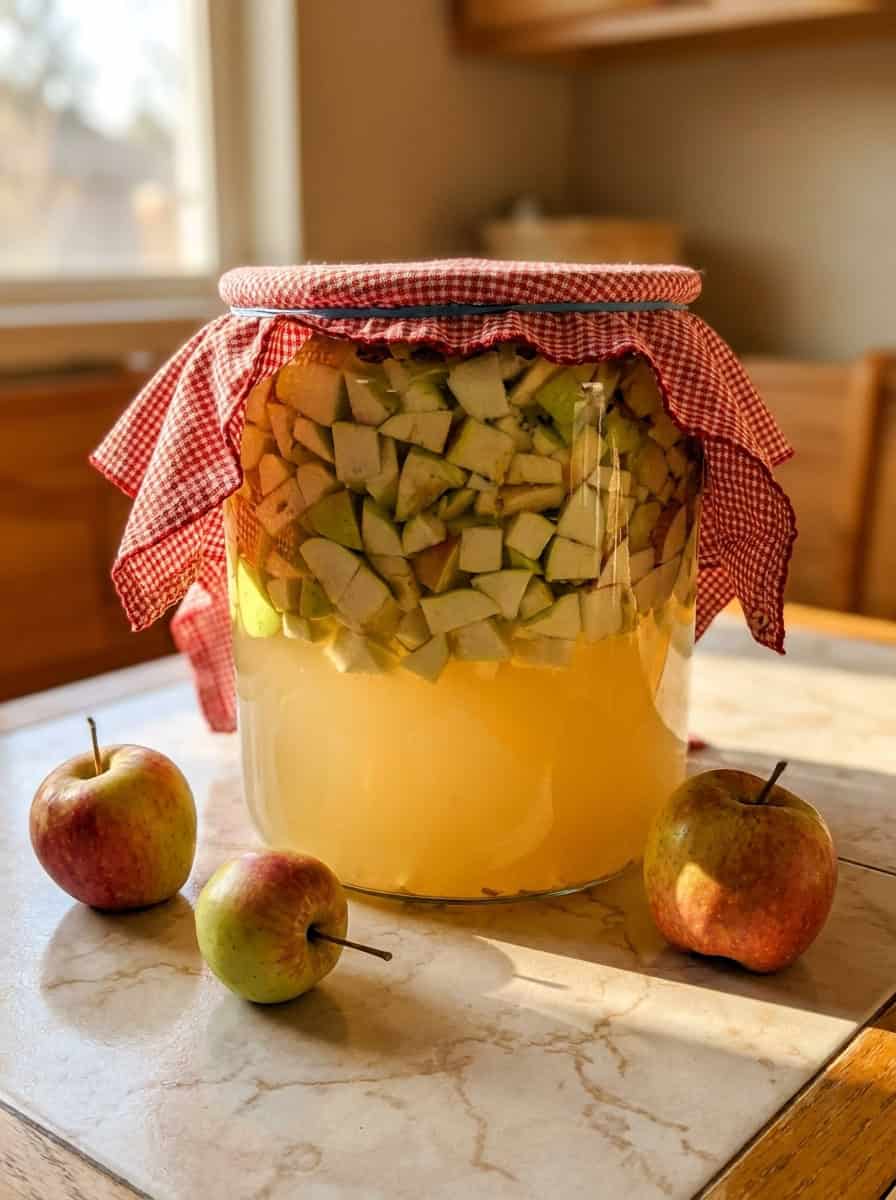
Wash and chop your apples into chunks, or gather your saved apple scraps, and add them to your jar or fermenting vessel until it’s about halfway full.
Pour lukewarm filtered water over the apples until the container is almost full, measuring and noting the total amount of water you add.
Stir in sugar at a ratio of 1 tablespoon per cup of water (or, for larger batches, 1 cup per gallon). Optionally, add a splash of finished raw apple cider vinegar to help inoculate the culture.
Stir everything until well combined, then cover the vessel with a breathable material.
Store it in a dark location at around 70 to 75°F to ferment. Stir it every day to prevent mold from forming on top. If needed, drape a dark towel over the container to block light.
After two weeks, strain out and reserve the liquid into a similar-sized container, and cover it again. Compost the spent fruit.
Move the covered container of liquid somewhere out of the way to continue fermenting long-term, keeping it dark. A cooler room temperature is fine at this stage, but don’t refrigerate it yet.
After about a month, taste the vinegar to see if it’s fermented and tart to your liking. If needed, let it continue fermenting for a total of two to three months.
Once it reaches the flavor you want, transfer the apple cider vinegar into bottles with lids (swing-top bottles are great). Store at room temperature or in the fridge, and enjoy.
Tips, uses, and storing
A few things help. Use filtered, non-chlorinated water so the cultures can thrive. Keep the vessel covered with breathable material and stir daily in the first two weeks to prevent surface mold. Keep it dark and at a warm room temperature for active fermentation. And taste as it goes so you can stop when it’s tart enough for you.
A couple more. It’s normal for the vinegar to look cloudy and to develop a gelatinous “mother”, that’s a sign of healthy, live vinegar (you can save it to speed up future batches). If you ever see fuzzy mold or smell something truly off, though, it’s best to discard that batch and start again.
Homemade apple cider vinegar is wonderfully versatile: use it in salad dressings and vinaigrettes, sauces and marinades, for pickling, in cooking, or diluted in water as a drink or tonic. Because it’s raw and unfiltered, it retains beneficial cultures. Just note that raw vinegar’s acidity varies, so it’s best for cooking and dressings rather than home canning, where a standardized, known acidity is required for safety.
For storing, properly fermented apple cider vinegar keeps well for over a year, at room temperature or refrigerated, as long as it doesn’t develop visible mold or a strange, off flavor or appearance. Bottling it once it’s reached your desired tartness slows further fermentation. Keep an eye on it over time, and enjoy your homemade, probiotic-rich vinegar in all sorts of ways.
This makes a batch of vinegar sized to your vessel. Tangy, raw, and made from apples you might otherwise have wasted, this homemade apple cider vinegar is a simple, rewarding fermentation project, and it turns humble apple scraps into something genuinely useful and delicious.
Print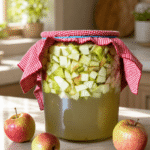
Homemade Apple Cider Vinegar
Make your own raw, probiotic-rich apple cider vinegar at home from just apples (or apple scraps), sugar, and filtered water. A hands-off, zero-waste fermentation project: fill a vessel, add sweetened water, and let wild cultures transform it into tangy vinegar over two to three months.
- Total Time1440 hours 20 minutes
- Yield1 batch 1x
- DietGluten-Free, Vegan, Vegetarian
Ingredients
- diced apples or apple scraps (skins, cores) (enough to fill your vessel about halfway; scraps can be saved in the freezer)
- filtered water (lukewarm, enough to nearly fill the vessel (measure the total added))
- 1 tbsp sugar (per 1 cup water, OR 1 cup sugar per 1 gallon water)
- finished raw apple cider vinegar (optional splash, to inoculate the culture)
Instructions
- Fill the Vessel: Wash and chop apples into chunks, or gather saved apple scraps, and add to your jar or fermenting vessel until about halfway full.
- Add Water: Pour lukewarm filtered water over the apples until the container is almost full, measuring and noting the total amount added.
- Add Sugar: Stir in sugar at 1 tablespoon per cup of water (or 1 cup per gallon for large batches). Optionally add a splash of finished raw apple cider vinegar to inoculate.
- Cover: Stir until well combined and cover with a breathable material (not a sealed lid).
- First Ferment: Store in a dark location at about 70 to 75°F. Stir every day to prevent surface mold. Drape a dark towel over it if needed to block light.
- Strain: After two weeks, strain and reserve the liquid into a similar-sized container and cover again. Compost the spent fruit.
- Long Ferment: Move the covered liquid somewhere out of the way to continue fermenting, keeping it dark. A cooler room temperature is fine now, but don’t refrigerate yet.
- Taste: After about a month, taste to see if it’s tart to your liking. If needed, continue fermenting for a total of two to three months.
- Bottle: Once fermented to your desired flavor, transfer into bottles with lids (swing-top bottles work well). Store at room temperature or refrigerated, and enjoy.
Notes
This is a ratio-based recipe that scales to your vessel: fill halfway with apples/scraps, nearly fill with filtered water, and add 1 tbsp sugar per cup water (1 cup per gallon). Use filtered, non-chlorinated water. Cover with breathable material (not a sealed lid) and stir daily for the first two weeks to prevent mold. Keep dark and at warm room temperature. Cloudiness and a gelatinous ‘mother’ are signs of healthy live vinegar; discard if you see fuzzy mold or smell something truly off. Best for dressings, sauces, and drinking, not for home canning (raw vinegar’s acidity varies). Keeps over a year at room temperature or refrigerated. Fermenting time shown (60 days) is approximate; total is 2 to 3 months.
- Prep Time: 20 minutes
- Category: Condiment
- Method: Fermenting
- Cuisine: American