Is there any flavor combination quite as nostalgic and refreshing as mint and chocolate? It’s a debate that divides households, but if you are here, you know the truth: the cool, crisp bite of mint cutting through rich, velvety chocolate is the ultimate dessert experience.
This recipe for Homemade Mint Chocolate Ice Cream skips the fussy custard base (no eggs required!) and goes straight for flavor and creaminess. It is a “Philadelphia-style” ice cream, meaning it relies on the high fat content of heavy cream rather than egg yolks for its luscious texture. This makes it faster, easier, and arguably fresher tasting. Whether you are looking to cool down on a hot summer afternoon or simply craving a midnight treat, this mint chocolate ice cream comes together with minimal active effort but delivers maximum satisfaction.
Ingredients
To achieve that premium ice cream parlor texture, quality ingredients are essential. Here is what you need to get started:
| Ingredient | Quantity | Notes |
| Heavy Cream | 1 cup | Chilled; provides the rich fat content |
| Whole Milk | 1/2 cup | Do not use skim; fat is flavor here |
| Sugar | 3/4 cup | Granulated white sugar works best |
| Vanilla Extract | 1 tablespoon | Adds depth to the chocolate |
| Cocoa Powder | 1/3 cup | Unsweetened; use Dutch-processed for darker color |
| Mint Extract | 1/2 teaspoon | Peppermint extract is preferred |
| Chocolate Chips | Optional | Mini chips or chopped bar work best |

Timing
One of the best features of this recipe is how quickly the base comes together. However, patience is required for the freezing elements.
- Prep Time: 10 minutes
- Churn Time: 20–25 minutes (depending on machine)
- Freezing Time: 24 hours (for the bowl) + 1 hour (optional firming)
- Total Active Time: ~30 minutes
Context: While the total elapsed time seems long due to freezing the bowl, the actual work involved is less than making a batch of cookies!
Step-by-Step Instructions
Follow these steps to create a smooth, scoopable frozen dessert.
Step 1: Prepare the Equipment
Freeze the Cooling Bowl for 24 hours prior to use. This is the most critical step. If your cooling bowl isn’t completely frozen solid, the liquid will not churn into ice cream; it will remain a soup. Shake the bowl—if you hear liquid sloshing inside the walls, it needs more time in the freezer.
Step 2: Create the Chocolate Base
In a medium mixing bowl, whisk together the 1 cup heavy cream and 1/2 cup milk. Add the 3/4 cup sugar, 1 tablespoon vanilla extract, 1/3 cup unsweetened cocoa powder, and 1/2 teaspoon mint extract.
Tip: Sifting the cocoa powder before adding it prevents those stubborn little lumps of dry cocoa from forming in your cream.
Step 3: Dissolve and Smooth
Whisk the mixture vigorously for 3 to 4 minutes. You aren’t trying to whip air into it yet (the machine will do that), but you need to ensure the sugar is fully dissolved and the mixture is completely smooth. Rub a little mixture between your fingers; if it feels gritty, keep whisking.
Step 4: Chill the Base
Chill the mixture in the refrigerator until you are ready to make the ice cream. Even just 30 minutes helps. Starting with a cold base prevents ice crystals from forming and ensures a creamier final texture.
Step 5: Churn the Ice Cream
Turn on your Everyday Ice Cream Maker before pouring anything in. While the machine is churning, slowly pour the ice cream mixture into the Cooling Bowl through the Ingredient Chute.
Tip: If you are adding optional chocolate chips, wait until the last 2 minutes of churning to drop them in so they don’t clog the paddle.
Step 6: Serve or Firm Up
When the mixture is fully frozen and has risen to fill the Cooling Bowl (usually 15 to 25 minutes), the ice cream is ready to serve. At this stage, the texture will be similar to soft serve. If you prefer a traditional scoop-shop consistency, transfer the ice cream to a separate airtight container and freeze for an additional hour.
Serve and enjoy—this delicious ice cream is just mint to be!
Nutritional Information
Here is an estimated nutritional breakdown per serving (based on 4 servings):
- Calories: ~380 kcal
- Fat: 25g (Saturated: 15g)
- Carbohydrates: 38g
- Sugars: 32g
- Protein: 3g
- Cholesterol: 80mg
Note: Cocoa powder provides antioxidants, while calcium is present from the milk and cream.
Healthier Alternatives
If you want to enjoy this treat with a lighter nutritional footprint, try these modifications:
- Dairy Swap: For a lighter version, swap the heavy cream for half-and-half. The texture will be slightly less creamy and more icy (like ice milk), but significantly lower in calories.
- Sugar Substitute: You can replace the granulated sugar with monk fruit sweetener or allulose. Allulose is particularly good for ice cream as it doesn’t crystallize as hard as other sweeteners when frozen.
- High Protein: Blend in a scoop of chocolate whey protein powder during the whisking stage. You may need to add a splash more milk to adjust the consistency.
- Dairy-Free/Vegan: Substitute the heavy cream with full-fat canned coconut milk and the milk with almond or oat milk. Ensure your cocoa powder and chips are vegan-certified.
Serving Suggestions
Elevate your homemade ice cream with these serving ideas:
- The Classic Cone: Serve in a waffle cone dipped in melted dark chocolate for a double-chocolate crunch.
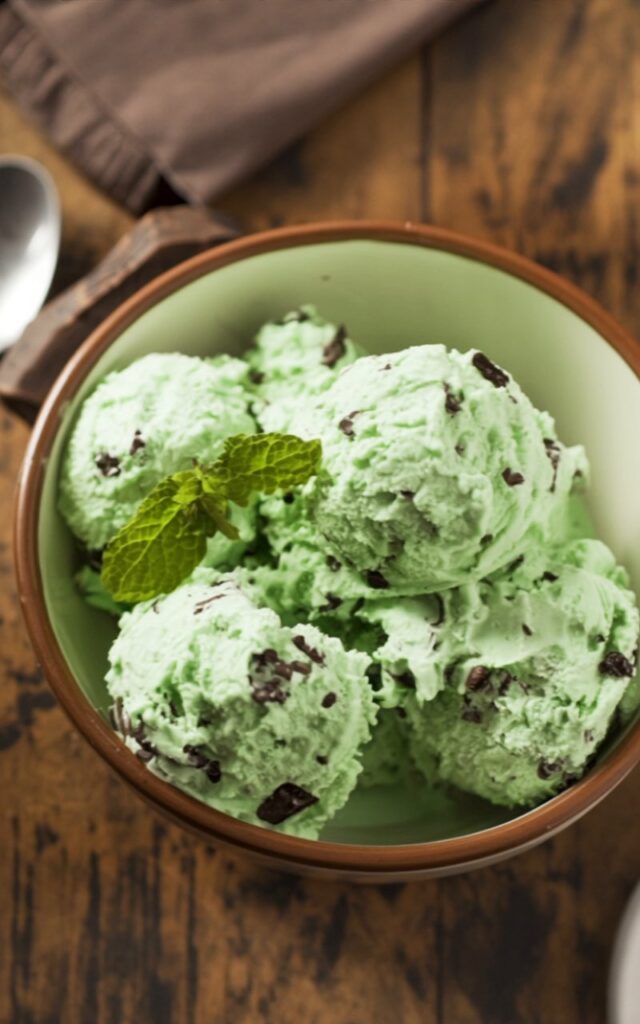
- Mint Garnish: Place a fresh sprig of mint on top. The aroma of the fresh herb amplifies the mint extract in the cream.
- Hot & Cold: Drizzle hot fudge sauce over the cold ice cream. The contrast between the hot sauce and the cold mint ice cream is a sensory delight.
- Sandwich It: Smash a scoop between two chocolate cookies or brownies for a decadent ice cream sandwich.
Common Mistakes to Avoid
Making ice cream is science. Here is how to avoid the common variables that ruin the experiment:
- The Bowl Wasn’t Cold Enough: This is the #1 error. Solution: Keep your freezer bowl in the coldest part of your freezer (the back) for a full 24 hours. Do not cheat on this time.
- Overdoing the Mint: Mint extract is potent. Too much can make your dessert taste like toothpaste. Solution: Measure carefully. Start with 1/2 teaspoon; you can always add a drop more, but you can’t take it out.
- Over-churning: Leaving the machine running too long can actually turn the cream into butter. Solution: Stop as soon as it looks like soft serve.
- Adding Chips Too Early: If added at the start, chips can sink or jam the paddle. Solution: Add mix-ins only when the ice cream is thick and almost done.
Storing Tips
Homemade ice cream lacks the stabilizers found in commercial brands, so storage is key to maintaining texture.
- Container: Use a shallow, flat container rather than a deep tub. This promotes even freezing.
- Surface Protection: Press a piece of plastic wrap or parchment paper directly onto the surface of the ice cream before putting the lid on. This prevents ice crystals from forming on top.
- Shelf Life: Homemade ice cream is best enjoyed within 1 to 2 weeks. After that, it may become grainy or pick up freezer odors.
- Serving: If frozen solid, let the container sit on the counter for 5–10 minutes before scooping to soften slightly.
Conclusion
This Homemade Mint Chocolate Ice Cream proves that you don’t need eggs or heat to create a decadent, professional-quality dessert. It is rich with cocoa, refreshing with mint, and incredibly smooth thanks to the heavy cream base. It’s the perfect recipe for beginners and seasoned dessert lovers alike.
We hope you enjoy making and savoring this dish as much as we do. Try it out and let us know in the comments how it turned out for you! We’d love to hear your feedback. Don’t forget to rate the recipe and subscribe to our blog for more delicious, healthy recipes delivered straight to your inbox.
FAQs
Q1. Can I make this without an ice cream maker?
Yes, though the texture will be slightly different. Pour the chilled mixture into a shallow dish and freeze. Every 30 minutes, take it out and whisk it vigorously with a fork to break up ice crystals. Repeat this for about 3 hours until frozen. This is known as the “granita” or hand-churn method.
Q2. Can I use fresh mint leaves instead of extract?
Absolutely. To use fresh mint, heat the milk (not the cream) and steep a handful of fresh mint leaves in it for 20 minutes. Strain the leaves out, let the milk cool completely, and then proceed with the recipe. This gives a more herbaceous, natural mint flavor compared to the sharp punch of extract.
Q3. Why does my homemade ice cream get so hard in the freezer?
Commercial ice cream contains air (overrun) and softeners. Your homemade version is denser. To keep it softer, you can add 1 tablespoon of vodka (alcohol doesn’t freeze) or liquid glucose/corn syrup in place of some sugar, which lowers the freezing point.
Print
Homemade Mint Chocolate Ice Cream: Rich, Creamy & Easy
Skip the eggs and custard cooking with this easy, Philadelphia-style Mint Chocolate Ice Cream. Made with heavy cream, cocoa powder, and refreshing mint extract, this recipe delivers a creamy, soft-serve texture in under 30 minutes of active time.
- Total Time24 hours 35 minutes
- Yield4 servings 1x
Ingredients
Ice Cream Base
- 1 cup heavy cream (chilled)
- 0.5 cup milk (whole milk preferred)
- 0.75 cup sugar (granulated)
- 1 tbsp vanilla extract
- 0.33 cup unsweetened cocoa powder (sifted)
- 0.5 tsp mint extract (peppermint)
- 0.5 cup chocolate chips (optional)
Instructions
- Freeze the Equipment: Freeze the Cooling Bowl for 24 hours prior to use to ensure proper freezing.
- Whisk the Base: In a medium bowl, whisk together the heavy cream and milk. Add the sugar, vanilla extract, cocoa powder, and mint extract. Whisk for 3 to 4 minutes until sugar is dissolved and mixture is smooth.
- Chill: Chill the mixture in the refrigerator for at least 30 minutes until ready to make ice cream.
- Churn: Turn on the Everyday Ice Cream Maker. While the machine is churning, slowly pour the ice cream mixture into the Cooling Bowl through the Ingredient Chute.
- Finish and Serve: When the mixture is fully frozen (approx 20 mins) and has risen to fill the Cooling Bowl, the ice cream is ready. Serve immediately for soft serve texture, or freeze in a separate container for 1 hour for firmer consistency.
Notes
Ensure your cooling bowl is completely frozen solid; if you hear liquid sloshing, it needs more time.
- Prep Time: 10 minutes
- Cook Time: 25 minutes
- Category: Dessert, Snack
- Cuisine: American
Nutrition
- Calories: 380
- Sugar: 32
- Sodium: 40
- Fat: 25
- Saturated Fat: 15
- Carbohydrates: 38
- Fiber: 2
- Protein: 3
- Cholesterol: 80