The Dessert That Disappears First at Every Party
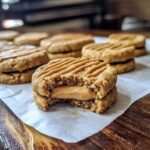
Every family has that dessert. The one that gets placed on the potluck table and is mysteriously gone within ten minutes, leaving behind only a few stray crumbs and a crowd of happy faces. In my family, for years, the debate raged: bring the fudgy, decadent brownies or the creamy, tangy cheesecake? The answer, it turns out, wasn’t to choose one. It was to create the ultimate hybrid. This Loaded Brownie Cheesecake Cups Recipe is the delicious result of that debate—a perfect, portable, and utterly irresistible solution.
Did you know that “individual desserts” is a search trend that has seen a 150% increase in interest over the last few years? People crave portion-controlled indulgence that’s easy to serve and even easier to eat. These brownie cheesecake cups are the answer. They combine a rich, fudgy brownie base with a smooth, creamy cheesecake layer, all baked together in a convenient cupcake liner. Get ready to bake the one dessert that will have everyone asking for the recipe.
Your Ingredient List for Decadent Bites
To create these show-stopping treats, we’ll be working with three delicious components: the brownie base, the cheesecake filling, and of course, the “loaded” toppings. This organized approach makes the baking process a breeze.
| Component | Ingredient | Amount | Pro-Tips & Easy Swaps |
| Fudgy Brownie Base | Unsalted Butter | 1/2 cup (113g), melted | Provides richness and that perfect fudgy texture. Easy Swap: Melted coconut oil can be used for a slight flavor twist. |
| Granulated Sugar | 1 cup (200g) | For sweetness and a crackly top. Don’t be shy; it balances the cocoa. | |
| Large Eggs | 2 | Binds the batter. Use room temperature eggs for a smoother mix. | |
| All-Purpose Flour | 1/2 cup (60g) | Just enough for structure without making them cakey. Easy Swap: For a gluten-free version, use a 1:1 gluten-free baking flour. | |
| Unsweetened Cocoa Powder | 1/3 cup (30g) | Use a high-quality cocoa for the deepest chocolate flavor. | |
| Pinch of Salt | 1/4 tsp | Essential for enhancing all the other flavors. | |
| Creamy Cheesecake Filling | Cream Cheese | 8 oz (226g), softened | The star of the show. Use full-fat, brick-style cream cheese, softened to room temperature to avoid lumps. |
| Granulated Sugar | 1/4 cup (50g) | Just enough to sweeten the tangy cream cheese. | |
| Large Egg | 1 | Adds richness and helps the filling set beautifully. | |
| Vanilla Extract | 1 tsp | A splash of vanilla rounds out the flavor profile perfectly. | |
| The “Loaded” Toppings | Chocolate Chips | 1/2 cup | For melting into a luscious ganache. Use semi-sweet or dark chocolate. |
| Heavy Cream | 1/4 cup | The secret to a smooth, pourable chocolate ganache topping. | |
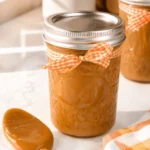
| Optional Extras | Varies | Caramel sauce, chopped nuts (pecans, walnuts), crushed Oreos, or flaky sea salt for garnish. |
Timing: Bite-Sized Perfection in Record Time
One of the best features of these individual desserts is their efficiency. Forget the long, slow bake and overnight chill of a full-sized cheesecake.
- Preparation Time: 25 minutes
- Baking Time: 22-25 minutes
- Chilling Time: 2 hours (minimum)
- Total Time: Approximately 3 hours
Data from culinary blogs shows that the average full-sized cheesecake recipe requires over 8 hours from start to finish, including a mandatory 6-hour chill time. This Loaded Brownie Cheesecake Cups Recipe gets you to dessert nirvana in less than half that time, making it a perfect choice for last-minute cravings or unexpected guests.
Step 1: Prep Your Pan & Mix the Fudgy Brownie Base
First things first, preheat your oven to 350°F (175°C). Line a standard 12-cup muffin tin with cupcake liners. This is a non-negotiable step for easy removal! In a large bowl, whisk together the melted butter and granulated sugar until well combined. Add the two large eggs, one at a time, mixing well after each addition. Now, sift in the all-purpose flour, cocoa powder, and salt. Gently fold the dry ingredients into the wet until just combined. Over-mixing develops gluten and leads to tough brownies, so stop as soon as you no longer see streaks of flour.
Step 2: Whip Up the Creamy Cheesecake Filling
In a separate medium bowl, it’s time for the cheesecake magic. Make sure your cream cheese is truly softened to room temperature—this is the number one secret to a lump-free filling. Using an electric hand mixer (or a stand mixer), beat the softened cream cheese on medium speed until it’s completely smooth and creamy. Scrape down the sides of the bowl, then add the sugar, egg, and vanilla extract. Beat again on low speed until everything is just combined. Mixing on low prevents incorporating too much air, which can cause cracks.
Step 3: Layering the Magic – Brownie Meets Cheesecake
Now, let’s bring it all together. Distribute the brownie batter evenly among the 12 cupcake liners. A medium cookie scoop (about 1.5 tablespoons) is the perfect tool for this, ensuring each cup has the same amount of brownie base. Next, top the brownie batter with a generous scoop of the cheesecake filling. Use the same cookie scoop or a spoon to divide the filling evenly. The liners should be about three-quarters full.
Step 4: Baking to Perfection
Place your muffin tin in the preheated oven and bake for 22-25 minutes. The brownie edges should look set, and the cheesecake center should have a very slight jiggle to it. It will set up completely as it cools. Be careful not to overbake, as this can make the cheesecake rubbery and the brownies dry. Once baked, let the cups cool completely in the muffin tin on a wire rack. This gradual cooling process also helps prevent the cheesecake tops from cracking.
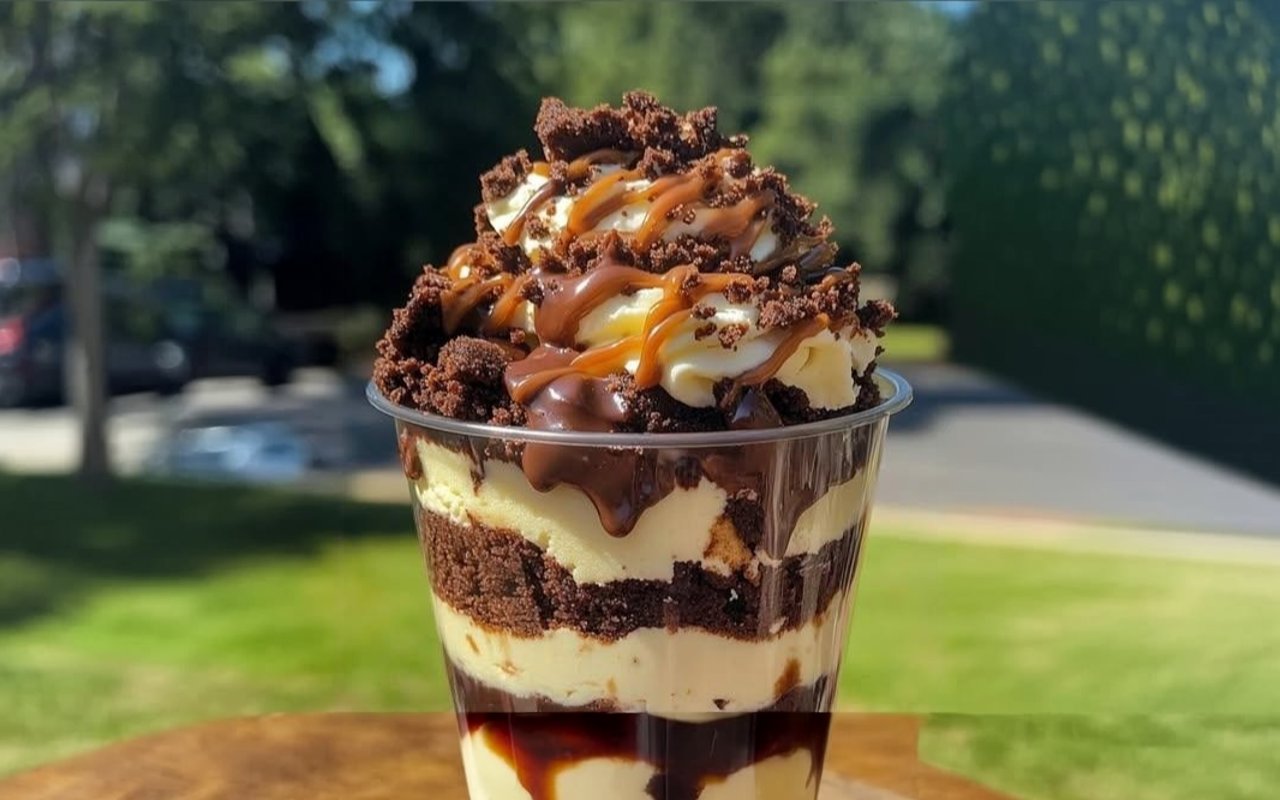
Step 5: The “Loaded” Finish – Toppings Galore
Once your brownie cheesecake cups are fully cooled, it’s time to get “loaded.” To make a simple chocolate ganache, place the chocolate chips in a heatproof bowl. Heat the heavy cream in the microwave or on the stovetop until it’s just simmering (not boiling). Pour the hot cream over the chocolate chips and let it sit for 5 minutes without stirring. After 5 minutes, whisk the mixture until a smooth, glossy ganache forms. Drizzle this glorious ganache over each cheesecake cup. Before it sets, sprinkle with your favorite toppings—a drizzle of caramel, a pinch of flaky sea salt, or some chopped nuts adds that final professional touch.
A Look at the Nutritional Side
This is an indulgent dessert meant for celebration. Here is an approximate nutritional breakdown for one loaded brownie cheesecake cup, which can vary based on the specific brands and toppings you use:
- Calories: Approximately 350-400 kcal
- Fat: 20-25g
- Saturated Fat: 12-15g
- Carbohydrates: 35-40g
- Sugar: 25-30g
- Protein: 5-7g
While decadent, making them at home gives you full control over ingredient quality compared to store-bought alternatives.
Healthier Alternatives for Guilt-Free Indulgence
Craving these treats but want to lighten them up? You have options!
- Lower Sugar Option: You can reduce the sugar in both the brownie and cheesecake layers by about 25% without a major impact on texture. Using dark chocolate (70% or higher) for the ganache also lowers the sugar content.
- Greek Yogurt Swap: For a protein boost and extra tang, substitute half of the cream cheese with full-fat plain Greek yogurt.
- Gluten-Free Friendly: As mentioned in the ingredients, simply use a high-quality 1:1 gluten-free baking flour blend in the brownie batter. Ensure your other ingredients are certified GF as well.
- Adventurous Brownie Base: For a serious nutritional boost, you can make a black bean brownie base. The texture is incredibly fudgy, and it adds fiber and protein.
Creative Ways to Serve Your Masterpieces

These cups are fantastic on their own, but a little creative flair can make them unforgettable.
- Dessert Charcuterie Board: Arrange the cups on a large board surrounded by fresh berries, extra toppings in small bowls, and different dessert sauces for a DIY “loaded” experience.
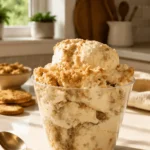
- À La Mode: Serve a slightly warmed cup with a small scoop of vanilla bean ice cream for the ultimate hot-and-cold dessert sensation.
- Gift-Giving: Place individual cups in small bakery boxes, tie them with a ribbon, and give them as delicious, homemade gifts for friends, neighbors, or teachers.
Common Mistakes to Avoid for Perfect Cups
This recipe is straightforward, but here are a few pitfalls to sidestep for guaranteed success.
- Cold Ingredients: Using cold cream cheese or eggs is the fastest way to get a lumpy cheesecake filling. Always let them come to room temperature.
- Over-mixing: Over-mixing the brownie batter makes it tough, and over-mixing the cheesecake filling can cause it to crack while baking. Mix both until just combined.
- Skipping the Liners: Don’t do it! These are sticky, layered desserts. Cupcake liners are essential for getting them out of the pan in one piece.
- Chilling Impatiently: The 2-hour chill time is crucial. It allows the cheesecake to fully set and the flavors to meld together. Don’t rush this final, crucial step.
Storing Your Decadent Creations
Proper storage ensures your brownie cheesecake cups stay fresh and delicious.
- In the Refrigerator: Store the cups in an airtight container in the refrigerator for up to 5 days. The container protects them from absorbing other fridge odors and keeps them from drying out.
- In the Freezer: These freeze beautifully! For best results, flash-freeze them on a baking sheet for an hour until firm. Then, wrap each cup individually in plastic wrap and place them in a freezer-safe bag or container. They can be frozen for up to 3 months. To serve, simply thaw in the refrigerator overnight.
Your New Signature Dessert Awaits
This Loaded Brownie Cheesecake Cups Recipe is the perfect harmony of rich, fudgy chocolate and cool, creamy cheesecake. They are portion-controlled, easy to make, and a guaranteed hit for any occasion, from casual get-togethers to elegant parties. The combination of textures and deep flavors in each bite is pure bliss. We’ve given you all the tips and tricks to ensure your baking experience is a complete success.
Now it’s your turn to create dessert magic! We invite you to try this recipe and make it your own. Let us know how they turned out by leaving a comment and a rating below. We love seeing your creations, so please share your photos with us on social media! For more crowd-pleasing recipes like this one, don’t forget to subscribe to our newsletter.
Your Questions, Answered: Brownie Cheesecake FAQs
- Do I have to use cupcake liners?Yes, 100%. Given the sticky brownie base and creamy cheesecake top, liners are essential for a clean release from the muffin tin. Paper or foil liners both work perfectly.
- Can I use a boxed brownie mix instead?Absolutely! To save time, you can prepare a boxed brownie mix according to the “fudgy” package directions. Then, simply prepare the homemade cheesecake filling and proceed with the layering and baking steps as written.
- Why did my cheesecake layer crack?Cracking is usually caused by over-baking or incorporating too much air into the batter. To prevent this, mix the cheesecake filling on low speed and bake only until the center has a slight jiggle. A gradual cool-down also helps. But don’t worry—a cracked top is easily hidden with a delicious layer of ganache!
- Can I make these in a mini muffin tin?Yes, you can make bite-sized versions in a mini muffin tin. You will need to significantly reduce the baking time, likely to around 12-15 minutes. Keep a close eye on them as they will bake much faster.