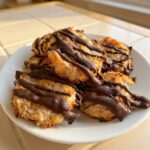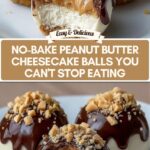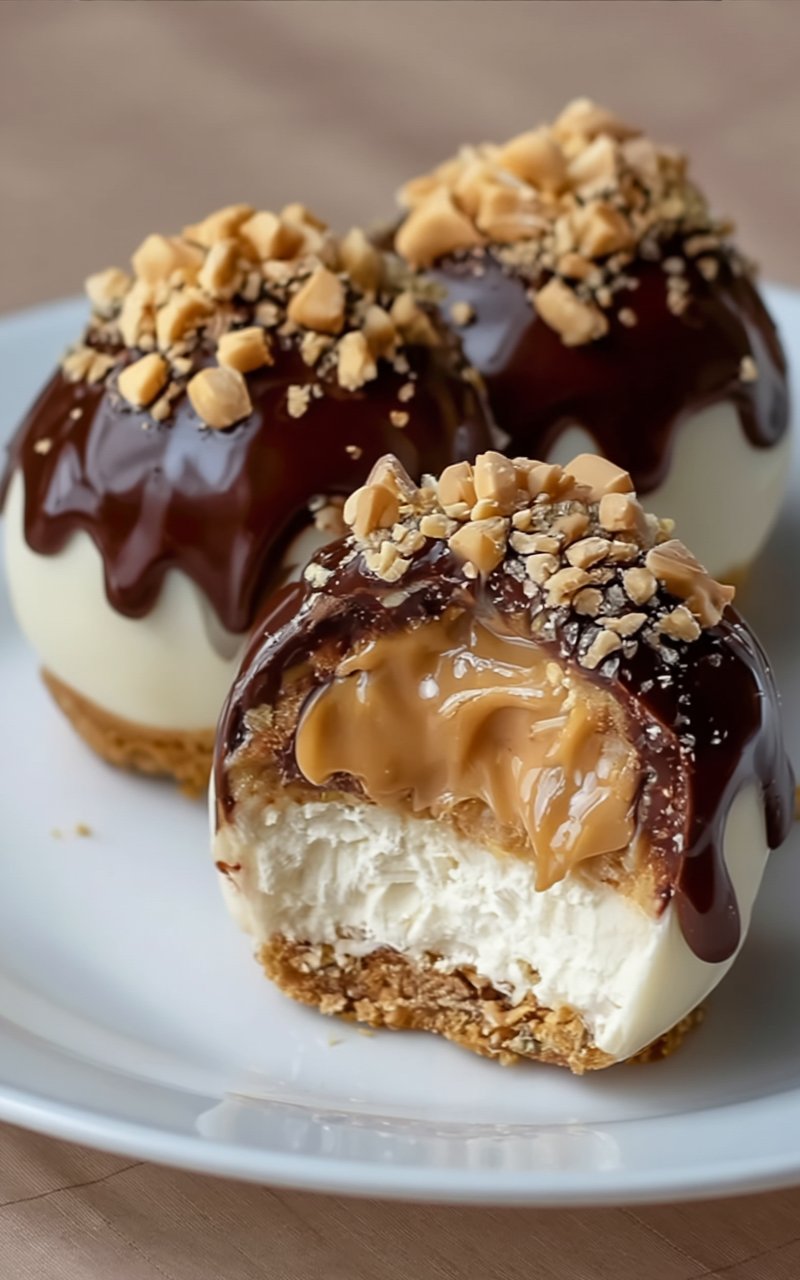
I need to be honest with you before we start. These no-bake peanut butter cheesecake balls are dangerous. Not in a cute, exaggerated food-blogger way. In a very real, I-made-a-batch-and-they-were-gone-by-Tuesday way. A creamy cheesecake shell wrapped around a salty-sweet peanut butter center, all dipped in glossy dark chocolate and sprinkled with crushed peanuts. No oven required. No self-control left.
I originally made these for a friend’s party. Brought 24. Came home with the empty tray and exactly zero leftovers. Someone actually asked me to start a business. I’m still thinking about it.
The Five Layers of What Makes These Ridiculous
Here’s everything that goes into building these little bite-sized masterpieces — five component groups, all simple, all working together beautifully.
Cheesecake Base
| Ingredient | Amount | What You’re Getting |
|---|---|---|
| Graham cracker crumbs | 1½ cups (~150g) | Buttery, toasty crunch at the bottom of every bite |
| Unsalted butter, melted | 6 tbsp | Holds those crumbs together like golden glue |
| Granulated sugar | 2 tbsp | A whisper of sweetness in the crust |
Cheesecake Filling
| Ingredient | Amount | What You’re Getting |
|---|---|---|
| Cream cheese, softened | 8 oz (225g) | The tangy, velvety heart of the whole thing |
| Granulated sugar | ¼ cup | Smooth sweetness without being heavy |
| Vanilla extract | ½ tsp | That warm, round finish |
| Heavy cream or whipping cream | ⅓ cup | Whipped into clouds, folded in for airiness |
Peanut Butter Core
| Ingredient | Amount | What You’re Getting |
|---|---|---|
| Creamy peanut butter | ½ cup | Rich, salty, melty — the surprise center |
| Powdered sugar | 2 tbsp | Makes it just firm enough to roll into balls |
| Salt | A pinch | The thing that makes peanut butter taste more like peanut butter |
Chocolate Coating
| Ingredient | Amount | What You’re Getting |
|---|---|---|
| Semi-sweet chocolate chips or dark chocolate | 1 cup | Snappy, glossy, gorgeous shell |
| Vegetable oil or coconut oil | 1 tbsp | Thins the chocolate for that perfect smooth dip |
Garnish (Optional but Highly Recommended)
| Ingredient | The Vibe |
|---|---|
| Chopped peanuts, toasted | Salty crunch on every glossy surface |
| Melted peanut butter drizzle | Over-the-top beautiful and peanut-buttery |

Where People Go Wrong With These (So You Don’t)
These are genuinely easy — but “easy” doesn’t mean “impossible to mess up.” A few quick saves before you dive in:
Warm cream cheese. If your cream cheese isn’t properly softened to room temperature, you’ll get lumps in your filling that no amount of mixing will fix. Set it out at least an hour before you start. Microwave shortcuts lead to melty edges and cold centers — not worth the gamble.
Over-whipping the cream. You want soft peaks, not stiff. Over-whipped cream gets grainy and won’t fold smoothly into the cheesecake mixture. The second it holds a gentle droop when you lift the whisk — stop.
Skipping the freeze before dipping. Those 15 minutes in the freezer before the chocolate coating aren’t optional. Warm cheesecake balls will melt into your chocolate and turn the whole thing into a messy puddle. Cold balls = clean, even coating.
Chocolate that’s too hot. Let your melted chocolate cool for a couple of minutes before dipping. Screaming hot chocolate will start melting the cheesecake on contact. You want it fluid but not fiery.
Rushing the final chill. A full hour in the fridge after coating. That’s what gives you the satisfying snap when you bite through the chocolate shell.
Let’s Build These, Layer by Beautiful Layer
Time commitment: 30 minutes hands-on, about 2 hours total with all the chilling. No oven. No baking. Just bowls, a fridge, and a little patience.
Step 1: Build the Buttery Base
Toss your graham cracker crumbs, sugar, and melted butter into a bowl and stir until everything is coated and looks like wet sand. Press a small spoonful into silicone molds or mini muffin cups — just enough to form a thin, compact layer at the bottom. Pop them into the fridge to firm up while you work on the next layer.
Pro tip: Silicone molds are your best friend here. They make unmolding effortless. If you’re using mini muffin tins, line them with plastic wrap or small cupcake liners so nothing sticks.
Step 2: Whip Up That Dreamy Cheesecake Layer
Beat your softened cream cheese with the sugar until it’s impossibly smooth — no lumps, no graininess. Mix in the vanilla. In a separate bowl, whip the heavy cream until it hits those soft, pillowy peaks. Now gently fold the whipped cream into the cream cheese mixture with a spatula. Don’t stir — fold. You’re keeping all that air in there, and that air is what gives these their light, mousse-like texture.
Spoon the filling into your chilled molds on top of the crust, but leave a small hollow in the center for the peanut butter surprise. Back into the fridge they go.
Step 3: Roll the Peanut Butter Hearts
In a small bowl, stir together the peanut butter, powdered sugar, and salt until you’ve got a smooth, slightly firm mixture. Roll it into tiny marble-sized balls. Take one and gently press it into the center of each cheesecake mold, then smooth the top with the back of a spoon or a small spatula so everything is flush.
Chill for at least 30 minutes until everything is firm to the touch. If you’re impatient (no judgment), the freezer will get you there in about 15 minutes.
Step 4: Unmold and Freeze Briefly
Carefully pop the cheesecake balls out of their molds and set them on a parchment-lined tray. They should feel solid and hold their shape easily. Slide the tray into the freezer for 15 minutes — this quick blast of cold is what gives you a flawless chocolate coating in the next step.
Step 5: Dip Into That Glossy Chocolate Shell
Melt your chocolate and oil together in 30-second microwave bursts, stirring between each one until everything is smooth, shiny, and absolutely gorgeous. Let it cool for just a minute or two — you want it pourable but not blazing hot.
Dip each frozen cheesecake ball into the chocolate. You can submerge them completely with a fork or spoon, or drizzle the chocolate over the top for a more artistic look. Immediately scatter those toasted peanut bits on top before the chocolate sets — you’ve got about 20 seconds, so work quickly.
Set them back on the parchment-lined tray.
Step 6: The Final Chill (Almost There)
Refrigerate for at least 1 hour until the chocolate is completely firm and gives you that satisfying snap when you bite in. Before serving, let them sit at room temperature for 5–10 minutes — this softens the cheesecake filling just enough so the texture goes from firm to creamy, which is exactly where you want it.
Plate them up with a drizzle of melted peanut butter or caramel sauce across the plate. Watch people lose their minds.

Per Ball, Here’s What You’re Looking At
Based on approximately 12 cheesecake balls:
- Calories: ~260 kcal
- Total Fat: 19g
- Saturated Fat: 10g
- Carbohydrates: 20g
- Sugar: 14g
- Protein: 5g
- Sodium: 135mg
- Cholesterol: 30mg
For a dessert that tastes this indulgent, 260 calories per ball is honestly pretty reasonable — especially since one or two genuinely satisfies. The peanut butter gives you a nice little hit of protein too, which helps balance all that richness.
Picture These On Your Table
- Stacked on a cake stand at a dinner party — they look like truffles from a fancy chocolate shop.
- Nestled in a small box with wax paper as a homemade gift — infinitely more impressive than store-bought.
- On a platter alongside fresh strawberries and salted pretzels for a sweet-and-salty dessert board.
- With a tiny cup of strong espresso — the bitterness plays off the peanut butter and chocolate perfectly.
- Frozen solid and eaten straight from the freezer on a hot summer night — trust me on this one.
These Are Your New Signature Move
Here’s what I love most about these no-bake peanut butter cheesecake balls: they look like you spent all day in a pastry kitchen, but the reality is a few bowls, a fridge, and about 30 minutes of real work. They’re the kind of dessert that earns you a reputation — the person who always brings those to the party.
Make a batch this weekend. Double it if you’re sharing. And please, please come back and tell me how they disappeared — because they will. Drop a comment, rate the recipe, share a photo of those glossy little beauties. I want to hear everything. Now go fill your fridge with something extraordinary.
Print
No-Bake Peanut Butter Cheesecake Balls
Creamy, tangy cheesecake wrapped around a salty-sweet peanut butter center, coated in glossy dark chocolate and topped with crushed peanuts. No oven needed — just a few bowls, a fridge, and about 30 minutes of hands-on work for a dessert that looks and tastes like it came from a professional pastry shop.
- Total Time2 hours 30 minutes
- Yield12 cheesecake balls 1x
Ingredients
Cheesecake Base
- 1½ cups (about 150g) graham cracker crumbs
- 6 tablespoons unsalted butter, melted
- 2 tablespoons granulated sugar
Cheesecake Filling
- 8 oz (225g) cream cheese, softened to room temperature
- ¼ cup granulated sugar
- ½ teaspoon vanilla extract
- ⅓ cup heavy cream or whipping cream
Peanut Butter Core
- ½ cup creamy peanut butter
- 2 tablespoons powdered sugar
- A pinch of salt
Chocolate Coating
- 1 cup semi-sweet chocolate chips or dark chocolate, chopped
- 1 tablespoon vegetable oil or coconut oil
Garnish (Optional)
- ¼ cup chopped peanuts, toasted
- A drizzle of melted peanut butter
Instructions
- Prepare the Base: Combine graham cracker crumbs, sugar, and melted butter until mixture resembles wet sand. Press a small amount into the bottom of silicone molds or mini muffin cups. Refrigerate to firm up while preparing the filling.
- Make the Cheesecake Layer: Beat softened cream cheese and sugar until smooth and creamy. Mix in vanilla extract. In a separate bowl, whip heavy cream to soft peaks. Gently fold whipped cream into the cream cheese mixture. Spoon filling into chilled molds on top of the crust, leaving a small hollow in the center. Return to the refrigerator.
- Prepare the Peanut Butter Filling: Mix peanut butter, powdered sugar, and a pinch of salt until smooth. Roll into marble-sized balls. Press one peanut butter ball into the center of each cheesecake mold and smooth the top. Chill for at least 30 minutes or freeze for 15 minutes until firm.
- Remove and Shape: Carefully unmold the cheesecake balls and place on a parchment-lined tray. Freeze for about 15 minutes before coating to help the chocolate adhere.
- Prepare the Chocolate Coating: Melt chocolate and oil together in 30-second microwave intervals, stirring between each until smooth. Let cool slightly. Dip each chilled cheesecake ball into the melted chocolate and place back on the tray. Immediately sprinkle with chopped toasted peanuts before the chocolate sets.
- Chill and Serve: Refrigerate coated cheesecake balls for at least 1 hour until fully set. Let sit at room temperature for 5–10 minutes before serving to soften slightly. Serve with a drizzle of melted peanut butter or caramel sauce.
Notes
Cream cheese must be fully softened to room temperature for a smooth, lump-free filling. Whip heavy cream to soft peaks only — over-whipping makes the texture grainy. Freeze cheesecake balls for 15 minutes before dipping in chocolate for a clean, even coating. Store in the refrigerator for up to 5 days or freeze for up to 1 month. Let frozen balls thaw in the fridge for 1 hour before serving.
- Prep Time: 30 minutes
- Category: Dessert, Snack
- Cuisine: American
Nutrition
- Calories: 260
- Sodium: 135
- Saturated Fat: 10
- Protein: 5
- Cholesterol: 30