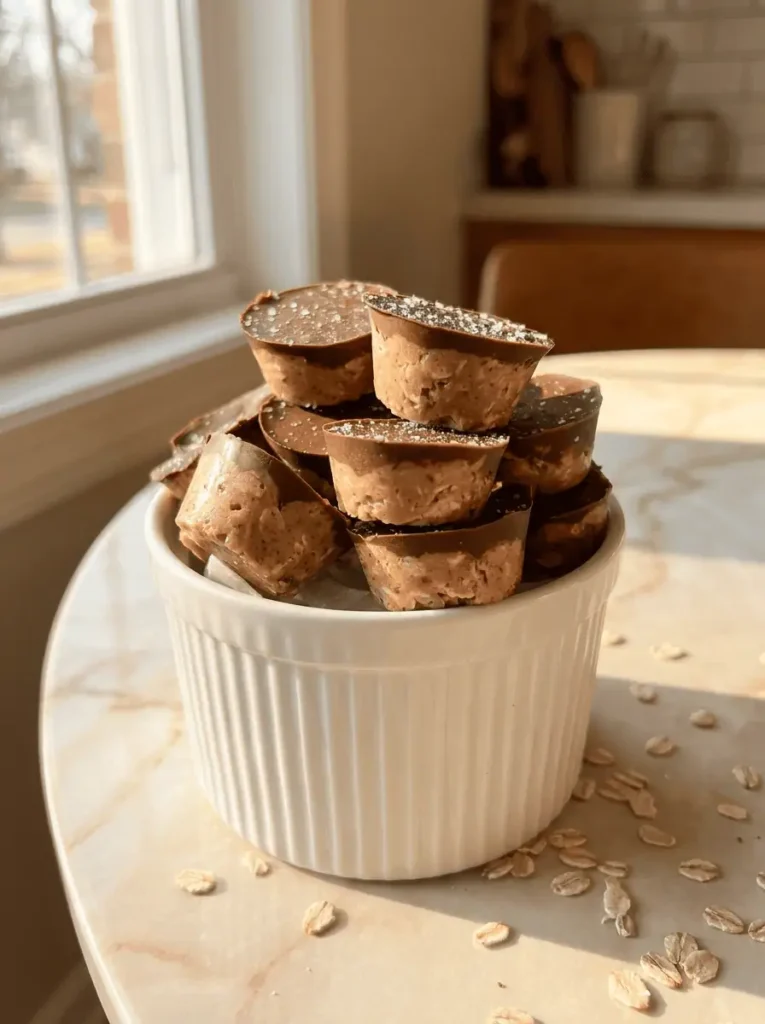
If you love the chocolate-and-peanut-butter combination, these are about to become a staple in your freezer. No-bake peanut butter oat cups are little two-layer bites: a soft, chewy peanut butter oat base topped with a layer of set chocolate, finished with a sprinkle of flaky sea salt. They come together in about 10 minutes of hands-on work, they’re made from just a handful of wholesome ingredients, and they’re packed with protein, which makes them a genuinely satisfying grab-and-go snack as much as a treat. No oven required, just mix, press, top, and freeze.
These are the kind of thing that’s dangerous to have around in the best way. They taste like a homemade peanut butter cup crossed with a chewy oatmeal cookie, but they’re built on oats, peanut butter, chia seeds, and protein powder, so they actually keep you full. Make a batch on the weekend and you’ve got a week’s worth of snacks ready to pull from the freezer whenever a craving hits, which is exactly what makes them so handy.
Why these work so well
A couple of simple things make these bites both delicious and genuinely useful as a snack, and they’re worth understanding.
The base is a no-bake oat dough that gets its structure from the balance of dry and sticky ingredients rather than from baking. Oats and protein powder provide the body and chew, while peanut butter and maple syrup (or honey) bind everything together and add richness and sweetness. The chia seeds are a quiet helper here: they absorb moisture and help hold the mixture together, while adding fiber and healthy fats. Getting the texture right is the one thing to pay attention to, you want a dough that’s moist enough to press together and hold its shape, but not so sticky it won’t set, and you can adjust with a little more nut butter or syrup if it’s dry.
Because protein powders vary so much in how much liquid they absorb, the recipe is smart to tell you to adjust. If your dough feels dry and crumbly, a little extra nut butter or sweetener brings it together; if it’s too wet, a few more oats firm it up. Trust the feel of the dough over the exact measurements.
The chocolate layer is simply melted chocolate chips, with a little coconut oil if needed to thin it so it pours and sets smoothly. Freezing is what sets everything: the base firms up and the chocolate hardens into a satisfying snap, and it’s also how you store them, so they stay firm and ready.
What goes in
The ingredients split into the oat base and the chocolate top.

For the oat base, you’ll need quick oats, peanut butter (or almond butter), maple syrup or honey, chia seeds, protein powder, vanilla, and a good pinch of sea salt. Optional add-ins like cinnamon, mini chocolate chips, cacao nibs, or raisins are a nice touch.
For the chocolate layer, just chocolate chips and a little coconut oil to thin them if needed.
A few notes. Use quick oats for the right soft texture; if you only have old-fashioned rolled oats, pulse them in a food processor a few times to break them down. Use a protein powder flavor you actually like, since it comes through, vanilla or chocolate both work well. For a nut-free version, swap in sunflower seed butter. And use good chocolate chips, since the chocolate layer is half the appeal; dark, milk, or semisweet all work depending on your taste.
How to make them
In a large bowl, combine all the oat base ingredients and mix until well combined. Now check the texture: depending on your protein powder, you may need to add an extra tablespoon or two of nut butter or syrup to get a moist, pressable dough. You’re aiming for a mixture that holds together when pressed but isn’t overly sticky, not dry and crumbly, not wet and loose.
Get a silicone mini muffin tin, which makes the cups easy to pop out later. If yours isn’t silicone, use parchment muffin liners or spray the tin really well with oil so they release. Divide the oat mixture among the cups, filling each about two-thirds of the way and pressing it down so it’s compact.
Melt the chocolate. Combine the chocolate chips and coconut oil in a small bowl and microwave in 30-second bursts, stirring well between each, until completely smooth (or use a double boiler). Spoon the melted chocolate over each cup, filling the last third so the chocolate covers the oat layer.
Place the tray in the freezer for at least 2 to 3 hours, until fully set, before popping the cups out of the pan. Sprinkle the tops with a little flaky sea salt, which makes the chocolate and peanut butter pop, and you’re done.
Tips and storing
A few things help. Pay attention to the dough texture and adjust as needed, since that’s the main variable and it depends on your specific protein powder and nut butter. Press the base firmly into the cups so they hold together. And if you want clean layers, let the oat base chill in the freezer for a few minutes before adding the chocolate, so the chocolate sits on top rather than sinking in.
The flaky sea salt on top is a small finishing touch that makes a real difference, balancing the sweetness and bringing out both the chocolate and the peanut butter. Don’t skip it if you have it.
These live in the freezer, which is part of their charm as a make-ahead snack. Store them in an airtight container in the freezer, where they’ll keep for a couple of months. Because they’re frozen, they’re ready whenever you want one, and they soften just enough to eat after a minute or two out of the freezer, or you can enjoy them firm and cold straight away. They don’t hold up as well at room temperature for long stretches, since the base is soft, so the freezer is their home.
This makes about a dozen mini cups, depending on your pan. Chewy, chocolatey, peanut-buttery, and protein-packed, these no-bake peanut butter oat cups are proof that an easy, wholesome snack can taste just like a treat, and they might just earn a permanent spot in your weekly routine.
Print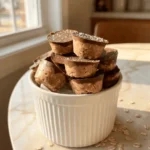
No-Bake Peanut Butter Oat Cups
No-bake peanut butter oat cups are two-layer bites with a chewy peanut butter oat base and a set chocolate top, finished with flaky sea salt. Made from a handful of wholesome ingredients in 10 minutes, they’re a protein-packed grab-and-go snack or treat.
- Total Time3 hours 10 minutes
- Yield12 cups 1x
- DietGluten-Free, Vegetarian
Ingredients
Oatmeal Cups
- 3/4 cup quick oats (see notes for rolled oats)
- 1/2 cup peanut butter (or almond butter; sunflower seed butter for nut-free)
- 1/4 cup maple syrup or honey
- 2 tbsp chia seeds
- 1/4 cup protein powder (a flavor you love)
- 1 tsp vanilla extract
- 1 pinch sea salt (a good pinch)
- optional add-ins (cinnamon, mini chocolate chips, cacao nibs, raisins, etc.)
Chocolate Layer
- 1 1/4 cups chocolate chips
- 2 tsp coconut oil (if needed, to thin the chocolate)
Instructions
- Make the Base: In a large bowl, combine all the oatmeal cup ingredients until well combined. Depending on your protein powder, add an extra tablespoon or two of nut butter or syrup if needed for a moist, pressable dough, not too sticky, not dry.
- Prep the Pan: Use a silicone mini muffin tin (or parchment liners, or a well-greased tin). Divide the mixture among the cups, filling each about 2/3 full and pressing down.
- Melt the Chocolate: Combine the chocolate chips and coconut oil in a small bowl. Microwave in 30-second increments, stirring between each, until completely melted (or use a double boiler).
- Top: Divide the chocolate among the cups, filling the last 1/3 to cover the oat layer.
- Freeze: Freeze for at least 2 to 3 hours before removing the cups from the pan. Top with sea salt and store in an airtight container in the freezer.
Notes
Use quick oats for the right texture; blitz rolled oats in a food processor if that’s all you have. Adjust the dough with more nut butter or syrup if dry, since protein powders absorb differently. For nut-free, use sunflower seed butter; for vegan, use maple syrup, dairy-free chocolate, and plant protein. The flaky sea salt on top is worth it. Store in the freezer up to a couple of months; best eaten cold or after a minute out of the freezer.
- Prep Time: 10 minutes
- Category: Dessert, Snack
- Method: No-Bake
- Cuisine: American