


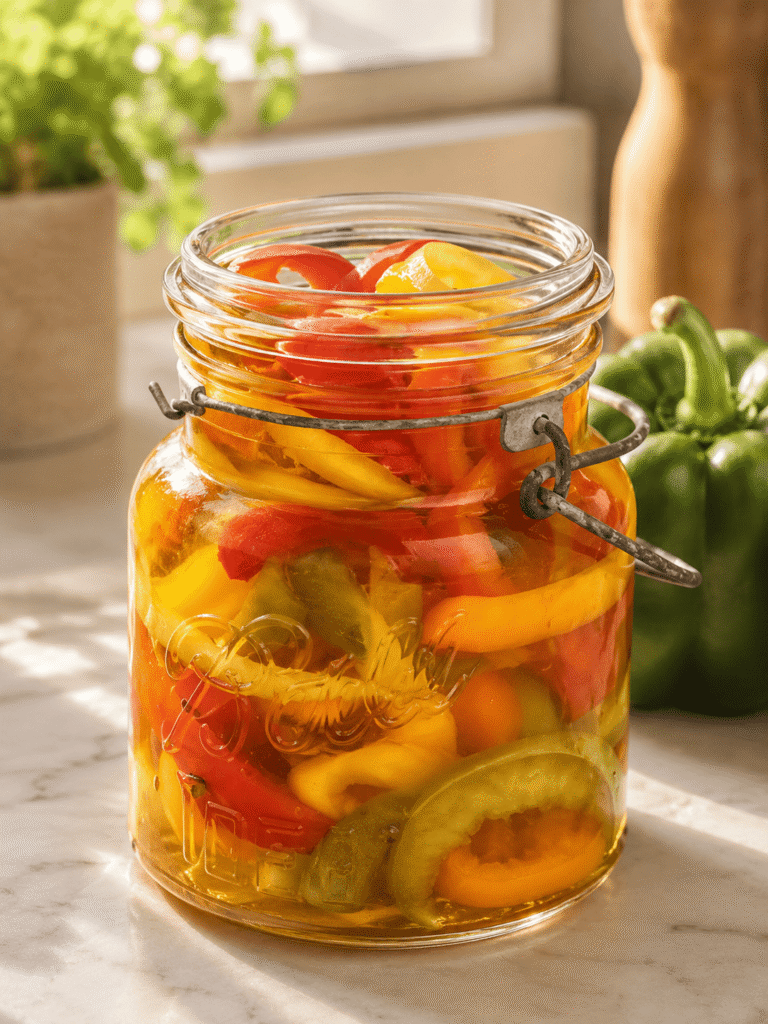
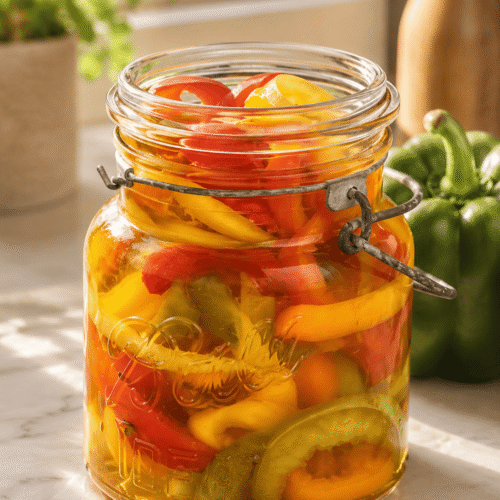
These pickled sweet peppers are a wonderful way to preserve summer’s colorful bell pepper harvest, and they’re simple to make right in your own kitchen. A mix of red, green, and orange bell peppers and thinly sliced onion are packed into jars and covered with a sweet-tangy brine flavored with garlic, turmeric, peppercorns, mustard seed, and celery seed, then water-bath processed for shelf-stable jars you can enjoy all year. They’re absolutely fantastic on sandwiches, steak and cheese subs, burgers, and salads, adding a bright, sweet-tangy crunch wherever they go. This is a classic home-canning project that rewards a little patience with jars of pickled peppers you’ll reach for again and again.
The key to great pickled peppers is the brine: a well-balanced mix of cider and white vinegar, sugar, and warm spices that gives the peppers their signature sweet-tangy flavor. Packing the jars generously with peppers and onion (since they tend to float up during processing) and properly water-bath processing them ensures the jars seal safely for long-term, shelf-stable storage. And while they’re ready to eat once processed, letting them rest for a few weeks really lets the flavor develop into something special.
Why this works
A few key techniques are what make this a successful canning recipe, and they’re worth understanding.
The vinegar-and-sugar brine is what makes these shelf-stable and flavorful. Combining cider vinegar, white vinegar, water, sugar, salt, and spices and bringing it to a boil creates a brine that’s acidic enough for safe water-bath canning while also being sweet and well-spiced. The combination of two vinegars gives a more rounded, complex tang than either alone.
Packing the jars generously matters for both flavor and safety. Pressing the sliced peppers and onions down firmly in each jar ensures you get plenty of vegetables per jar, which matters because they tend to rise and compact during processing. A well-packed jar means better flavor and a more consistent finished product.
Proper headspace and bubble removal are essential canning steps. Leaving ½-inch headspace when ladling in the hot brine and removing any trapped air bubbles helps ensure a proper seal forms during processing. Wiping the jar rims clean before applying the lids is what allows the lids to seal properly, any residue on the rim can prevent a good seal.
And water-bath processing plus a full resting period is what makes these safe and delicious. Processing the filled jars in a water bath for the specified time (adjusted for your altitude) creates the vacuum seal needed for safe, shelf-stable storage. Letting the jars cool undisturbed for 24 hours lets the seals set properly, and letting the peppers rest for 3 to 4 weeks before eating allows the brine to fully penetrate the vegetables for the best flavor.
What goes in
The ingredients build the brine and the vegetables that get pickled.

For the brine, you’ll need pickling or kosher salt, cider vinegar, white vinegar, water, granulated sugar, garlic, turmeric powder, whole peppercorns, mustard seed, and celery seed.
For the vegetables, you’ll need red, green, and orange bell peppers, sliced ¼-inch thick, and a large onion, halved and thinly sliced.
A few notes. Use a mix of pepper colors for the prettiest jars and best flavor variety. Slice the peppers evenly at ¼-inch thick so they pack well and pickle consistently. Use pickling or kosher salt rather than table salt, which can contain additives that cloud the brine. And make sure you have properly sterilized jars and functioning canning equipment before you start, since this is a water-bath canning recipe.
How to make them
In a large pot, make the brine by combining the salt, cider vinegar, white vinegar, water, sugar, garlic, and spices. Bring to a boil over medium to high heat.
Sterilize your jars in a 16-quart canning pot. Pack the sliced peppers and onions into the jars, pressing down to compact them, making sure each jar has plenty of peppers and onions, since they will rise up during processing.
Using a wide-mouth funnel, ladle the hot pickling brine over the peppers and onions, leaving ½-inch headspace. Remove any air bubbles. Wipe the rim with a clean, damp paper towel. Center the lid on the jar and apply the band until fingertip tight.
Place the jars in a water bath and process for 15 minutes, adjusting for your altitude. Remove from the water bath and let cool completely on the counter for 24 hours.
For the best flavor, let the jars stand for 3 to 4 weeks before enjoying. Store in a cool, dry place for up to 1 year.
Once opened, store in the refrigerator.
Tips, serving, and storing
A few things help. Pack the jars generously, since the peppers will settle and compact during processing. Measure headspace carefully and remove air bubbles thoroughly for a proper seal. Adjust your processing time for altitude if you’re at a higher elevation. And be patient, letting the jars rest for 3 to 4 weeks genuinely makes a difference in flavor.
A couple more. If you have leftover brine, you can refrigerate it for a few days or use it to make additional jars of pickled peppers. And check that jar lids have properly sealed (the lid should not flex when pressed) before storing them at room temperature; any unsealed jars should be refrigerated and used promptly.
These pickled sweet peppers are fantastic on sandwiches, steak and cheese subs, burgers, and hot dogs, and they add a bright, tangy crunch to salads, grain bowls, and charcuterie boards. Their sweet-tangy flavor pairs especially well with rich or savory foods, cutting through and balancing them nicely.
For storing, unopened, properly sealed jars keep in a cool, dry place for up to 1 year. Once you open a jar, store it in the refrigerator and use it within a few weeks for the best quality. This recipe makes a generous batch, about 8 to 12 jars, so you’ll have plenty to enjoy and share.
This recipe makes about 8 to 12 pint jars. Bright, tangy, and beautifully colorful, these pickled sweet peppers are a rewarding home-canning project that pays off all year long, and they’re the kind of homemade condiment that makes ordinary sandwiches and salads feel special.
WP Tasty (Tasty Recipes Premium) field values
- Category: Preserves (Condiment)
- Method: Water Bath Canning
- Cuisine: American, Southern
- Diet: Vegan, Vegetarian, Gluten Free (naturally plant-based and gluten-free.)
- Keywords: pickled sweet peppers, canned bell peppers, sweet pickled peppers recipe, water bath canning peppers, homemade pickled peppers
- Serving Size: 1 jar (16 oz); note that the source’s nutrition reflects an entire jar, not a typical single-serving portion
- Calories: 728 (per jar, from source; full nutrition is in the JSON.)
- Equipment: Large pot, 16-quart canning pot, wide-mouth funnel, canning jars and lids
Pickled Sweet Peppers

Equipment
- Large Pot
- 16-quart canning pot
- Wide-mouth funnel
- Canning jars and lids
Ingredients
Brine
- 1 tbsp pickling or kosher salt
- 6 cups cider vinegar
- 2 cups white vinegar
- 4 cups water
- 6 cups granulated sugar
- 8-10 cloves garlic smashed
- 1/2 tbsp turmeric powder
- 1 tbsp whole peppercorns
- 1 tsp mustard seed
- 1 tsp celery seed
Vegetables
- 4 1/2-5 pounds red, green, and orange bell peppers sliced 1/4-inch thick
- 1 large onion halved and thinly sliced
Instructions
- Make the Brine: In a large pot, combine the salt, cider vinegar, white vinegar, water, sugar, garlic, and spices. Bring to a boil over medium to high heat.
- Pack the Jars: Sterilize your jars in a 16-quart canning pot. Pack the sliced peppers and onions into the jars, pressing down to compact, ensuring plenty of peppers and onions in each jar since they will rise up during processing.
- Add the Brine: Using a wide-mouth funnel, ladle the hot brine over the peppers and onions, leaving 1/2-inch headspace. Remove any air bubbles. Wipe the rim with a clean, damp paper towel. Center the lid on the jar and apply the band until fingertip tight.
- Process: Place the jars in a water bath and process for 15 minutes, adjusting for altitude. Remove from the water bath and let cool completely on the counter for 24 hours.
- Rest and Store: For the best flavor, let stand for 3 to 4 weeks before enjoying. Store in a cool, dry place for up to 1 year. Once opened, store in the refrigerator.