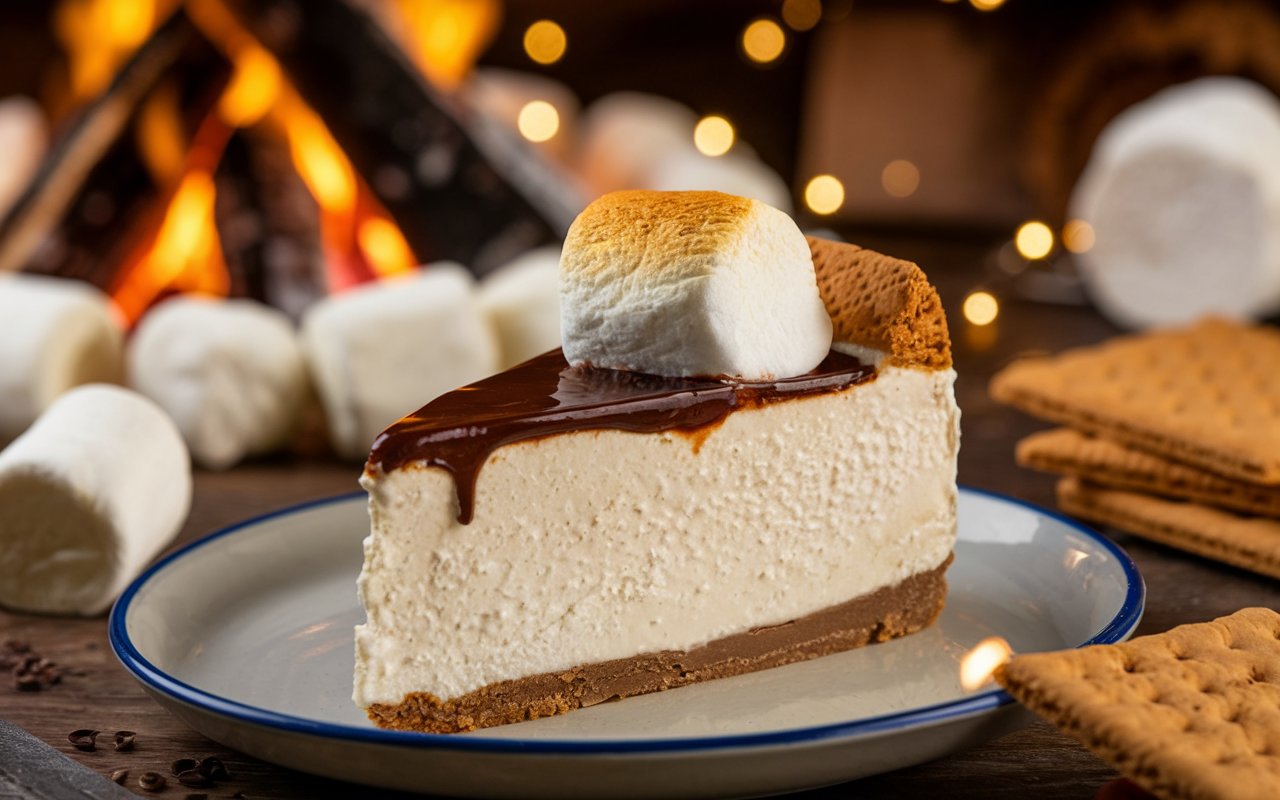
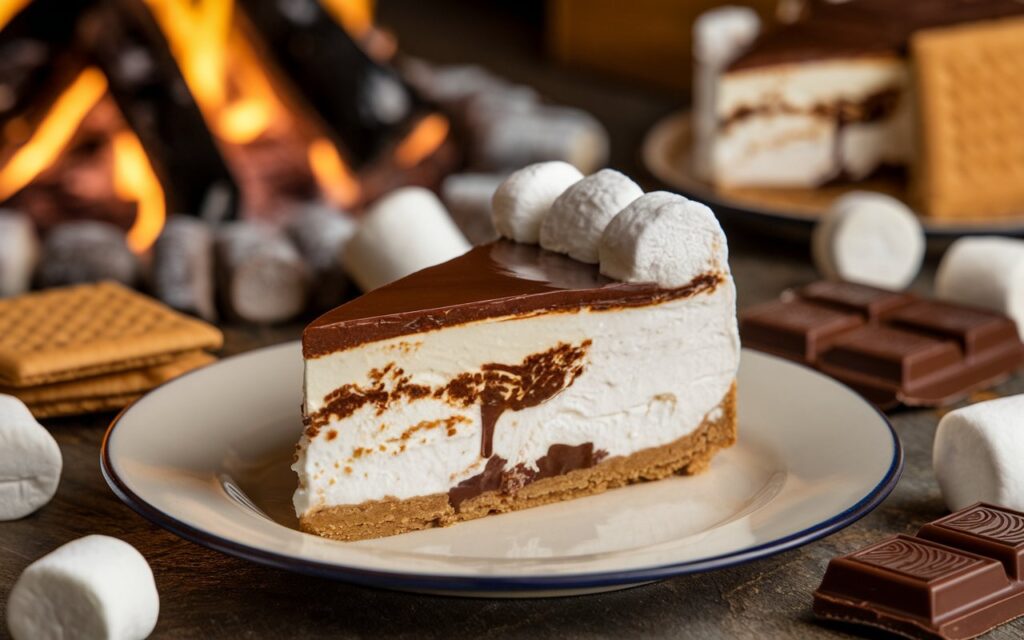
Transport yourself to a crackling campfire, where marshmallows toast golden, chocolate bars melt between graham crackers, and you inhale the nostalgic sweetness of s’mores. Now, imagine merging that classic trio—marshmallow, chocolate, graham—with a creamy cheesecake base to form a dessert that unites childlike wonder and refined indulgence. Each forkful of S’mores Cheesecake layers crisp graham crust, smooth chocolate-laced filling, and a pillowy marshmallow top toasted to a campfire-like finish. It’s a slice that conjures images of summer nights, but now in an oven-friendly, year-round format.
I first recognized the potential synergy of s’mores with cheesecake when craving that campfire essence in wintertime, longing for the sweet crunch of graham combined with molten chocolate and gooey marshmallow. Cheesecake, with its tang and creamy body, provided a perfect canvas: the graham base reaffirms s’mores roots, the chocolate swirl or layer offers rich cocoa depth, and a marshmallow topping or fluff stands in for toasted mallows. Over multiple tries, I found critical steps included a stable crust, carefully baked cheesecake that doesn’t overbrown, and a final blast or broiler to lightly toast the marshmallow top. Now, S’mores Cheesecake is a staple for potlucks, birthday parties, or any scenario where we want to recapture the magic of s’mores in a more sophisticated form.
In this guide, we’ll detail how to assemble S’mores Cheesecake—from pressing the graham cracker crust, crafting a chocolate-laced cheesecake, to crowning it with marshmallow fluff or homemade meringue. Whether you’re a s’mores devotee nostalgic for campfires or a cheesecake connoisseur seeking a creative spin, get ready for a dessert that merges the best of both worlds into one decadent slice.

Why S’mores Cheesecake Beckons
- Nostalgic Elements
Graham, chocolate, and marshmallow evoke memories of camping, childhood fun, and communal sweet experiences. - Cheesecake Richness
The tang of cream cheese complements chocolate’s sweetness, bridging a sophisticated approach to s’mores flavors. - Textural Contrast
Crunchy crust, velvety filling, plus the sticky stretch of marshmallow on top. Every bite offers layered sensations. - Showstopper Factor
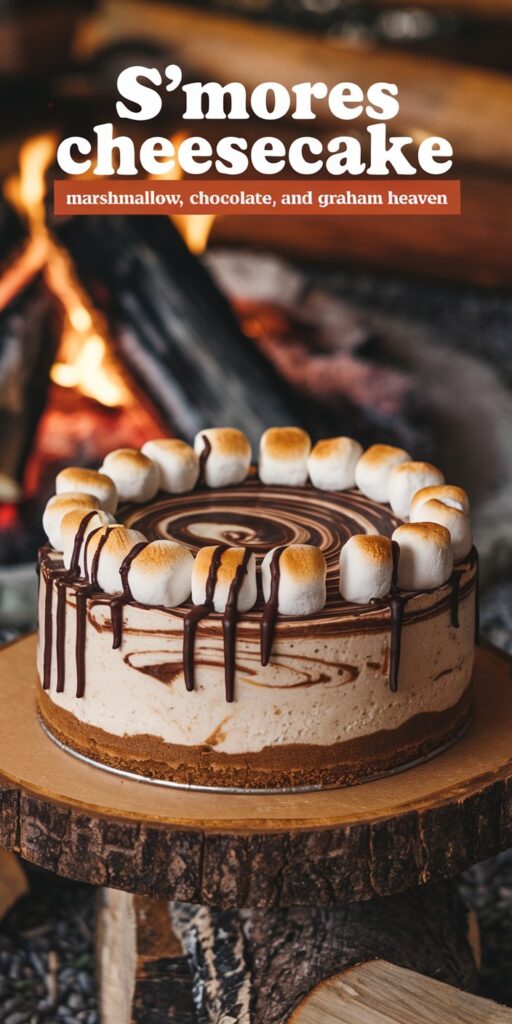
Toasting or torching the marshmallow top yields a visually striking dessert that draws oohs and ahhs at gatherings.
Ingredient Overview
Makes ~8–10 slices (standard 9-inch springform pan):
| Ingredient | Quantity | Notes |
|---|---|---|
| Crust | ||
| Graham Crackers (crumbs) | ~1½ cups (about 12 full crackers) | Alternatively, store-bought graham crumbs |
| Sugar | ~2 tbsp | Just enough for slight sweetness |
| Butter (melted) | ~5 tbsp (70 g) | Binds crumbs |
| Salt (pinch) | optional, but recommended | Balances sweetness |
| Chocolate Filling | ||
| Cream Cheese (room temp) | 24 oz (3 blocks, 680 g) | Full-fat for best texture, avoid low-fat versions |
| Sugar | ~¾–1 cup (150–200 g) | Adjust sweetness to taste |
| Eggs (large) | 3 | Room temperature ensures smooth incorporation |
| Sour Cream or Greek Yogurt | ~½ cup (120 ml) | Adds tang & creaminess |
| Cocoa Powder (unsweetened) | ~¼ cup (25 g) | For a chocolatey base, can add more if desired |
| Semi-Sweet Chocolate (melted, optional) | ~4 oz (115 g) | Intensifies chocolate layer, optional but recommended |
| Vanilla Extract | 1–2 tsp | Rounds out flavor |
| Salt | ¼ tsp | Enhances chocolate flavor |
| Marshmallow Topping | ||
| Marshmallow Fluff or Creme | ~1½–2 cups | Easiest route. Alternatively, homemade meringue or large marshmallows |
| Optional Topping Approach | Toast mini marshmallows on top, or pipe homemade meringue & torch it | Personalize the final s’mores effect |
*(Note: This version calls for a chocolate cheesecake base. Some prefer layering a plain cheesecake with chocolate swirl. Adjust cocoa powder or melted chocolate for intensity. For the topping, marshmallow creme is simplest. For a fully homemade approach, consider a basic Swiss meringue that you torch on top.)
Step-by-Step Recipe (Approx. 5–6 Hours Including Cooling)
Part A: Crust
- Prepare Pan
- Preheat oven to 350°F (175°C). Lightly grease a 9-inch springform pan. Wrap the exterior with foil if you plan a water bath (optional but helps prevent cracks).
- Form Crust
- Crush ~1½ cups graham crackers into fine crumbs (or measure out that quantity if pre-ground). Mix with 2 tbsp sugar and a pinch of salt, then stir in ~5 tbsp melted butter. The mixture should hold form when pressed.
- Press crumbs into the pan’s bottom (and slightly up sides if you prefer). Compact firmly using the bottom of a measuring cup. Bake ~10 minutes to set. Let cool.
Part B: Chocolate Cheesecake Filling
- Cream Cheese Base
- In a stand mixer or with a hand mixer, beat 24 oz room-temp cream cheese on medium speed ~2 minutes until smooth and lump-free. Gradually incorporate ~¾–1 cup sugar. Beat until creamy.
- Incorporate Eggs & Sour Cream
- Beat in 3 eggs, one at a time, scraping bowl as needed. Add ½ cup sour cream (or Greek yogurt) for tang. Mix lightly to avoid over-aerating, which can lead to cracks.
- Chocolate Components
- Sift in ~¼ cup unsweetened cocoa powder, mixing gently. If using ~4 oz melted chocolate (cooled slightly), drizzle it in as well. Add 1–2 tsp vanilla extract and ¼ tsp salt. Blend until fully combined. Taste a small spoonful—adjust sugar or cocoa if needed for sweetness and chocolate intensity.
- Fill & Bake
- Pour filling onto cooled crust. If using a water bath, place the springform in a large roasting pan and add hot water halfway up the side. Bake ~45–55 minutes, or until edges are set but center still slightly jiggly. If skipping water bath, carefully watch for cracks, though s’mores style can hide minor cracks under topping.
- Cool
- Turn off oven, crack door slightly. Let cheesecake sit ~10 minutes to reduce sudden temperature changes. Transfer out of oven, remove foil if used. Let cool to room temperature, then refrigerate at least 4 hours or overnight for best set.
Part C: Marshmallow Topping & Assembly
- Marshmallow Layer
- Once cheesecake is fully chilled, top with ~1½–2 cups marshmallow fluff, smoothing gently with a spatula. If you want a swirl or peaks, swirl a spatula for a decorative look.
- Torch or Broil
- For a “toasted” s’mores effect, you can carefully use a kitchen torch to lightly brown the marshmallow layer, forming a gentle caramelization. Move torch swiftly, avoiding burning. If you lack a torch, set oven broiler on high, place cheesecake briefly under it with door cracked, rotating often. Watch carefully—marshmallow can burn within seconds.
- Optional Garnish
- Decorate top with mini chocolate bars, graham pieces, or drizzle melted chocolate. Some scatter mini marshmallows for extra “campfire” flair.
- Chill & Serve
- Let the top cool from any torching heat, then slice. A hot, clean knife helps cut through the sticky marshmallow layer. Serve slices promptly or keep chilled for up to 2 days (the marshmallow layer can weep if stored too long).
*(Note: Marshmallow fluff remains sticky, so slicing can be tricky. Wiping the blade between cuts yields cleaner edges. The final flavor merges tangy chocolate cheesecake, crisp graham base, and gooey toasted topping, echoing s’mores in a more refined format.)
Flavor Variations
- Caramel Twist
- Drizzle caramel sauce on top with or before the marshmallow for an even sweeter dimension. The sauce seeps into the cheesecake cracks, intensifying sweetness.
- Peanut Butter S’mores
- Add ~½ cup creamy peanut butter to the cheesecake filling or swirl it in. The peanut-chocolate plus toasted marshmallow can echo a peanut butter cup vibe.
- Extra Chocolate Chunk
- Stir chocolate chips directly into the cheesecake filling for pockets of melted chocolate. Great for those who can’t get enough cocoa in each bite.
- Graham Topping
- Crumble extra graham crackers over the toasted marshmallow, layering crunch on top. This doubles down on the s’mores identity.
Serving & Storage
- Slice & Warm
- Cheesecake is typically served chilled. For a gooier topping, let slices sit ~10 minutes at room temperature or lightly warm the topping with a kitchen torch again right before serving.
- Leftovers
- Store leftover cheesecake in the fridge up to 2 days. The marshmallow layer may become sticky or slightly deflated over time. A tight cover helps maintain shape but can stick to fluff.
- Freezing
- Classic cheesecakes freeze well, but the marshmallow top can degrade upon thawing, turning tacky or watery. If planning to freeze, do so pre-marshmallow layer, then add and torch it fresh once thawed.
- Presentation
- S’mores Cheesecake slices stand out with their tri-layer look: golden crust, chocolate filling, toasted topping. A swirl of chocolate sauce or a mini graham wedge can garnish each plate.

Perfect Execution Tips
- Avoid Overmixing
- Keep the cheesecake filling from being whipped excessively. Over-aeration can result in cracks or a grainy texture. A gentle fold after each egg ensures a smooth batter.
- Proper Bake
- Slight jiggle in the center upon finishing is normal. Overbaking leads to dryness or cracks, though this can be hidden by the topping. Still, aim for a creamy interior.
- Torching Marshmallow
- Move the flame constantly to avoid scorching. Marshmallow browns quickly—once the color shift starts, it can burn in a second if left too long in one spot.
- Clean Slices
- Running a sharp knife under hot water (then drying) between slices helps cut through the sticky top neatly. This step also prevents lumps of topping from dragging across the cheesecake.
FAQ – S’mores Cheesecake
Q1: Could I skip the water bath for the cheesecake?
A1: Yes. The water bath helps ensure an even, gentle bake, reducing cracks. But with the marshmallow top, minor cracks are hidden. Adjust bake time slightly if skipping—monitor color and center jiggle.
Q2: Do I need real marshmallows instead of fluff?
A2: You can arrange mini marshmallows on top and broil or torch them. They melt together forming a toasted layer but can be trickier to achieve an even finish. Marshmallow fluff is simpler to spread and torch.
Q3: Is it possible to use a no-bake cheesecake base?
A3: Yes, but the s’mores synergy typically includes a baked approach. For a no-bake version, ensure the crust is well-chilled and stabilized. Then add a gelatin or whipped cream-based chocolate filling, finishing with marshmallows or fluff. The flavor remains, though the texture differs.
Q4: My crust crumbled upon slicing.
A4: Possibly not enough butter or you didn’t compress it well. Alternatively, chilling the crust thoroughly before adding filling or baking can set it.
Q5: Can I make mini s’mores cheesecakes?
A5: Absolutely. Use a muffin tin with liners. Press a small crust in each, fill with cheesecake, bake ~15–20 minutes. Top each mini with marshmallow fluff and torch. Great for single servings.
Conclusion
Blending the nostalgic trifecta of graham, chocolate, and marshmallow with the luscious tang of cheesecake, S’mores Cheesecake stands as a showpiece that unites campfire whimsy and dessert sophistication. Whether you use a blowtorch to give that final toasted flourish or rely on your oven’s broiler, the toasted topping, chocolate-laden filling, and crisp crumb crust ensure each forkful channels the essence of s’mores in every creamy mouthful.
Now that you’ve learned how to build a stable graham crust, whisk together a chocolate cheesecake base, and layer on (or torch) a marshmallow topping, why not present this at your next gathering? Once your guests dive into that final toasted slice—possibly crowned by extra chocolate drizzle or miniature graham squares—return and share your personal spin. Did you add peanut butter, swirl in caramel, or do a swirl of chocolate sauce throughout the filling? Your approach might guide other sweet tooths to discover how this campfire classic transforms into a beloved, decadent cheesecake in the comfort of their kitchen.