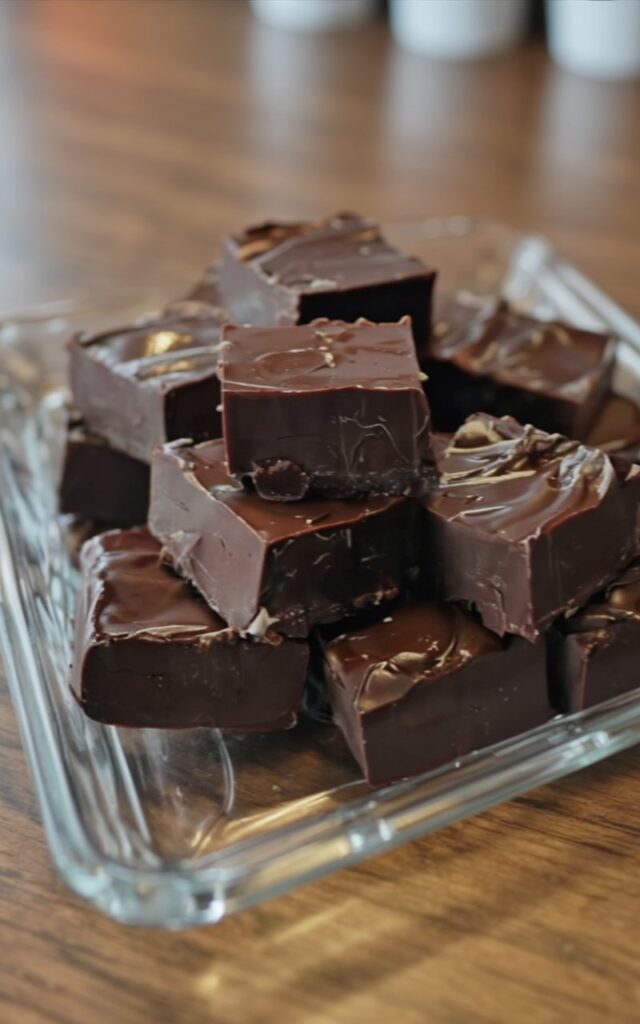
There is a specific kind of magic that happens when simple pantry staples transform into a block of velvety, rich candy. While quick-fix microwave recipes have their place, nothing compares to the texture and depth of authentic Old Fashioned Chocolate Fudge. I remember the first time I attempted this classic confection; the anticipation of watching the thermometer rise and the arm workout from beating the mixture created a sense of accomplishment that made the first bite even sweeter.
This recipe captures that nostalgic, homemade taste—perfectly balancing the bitterness of Hershey’s Cocoa with the sweetness of crystallized sugar. Unlike modern shortcuts, this method relies on the chemistry of the “soft-ball stage” to create a treat that is firm yet melts in your mouth. Whether you are crafting holiday gifts or satisfying a midnight craving, this guide will help you master the art of traditional candy making.
Ingredients
To achieve that classic texture, precision is key. Here is what you will need:
| Ingredient | Quantity | Notes |
| Hershey’s Cocoa | 4 tbsp | Unsweetened, provides the deep chocolate base. |
| Granulated Sugar | 3 cups | Required for setting. Creates the crystalline structure. |
| Salted Butter | 1 stick (½ cup) | Adds richness and balances the sweetness. |
| Carnation Evaporated Milk | 5 oz can | Do not confuse with condensed milk; provides creaminess. |
| Vanilla Extract | 1 tsp | Enhances the chocolate flavor profile. |
| Nuts | ½ cup (Optional) | Walnuts or pecans work best for crunch. |

Timing
Making real fudge is a labor of love, but it is faster than baking a layer cake.
- Prep Time: 10 minutes
- Cook Time: 15–20 minutes
- Cooling Time: 2–3 hours (passive)
- Total Active Time: ~30 minutes (Roughly the same time as making a batch of cookies, but with more waiting).
Step-by-Step Instructions
Step 1: Prepare the Pan
Before you turn on the stove, preparation is crucial. Lightly grease an 8×8 inch square baking pan with butter. Alternatively, you can line it with parchment paper leaving an overhang for easy removal later. Set this aside on a heat-proof surface.
Step 2: Combine and Melt
In a medium, heavy-bottomed saucepan over medium heat, add the 1 stick of salted butter. Allow it to melt completely. Once liquid, whisk in the 4 tbsp Hershey’s Cocoa and the 5 oz can of Carnation Evaporated Milk.
- Chef’s Tip: It is absolutely critical to add the 3 cups of granulated sugar at this stage. Without the sugar, the chemical reaction required to thicken the mixture into fudge simply will not happen. Whisk until the mixture is smooth and unified.
Step 3: Boil the Mixture
Increase the heat slightly to bring the mixture to a rolling boil. You must stir constantly to prevent scorching at the bottom. Carefully insert a candy thermometer into the liquid, ensuring it doesn’t touch the bottom of the pan. Cook until the temperature reaches the soft-ball stage (approximately 234°F to 240°F).
- Tip: If you do not own a thermometer, use the “cold water test.” Drop a small amount of the hot syrup into a bowl of very cold water. If it forms a soft, flexible ball that flattens when removed from the water, it is ready.
Step 4: Cool the Mixture
Remove the saucepan from the heat immediately. Gently stir in the 1 tsp Vanilla Extract. Crucial Step: Do not beat or over-stir the mixture at this point. Let the saucepan stand undisturbed until the mixture cools to lukewarm (approximately 110°F). This usually takes about 45 minutes to an hour.
Step 5: Beat and Thicken
Once the mixture has cooled to lukewarm, the real work begins. Grab a sturdy wooden spoon and beat the fudge vigorously. You are looking for a specific visual change: continue beating until the mixture loses its glossy, wet shine and transforms into a creamy, matte, and thick consistency.
- Tip: This happens suddenly! If you are adding nuts, fold them in quickly the moment the gloss disappears.
Step 6: Pour and Set
Working quickly before the fudge sets in the pot, pour the thickened mixture into your prepared pan. Use a spatula to spread it evenly into the corners. Do not refrigerate; allow the fudge to cool completely at room temperature. This ensures the best texture.
Step 7: Serve
Once the fudge is fully firm to the touch, lift it out of the pan using the parchment paper or cut it directly in the pan into small squares. Serve and enjoy the creamy, rich results of your hard work!
Nutritional Information
Fudge is an indulgent treat. Here is an estimated breakdown per square (assuming the batch is cut into 25 small squares):
- Calories: ~140 kcal
- Carbohydrates: 22g (Sugar: 21g)
- Fat: 5g (Saturated: 3g)
- Protein: 1g
- Key Insight: While high in sugar, the use of cocoa powder provides a small dose of antioxidants and minerals like iron and magnesium compared to vanilla-based candies.
Healthier Alternatives
If you are looking to tweak this recipe for specific dietary needs while keeping the spirit of the dish alive, consider these adjustments:
- Vegan Option: Swap the salted butter for a high-quality plant-based butter stick and use full-fat canned coconut milk (shaken well) instead of evaporated milk. Ensure your sugar is bone-char free.
- Nutrient Boost: Increase the volume of nuts (walnuts or almonds) to add healthy fats, fiber, and protein, which can help mitigate the blood sugar spike.
- Reduced Sugar: While sugar is structural in this recipe, you can try using a 50/50 blend of cane sugar and a crystalline allulose sweetener. Note: This may alter the setting temperature slightly, so watch your thermometer closely.
Serving Suggestions
This Old Fashioned Chocolate Fudge is versatile and makes for a beautiful presentation:
- The Perfect Pair: Serve a square alongside a cup of strong, black coffee or an espresso. The bitterness of the coffee cuts through the intense sweetness of the fudge.
- Holiday Gifting: Place squares in small confectioners’ cups and pack them into decorative tins. It’s a classic, heartwarming gift for neighbors and friends.
- Dessert Topper: If you have leftover crumbles from cutting the fudge, sprinkle them over vanilla bean ice cream for a premium sundae experience.
Common Mistakes to Avoid
Candy making is precise chemistry. Here are the most common pitfalls and how to prevent them:
- Grainy Texture: This happens if sugar crystals form on the side of the pan and fall back in, or if you stir while cooling.
- Solution: Wash down the sides of the saucepan with a wet pastry brush during boiling, and do not stir during the cooling phase (Step 4).
- Fudge Won’t Set: The mixture likely didn’t reach the correct temperature.
- Solution: Trust your thermometer. If you pull it off the heat at 230°F, it will be too soft. It must hit at least 234°F.
- Fudge is Dry or Crumbly: This is a result of overcooking (temperature went too high) or beating it for too long in Step 5.
- Solution: Remove from heat promptly and pour immediately once the gloss fades.
Storing Tips
To keep your fudge tasting fresh for as long as possible:
- Room Temperature: Store in an airtight container at room temperature for up to 2 weeks. Separate layers with wax paper to prevent sticking.
- Freezing: Fudge freezes beautifully! Wrap the block or individual squares tightly in plastic wrap, then place in a heavy-duty freezer bag. It will last up to 3 months.
- Thawing: Thaw the fudge in the refrigerator overnight, then let it come to room temperature before unwrapping to prevent condensation from making the surface sticky.
Conclusion
Mastering this Old Fashioned Chocolate Fudge recipe connects you to generations of home cooks who understood that great things take time and patience. The result—a dense, creamy, chocolatey bite—is far superior to anything you can buy at a store. It is a true labor of love that pays off in flavor.
We hope you enjoy making and savoring this dish as much as we do. Try it out and let us know in the comments how it turned out for you! Did you add nuts or keep it pure? We’d love to hear your feedback. Don’t forget to rate the recipe and subscribe to our blog for more delicious, nostalgic recipes delivered straight to your inbox.
FAQs
Q1. Can I use sweetened condensed milk instead of evaporated milk?
No, these are very different products. Sweetened condensed milk contains added sugar and is much thicker. Since this recipe adds 3 cups of sugar separately, using condensed milk would throw off the moisture balance and make the fudge sickly sweet and impossible to set correctly. Stick to Carnation Evaporated Milk.
Q2. Why did my fudge turn out too soft?
The most likely culprit is that the syrup did not reach the “soft-ball stage” (234°F – 240°F). Humidity can also play a role; on very rainy or humid days, candy can absorb moisture from the air, making it harder to set. If it’s too soft, you can still enjoy it as a delicious spoon fudge or ice cream topping!
Q3. Can I double this recipe?
It is generally not recommended to double candy recipes unless you have a very large, wide pot and professional equipment. A double batch takes much longer to boil, which can alter the texture or cause the sugar to caramelize too much. It is safer and more consistent to make two separate batches.
Print
Ultra-Creamy Old Fashioned Chocolate Fudge
Experience the nostalgia of authentic Old Fashioned Chocolate Fudge. This recipe uses Hershey’s Cocoa and the traditional soft-ball stage method to create a dessert that is rich, creamy, and perfectly firm. A timeless classic that beats any quick-fix alternative.
- Total Time3 hours 30 minutes
- Yield25 squares 1x
Ingredients
Fudge Base
- 4 tbsp Hershey’s Cocoa (unsweetened)
- 3 cups Granulated Sugar (required for setting)
- 1 stick Salted Butter
- 5 oz Carnation Evaporated Milk (1 can)
- 1 tsp Vanilla Extract
- 0.5 cup Nuts (optional (walnuts or pecans))
Instructions
- Prepare the Pan: Lightly grease an 8×8 inch square baking pan with butter or line it with parchment paper. Set this aside.
- Combine and Melt: In a medium, heavy-bottomed saucepan over medium heat, melt the 1 stick of salted butter. Once melted, whisk in the 4 tbsp Hershey’s Cocoa, 5 oz Carnation Evaporated Milk, and 3 cups of sugar.
- Boil the Mixture: Bring the mixture to a rolling boil while stirring constantly. Insert a candy thermometer and cook until the temperature reaches the soft-ball stage (approximately 234°F to 240°F).
- Cool: Remove the saucepan from the heat. Stir in the 1 tsp Vanilla Extract. Do not beat the mixture yet. Let it stand undisturbed until it cools to lukewarm (approximately 110°F).
- Beat and Thicken: Once cooled, beat the fudge vigorously with a wooden spoon. Continue beating until the mixture loses its glossy shine and becomes creamy and thick. Fold in nuts if using.
- Pour and Set: Immediately pour the thickened fudge into your prepared pan. Spread it evenly and allow it to cool completely at room temperature until firm.
- Serve: Once fully set, cut into squares and enjoy.
Notes
Do not stir the mixture while it is cooling (Step 4). Stirring too early will cause crystallization, resulting in a grainy texture instead of creamy fudge.
- Prep Time: 10 minutes
- Cook Time: 20 minutes
- Category: Dessert, Snack
- Cuisine: American
Nutrition
- Calories: 140
- Sugar: 21
- Sodium: 30
- Fat: 5
- Saturated Fat: 3
- Carbohydrates: 22
- Fiber: 1
- Protein: 1
- Cholesterol: 10