



The idea behind this one took me a minute to get my head around.
It’s a no bake cheesecake that never fully sets. On purpose. It firms up overnight just enough to hold its layers when you cut into it, but stays soft enough that you serve it with an ice cream scoop instead of a knife. Graham cracker crumbs and homemade strawberry sauce run through it in bands, so every scoop pulls up some of each.
Three components, none of them difficult, and about forty minutes of actual work. Then eight hours of leaving it completely alone, which is the easy part.
I’ve made regular no bake cheesecake plenty of times and this is more forgiving. There’s no worrying about whether it will slice cleanly, because slicing isn’t the plan.
White chocolate is holding the whole thing together
Four ounces of melted white chocolate goes into the cheesecake base and it is not there for flavor. You barely taste it.

It’s there because cocoa butter is solid at refrigerator temperature and liquid when warm. Stir it in warm, chill the mixture, and the cocoa butter sets up throughout and gives you structure. No gelatin, no baking, no water bath. That’s the whole mechanism.
Use a chopped bar, not chips. This matters and it’s the kind of thing that’s easy to shrug off at the shop. Chocolate chips are made with stabilizers specifically so they hold their shape when heated, which is exactly the opposite of what you need. They resist melting smoothly and they’ll seize into a grainy mess if you push them.
Melt in thirty second bursts in the microwave, stirring between each one. Ninety seconds total should be plenty. White chocolate seizes faster than dark because the milk solids scorch, so stop while it still looks slightly underdone and stir the rest of the way.
Cook the strawberry sauce properly or it will bleed
The cornstarch is what keeps this sauce from turning the whole cheesecake pink and watery by morning.
Toss the sugar and cornstarch together with the strawberries before any heat gets involved. That distributes the starch evenly through the fruit instead of dumping it into hot liquid where it clumps immediately and stays clumped.
Then bring it to an actual rolling boil. Not a simmer. Cornstarch has to reach boiling point to gelatinize properly, and a sauce you pulled off at a simmer will look thick in the pan and thin right back out in the fridge. Five to eight minutes, until the berries have genuinely softened.
Blend about half of it, either with an immersion blender straight in the pan or by scooping half into a food processor, then return it and stir for another minute until it looks glossy and coats the spoon. Leaving half unblended gives you actual pieces of fruit in the finished dessert, which is nicer than a uniform puree.
Cool it completely before it goes anywhere near the cheesecake. Warm sauce will slacken the base and your layers will muddy together into pink sludge. It’ll still taste good. It won’t look like anything.
Whip the cream first, then reuse the bowl
Order of operations saves you a bowl here, and it’s worth doing it in this direction rather than the other.
Whip the heavy cream to stiff peaks first and scoop it out into a separate bowl. Then use that same unwashed mixing bowl for the cream cheese and powdered sugar. The traces of cream left behind get absorbed straight into the cheesecake base and disappear.
Do it the other way around and it doesn’t work at all. Cream cheese residue in a bowl will stop cream from whipping properly, and you’ll stand there for five minutes wondering why it’s staying loose and soupy.
Room temperature cream cheese, by the way. Take the blocks out an hour ahead. Cold cream cheese leaves lumps that never fully beat out, and there’s no rescuing it once they’re in.
Building the layers
Spread half the cheesecake mixture into the bottom of an eight by eight pan. Swirl in a little more than half the strawberry sauce, then scatter about two thirds of the graham cracker crumbs across the top.
Then repeat with everything that’s left.
Those uneven ratios are deliberate. Putting more than half the sauce and more than half the crumbs into the first round pushes them toward the middle of the finished dish, which is where your scoop lands. The top layer gets what remains.
The pan size matters less than the depth. An eight by eight gives you layers thick enough to see clearly and thin enough that a scoop reaches both bands in a single pull. A wider dish spreads everything too thin and the layers stop reading as layers.
Crushing the crackers
Six full graham cracker sheets into a large ziplock bag, then whack it until you have a fine crumb. A rolling pin is the obvious tool but the bottom of a heavy glass works just as well and I usually reach for whatever is closest.
Stir the sugar and salt through the crumbs first, then pour in the melted butter and mix until every crumb looks damp. The salt is easy to skip and worth including. A pinch against all that sweetness sharpens the whole thing up.
The overnight chill
Cover it and put it in the fridge for at least eight hours.
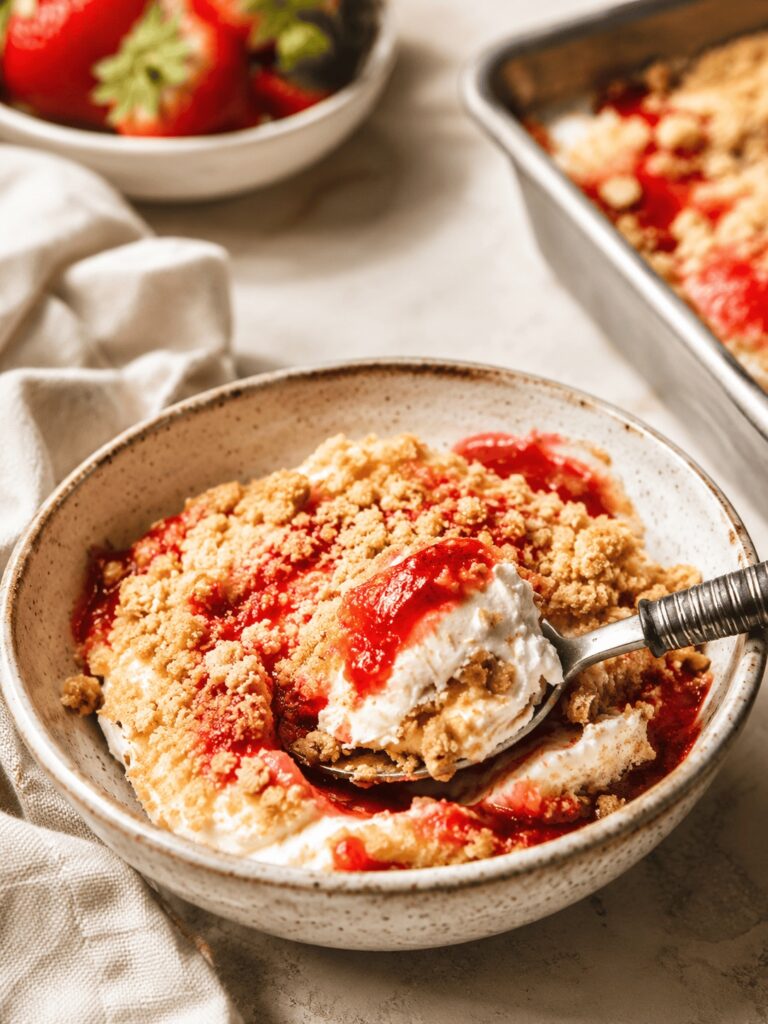
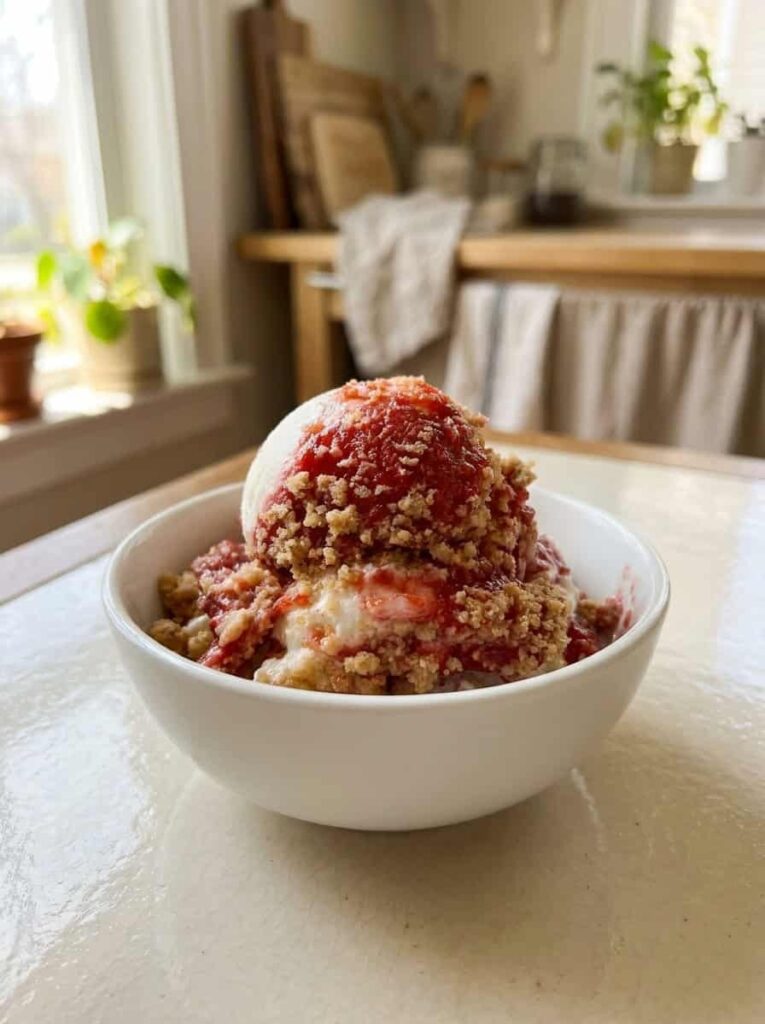
I know this is the least satisfying instruction in any recipe. It’s also the one that turns a bowl of soft mixture into something with structure and definition. There’s no shortcut and there’s no version of this where four hours is fine.
The next day, scoop straight from the pan into bowls or dessert cups. A two ounce ice cream scoop gives you a neat round portion. It’ll hold its shape for maybe twenty minutes out of the fridge before it starts to slump, so scoop to order rather than plating everything ahead of time.
Making it gluten free
Use the same weight of gluten free graham crackers and cut the butter back to three tablespoons instead of a quarter cup.
That adjustment isn’t optional if you’re swapping. Gluten free crackers absorb noticeably less fat than wheat ones, and using the full amount leaves the crumb layer greasy and heavy instead of buttery and loose.
Print
No Bake Scoopable Cheesecake
A soft set no bake cheesecake layered with buttery graham cracker crumbs and homemade strawberry sauce, served with an ice cream scoop.
- Total Time8 hours 40 minutes
- Yield9 servings 1x
- DietVegetarian
Ingredients
Strawberry sauce
- 1 lb fresh strawberries (or frozen, thawed)
- 1/4 cup granulated sugar (50g)
- 1 tbsp cornstarch
- 1 tsp lemon juice (or water)
Graham cracker crust
- 6 full graham cracker sheets (94g)
- 2 tbsp granulated sugar
- kosher salt (pinch)
- 1/4 cup unsalted butter (56g, melted)
No bake cheesecake
- 1/2 cup heavy whipping cream (120g)
- 3 blocks full fat cream cheese (8 oz each, room temperature)
- 1 1/2 cups powdered sugar (165g, spooned and leveled)
- 1/4 cup sour cream (60g)
- 2 tsp vanilla extract
- 4 oz white chocolate bar (chopped, do not use chips)
Instructions
Strawberry sauce
- Prep and coat. Rinse, hull and quarter the strawberries. In a medium saucepan stir together the sugar and cornstarch, then toss in the strawberries to coat evenly. Stir in the lemon juice and set over medium heat.
- Boil and thicken. Bring to a boil, stirring occasionally, and cook 5 to 8 minutes until the strawberries soften. Blend half the mixture, return it to the pan and stir another minute until glossy and thickened.
- Cool completely. Pour the sauce into a container and refrigerate until fully cold.
Graham cracker crust
- Crush and mix. Add the crackers to a large ziplock bag and crush to a fine crumb. Transfer to a bowl and stir in the sugar and salt, followed by the melted butter until evenly coated. Set aside.
Cheesecake and assembly
- Whip the cream. In a large mixing bowl whip the heavy cream to stiff peaks, about 2 minutes. Scoop into a separate bowl.
- Beat the cream cheese. In the same unwashed bowl, mix the cream cheese and powdered sugar until smooth. Scrape down and mix in the sour cream and vanilla.
- Melt the chocolate. Melt the chopped white chocolate in the microwave in 30 second intervals until smooth, no more than 90 seconds total. Do not overheat or it will seize.
- Combine. Mix the warm chocolate into the cheesecake mixture, give it one pass by hand with a spatula, then fold in the whipped cream until fully blended.
- Layer. Spread half the mixture into an 8×8 pan. Swirl in a little more than half the strawberry sauce and top with about two thirds of the graham crumbs. Repeat with the remaining mixture, sauce and crumbs.
- Chill overnight. Cover and refrigerate at least 8 hours. The next day, scoop into bowls with an ice cream scoop and serve.
Notes
Use a chopped white chocolate bar rather than chips, which contain stabilizers and resist melting smoothly. Bring the strawberry sauce to a full boil so the cornstarch activates, then cool completely before layering. For a gluten free version use the same weight of gluten free graham crackers and reduce the butter to 3 tablespoons.
- Prep Time: 40 minutes
- Cook Time: 8 minutes
- Category: Dessert
- Method: No-Bake
- Cuisine: American
Nutrition
- Serving Size: 1 serving