



No ice cream maker. That’s the whole appeal here.
I don’t own one. I’ve thought about buying one roughly once a summer for the last several years and then remembered how much cupboard space it would take up for something I’d use twice. So when I find a frozen dessert that skips the machine entirely and still comes out scoopable, I hold onto it.
This one tastes like banana pudding. Actual banana pudding, with the vanilla wafers and everything, except frozen and served in a bowl with a scoop. Fifteen minutes of work and then it sits in the freezer overnight doing the rest by itself.
Use yellow bananas, not brown ones
This runs against every instinct you’ve built up from making banana bread.

Banana bread wants bananas that are practically black. All that sugar has developed, the flavor has concentrated, and the texture has gone soft enough to mash with a fork. That’s correct for bread and wrong for this.
Here you want plain yellow bananas. Ripe enough to eat, not a day past. Overripe bananas have a fermented edge to them that reads as almost boozy, and freezing does nothing to soften that. It takes over the whole tub.
Yellow bananas give you a cleaner banana flavor that sits properly alongside the vanilla and the wafers instead of shouting over them. Worth knowing that freezing mutes flavors slightly across the board, but not enough to justify going riper to compensate.
Why this works without churning
An ice cream machine exists to do one job: keep the ice crystals small while the base freezes. It churns constantly so no crystal gets big enough to feel gritty on your tongue.
No churn recipes get to the same place by a different road.
Whipped cream is already full of air, which is the other thing churning provides. And sweetened condensed milk has very little free water and an enormous amount of sugar, so there isn’t much left to freeze into large crystals in the first place. Fold the two together and the texture holds without any machine involved.
Whip the cream to stiff peaks and then stop. About two minutes. Overwhipped cream turns grainy and starts heading toward butter, and once that’s happened it won’t fold smoothly into the banana mixture. You’ll be able to see the difference.
That tablespoon of dry milk powder is marked optional and it does earn its place. It absorbs a bit of extra moisture and keeps everything stable through the temperature swings a home freezer goes through every time somebody opens the door. If the tub is going to sit for more than a few days, add it.
The salt matters more than it looks like it should
A good pinch of kosher salt goes into the banana base.
Cold dulls your tongue. That’s just how taste works, and it’s why frozen desserts consistently read as flatter than the same mixture would at room temperature. Ice cream recipes compensate by being sweeter than you’d think, and salt does the same job from the other direction.
Without it, this tastes sweet and slightly vague. With it, the banana and the vanilla stay distinct even straight out of the freezer. It’s a small thing that makes a large difference.
The single drop of yellow gel food coloring is genuinely optional and it’s purely cosmetic. Blended banana turns a grey-beige color that tastes exactly right and photographs terribly. One drop fixes the color and changes nothing else about the recipe.
The wafers become the best part
Two cups of vanilla wafers get crushed in by hand, roughly, so you end up with a mix of fine crumbs and recognizable chunks.
They go in completely dry. And then overnight in the freezer they slowly draw moisture out of the base and soften into something much closer to cake than cookie. Layers of it, running all through the tub.
That transformation is the entire reason this recipe works, and it’s also why the overnight freeze isn’t negotiable. Six hours gives you something soft that won’t hold a scoop, with wafers that are still dry and crunchy. The magic happens in the last few hours.
One bowl, one processor, no fuss
Worth saying that the equipment list here is short and none of it is specialised. A food processor for the bananas, a mixer for the cream, a pie dish to freeze it in. If you don’t have a food processor, a blender works, and honestly two very ripe bananas mashed hard with a fork will get you most of the way there. The texture just won’t be quite as smooth.
Putting it together
Blend the bananas smooth in a food processor. Add the sweetened condensed milk, the salt, the vanilla and the food coloring if you’re using it, then blend again until it’s properly combined. Set that aside.
In a large bowl, whip the heavy cream with the powdered sugar and the milk powder on high speed to stiff peaks. Two minutes, no longer.
Pour in half the banana mixture and fold it through with a spatula. Add the rest, then crush the wafers in with your hands and fold again until everything is evenly distributed.
Pour it into a nine inch pie dish, or anything roughly that size. Top with more crushed wafers, cover with plastic wrap pressed against the surface, and freeze overnight.
Serving and keeping it
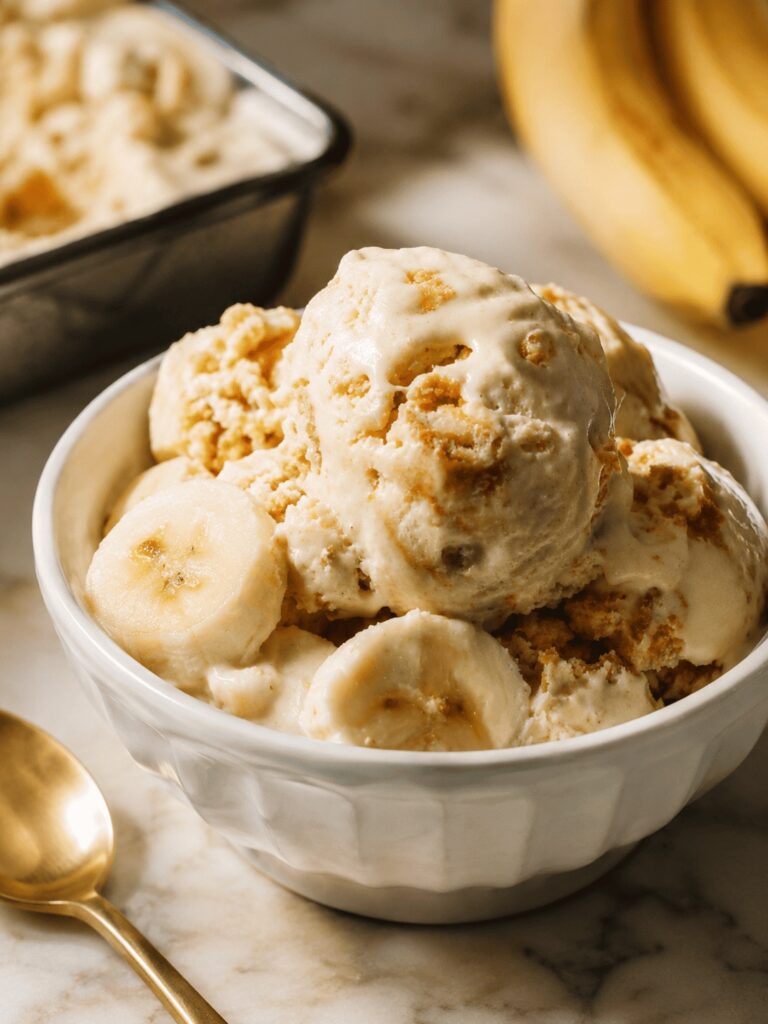
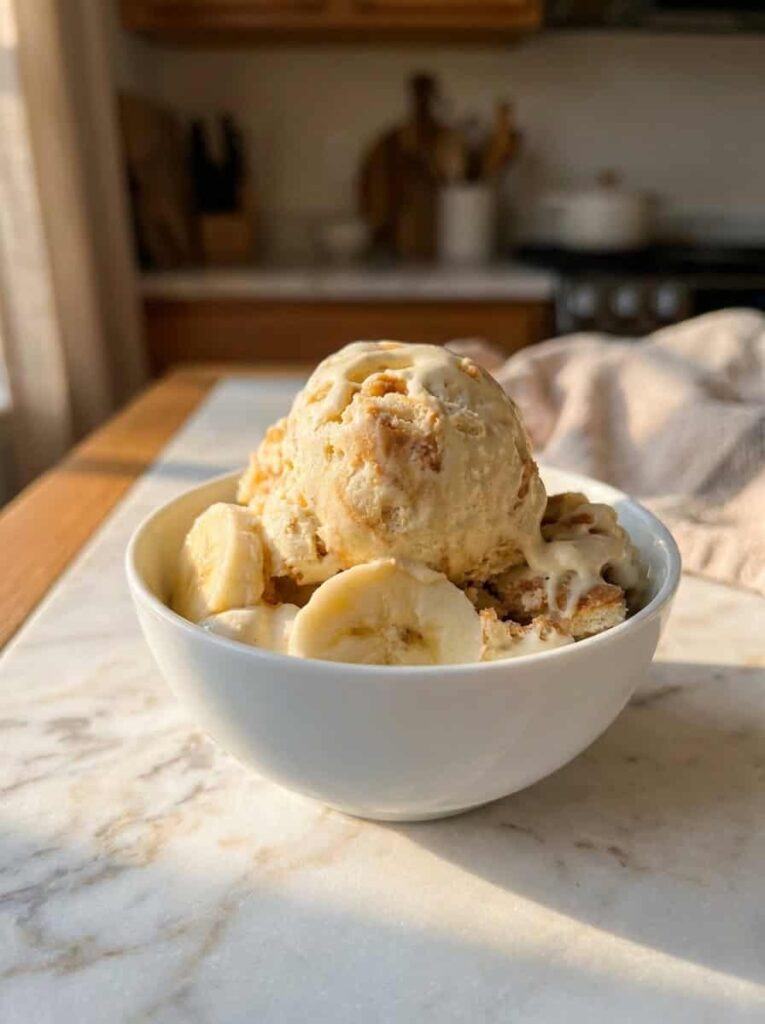
Let it sit on the counter about ten minutes before you scoop. Straight from the freezer it’s too hard to move and you’ll bend a spoon trying. Ten minutes brings it right to the point where a scoop glides through.
Serve with fresh banana slices and a few extra wafers crumbled over the top.
Covered tightly it holds about two weeks before ice crystals start showing on the surface. Press the plastic wrap directly against the ice cream rather than just laying it over the dish, which is what makes the difference.
For a dairy free version, use an eleven ounce can of sweetened condensed coconut milk, and swap the cream, powdered sugar and milk powder for a thawed eight ounce tub of plant based whipped topping. Use dairy free wafers and the texture comes out very close to the original.
Print
No Churn Banana Pudding Ice Cream
An easy no churn ice cream with banana, sweetened condensed milk and vanilla wafers that soften into layers overnight.
- Total Time8 hours 15 minutes
- Yield10 servings 1x
- DietVegetarian
Ingredients
- 2 yellow bananas (not ripe, plus more for topping)
- 14 oz sweetened condensed milk (1 can)
- kosher salt (good pinch)
- 1 tsp vanilla bean paste (or vanilla extract)
- 1 drop yellow gel food coloring (optional)
- 1 1/2 cups heavy whipping cream (360g)
- 2 tbsp powdered sugar
- 1 tbsp dry nonfat milk powder (optional, for stability)
- 2 cups vanilla wafers (plus more for topping)
Instructions
- Blend the base. Blend the bananas smooth in a food processor. Add the sweetened condensed milk, salt, vanilla and food coloring if using, and blend until well combined. Set aside.
- Whip the cream. In a large bowl using a hand or stand mixer with the whisk attachment, whip the heavy cream, powdered sugar and milk powder on high speed to stiff peaks, about 2 minutes. Do not overwhip.
- Fold in half. Pour in half the banana mixture and fold with a spatula to combine.
- Add the wafers. Add the remaining banana mixture, then crush in the vanilla wafers roughly by hand and fold to combine.
- Freeze overnight. Pour into a 9 inch pie dish or similar, top with additional crushed wafers, cover with plastic wrap pressed to the surface and freeze overnight.
- Serve. Let sit out about 10 minutes before scooping. Serve with extra banana slices and crumbled wafers.
Notes
Use yellow bananas rather than overripe ones. The milk powder is optional and improves freezer stability. Standard vanilla wafers contain gluten; use certified gluten free wafers if needed. For a dairy free version use an 11 oz can of sweetened condensed coconut milk and a thawed 8 oz tub of plant based whipped topping in place of the cream, powdered sugar and milk powder.
- Prep Time: 15 minutes
- Category: Dessert
- Method: No-Bake
- Cuisine: American
Nutrition
- Serving Size: 1 serving